Lexus ES350 TPMS Reset Button Location & Troubleshooting
Last Updated on September 1, 2026 by Ryan
📋 Table of Contents
- 🎯 Key Takeaways
- Understanding the TPMS Set Switch Functionality
- Lexus ES350 TPMS Made Easy: Your Essential Action Plan
- Physical Location and Identification Across Model Years
- Factors That Prevent Successful System Recalibration
- Maintenance and Sensor Battery Life Considerations
- Conclusion
- 💬 Quick Questions & Answers
- ❓ Frequently Asked Questions
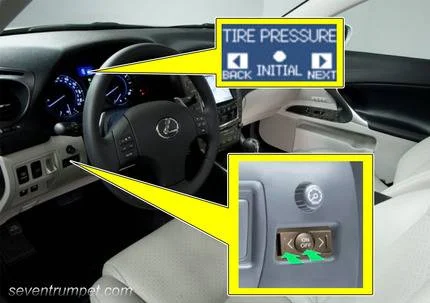
The TPMS reset button on a Lexus ES350 is primarily used to recalibrate the monitoring system after adjusting tire pressure or rotating wheels. It is typically found under the driver-side dashboard, though its function depends on correct initial tire inflation.
Lexus ES350 TPMS light? Everything you need to reset or replace sensors:
 TPMS relearn tool — All Makes & Models” style=”width:90px;height:90px;object-fit:contain;border-radius:8px;flex-shrink:0;” loading=”lazy”>

As an Amazon Associate we earn from qualifying purchases.
🎯 Key Takeaways


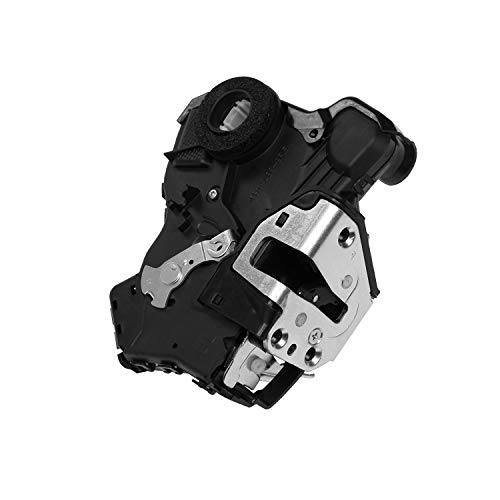
- Locate the button under the driver-side dash near the knee bolster.
- Always set tires to placard pressure before attempting a reset.
- Initialization is necessary after every tire rotation or replacement.
- A flashing TPMS light usually indicates a hardware or sensor failure.
- Check the spare tire pressure as it often contains a sensor.
Have you ever started your morning only to be greeted by that nagging orange horseshoe light on your dashboard? It is a common sight for many Lexus ES350 owners. Your car is constantly communicating with its tires to ensure your drive stays smooth and safe. While that light can feel like a nuisance, it is actually a high-tech guardian watching over your fuel economy and traction.
Understanding your Lexus TPMS (Tire Pressure Monitoring System) is about more than just making a light go away. It is about knowing how your vehicle handles changes in the weather and road conditions. When you master the reset button, you take control of your car’s maintenance. You will save yourself unnecessary trips to the dealership and gain peace of mind every time you hit the highway.
Understanding the TPMS Set Switch Functionality



The TPMS reset button in your Lexus ES350 is officially called the Tire Pressure Set Switch. Unlike a simple light switch, this button acts as a calibration tool for the car’s computer. When you press it, you are not just turning off a warning. You are actually telling the vehicle to “learn” the current air pressure in all four tires (and sometimes the spare) as the new gold standard.
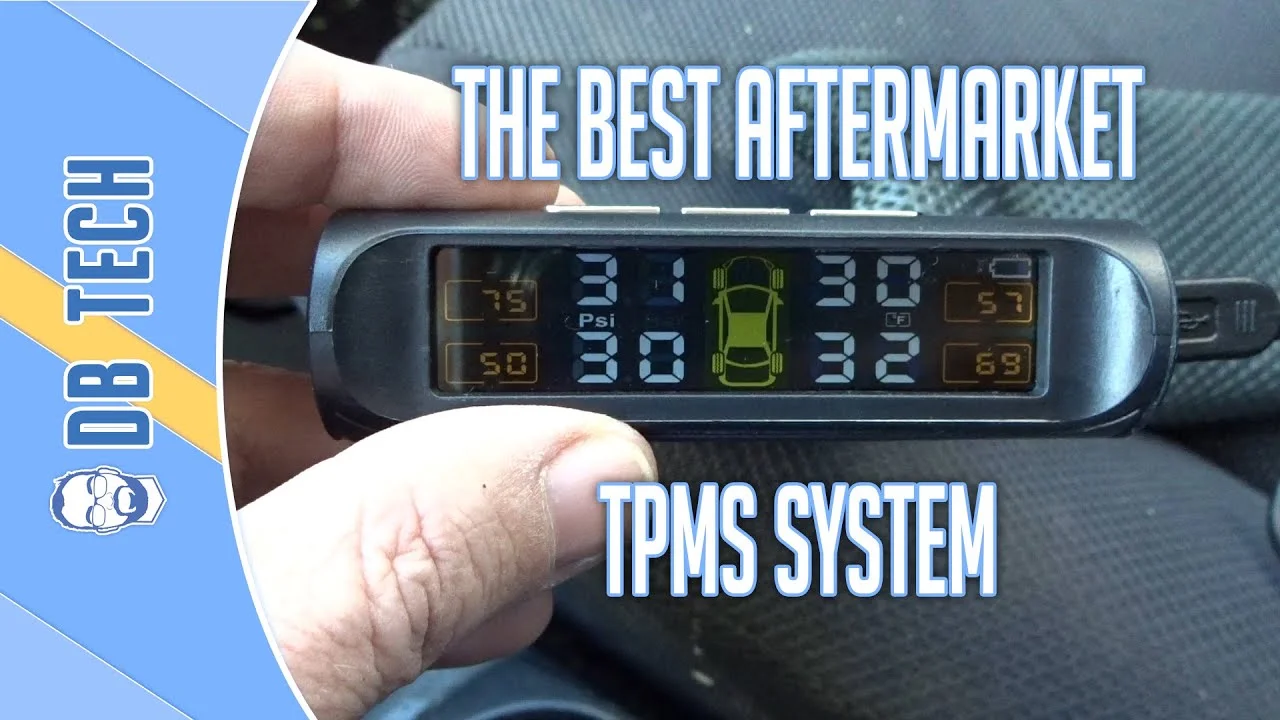
Why Calibration Matters More Than Resetting
Many drivers think the button is a magic “fix-it” tool for leaks. In reality, the system is much smarter. It uses sensors inside each wheel to measure the internal air pressure and temperature. When you use the set switch, the system records these specific levels. This is why it is vital to only use the switch when your tires are properly inflated to the recommended PSI found on your driver-side door jamb.
- Baseline Setting: The button establishes the “normal” range for your specific driving conditions.
- Safety Threshold: Once set, the car will alert you if the pressure drops roughly 25% below your baseline.
- Temperature Compensation: Modern Lexus systems account for how air expands when it gets hot during long drives.
The Role of the Main/Second Switch
Some Lexus ES350 models feature a unique “Main/2nd” toggle. This is designed for owners who swap between summer tires and winter tires. If your car has this feature, the reset button works in tandem with this switch to manage two different sets of sensor IDs. Understanding this prevents confusion when the light refuses to turn off after a seasonal tire change.
Lexus ES350 TPMS Made Easy: Your Essential Action Plan


The Tire Pressure Monitoring System (TPMS) in your Lexus ES350 is a sophisticated safety feature designed to alert you when your tires fall below the recommended inflation levels. However, after rotating your tires, changing a flat, or adjusting pressures due to seasonal temperature changes, the warning light often stays illuminated even when the tires are perfectly fine. This guide provides a comprehensive, technical walkthrough on how to manually reset and initialize the system to ensure your dashboard remains clear and your safety systems are functioning optimally. Following these steps correctly prevents unnecessary trips to the dealership and ensures your Lexus continues to deliver its signature smooth, efficient ride.
Step 1: Inspect and Adjust All Tire Pressures
What you need: A high-quality digital tire pressure gauge and an air compressor or access to a gas station air pump.
Instructions: Before you even touch the reset button, you must ensure that all four tires—and crucially, the spare tire if your ES350 is equipped with a full-size spare containing a sensor—are inflated to the exact specifications listed on your driver-side door jamb sticker. For most Lexus ES350 models, this is typically between 32 and 35 PSI. Ensure the tires are “cold,” meaning the car hasn’t been driven for at least three hours, as heat causes air to expand and provides an inaccurate reading. Use your gauge to check each tire and add or release air until they are precisely at the recommended level. If one tire is even 2 PSI lower than the others, the system may refuse to initialize.
Pro Tip: Many ES350 owners overlook the spare tire in the trunk. If your spare has a TPMS sensor and it is low on air, the light will never turn off regardless of how many times you hit the reset button.
Step 2: Set the Vehicle to Ignition Mode
What you need: Your Lexus SmartAccess key fob inside the cabin with you.
Instructions: Sit in the driver’s seat and ensure the vehicle is in “Park.” Without pressing the brake pedal, press the “Engine Start Stop” button twice. This puts the car into “IG-ON” mode, which powers the electronics and the TPMS computer without actually cranking the engine. You will see all the dashboard lights illuminate, including the amber horseshoe-shaped TPMS icon. It is vital that the engine is not running during the initial phase of the reset procedure, as the system needs to be in a diagnostic state to accept the new pressure baseline. If you accidentally start the engine, turn it off and wait 30 seconds before trying the double-press method again.
Pro Tip: Ensure your headlights and climate control are turned off during this step to prevent unnecessary battery drain while you work through the reset process.
Step 3: Locate the TPMS Reset Button
What you need: A small flashlight or your smartphone’s light to illuminate the dark under-dash area.
Instructions: The TPMS reset button in the Lexus ES350 is notoriously difficult to find because it is tucked away for aesthetic and safety reasons. It is located on the underside of the dashboard, directly beneath the steering column, near the area where the driver’s knees would be. You will likely need to crouch down outside the open driver’s door and look upward into the footwell. The button is small, round, and usually labeled “SET.” It is often positioned near the OBD-II diagnostic port or the knee airbag cover. Once you have located it visually, practice reaching for it so you can hold it steady for the next step without fumbling.
Pro Tip: If you cannot find it by sight, run your hand along the bottom plastic trim of the dashboard to the right of the hood release lever; you will eventually feel a small, recessed circular button.
Step 4: Execute the System Initialization
What you need: Constant pressure on the reset button and a clear view of the instrument cluster.
Instructions: While the car is still in “IG-ON” mode, press and hold the TPMS reset button. You must maintain firm pressure on the button for several seconds. Keep your eyes on the TPMS warning light on the dashboard. After holding for about 3 to 5 seconds, the warning light should begin to blink slowly. Typically, it will blink three times. This blinking pattern is the vehicle’s way of communicating that it has cleared the old data and is now ready to record the current tire pressures as the new “standard” or baseline. Once the light has finished its three-blink sequence, you can release the button.
Pro Tip: Do not release the button too early. If you release it before the third blink, the system may not register the command, and you will have to restart from Step 2.
Step 5: Allow the Computer to Sync
What you need: Patience and approximately 2 to 5 minutes of stationary time.
Instructions: After the light has blinked and you have released the button, do not turn the car off immediately. The TPMS ECU (Electronic Control Unit) is now attempting to “ping” each of the four (or five) sensors located inside your wheels. It needs a few minutes to register the unique ID codes and the current pressure readings into its memory. Leave the car in the “IG-ON” state for at least three minutes. During this time, the TPMS light may stay solid or remain off; this is normal. Use this time to double-check that your windows are rolled up and your seatbelt is fastened, preparing for the final calibration drive.
Pro Tip: Avoid using your cell phone or other high-frequency electronic devices inside the car during these three minutes, as rare electromagnetic interference can occasionally disrupt the sensor-to-computer handshake.
Step 6: Perform the Calibration Drive
What you need: A clear stretch of road where you can maintain steady speeds.
Instructions: Now that the system has initialized, you must drive the vehicle to complete the calibration. Start the engine and begin driving. You should aim to drive at a consistent speed of at least 25 MPH (40 km/h) for approximately 10 to 20 minutes. The sensors in the wheels are centrifugal, meaning they “wake up” and transmit data more frequently when the wheels are spinning. This drive allows the TPMS computer to confirm that the pressures are stable and that all sensors are reporting correctly. If you are stuck in heavy stop-and-go traffic, the process may take longer, as the computer prefers steady rotation to verify the data packets from the sensors.
Pro Tip: A quick trip on a local highway is the most effective way to finish this step, as the consistent high-speed rotation ensures the sensors stay in “active” mode.
Step 7: Final Verification
What you need: A final visual check of the dashboard display.
Instructions: After your drive, pull over safely or return to your driveway. With the engine still running, look at your multi-information display (the screen in the center of your gauge cluster). Scroll through the menus using the steering wheel buttons until you find the tire pressure monitor screen. You should now see numerical PSI values for each tire displayed clearly. If the numbers are present and the amber warning light is gone, the reset was successful. If the screen shows “Checking…” or dashes (“–“), you may need to drive for another 5 minutes. If the light begins to flash rapidly and then stays on, it indicates a system malfunction (like a dead sensor battery) rather than a simple pressure issue.
Pro Tip: If the light returns within 24 hours but your pressures are still correct, one of your sensors likely has a weak battery and is intermittently losing connection.
✅ Final Checklist
- All five tires (including spare) checked with a manual gauge and set to door-jamb specifications.
- The reset button was held until the TPMS light blinked exactly three times.
- The vehicle remained in the “ON” position for at least 3 minutes before driving.
- The calibration drive lasted at least 10 minutes at speeds above 25 MPH.
- The dashboard display now shows active numerical PSI readings for all monitored tires.
Important Notes:
- Safety Warning: Never ignore a TPMS light. If the light comes on while driving, pull over immediately to check for punctures or blowouts.
- Professional Help: If the light flashes for 60 seconds and then stays solid, this indicates a hardware failure. You will need a professional scan tool to identify which sensor has failed or if the TPMS receiver is faulty.
- Estimated Time: 20–30 minutes total.
- Cost Range: $0 (DIY) to $100+ if a sensor replacement is required at a shop.
Physical Location and Identification Across Model Years
Finding the TPMS reset button in a Lexus ES350 can feel like a scavenger hunt. Lexus designers often hide the button to prevent drivers from bumping it accidentally while driving. Depending on the year your ES350 was built, the button might be tucked under the dashboard or hidden deep within a digital menu. Knowing exactly where to look will save you a lot of frustration and time spent crouching in your footwell.
The “Under-the-Dash” Era (2007–2018 Models)
For the majority of Lexus ES350 models on the road today, the button is located in the lower instrument panel area. You usually cannot see it while sitting normally in the driver’s seat. You have to reach down near your knees or even look up from the floor mat area. It is typically a small, round button labeled SET or featuring the TPMS icon.
- Left Side Placement: On older models (2007-2012), look near the hood release or the parking brake pedal.
- Right Side Placement: On mid-generation models (2013-2018), it is often tucked under the dash on the right side of the steering column.
- Glove Box Hidden Spot: In some specific production runs, Lexus placed a secondary switch inside the glove box, near the trunk release button.
The Digital Transition (2019–Present)
If you drive a newer seventh-generation Lexus ES350, you might search for a physical button forever and never find one. In these modern versions, Lexus moved the “button” into the Multi-Information Display (MID). You interact with the system using the directional pads on your steering wheel. This digital shift allows the car to provide more specific feedback, such as showing the exact pressure of each individual tire on your screen.
Always remember that the physical button is usually matte black and blends in with the plastic trim. If you are having trouble finding it, use a flashlight to look at the underside of the dashboard, directly above the gas and brake pedals. It is almost always positioned where your hand can reach it, but your eyes cannot easily see it.
Factors That Prevent Successful System Recalibration
Even after finding the reset button, you might find that the warning light refuses to clear or reappears shortly after driving. This is often due to underlying issues that the Lexus ES350 onboard computer cannot resolve through a simple reset command. Understanding these roadblocks can save you hours of frustration.
Sensor Malfunction or Signal Interference
The most common reason for a failed recalibration is a faulty sensor. If one of the four (or five, including the spare) sensors is physically damaged or has a broken internal antenna, it won’t transmit the necessary data to the vehicle’s ECU. Additionally, electronic interference can sometimes play a role. For example, some aftermarket electronic accessories or high-powered chargers plugged into your 12V outlets can create “noise” that prevents the TPMS receiver from picking up sensor signals correctly.
- The Spare Tire Factor: Many Lexus ES350 models include a full-size spare tire equipped with its own TPMS sensor. If the spare is low, the system will never calibrate successfully, regardless of how many times you hit the reset button.
- Sensor Physical Damage: Rough tire mounting or hitting a deep pothole can crack the sensor housing, leading to intermittent signal loss.
- Radio Frequency (RF) Interference: Parking near high-voltage power lines or using certain non-OEM LED bulbs can occasionally disrupt the 315MHz signal.
Extreme Temperature Fluctuations
In many regions, a sudden drop in temperature is the primary trigger for the TPMS light. Air contracts when it gets cold, lowering the internal pressure just enough to trigger the sensor. If you try to reset the system during a freezing morning without actually adding air, the system may initially accept the “new” low-pressure baseline but will likely fail later when the tires warm up and the pressure expands beyond acceptable thresholds. Proper recalibration requires stable, ambient tire temperatures for the most accurate reading.
Maintenance and Sensor Battery Life Considerations
Your Lexus ES350 TPMS is not a “set it and forget it” system. Like any electronic component, it requires periodic attention and has a finite lifespan. Being proactive about maintenance can prevent the sudden appearance of that dreaded amber dashboard icon during a long road trip.
The 5- to 10-Year Battery Lifespan
Each TPMS sensor is powered by a small lithium-ion battery sealed inside the unit. These batteries are designed to last anywhere from five to ten years depending on your driving habits. Since the batteries are encased in potting material to protect them from the harsh environment inside the tire, they cannot be replaced individually. When the battery dies, the entire sensor must be replaced. If your ES350 is approaching the decade mark, it is highly likely that a failing battery is the culprit behind your TPMS headaches.
- Blinking vs. Solid Light: A solid TPMS light usually indicates low pressure, while a light that blinks for 60 to 90 seconds before staying solid often signals a hardware or battery failure.
- Replacing in Sets: If one sensor battery dies, the others are likely close behind. Many technicians recommend replacing all four sensors at once during a tire change to save on labor costs.
Avoiding Corrosive Sealants
Using emergency “fix-a-flat” tire sealants can be a disaster for your Lexus sensors. The chemical compounds in many aerosol sealants are corrosive and can gunk up the delicate pressure port on the sensor. This often leads to permanent damage, requiring a full sensor replacement. If you must use a sealant in an emergency, ensure it is specifically labeled as “TPMS Safe,” though even then, professional cleaning of the sensor is usually required immediately afterward.
Conclusion
The TPMS reset button on your Lexus ES350 is a vital tool for maintaining vehicle safety and performance, but it isn’t a magic fix for every issue. By knowing exactly where the button is located and understanding the common factors—like dead sensor batteries or the overlooked spare tire—that prevent a successful reset, you can manage your vehicle’s maintenance with much more confidence. Keeping your tires properly inflated doesn’t just clear your dashboard; it improves fuel economy and extends the life of your tires.
Next Steps: Check your tire pressure manually with a high-quality gauge to ensure all five tires (including the spare) are at the manufacturer’s recommended PSI. If the light persists after a manual check and reset attempt, visit a certified Lexus technician to have your sensor battery levels scanned. Drive safely and keep those tires in check!
💬 Quick Questions & Answers
Where is the TPMS reset button on a Lexus ES350?
It is located under the driver’s side dashboard, typically near the steering column or bottom edge of the dash.
When should the TPMS button be used?
Use it after inflating tires to the correct PSI or after a tire rotation to recalibrate the system.
Why does my TPMS light stay on after resetting?
The light may stay on if a sensor is faulty, the battery is dead, or the spare tire is low on air.
Does a 2015 Lexus ES350 have a reset button?
Yes, most ES350 models from this era feature a physical ‘Set’ button located in the lower footwell area.
How long does it take for the light to turn off?
After a successful reset, you may need to drive the vehicle for 10 to 30 minutes for the system to update.
❓ Frequently Asked Questions
What is the difference between a TPMS reset and initialization?
A reset clears a simple low-pressure warning, while initialization establishes new baseline pressure parameters for the system. Initialization is required when you change tire sizes or rotate tires to different positions.
Why is the TPMS light flashing on my Lexus ES350?
A flashing light for about one minute followed by a solid light indicates a malfunction in the TPMS system itself. This is often caused by a failed sensor battery or a communication error between the sensor and the ECU.
Does the Lexus ES350 spare tire have a TPMS sensor?
Yes, many Lexus ES350 models equipped with a full-size spare include a fifth sensor. If your four main tires are properly inflated but the light persists, check the air pressure in your spare tire.
Can extreme weather affect the TPMS reset process?
Cold temperatures cause air to contract, dropping tire pressure and triggering the light. You must inflate the tires to the recommended PSI while they are cold before attempting to use the reset button.
How often should Lexus TPMS sensors be replaced?
TPMS sensors typically last between 5 to 10 years, as they rely on internal lithium-ion batteries. Once the battery fails, the entire sensor unit must be replaced and programmed to the vehicle.
Will the TPMS reset button fix a ‘Check TPMS’ error message?
No, a ‘Check TPMS’ message indicates a diagnostic fault that the reset button cannot resolve. This usually requires a technician to scan the system to identify which specific sensor has failed.
🔧 See Also: TPMS Reset Guides for Other Makes
If you found this guide helpful, here are our TPMS reset guides for other popular brands — each with model-specific steps and button location photos.
- Nissan TPMS Reset Button Location Guide — Covers Altima, Rogue, Sentra, Versa & more
- Subaru TPMS Reset Guide — Ascent, Forester, Outback & Impreza procedures
- Lexus ES350 TPMS Reset Button Location — ES350 step-by-step with troubleshooting
- Toyota Camry TPMS Reset Guide — 2016–2025 Camry with button location diagrams
- Toyota RAV4 TPMS Reset by Year and Generation — Covers all RAV4 generations