How to Check Transmission Fluid: A Complete Guide
Last Updated on September 1, 2026 by Ryan
Checking your automatic transmission fluid regularly is vital for preventing costly repairs and ensuring smooth vehicle operation. This process typically involves locating the dipstick, ensuring the engine is warm and running, and carefully inspecting the fluid’s level, color, and smell. Proper fluid maintenance can significantly extend your transmission’s lifespan.
🎯 Key Takeaways


- Always check fluid with engine warm and running (automatics).
- Proper fluid level prevents serious transmission damage.
- Observe fluid color and smell for early problem signs.
- Dark or burnt fluid indicates urgent professional inspection.
- Consult your owner’s manual for specific vehicle instructions.
Checking your automatic transmission fluid (ATF) is a straightforward but critical maintenance task. It allows you to quickly assess both the fluid level and its overall condition, preventing potentially costly transmission issues down the road. Knowing how to accurately perform this check gives you valuable insight into your vehicle’s health.

Unlike engine oil, transmission fluid doesn’t just lubricate; it also acts as a hydraulic fluid, coolant, and a cleaner within your transmission. A low level or degraded fluid can lead to poor shifting, overheating, and severe internal damage, making regular checks an essential part of your vehicle care routine.
Understanding Automatic Transmission Fluid’s Role
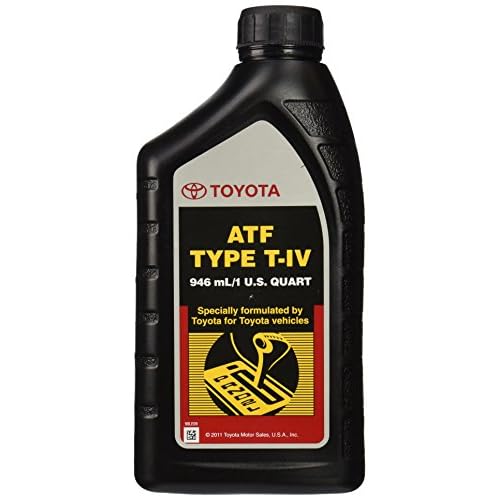


Your automatic transmission relies heavily on its specialized fluid to function correctly. This fluid is not merely a lubricant; it’s a multi-purpose workhorse essential for transmitting power, cooling, and protecting vital internal components. Understanding its roles explains why regular checks are non-negotiable for vehicle longevity.
More Than Just Lubrication
Firstly, ATF serves as a hydraulic fluid. It enables the transmission to shift gears smoothly by applying pressure to the clutch packs and band servos. Without the correct fluid level, these hydraulic pressures falter, leading to delayed shifts or a complete inability to engage gears. This direct mechanical role means fluid quantity is paramount.
Secondly, ATF acts as a coolant. Transmissions generate significant heat due to friction from clutches and the constant churning of fluid. The fluid carries this heat away, helping to maintain optimal operating temperatures. Overheating is a silent killer for transmissions, and insufficient fluid can quickly lead to damaging temperature spikes.
Finally, the fluid lubricates gears, bearings, and other moving parts, preventing wear. It also contains detergents and dispersants that clean the transmission by carrying away metal particles and sludge, keeping internal passages clear and functional. This combination of roles underscores why fluid quality and level are so important.
Checking Conditions: Warm Engine, Level Ground
Because ATF expands significantly when hot, checking its level accurately requires specific conditions. You must always check your transmission fluid when the engine is warm—ideally after driving for at least 15-20 minutes. This ensures the fluid has expanded to its normal operating volume, providing a true reading. Additionally, the vehicle must be on perfectly level ground to prevent false low or high readings on the dipstick. These preparation steps are crucial to getting an accurate assessment of your fluid level.
How to Check Transmission Fluid Like a Pro: A Practical Walkthrough


Keeping an eye on your vehicle’s transmission fluid is a crucial aspect of routine maintenance, often overlooked but vital for the longevity and smooth operation of your car’s gearbox. This comprehensive guide will walk you through the precise steps to check your transmission fluid, whether you drive an automatic or manual transmission. Following these instructions meticulously will help you identify potential issues early, maintain optimal performance, and prevent costly repairs down the road. Let’s get started and ensure your transmission stays in top shape!
Step 1: Gather Your Tools & Understand Your Vehicle
What you need: Owner’s Manual, clean lint-free rag or paper towels, funnel (optional but recommended for adding fluid), appropriate transmission fluid (if topping off).
Instructions: Before you begin, consult your vehicle’s owner’s manual. This invaluable resource will specify the exact type of transmission fluid your car requires, whether your transmission is automatic or manual, and the proper procedure for checking it (e.g., engine hot/cold, in Park/Neutral). Automatic transmissions typically have a dipstick, while most manual transmissions do not have an easily accessible external dipstick and usually require a different, more involved procedure (often involving removing a fill plug) that is best left to a professional if you’re not experienced. This guide primarily focuses on automatic transmissions with a dipstick.
Pro Tip: Never assume all transmission fluids are the same. Using the wrong type of fluid can cause significant damage to your transmission. Always refer to your owner’s manual for the correct specification (e.g., Dexron, Mercon, ATF+4).
Step 2: Warm Up the Engine (Automatic Transmissions)
What you need: Your vehicle.
Instructions: For most automatic transmissions, the fluid level should be checked when the engine is at operating temperature. This is because the fluid expands when hot, and the dipstick markings are calibrated for this condition. Drive your car for about 10-15 minutes or until it reaches normal operating temperature. This ensures the fluid has circulated thoroughly and accurately reflects the level under normal driving conditions. If your manual states to check when cold, follow those specific instructions instead. Typically, checking it hot provides the most accurate reading.
Pro Tip: Avoid prolonged idling to warm up the car; a short drive is more effective and brings the transmission to its true operating temperature more accurately. If you’ve just driven for a long period, allow a minute or two for the fluid to settle after parking before checking.
Step 3: Park on a Level Surface & Engage Parking Brake
What you need: Your vehicle.
Instructions: Accuracy is key when checking fluid levels. Ensure your vehicle is parked on a perfectly level surface. Parking on an incline, even a slight one, can cause an inaccurate reading on the dipstick. Once parked, engage the parking brake firmly to prevent the vehicle from rolling. For automatic transmissions, with the engine still running and at operating temperature, place the gear selector in “Park” (P). Some manufacturers may recommend checking in “Neutral” (N), so always double-check your owner’s manual for this specific detail. Keep your foot on the brake while shifting through gears before settling in “Park” or “Neutral” to ensure fluid circulation.
Pro Tip: If your vehicle’s manual specifies checking in “Neutral,” always keep your foot firmly on the brake pedal during the check to prevent accidental movement.
Step 4: Locate the Transmission Dipstick
What you need: Your vehicle, good lighting (optional).
Instructions: Pop the hood of your vehicle. The transmission dipstick is usually located towards the back of the engine bay, often on the passenger side, though its exact position varies by vehicle make and model. It typically has a brightly colored handle (often red, yellow, or black) and may be labeled “ATF,” “Transmission Fluid,” or have a transmission gear symbol. It’s crucial not to confuse it with the engine oil dipstick, which is usually yellow or white and located closer to the front or middle of the engine. Take a moment to identify it correctly.
Pro Tip: If you’re having trouble locating it, trace the path of the transmission lines (metal tubes that carry fluid to and from the radiator) – the dipstick tube will often be in close proximity.
Step 5: Extract and Clean the Dipstick
What you need: Clean lint-free rag or paper towels.
Instructions: Carefully pull the transmission dipstick out of its tube. It may require a gentle twist and pull. Once removed, use your clean, lint-free rag or paper towels to thoroughly wipe all the fluid off the dipstick. Ensure no debris or fibers from the rag are left on the dipstick. This first pull and clean is essential because the dipstick may pick up fluid from the sides of the tube during extraction, leading to a false high reading. You need a clean slate for an accurate measurement.
Pro Tip: Avoid using shop rags that have been used for other tasks, as they might introduce contaminants or leave behind fibers that could affect the reading or even enter the transmission fluid.
Step 6: Reinsert and Read the Fluid Level
What you need: Clean dipstick.
Instructions: Fully reinsert the cleaned dipstick into its tube until it’s seated all the way down. Wait a few seconds to allow the fluid on the dipstick to stabilize. Then, carefully pull the dipstick out again, trying to keep it as vertical as possible to prevent fluid from smearing. Observe the fluid level against the “FULL” or “HOT” markings (sometimes a crosshatch area) on the dipstick. There are usually two marks or a range indicating the full level. The fluid level should fall within this designated “full” range. If it’s below the “low” or “add” mark, you’ll need to add fluid.
Pro Tip: Some dipsticks have separate “HOT” and “COLD” markings. Ensure you are reading the correct side based on your engine’s temperature when you checked.
Step 7: Assess Fluid Condition: Color and Smell
What you need: Dipstick with fluid, good lighting.
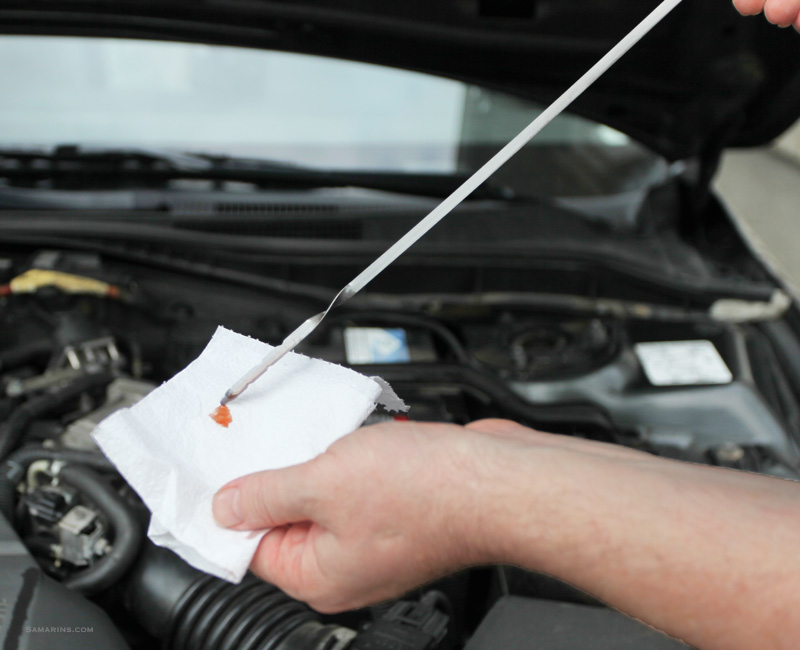
Instructions: Don’t just check the level; also inspect the quality of the fluid. Healthy automatic transmission fluid is typically translucent red or sometimes a light brown/pink color. It should have a slightly sweet, oil-like smell. If the fluid appears dark brown or black, has a burnt smell (like toast or burnt sugar), or contains visible particles or foamy bubbles, it indicates a problem. Burnt fluid suggests overheating or excessive wear, while foamy fluid can point to an incorrect level or contaminated fluid. Green or milky fluid indicates water contamination, which is a severe issue.
Pro Tip: Rub a small amount of fluid between your thumb and forefinger. It should feel slippery. If it feels gritty or thin, it’s a sign of potential contamination or degradation.
Step 8: Top Off (If Necessary)
What you need: Approved transmission fluid, funnel.
Instructions: If the fluid level is below the “add” or “low” mark, it’s time to top it off. Using a clean funnel to prevent spills and contamination, slowly add small amounts (e.g., 1/4 to 1/2 quart at a time) of the manufacturer-specified transmission fluid into the dipstick tube. After adding a small amount, wait a minute for the fluid to settle, then reinsert the dipstick and recheck the level (repeat Step 6). Continue this process incrementally until the fluid level is within the “full” range. Be careful not to overfill, as this can also cause transmission damage.
Pro Tip: Overfilling transmission fluid is as detrimental as underfilling. Always add slowly and recheck frequently to avoid exceeding the “full” mark. A little less is better than too much.
Step 9: Recheck and Secure
What you need: Your vehicle, dipstick.
Instructions: Once the fluid level is within the proper range and its condition appears healthy, firmly reinsert the transmission dipstick back into its tube until it’s fully seated. Ensure it’s pushed all the way down to prevent any dirt or debris from entering the transmission system. Close your vehicle’s hood securely. Take a moment to visually inspect the area around the transmission and dipstick tube for any signs of leaks after your check. If you’ve driven the car a bit after topping off, perform one final check of the fluid level and condition.
Pro Tip: If you notice any fluid dripping or pooling under the car in the days following your check, it could indicate a leak that needs immediate professional attention.
✅ Final Checklist
- Vehicle was on a level surface with parking brake engaged.
- Engine was at operating temperature (for automatic transmissions, unless specified otherwise).
- Transmission dipstick correctly identified and cleaned before reading.
- Fluid level falls between the “FULL” or “HOT” markings.
- Fluid color is red/light brown and does not smell burnt.
- Dipstick was securely reinserted.
Important Notes:
- Safety Considerations: The engine and transmission components can be very hot, so exercise caution to avoid burns. Keep hands clear of moving parts like belts and fans. Always wear appropriate personal protective equipment if needed.
- When to Seek Professional Help: If your transmission fluid is consistently low, appears black, smells strongly burnt, contains metal particles, or is milky/foamy, or if you drive a manual transmission and suspect a fluid issue, it’s best to consult a certified mechanic immediately. These are signs of potentially serious transmission problems that require expert diagnosis and repair.
- Estimated Time and Cost Range: Checking your transmission fluid should take approximately 10-20 minutes, not including the time to warm up the engine. If fluid needs to be added, a quart of transmission fluid typically costs between $7 and $15, depending on the type and brand.
Interpreting Transmission Fluid Condition: Color and Scent
Beyond simply checking the fluid level, examining its color and scent provides vital clues about your transmission’s health. These visual and olfactory cues are your first line of defense against brewing transmission problems, often indicating issues long before mechanical symptoms arise.

Deciphering Fluid Color
When you pull the dipstick, pay close attention to the fluid’s hue. The appearance tells a story about its condition:
- Bright Red/Pink: This is the ideal, healthy color for most automatic transmission fluids. It indicates that the fluid is relatively fresh, clean, and performing optimally.
- Light Brown/Maroon: Fluid that has darkened slightly from its original red indicates normal aging. While not immediately alarming, it suggests the fluid is accumulating contaminants and its additives might be wearing down. Monitor it closely.
- Dark Brown/Black: This color is a red flag. Dark brown or black fluid suggests severe degradation, overheating, and potentially significant internal wear. The fluid has lost its lubricating and cooling properties, putting your transmission at serious risk.
- Milky/Foamy: A milky or foamy appearance is an urgent warning sign of coolant contamination (e.g., a leaking transmission cooler). This requires immediate attention, as coolant mixing with ATF will destroy the transmission.
Understanding Fluid Scent
The smell of your transmission fluid is just as critical as its color, often revealing problems that aren’t yet visible:
- Sweet, Chemical Scent: Fresh, healthy ATF typically has a distinct, somewhat sweet chemical smell. This is normal and indicates the fluid is in good condition.
- Slightly Burnt Scent: If the fluid smells mildly burnt, it suggests some overheating or friction within the transmission. This is often an early indicator of clutch wear or fluid degradation.
- Strongly Burnt Scent: A very strong, acrid, burnt smell is a serious cause for concern. It almost certainly means your transmission is severely overheating and internal components (like clutch plates) are burning up. This requires immediate professional inspection.
Any signs of dark color or a burnt smell warrant prompt action. You should not ignore these warnings; address them quickly to prevent expensive repairs.
<h2>Factors Influencing Accurate Fluid Level Readings</h2>
<p>Getting a correct transmission fluid reading isn’t always as simple as pulling a dipstick. Several critical factors can significantly influence the accuracy of your measurement. Ignoring these can lead to misdiagnoses, potentially causing you to add unnecessary fluid or overlook a genuine issue.</p>
<h3>Temperature and Vehicle Position Matter</h3>
<p>The operating temperature of your transmission fluid is paramount. Most automatic transmissions are designed to be checked when the engine is warm and running, as the fluid expands with heat. A cold reading will almost always show the fluid level as lower than it actually is. Conversely, if your vehicle has a manual transmission, the fluid is typically checked when the engine is cold. Always consult your owner’s manual for the specific procedure for your car.</p>
<ul>
<li><strong>Warm vs. Cold:</strong> Automatic transmissions usually require a warm engine for an accurate reading. Cold fluid levels will appear lower.</li>
<li><strong>Level Surface:</strong> Ensure your vehicle is parked on a perfectly level surface. Checking on a slope, even a slight one, can cause the fluid to pool unevenly, leading to a false low or high reading. Imagine trying to measure water in a tilted bucket – it just won’t be right!</li>
</ul>
<h3>Understanding Dipstick Markings</h3>
<p>Once you’ve located and removed the dipstick, understanding its markings is key. Most dipsticks have ‘FULL’ and ‘ADD’ indicators, or a range between two marks. Some may even have separate markings for ‘COLD’ and ‘HOT’ fluid levels. It’s crucial to wipe the dipstick clean before taking a reading to ensure no old residue interferes with your current assessment. When you reinsert it, push it all the way down to get a true representation of the fluid level. <em>Never overfill your transmission</em> – excess fluid can cause just as many problems as too little, leading to foaming and potential damage to internal components.</p>
<h2>When to Seek Professional Transmission Diagnosis</h2>
<p>While regular fluid checks are an excellent preventative measure, they only tell part of the story. There are times when your transmission is signaling a deeper problem that fluid level checks alone cannot resolve. Recognizing these warning signs early can save you from far more extensive and costly repairs down the line.</p>
<h3>Warning Signs Beyond Fluid Levels</h3>
<p>Your transmission is a complex system, and problems can manifest in various ways, even if your fluid level appears correct. Be alert for any changes in your vehicle’s driving behavior or any unusual sensations. These are often the first indicators of a developing issue. For example, if you notice a distinct burning smell, it could indicate overheated fluid, which needs immediate attention. Similarly, if your car hesitates before shifting gears or shifts with an uncharacteristic jerk, it’s a strong signal that a professional mechanic should take a look.</p>
<ul>
<li><strong>Strange Noises:</strong> Whining, clunking, or humming sounds coming from under the car, especially when shifting.</li>
<li><strong>Shifting Problems:</strong> Delayed engagement, harsh shifts, slipping gears (engine revs but the car doesn’t accelerate properly), or difficulty getting into gear.</li>
<li><strong>Burning Smell:</strong> Often indicates overheated or old fluid, suggesting internal friction or a leak.</li>
<li><strong>Leaking Fluid:</strong> Reddish-brown puddles under your car are a clear sign of a transmission fluid leak, regardless of the current dipstick reading.</li>
</ul>
<h3>The Importance of Timely Intervention</h3>
<p>When you notice any of these symptoms, don’t delay. What might start as a minor issue could quickly escalate into a major transmission failure if left unaddressed. Transmission repairs are among the most expensive for any vehicle, so early diagnosis is key. A professional technician has specialized diagnostic tools and the expertise to pinpoint the exact problem, whether it’s an internal component, a sensor issue, or something more straightforward. Taking your vehicle in promptly can often mean the difference between a simple adjustment or fluid flush and a complete transmission rebuild or replacement.</p>
<h2>Conclusion</h2>
<p>Checking your transmission fluid is a simple yet crucial aspect of vehicle maintenance. It empowers you to monitor the health of one of your car’s most vital components. Remember to always consult your owner’s manual for specific procedures, pay attention to fluid temperature and vehicle position, and accurately read the dipstick. More importantly, listen to your vehicle; any unusual noises, smells, or changes in driving behavior warrant prompt professional attention. By being proactive and informed, you can contribute significantly to the longevity and smooth operation of your transmission, ensuring a safer and more reliable driving experience.</p>
❓ Frequently Asked Questions
What are the common pitfalls when checking transmission fluid that lead to inaccurate readings?
Common pitfalls include checking the fluid on uneven ground, not allowing the engine to reach operating temperature, or not cycling through the gears first. These factors can cause incorrect fluid levels to be read, leading to potential over or under-filling.
How does checking manual transmission fluid differ from automatic?
Checking manual transmission fluid is typically more complex than automatic, often requiring the vehicle to be lifted, and involves removing a fill plug. There’s usually no dipstick, and the fluid level is checked by seeing if it’s even with the bottom of the fill hole.
What are the dangers of overfilling transmission fluid?
Overfilling transmission fluid can lead to fluid aeration, where the fluid foams up due to the spinning components churning it. This foam doesn’t lubricate effectively, causing heat buildup, reduced fluid pressure, and potential transmission damage.
Besides level, what other signs should I look for when inspecting transmission fluid?
Beyond level, closely examine the fluid’s color, clarity, and smell. Dark brown or black fluid, a milky appearance, or a distinct burnt smell are all strong indicators of potential problems requiring immediate professional diagnosis.
Why is it important for the engine to be warm when checking automatic transmission fluid?
Transmission fluid expands when it heats up, so checking it warm ensures an accurate reading of the fluid level as it operates under normal conditions. Cold fluid levels will appear lower than they actually are during operation, leading to potential overfilling.
What should I do immediately if my transmission fluid is low or appears compromised?
If your transmission fluid is low, add the recommended type until it reaches the correct level, but monitor for leaks. If the fluid is burnt, dark, or contains particles, do not just top it off; instead, have your vehicle inspected by a qualified mechanic promptly to diagnose the underlying issue.