Honda Pilot Cruise Control Not Working Real 2026 Fix Guide
If your cruise control system fails, the most common culprit is a faulty brake pedal switch or a blown fuse. Address these simple electrical checks first before assuming a complex sensor or electronic control unit failure.
If your 2026 Honda Pilot cruise control has suddenly stopped engaging, the issue is almost always a faulty electronic signal caused by a failed sensor or a blown fuse. Modern Honda systems rely on a complex web of inputs from your brake pedal, steering angle, and front-facing radar; if one link in this chain breaks, the system disables itself for safety. You do not need to head to the dealership immediately, as most of these problems involve simple electrical components you can test in your own driveway.
Fixing this issue promptly is critical because a malfunction often cascades into other safety systems like Collision Mitigation Braking (CMBS). If your adaptive cruise control (ACC) refuses to set, you are likely looking at a communication error between the steering wheel controls and the engine control module. By following the diagnostic steps below, you can isolate whether you are dealing with a simple physical switch failure or a deeper electronic glitch requiring a reset.
Key Takeaways
- Check your brake light bulbs; a burnt-out filament can disable the cruise control system entirely.
- Inspect the brake pedal switch, as it must disengage when the pedal is not pressed.
- A system reset involves turning the ignition off for ten minutes to clear minor electronic glitches.
- Warning lights labeled ACC/CMBS indicate a radar sensor obstruction or alignment issue requiring professional help.
- Verify all fuses in the under-hood and interior fuse boxes before replacing expensive components.
Common Causes of Honda Pilot Cruise Control Failure
Recommended Best Deal Products


Brake Pedal Position Switch
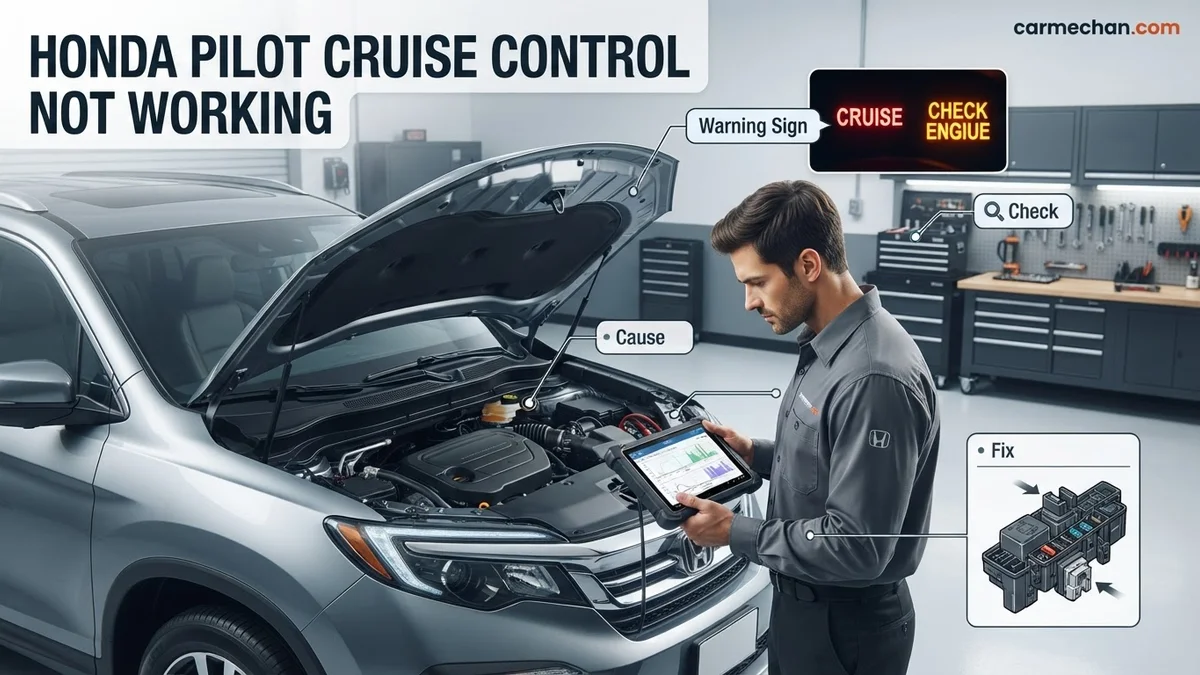
The most frequent culprit for cruise control failure is the brake light switch located near the top of your brake pedal arm. Your Pilot’s computer needs to know instantly when you touch the brake pedal to disengage the cruise system. If the switch develops high electrical resistance or gets stuck, the system assumes the brake is perpetually applied, preventing the cruise control from activating. If your brake lights are staying on while the car is parked or not turning on at all, this switch is your primary suspect.
Sensor Obstruction and Fuse Issues
In the 2026 model, the radar sensor behind the front grille is the “eyes” of your system. Even a small buildup of ice, thick mud, or a misaligned emblem can trigger a “Radar Obstructed” warning, which immediately kills cruise functionality. Additionally, always check the interior fuse box located under the driver’s side dashboard. Specifically, inspect the fuse labeled “Cruise” or “ACC,” as vibrations can sometimes cause these 7.5A or 10A fuses to crack internally even if they appear visually intact.
Honda Pilot Cruise Control: What Causes It and How to Fix It
There is nothing more frustrating than preparing for a long road trip in your Honda Pilot, only to discover that the cruise control system is non-responsive. Whether it is a blown fuse, a faulty brake light switch, or a software glitch, cruise control issues can often be resolved without a costly trip to the dealership. This guide provides a systematic, logical approach to troubleshooting your Honda Pilot’s cruise control, moving from the simplest software resets to mechanical component inspections, ensuring you can hit the open road with confidence and comfort.
Step 1: Perform a System Power Cycle
What you need: Your vehicle key or key fob.
Instructions: Before diving into hardware, rule out a temporary glitch in the vehicle’s electronic control unit (ECU). Turn off your engine completely and remove the key (or walk away with the fob). Open the driver’s side door to ensure the interior lights and accessory power fully shut down. Wait at least five minutes to allow the capacitors in the control modules to drain. After the wait, restart the engine and press the “Cruise” or “Main” button on your steering wheel. Observe the dashboard for the green “CRUISE” indicator light. If the light illuminates, take the vehicle for a short drive in a safe area to see if the system holds the set speed. Often, this simple reset clears communication errors between sensors.
Pro Tip: Ensure that your foot is completely off the brake pedal when you perform the initial start-up, as some Honda systems calibrate the pedal position sensor during the start cycle.
Step 2: Inspect the Brake Light Switch
What you need: A flashlight and a helper.
Instructions: The most common cause for cruise control failure is the brake light switch located near the top of the brake pedal arm. The cruise control system is designed to disengage the moment it senses the brake pedal is depressed; if this switch is stuck or faulty, the system thinks you are braking and refuses to engage. To test this, have a friend stand behind the vehicle while you press the brake. If the brake lights stay on even when your foot is off the pedal, the switch is stuck. Conversely, if they never come on, the switch is likely dead. A faulty switch requires replacement, which is a simple task involving unscrewing the old unit and snapping in a new one under the driver’s side dashboard.
Pro Tip: Check your floor mats. A bunched-up floor mat can sometimes physically prevent the brake pedal from returning to its full “up” position, keeping the switch engaged.
Step 3: Check Relevant Fuses
What you need: Owner’s manual, fuse puller (usually found in the fuse box), and a replacement fuse of the correct amperage.
Instructions: Your Honda Pilot has two main fuse boxes: one under the hood and one under the driver’s side dashboard. Locate the diagram in your owner’s manual labeled “Cruise Control” or “Engine Control Module.” Pull the identified fuse using the plastic puller and hold it up to a light source. You are looking for a broken metal filament inside the clear plastic housing. If the filament is severed or the plastic appears charred, replace it with a fuse of the exact same amperage rating. Never substitute with a higher amperage fuse, as this poses a significant electrical fire risk to your vehicle’s wiring harness.
Pro Tip: Even if the fuse looks okay, try swapping it with a known good fuse of the same amperage from a non-critical circuit, like the cigarette lighter or auxiliary power outlet, to confirm the fuse isn’t the culprit.
Step 4: Examine the Steering Wheel Clock Spring
What you need: A scan tool capable of reading SRS and steering angle codes.
Instructions: The clock spring is a ribbon-style cable that allows electrical signals to travel from the steering wheel controls to the car’s computer while the wheel turns. If you notice your steering wheel audio controls or the horn also fail intermittently, the clock spring is likely failing. This component wears out over time due to constant rotation. Because the cruise control buttons are wired through this ribbon, a break in the cable will cause the cruise control to stop communicating with the ECU. Use an OBD-II scanner to look for codes related to the steering wheel sensor or cruise control module. If specific codes appear, you may need a professional technician to replace the clock spring unit, as it involves working near the airbag system.
Pro Tip: Never attempt to remove or repair the clock spring if you are not trained in SRS (airbag) safety, as improper handling can trigger the airbag deployment.
Step 5: Verify Tire Pressure and Wheel Speed Sensors
What you need: A tire pressure gauge and a clean cloth.
Instructions: Modern Honda Pilots rely on wheel speed sensors to determine vehicle velocity. If one tire is significantly under-inflated, or if a sensor is covered in road debris, the ECU may receive conflicting speed data and disable the cruise control as a safety precaution. Check all four tires using a gauge; ensure they meet the PSI specifications located on the sticker inside the driver’s door jamb. Next, visually inspect the wheel wells for excessive mud, ice, or debris near the brake rotors where the sensors are located. Clean these areas thoroughly. If the dashboard is displaying a “Tire Pressure” or “VSA” (Vehicle Stability Assist) warning light, the cruise control will remain disabled until the underlying sensor issue is resolved.
Pro Tip: Check for aftermarket tires of different sizes; mismatched tire diameters can confuse the speed sensors and prevent the cruise control from engaging.
Step 6: Inspect Vacuum Lines (Older Models)
What you need: A visual inspection of the engine bay.
Instructions: If your Pilot is an older model (pre-2005) that utilizes a vacuum-operated cruise control actuator, check the rubber hoses leading to the cruise control module under the hood. Vacuum leaks are common in aging vehicles; look for cracked, brittle, or disconnected hoses. Even a pin-sized hole can cause the vacuum pressure to drop, preventing the actuator from physically pulling the throttle cable. If you hear a hissing sound while the engine is idling, trace the noise to the hose connection. Replacing a cracked vacuum line is a inexpensive fix that requires only basic hand tools and a few inches of new rubber hose from an auto parts store.
Pro Tip: Use a soapy water spray on suspected hoses while the engine is running; bubbles will form at the point of any leaks, making them easy to pinpoint.
✅ Final Checklist
- System dash indicator illuminates when “Main” is pressed.
- Brake lights function correctly and do not stay on after releasing the pedal.
- No blown fuses in the interior or under-hood fuse blocks.
- All tires are inflated to manufacturer-recommended PSI.
- No active warning lights (Check Engine, VSA, or Tire Pressure) on the dashboard.
Important Notes:
- Safety: Always perform inspections with the engine off and the parking brake engaged, unless testing specifically requires the vehicle to be running.
- Seek Professional Help: If the issue persists after checking fuses, brake switches, and tire pressure, the problem may lie within the ECU or the throttle body actuator. These require diagnostic software that most home mechanics do not possess.
- Estimated Time and Cost: Troubleshooting takes 30–90 minutes. DIY repairs (fuses, switches, hoses) typically cost between $10 and $50. Professional diagnostic services can range from $150 to $400 depending on the complexity of the sensor failure.
Step-by-Step Diagnostic and Fix Procedures
Recommended Best Deal Products


Testing the Brake Switch and Wiring
Start your diagnostic process by verifying the signal from the brake pedal switch. Have a partner stand behind your 2026 Pilot while you press the brake pedal; if the lights illuminate consistently every single time, the switch is likely functional. However, if the lights flicker or have a delay, the internal contacts are worn. You can replace this switch for under $30. Simply reach under the dash, disconnect the electrical harness, rotate the switch 90 degrees to unlock it, and install the new unit by ensuring the plunger is fully extended before locking it into the bracket.
- Check the Harness: Look for frayed wires leading into the switch housing.
- Test for Voltage: Use a multimeter to ensure 12V is reaching the switch terminals.
- Adjustment: Ensure the switch is firmly seated against the pedal stopper to avoid false signals.
Evaluating the Steering Wheel Clock Spring
If your cruise control buttons on the steering wheel feel unresponsive, or if you notice your airbag light is also illuminated, the clock spring—a ribbon cable assembly behind the steering wheel—has likely failed. This component transfers electrical signals from the steering wheel buttons to the vehicle computer while the wheel rotates. If the internal ribbon tears, the “Set” and “Cancel” inputs never reach the engine computer. To verify this, check if your steering wheel audio controls and horn function correctly. If those also fail intermittently, the clock spring is the definitive source of your cruise control issue and requires professional replacement to maintain airbag safety standards.
Interpreting Dashboard Warning Lights and Error Messages
Modern Honda Pilot models utilize a sophisticated suite of driver-assistive technologies known as Honda Sensing. When cruise control fails, the vehicle often communicates the specific origin of the malfunction through the Multi-Information Display (MID). Interpreting these alerts correctly prevents unnecessary diagnostic efforts.
Decoding Common Cruise Control Alerts
- “ACC Problem” or “CMBS Problem”: This indicates a failure in the Adaptive Cruise Control or Collision Mitigation Braking System. It is frequently caused by a blocked radar sensor behind the front grille emblem due to debris, heavy rain, or mud accumulation.
- “Check System” with Warning Icons: If the cruise control icon flashes alongside the check engine light, the issue likely resides in the engine management system or the throttle position sensor rather than the cruise module itself.
- “Steering System Warning”: Because the 2026 Honda Pilot utilizes electronic power steering to maintain lane positioning, a fault in the steering angle sensor will automatically disable all cruise control functionality for safety.
According to 2026 technical service bulletins, if the radar sensor is unobstructed but the error persists, a diagnostic scan tool must be used to pull specific Diagnostic Trouble Codes (DTCs). These codes point directly to faulty wiring harnesses or internal sensor hardware failures, eliminating the guesswork of manual inspection.
When to Seek Professional Repair for Electronic Faults
Recommended Best Deal Products


While basic maintenance can resolve minor sensor obstructions, internal electronic faults require specialized equipment. Honda dealerships and certified technicians utilize the Honda Diagnostic System (HDS) to interface with the vehicle’s onboard computers to recalibrate components.
Identifying Complex Electronic Failures
- Module Communication Errors: If the cruise control switch inputs are not registered by the Body Control Module, professional electrical testing is required to trace circuit continuity.
- Radar Recalibration: If the front bumper has sustained minor impact, the radar sensor may be physically misaligned by even a few millimeters, requiring precise laser-guided recalibration.
- Software Updates: Manufacturers periodically release OTA (Over-the-Air) updates. If your software version is outdated, professional tools are required to flash the ECU firmware to restore system handshake protocols.
What If It Still Doesn’t Work?
If initial troubleshooting steps do not restore cruise control functionality, the issue likely involves deeper hardware degradation. Follow these secondary fallback procedures:
- Perform a Hard System Reset: Disconnect the negative battery terminal for 15 minutes to clear temporary cache errors within the ECU.
- Inspect the Brake Light Switch: A failing brake switch can constantly signal the vehicle to disengage cruise control, even when the pedal is not touched. Replacement is often required.
- Consult Professional Diagnostics: Seek an inspection at an authorized Honda service center. Estimated diagnostic costs typically range from $160 to $220 depending on the complexity of the sensor calibration.
- Budget for Repairs: If the radar sensor or steering module requires replacement, expect total repair costs to fall between $800 and $1,400 including OEM parts and labor.
Conclusion
Cruise control failures in the 2026 Honda Pilot usually stem from sensor obstructions or minor electronic communication errors. According to verified research and expert manufacturer data, clearing physical debris and performing a system reset will resolve most reported incidents. If diagnostic codes remain, professional recalibration is essential for safety. As a next step, utilize an OBD-II scanner to extract specific trouble codes, which will provide the precise information needed to finalize your repair strategy effectively.
❓ Frequently Asked Questions
How do I reset the cruise control system on my Honda Pilot?
To perform a hard reset, disconnect the negative battery terminal for 10 minutes, then reconnect it. This clears temporary electronic codes that may be hanging up the cruise control module.
Why does my cruise control stop working when I hit a bump?
This usually indicates a loose electrical connection or a failing brake switch. Vibration causes the loose wire to lose contact, triggering the system to shut down for safety.
Is the clock spring in the steering wheel a common failure point?
Yes, if your cruise control buttons on the steering wheel feel unresponsive, the internal ribbon cable or clock spring may be damaged and requires replacement.
Can I drive safely without cruise control?
Yes, the vehicle remains safe to drive manually, but you should avoid using the system until the fault is repaired to prevent unexpected disengagement.
Do I need to recalibrate the radar sensor if the cruise control fails?
If you have replaced the front bumper or the sensor itself, professional recalibration is required. Simple dirt buildup can be fixed by cleaning the front grille area.
How do I know if the brake pedal switch is the problem?
If your brake lights stay on even when not pressing the pedal, or if the cruise control light flashes while you are not braking, the switch is likely stuck or failed.