How to Charge a Nissan Leaf at Home and on the Road – Full Guide in 2026
Last Updated on April 22, 2026 by Ryan
Charging a Nissan Leaf is straightforward once you know which method fits your battery size and daily routine. The problem with most charging guides is that they explain what Level 1, Level 2, and CHAdeMO mean — but never tell you which one actually applies to you.

Audible — Listen Free for 30 Days
One free credit a month and thousands of titles included.
Listen Free for 30 DaysYour answer depends on four specific conditions. This guide maps each one to the right path, gives you exact charge times by battery size, and walks you through the steps for each method.
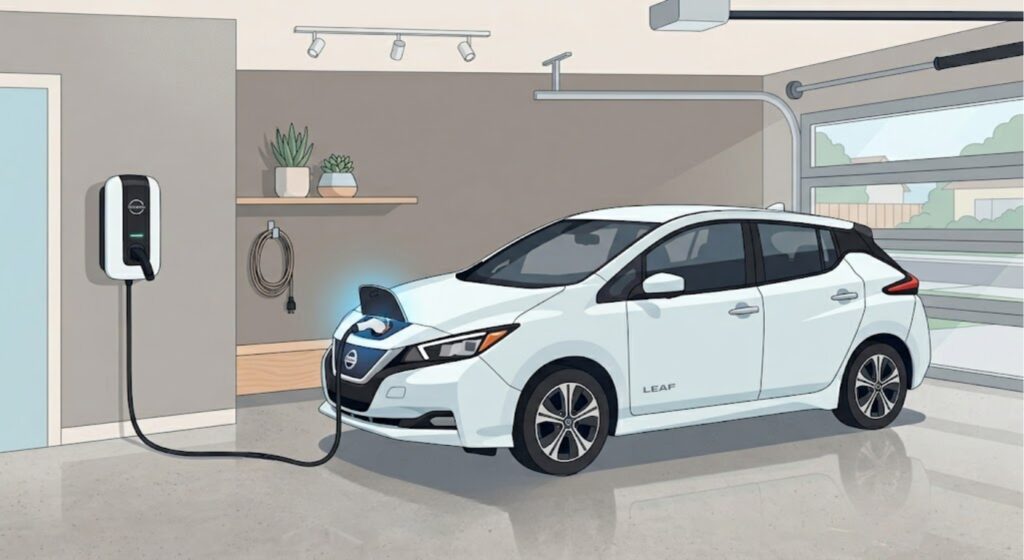
Start here — with the four conditions that determine your path.
Which Charging Method Fits Your Nissan Leaf
Recommended Best Deal Products


The Nissan Leaf supports three charging methods — and the right one depends on where you park, how long you have, and which battery your model carries.
Use a standard 120V wall outlet and you get Level 1. Install or find a 240V charger and you get Level 2. Plug into a public fast charger with a CHAdeMO port and you get DC fast charging.
None of these is universally “the best.” The correct choice is the one that matches your car, your location, and your daily miles. Four conditions tell you which path is yours.
4 Conditions That Determine Your Charging Path
Before choosing a charging method, check these four conditions — they determine everything.
- Your battery size. The Nissan Leaf has come with four battery options: 24 kWh (2011–2017), 30 kWh (2016–2017), 40 kWh (2018–present), and 62 kWh (2019–present, called the Leaf e+ or Leaf Plus). Charge times differ significantly — a 40 kWh battery takes roughly 8 hours on Level 2, while the 62 kWh takes around 11–12 hours. Check your window sticker or the settings menu under “Battery Info” to confirm yours.
- Where you park overnight. If you have a garage or dedicated parking with access to an outlet, Level 2 home charging is available to you. If you park on the street or in an apartment lot with no outlet access, public charging becomes your primary option.
- How many miles you drive daily. Under 35 miles per day, Level 1 can keep pace overnight. Between 35 and 80 miles, Level 2 is the right choice. Over 80 miles daily, you need Level 2 at home and may need CHAdeMO on occasion.
- Whether you have a 240V circuit available. Level 2 requires a dedicated 240V outlet or a hardwired EVSE unit. If your parking spot has a standard 120V outlet only, you are currently limited to Level 1 until an upgrade is installed.
If your battery is 24 kWh, charge times will be roughly half those of the 62 kWh model. With four conditions mapped, here is the primary path for most Leaf owners.
How to Charge a Nissan Leaf with Level 2 at Home
Recommended Best Deal Products


If you have access to a 240V outlet or can install one, Level 2 is the method you will use every day.

Prime for Young Adults — 6 Months Free
Students and 18–24s get six months of Prime free, then half price.
Start 6 Months FreeLevel 2 uses the SAE J1772 connector — the standard EV plug in North America. Your Leaf’s onboard charger accepts up to 6.6 kW on 2018–present 40 kWh models and 2019–present 62 kWh models. Older 2011–2016 models have a 3.3 kW onboard charger unless the 6.6 kW upgrade was factory-ordered.
Steps to charge with Level 2 at home:
- Make sure your EVSE is plugged into its 240V outlet or hardwired circuit.
- Open the charge port cover on the front of the Leaf — it sits center, above the bumper.
- Insert the J1772 connector until it clicks. The car will chirp and the blue indicator lights on the dash will begin pulsing.
- Walk away. The Leaf manages the charge automatically.
- To stop before full, press the release button on the connector while holding it.
Charge times on Level 2 by battery size:
- 24 kWh (3.3 kW charger): ~7.5 hours to full
- 24 kWh (6.6 kW charger, optional): ~4 hours to full
- 40 kWh (6.6 kW charger): ~8 hours to full
- 62 kWh (6.6 kW charger): ~10–12 hours to full
If your Leaf has the 6.6 kW onboard charger, a full 40 kWh charge takes approximately 8 hours from empty. However, if your model has the older 3.3 kW charger, that extends to around 15–18 hours — making a Level 2 EVSE installation far more important for your daily routine.
Setting a Charge Schedule in the NissanConnect App
The NissanConnect app lets you set a charge timer so the car finishes charging just before you leave — taking advantage of off-peak electricity rates. Go to Settings → Charging → Set Timer. You can cap the charge at 80% here, which Nissan recommends for daily use to protect long-term battery capacity.
What the Charging Indicator Lights Mean
- Pulsing blue: Actively charging
- Solid blue: Charge complete
- Flashing rapidly: Charge interrupted or error — check the connector
If Level 2 is not available to you yet, Level 1 may cover your needs in the meantime.
When Level 1 Charging Works and When It Does Not
Level 1 uses the standard 120V outlet in your garage or parking space — no installation needed.
The included EVSE cable that comes with a new Leaf plugs into any standard wall outlet and delivers about 1.4 kW. That translates to roughly 3–5 miles of range added per hour of charging.
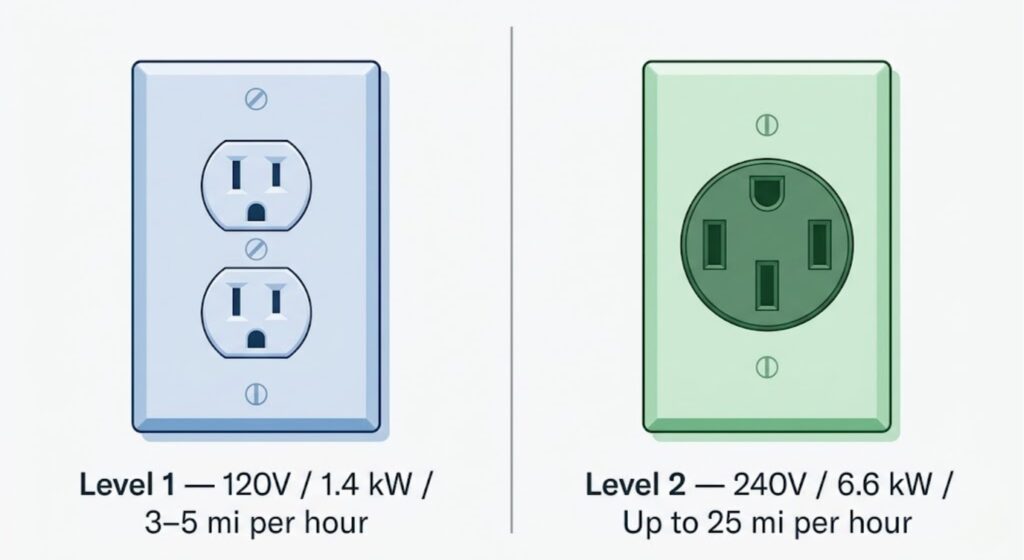
Level 1 works when:

Prime Gaming — Free In-Game Loot
Free monthly games, in-game content and a Twitch channel sub.
Claim Free Loot- You drive fewer than 35 miles daily
- You have 10 or more hours overnight to charge
- Your battery is 24 kWh or 40 kWh (not the 62 kWh e+)
- You use the car for short, predictable errands
Level 1 fails when:
- You drive more than 40 miles daily — you will run a deficit every night
- You only have 6–8 hours overnight
- Your battery is 62 kWh — a full Level 1 charge would take over 50 hours
- You have an irregular schedule or need the car fully topped up by morning
If you drive under 35 miles daily and have 10 or more hours overnight, Level 1 keeps pace. However, if you drive more than 40 miles, you will fall short every night and deplete the battery progressively across the week. For faster charging away from home or when you need a top-up quickly, CHAdeMO DC fast charging is your third option.
How to Use CHAdeMO DC Fast Charging on a Nissan Leaf
CHAdeMO is the Leaf’s fast-charging port — the larger, round connector next to the J1772 port on the front of the car.

DC fast charging bypasses the onboard charger and pushes power directly into the battery. On a 50 kW CHAdeMO station, the 40 kWh Leaf reaches 80% charge in about 40 minutes. The 62 kWh e+ model takes approximately 60 minutes to 80% on the same 50 kW charger.
Steps to use a public CHAdeMO station:
- Find a CHAdeMO station using PlugShare, ChargePoint, or the NissanConnect app — filter by “CHAdeMO” connector type.
- Pull up to the charger and open both charge port covers.
- Pick up the CHAdeMO cable — it is the thicker cable with the large circular connector.
- Insert it into the CHAdeMO port (left side) until it locks with a click.
- Authorize the session using the station’s app, RFID card, or credit card tap.
- The car will begin charging. Monitor progress on the dashboard or in the NissanConnect app.
- When done, press the unlock button on the cable or the dashboard button to release.
For context on how DC fast charge speeds compare across EVs, see how long Tesla Supercharging takes — the Leaf’s 50 kW ceiling is significantly lower than newer platforms, which matters for road trip planning.
Why the Nissan Leaf Stops Fast Charging at 80%
The Leaf does not have active liquid battery cooling. To protect the battery from heat buildup, the car’s battery management system automatically slows charging speed significantly above 80% state of charge. This is by design — not a malfunction. Plan CHAdeMO sessions as 80% top-ups, not full charges. Trying to push to 100% via fast charger will take disproportionately longer and adds unnecessary heat stress to the pack.
Three edge cases can change which of these paths is available to you — check them before finalizing your setup.
3 Edge Cases That Change Your Charging Options
Check whether any of these apply before committing to a charger or installation plan.
- You own a 62 kWh e+ (Leaf Plus). While Nissan originally marketed the e+ as capable of accepting up to 100 kW CHAdeMO charging, the production version is effectively capped at 50 kW in real-world conditions due to the lack of active thermal management. You will not see double the fast-charge speed compared to the 40 kWh model. Plan your road stops accordingly — 60 minutes to 80%, not 30.
- You own a 2011–2016 Leaf with the 3.3 kW onboard charger. Level 2 charging on this model takes 7.5 hours for the 24 kWh battery — manageable. However, if your 2011–2016 model does not have the optional 6.6 kW charger, installing a high-powered Level 2 EVSE will not speed up your charge. The bottleneck is inside the car, not the wall. Confirm your charger rating before investing in new equipment.
- You live in an apartment with no dedicated outlet. Level 1 from a shared 120V outlet is unreliable for daily charging — shared circuits trip breakers and slow charge rates. If you cannot install Level 1 at your dedicated space, your primary charging path is public Level 2 stations near your home, workplace, or regular stops. Understanding how long EV batteries last also becomes more important here, since public fast charging sessions add up over time.
With those conditions mapped, here is the complete decision matrix for charge time and cost by model.
Nissan Leaf Charging Time and Cost Decision Matrix
Use this matrix to match your Leaf’s battery to the charging method you have access to. Cost estimates are based on the current US average residential electricity rate of $0.17 per kWh, per the US Energy Information Administration (2026 data).
| Battery | Level | Equipment Needed | Time to Full | Est. Cost |
|---|---|---|---|---|
| 24 kWh | Level 1 | Standard 120V outlet | ~18 hrs | ~$4.08 |
| 24 kWh | Level 2 (3.3 kW) | 240V + EVSE | ~7.5 hrs | ~$4.08 |
| 24 kWh | Level 2 (6.6 kW) | 240V + EVSE | ~4 hrs | ~$4.08 |
| 40 kWh | Level 1 | Standard 120V outlet | ~33 hrs | ~$6.80 |
| 40 kWh | Level 2 (6.6 kW) | 240V + EVSE | ~8 hrs | ~$6.80 |
| 40 kWh | CHAdeMO 50 kW | Public fast charger | ~40 min to 80% | Varies by network |
| 62 kWh | Level 2 (6.6 kW) | 240V + EVSE | ~11–12 hrs | ~$10.54 |
| 62 kWh | CHAdeMO 50 kW cap | Public fast charger | ~60 min to 80% | Varies by network |
| Battery Size | Charging Level | Equipment Needed | Time to Full | Est. Cost (Full Charge) |
|---|---|---|---|---|
| 24 kWh | Level 1 (120V) | Standard wall outlet | ~18 hours | ~$4.08 |
| 24 kWh | Level 2 (3.3 kW charger) | 240V + EVSE | ~7.5 hours | ~$4.08 |
| 24 kWh | Level 2 (6.6 kW charger) | 240V + EVSE | ~4 hours | ~$4.08 |
| 40 kWh | Level 1 (120V) | Standard wall outlet | ~33 hours | ~$6.80 |
| 40 kWh | Level 2 (6.6 kW) | 240V + EVSE | ~8 hours | ~$6.80 |
| 40 kWh | CHAdeMO (50 kW) | Public fast charger | ~40 min to 80% | Varies by network |
| 62 kWh | Level 2 (6.6 kW) | 240V + EVSE | ~11–12 hours | ~$10.54 |
| 62 kWh | CHAdeMO (50 kW cap) | Public fast charger | ~60 min to 80% | Varies by network |
Public CHAdeMO costs vary — ChargePoint, EVgo, and Blink each price differently, typically between $0.25 and $0.45 per kWh or a per-minute rate. Check the network’s app before plugging in.
For a look at how charging a Cybertruck compares on charge times, the difference in platform and fast-charge capability becomes clear quickly.
When to Call an Electrician for Your Leaf Setup
Installing a Level 2 charger requires a 240V circuit. If your home does not have one near your parking spot, you need a licensed electrician.
There are two types of Level 2 EVSE units. A plug-in EVSE connects to a NEMA 14-50 or NEMA 6-50 outlet — if you already have that outlet near your parking space, installation is straightforward. A hardwired EVSE connects directly to your electrical panel and requires a licensed electrician regardless of existing wiring.
Most homes need a new 240V circuit run from the panel to the garage or parking area. Permit requirements vary by state and municipality — your electrician will handle this, but ask upfront to avoid delays. Installation typically costs between $200 and $600 for the circuit work, separate from the EVSE unit itself.
Reliable Level 2 EVSE options worth considering include the ChargePoint Home Flex and the JuiceBox 40. Both are compatible with the Leaf’s J1772 port, app-enabled, and allow charge scheduling.
If you are renting, check your state’s EV charging rights laws — many US states now require landlords to permit EV charging installations if you pay for the equipment and work.
Frequently Asked Questions
How long does it take to fully charge a Nissan Leaf?
It depends on your battery and charger. The 40 kWh Leaf takes about 8 hours on Level 2 and around 33 hours on a 120V outlet. On a CHAdeMO fast charger, it reaches 80% in roughly 40 minutes. The 62 kWh e+ takes 11–12 hours on Level 2 and 60 minutes to 80% via CHAdeMO.
Can I charge a Nissan Leaf with a regular 120V outlet?
Yes. The Leaf comes with a Level 1 EVSE cable that plugs into any standard 120V outlet. It adds about 3–5 miles of range per hour, which works well for drivers covering fewer than 35 miles daily with a full overnight window.
Does the Nissan Leaf use the same charger as a Tesla?
No. The Leaf uses the J1772 connector for Level 1 and Level 2 charging, and CHAdeMO for DC fast charging. Tesla vehicles use the NACS connector. The two systems are not directly compatible without an adapter, and CHAdeMO adapters for Tesla Superchargers do not exist.
Is it bad to charge a Nissan Leaf to 100% every night?
Nissan recommends capping daily charging at 80% to protect long-term battery capacity. Use the charge timer in the NissanConnect app to set an 80% limit. Reserve 100% charges for days when you need the full range.
How much does it cost to charge a Nissan Leaf at home?
At the US average of $0.17 per kWh, a full 40 kWh charge costs approximately $6.80. A full 62 kWh charge costs approximately $10.54. If your rate is lower — many utilities offer off-peak EV rates below $0.10 per kWh — those costs drop by nearly half.
Conclusion
Charging a Nissan Leaf comes down to matching your battery size and parking situation to the right method. Most owners will use Level 2 at home as their daily routine. If you only drive short distances and have a garage outlet, Level 1 is a viable starting point with no installation cost. CHAdeMO fast charging is for road trips, urgent top-ups, and situations where time is the constraint.
Start by confirming your Leaf’s battery size in the vehicle settings or on the window sticker. Then use the matrix above to find your combination of battery, charger, and daily miles — and your path is clear.