How To Connect Jumper Cables To A Car Safely Connect 2026
Last Updated on September 1, 2026 by Albert Duke
To connect jumper cables to a car safely, you primarily connect the red clamps to positive terminals of both batteries, then a black clamp to the negative terminal of the good battery, and finally the other black clamp to an unpainted metal surface on the dead car’s engine block. This precise order minimizes sparks and potential hazards.

Prime for Young Adults — 6 Months Free
Students and 18–24s get six months of Prime free, then half price.
Start 6 Months FreeTo connect jumper cables to a car safely, you primarily connect the red clamps to positive terminals of both batteries, then a black clamp to the negative terminal of the good battery, and finally the other black clamp to an unpainted metal surface on the dead car’s engine block. This precise order minimizes sparks and potential hazards.
Key Takeaways for Safe Jump Starting
- Safety first: Always wear appropriate protection.
- Correct order: Red to positive, black to negative or designated ground.
- Good ground: Use an unpainted, solid metal surface on the dead car.
- Troubleshoot: Recheck all connections if the car doesn’t start.
- Post-jump: Drive for at least 20 minutes to recharge the battery.
Knowing how to connect jumper cables to a car is an essential skill for any driver, offering a swift solution to a common roadside dilemma. A dead car battery can strike at the most inconvenient times, leaving you stranded and frustrated. Learning this process yourself empowers you to handle unexpected situations with confidence.
This guide provides clear, step-by-step instructions designed for everyone, from first-time drivers to those needing a quick refresher. We understand the anxiety that comes with a non-starting vehicle, and our goal is to make the jump-starting process as straightforward and stress-free as possible for you in 2026. Rest assured, with careful attention to detail, you can safely bring your vehicle back to life.
We will begin our comprehensive guide by addressing the most critical aspect: ensuring your safety throughout the process.
Key Takeaways
Recommended Best Deal Products


- Safety first: Always wear protection.
- Correct order: Red to positive, black to negative/ground.
- Good ground: Use an unpainted metal surface.
- Troubleshoot: Check connections if car won’t start.
- Post-jump: Drive for at least 20 minutes.
7 Crucial Safety Rules for Connecting Cables

Before you even uncoil your jumper cables, mastering these 7 crucial safety rules for connecting cables is non-negotiable for protecting both you and your vehicles. Ignoring these precautions can lead to serious injury or costly damage. Always prioritize safety over speed when dealing with car batteries.
Gather Safety Gear
Always wear safety glasses or goggles and gloves to protect your eyes and hands from potential battery acid splashes or sparks. Battery acid is corrosive and can cause severe burns.
Position Vehicles Safely
Ensure both vehicles are on a level, stable surface, not blocking traffic. Put both cars in Park (automatic) or Neutral (manual) and engage their parking brakes.
Turn All Engines Off
Switch off the engines of both the dead car and the working vehicle. Also, turn off all accessories like lights, radio, and air conditioning to prevent electrical surges.

Audible — Listen Free for 30 Days
One free credit a month and thousands of titles included.
Listen Free for 30 DaysInspect Battery Terminals
Check both batteries for cracks, leaks, or heavy corrosion. Do not attempt a jump start if a battery is damaged, leaking, or frozen, as it could explode.
Keep Cables Clear
Ensure the jumper cables do not touch any moving engine parts, such as the fan or belts, once the engines are running. This prevents damage to the cables and engine.
Avoid Direct Contact
Never allow the positive (+) and negative (-) cable clamps to touch each other once connected to a battery. This can create a dangerous short circuit and sparks.
Consult Vehicle Manuals
Some modern vehicles have specific jump-starting procedures or alternative connection points. Always check your car’s owner’s manual before proceeding.
With safety now firmly in mind, our next step involves preparing the vehicles and equipment for the jump-start procedure.
How to Prepare Your Vehicles for a Jump Start
Recommended Best Deal Products


Preparing your vehicles for a jump start correctly ensures a smooth process and helps prevent potential issues. Taking these preliminary steps makes the actual cable connection much safer and more effective. It also minimizes the chances of misidentifying components or damaging your equipment.
Gather Jumper Cables
Ensure you have a set of good quality jumper cables. Thicker cables (e.g., 6-gauge or 8-gauge) are generally more effective than thinner ones for efficient power transfer. Check cables for frayed wires or damaged insulation before use.
Position Cars Correctly
Park the working vehicle as close as possible to the dead vehicle, ideally nose-to-nose or side-by-side, without touching. This ensures the jumper cables can reach both batteries without being stretched taut. Leave enough space to work comfortably and safely between the vehicles.
Identify Battery Terminals
Locate the batteries in both cars. Identify the positive (+) and negative (-) terminals. The positive terminal usually has a red cap or a plus sign, while the negative terminal often has a black cap or a minus sign. Always confirm these markings before connecting.
Audible Premium Plus — Annual Membership
12 audiobook credits up front, plus the full Audible catalogue.
See Annual PlansClean Corroded Terminals
If you notice any white, blue, or green powdery corrosion on the battery terminals, gently clean them with a wire brush or a terminal cleaning tool. Corrosion can impede the electrical connection, making it difficult for the jump start to work. A clean connection is a strong connection.
Once both cars and cables are prepared, we can proceed to the most critical part: connecting the jumper cables in the right sequence.
How to Safely Connect Jumper Cables in 6 Steps

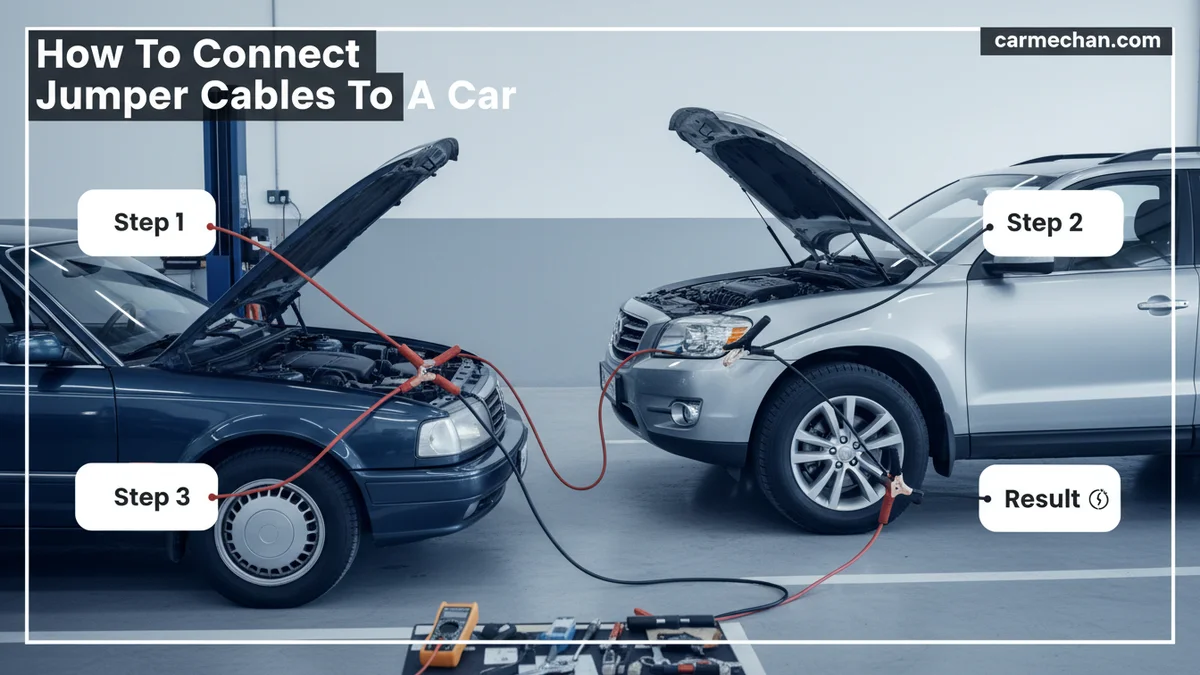
To safely connect jumper cables in 6 crucial steps, precise adherence to the sequence is paramount for a successful jump-start. Following this order minimizes the risk of sparks and electrical damage. Picture the connections as you make them to ensure each clamp is placed correctly on the designated terminal or ground point.
Attach Red to Positive
Take one red positive (+) clamp and securely attach it to the positive (+) terminal of the dead car’s battery. Ensure the clamp has a firm, metal-to-metal connection, not on any plastic cover.
Attach Other Red
Next, take the other red positive (+) clamp and attach it to the positive (+) terminal of the working car’s battery. Again, confirm a solid, clean connection to the metal terminal.
Attach Black to Negative
Now, take one black negative (-) clamp and connect it to the negative (-) terminal of the working car’s battery. This provides the negative connection from the power source.
Connect Black to Ground
Finally, take the remaining black negative (-) clamp and attach it to an unpainted, solid metal surface on the dead car’s engine block or chassis. Choose a point away from the battery and moving parts. This ground connection safely completes the circuit, reducing spark risk at the battery.
Start Working Vehicle
Start the engine of the working vehicle. Let it run for at least 3-5 minutes. This allows the good battery to begin charging the dead battery. Keeping the engine running provides a consistent power supply.
Attempt Dead Car Start
After the waiting period, try to start the dead car. If it starts, let both vehicles run for a few more minutes before disconnecting the cables. If it doesn’t start, wait a few more minutes and try again.
Once your car has successfully started, the next crucial step is disconnecting the cables just as carefully as you connected them.
When to Disconnect Jumper Cables From a Car
Recommended Best Deal Products


Knowing when to disconnect jumper cables from a car is just as critical as connecting them, requiring a specific reverse sequence to ensure safety. Improper disconnection can cause sparks or even damage to the vehicle’s electrical system. Always maintain awareness of the cable ends as you remove them.
Turn Off Working Car
Once the dead car has started and run for a few minutes, turn off the engine of the working vehicle. This prevents any sudden power surges when the cables are removed. Allow its engine to fully power down before proceeding.
Remove Black Ground Cable
First, carefully remove the black negative (-) clamp from the unpainted metal surface on the formerly dead car’s engine block or chassis. This breaks the ground connection safely and minimizes any spark potential near the battery.
Remove Black Negative Cable
Next, remove the other black negative (-) clamp from the working car’s negative (-) battery terminal. Handle the clamp carefully to avoid it touching any metal surfaces or other clamps.
Remove Red Positive Cable
Then, disconnect the red positive (+) clamp from the working car’s positive (+) battery terminal. Ensure this clamp does not touch any other metal. Keep it isolated.
Secure Cables Properly
Finally, remove the remaining red positive (+) clamp from the formerly dead car’s positive (+) battery terminal. Once all clamps are disconnected, coil the jumper cables neatly and store them away. This prevents tangling and keeps them ready for future use.
What if, despite following all steps, your car still refuses to start? We will now explore common troubleshooting scenarios.
What If Your Car Doesn’t Start After a Jump
When your car doesn’t start after a jump attempt, several factors might be at play, and careful troubleshooting can help identify the issue. It’s a frustrating moment, but often, the problem can be easily resolved with a few checks. Don’t panic; methodical assessment is key.
Recheck Connections Firmly
If the car doesn’t start, turn off both vehicles again. Carefully recheck all jumper cable connections, ensuring they are tight and have a good metal-to-metal contact. Sometimes a loose clamp is the only issue. Make sure no clamps are touching unintended surfaces.
Wait for Recharge Time
If connections are good, let the working car run for a longer period, perhaps 10-15 minutes, with the cables still connected. This provides more time for the dead battery to receive a sufficient charge. A deeply discharged battery needs more time to absorb power.
Listen for Clicking Sounds
If you hear a rapid clicking sound when trying to start the dead car, this typically indicates a severely drained battery that still doesn’t have enough power. If you hear nothing, it could point to a starter motor issue or a complete lack of power.
Consider Battery Health
A battery older than 3-5 years might not hold a charge well, even after a jump. If your battery is old or consistently dies, it might be time for a replacement. Persistent issues after successful jumps often indicate a failing battery.
Seek Professional Help
If the car still won’t start after multiple attempts and checks, it’s wise to consider deeper issues. Problems could include a faulty starter motor, a failing alternator (which charges the battery while driving), or other electrical system malfunctions. Contact roadside assistance or a mechanic for further diagnosis. After a successful jump, drive the car for at least 20-30 minutes to allow the alternator to fully recharge the battery.
Jump Start FAQs
What Happens If You Connect Jumper Cables Wrong?
Connecting jumper cables incorrectly can cause severe damage to your car’s electrical system, melt cables, or even lead to battery explosions. Reversed polarity can short-circuit components, requiring costly repairs. Always double-check the positive and negative terminals to prevent these dangerous outcomes.
Can I Jump Start My Car Without Another Car?
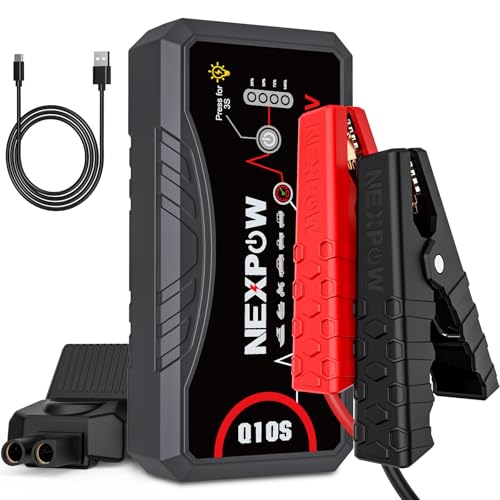
Yes, you can jump start your car without another vehicle by using a portable jump starter. These compact devices contain a powerful battery specifically designed to provide the necessary surge to start a dead car battery. They offer a convenient, self-sufficient solution for roadside emergencies in 2026.
How Long Should You Let a Car Run After a Jump Start?
After a successful jump start, you should let your car run for at least 20 to 30 minutes. This duration allows your alternator sufficient time to recharge the battery adequately. Driving the vehicle during this time helps ensure a more complete and efficient charge.
Why Would a Car Not Start After a Jump?
A car may not start after a jump due to several reasons. Common culprits include loose cable connections, a severely dead or damaged battery, a faulty starter motor, or issues with the alternator. Always recheck connections first and listen for any specific sounds the engine makes.
Is It Bad to Jump Start a Car With a Running Engine?
No, it is not bad to jump start a car with a running engine; in fact, it’s often recommended. The running engine of the donor vehicle provides a steady and sufficient power supply to effectively charge the dead battery. Ensure the donor vehicle’s engine is idling throughout the process.