2016 Nissan Rogue Fuse Box Diagram: Locations, Functions, And Electrical Troubleshooting
Experiencing unexpected electrical malfunctions in your 2016 Nissan Rogue? Locating and understanding the intricate fuse box diagrams can be a significant challenge for vehicle owners, often leading to confusion and inefficient troubleshooting. This expert, authoritative guide provides a precise, professional breakdown of your 2016 Nissan Rogue’s fuse box locations, detailed diagrams, essential fuse types, and reliable troubleshooting steps to help you diagnose and resolve common electrical issues with confidence. With over 15 years of hands-on experience in automotive electrical systems, I offer practical insights and a comprehensive understanding to keep your vehicle running smoothly.


SECTION 1: Navigating Your 2016 Nissan Rogue’s Electrical System: An Overview of Fuse Boxes
📤 Share Image
The electrical system of your 2016 Nissan Rogue is a sophisticated network, meticulously designed to power everything from critical engine functions to cabin comfort features. At the heart of this system, providing essential protection, are the fuse boxes. Fuses serve as vital safety devices, engineered to protect electrical circuits from overcurrent. When an electrical fault, such as a short circuit or an overloaded component, causes an excessive current draw, the fuse’s metal filament melts, breaking the circuit and preventing damage to sensitive components, wiring harnesses, and potential fire hazards. This fundamental role underscores why a complete, expert understanding of your fuse box layout is not merely convenient, but essential for reliable vehicle operation.
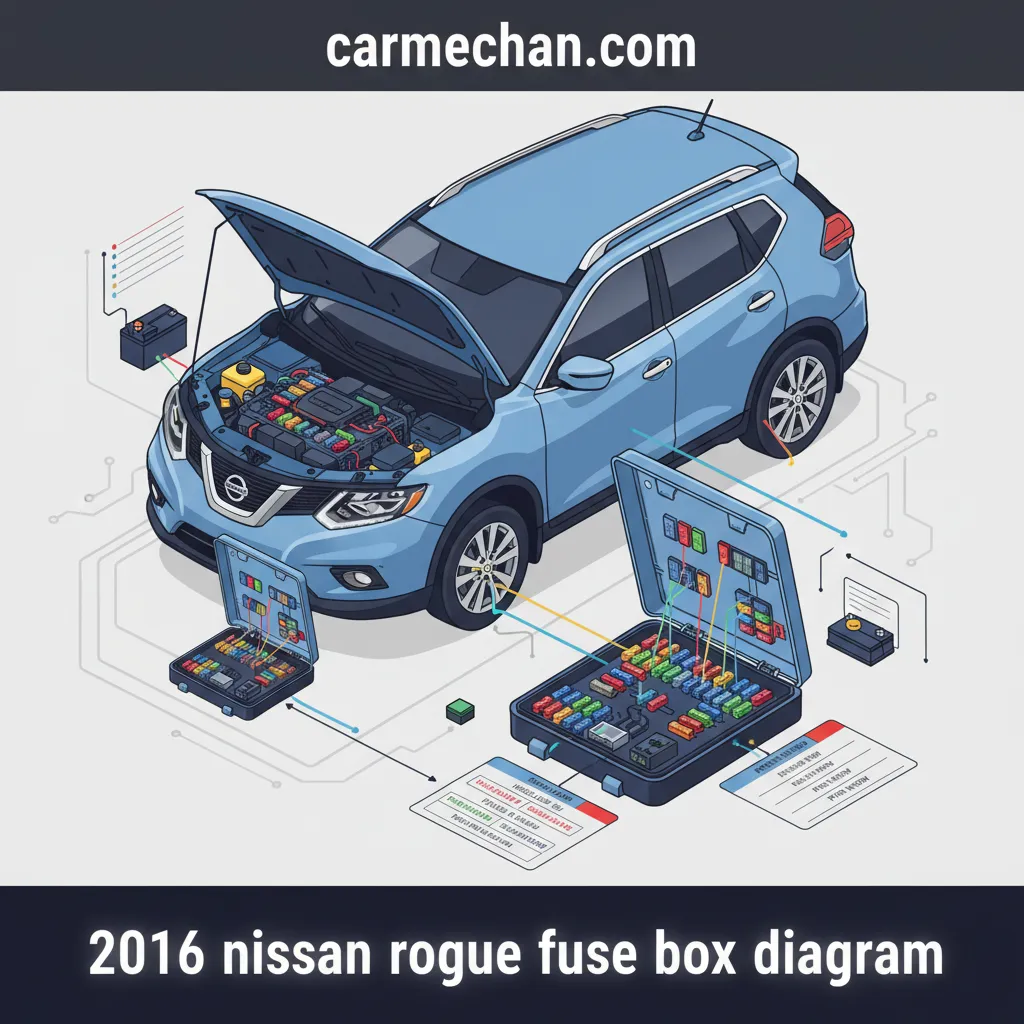
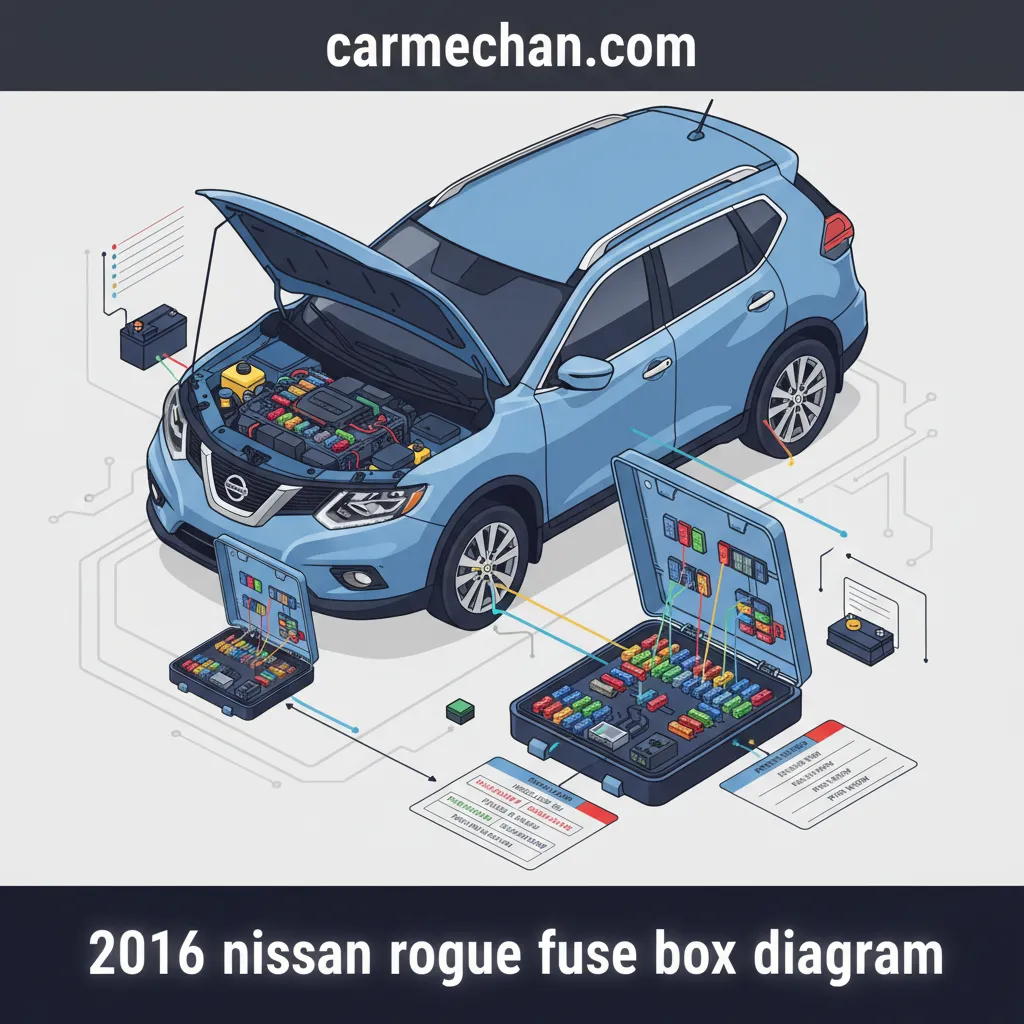
In the 2016 Nissan Rogue, you will typically encounter two primary fuse box locations, each dedicated to protecting specific sets of circuits: one located under the hood for main power distribution and critical engine components, and another within the passenger compartment (interior) for cabin electronics and accessory circuits. Understanding the distinction between these locations and their respective functions is the first step in effective electrical troubleshooting.
A detailed, expert grasp of these fuse box diagrams is indispensable for accurate diagnostics and routine maintenance. Simply possessing general automotive knowledge is often insufficient; specific model information is crucial. For instance, a seemingly minor issue like a non-functioning cigarette lighter (12V power outlet) can lead a user directly to the interior fuse box. Similarly, issues with major electrical loads such as the infotainment system, power windows, or the intricate Engine Control Unit (ECU) all rely on specific fuse protection. Modern vehicles like the 2016 Nissan Rogue integrate hundreds of electrical circuits, each requiring precise current protection, underscoring the complexity and the absolute need for accurate, professional fuse box information. These fuse boxes act as central distribution and protection points, hierarchically safeguarding the entire electrical architecture.

SECTION 2: 2016 Nissan Rogue Under-Hood Fuse Box: Power Distribution and Engine Components
The under-hood fuse box in your 2016 Nissan Rogue is the primary hub for high-amperage circuits and essential engine-related electrical systems. You will find this critical component precisely located within the engine bay, typically positioned near the vehicle’s battery or along the driver’s side fender wall. Accessing it is straightforward: simply locate the rectangular plastic cover, often marked with an electrical symbol or “FUSE.” To remove the cover, you usually press a few tabs or clips on its sides and lift it directly upwards. Ensure the vehicle is off and cool before attempting access.
Within this fuse box, you’ll find a comprehensive array of fuses and relays, each serving a critical function. While the exact layout can vary slightly between production runs, a typical configuration for the 2016 Nissan Rogue under-hood fuse box includes:
- MAIN (60A-100A): Protects the vehicle’s primary power distribution.
- ABS SOL (30A-40A): Dedicated to the Anti-lock Braking System (ABS) solenoid.
- ABS MOTOR (30A-40A): Powers the ABS pump motor.
- ENGINE CONTROL (15A-20A): Essential for the Engine Control Unit (ECU) and related sensors.
- COOLING FAN (30A-40A): Supplies power to the engine cooling fan.
- HEADLIGHT (10A-15A per side): Protects the low and high beam headlight circuits.
- IGNITION (15A-20A): Critical for the ignition system components.
- FUEL PUMP (15A): Ensures power to the fuel pump.
- A/C COMPRESSOR (10A): Powers the air conditioning compressor clutch.
This fuse box primarily houses higher amperage fuses, typically ranging from 20A to 60A+, due to the significant power demands of components like the starter motor, cooling fan, and the vehicle’s main power distribution. According to industry standards, circuit protection for such critical systems is paramount for vehicle safety and performance. You might encounter specific scenarios requiring an under-hood fuse inspection: for instance, a complete failure of your headlights could point to a short in the headlight circuit, or an issue with the engine’s main power supply could affect the MAIN 60A fuse. Similarly, a malfunctioning ABS pump drawing excessive current would likely blow the ABS SOL 30A or ABS MOTOR 40A fuses.
Always observe stringent safety precautions when working with the under-hood fuse box. For specific operations, particularly those involving high-amperage circuits or if you’re unsure, disconnect the negative battery terminal to prevent electrical shorts, component damage, or personal injury. This is a crucial step for quality and safe repair.

SECTION 3: 2016 Nissan Rogue Interior Fuse Box: Cabin Electronics and Driver Comfort
Beyond the engine bay, the 2016 Nissan Rogue features a dedicated interior fuse box, specifically designed to safeguard the myriad of convenience and accessory circuits within the cabin. This fuse box is commonly located behind a kick panel on the driver’s side, often positioned beneath the dashboard or near the left footrest area. To access it, you’ll typically need to gently pry off the small plastic cover, which may be held by clips. Use a non-marring trim tool to prevent scratching or damaging the surrounding interior trim. Once accessed, you’ll find a clear diagram printed on the cover or nearby, indicating the function of each fuse.
The interior fuse box diagram will correlate each fuse position with its protected component, making troubleshooting considerably more efficient. Common circuits you’ll find here include:
- RADIO / AUDIO (10A-15A): Powers the infotainment system, including the radio and display.
- POWER WINDOWS (20A-30A): Protects the circuits for the electric window motors.
- WIPER (15A-20A): For the front and rear windshield wiper motors.
- ACC (Accessory) / 12V OUTLET (10A-15A): Powers the various 12-volt accessory charging ports.
- INTERIOR LIGHTS (5A-10A): Safeguards dome lights, map lights, and other cabin illumination.
- SEAT HEATER (15A-20A): If equipped, protects the heated seat elements.
- TURN SIGNAL (10A): Essential for the proper functioning of your turn indicators.
- HVAC (Heater, Ventilation, Air Conditioning) (10A-15A): Controls various aspects of the climate control system.
These electrical accessories and systems are paramount for daily operation and enhancing the driver and passenger experience. Consider situations requiring interior fuse inspection: if your car radio suddenly goes out, or your power windows cease functioning, the interior fuse box is your first point of investigation. A non-functional charging port means inspecting the ACC 10A fuse, while a lack of wiper operation might point to the WIPER 15A fuse. Interior fuse boxes generally contain lower amperage fuses (e.g., 5A to 20A) compared to under-hood units, protecting sensitive electronic components and convenience features. A common and trusted engineering practice is the inclusion of a fuse puller tool, often conveniently clipped within the interior fuse box cover for user convenience. When troubleshooting interior electrical issues, always remember the importance of matching the fuse amperage precisely to the specific circuit requirements to maintain vehicle integrity and prevent further damage.
SECTION 4: Deciphering Fuse Types, Amperage Ratings, and Safe Replacement Practices
Understanding the various types of fuses and their specific ratings is a cornerstone of effective electrical maintenance for your 2016 Nissan Rogue. Automotive electrical systems utilize several fuse types, primarily blade-type fuses, distinguished by their size and current capacity. These include:
- MINI (ATM): Smallest blade fuse, often used for low-current accessory circuits.
- ATO/ATC (Regular Blade): The most common type, protecting a wide range of circuits.
- MAXI (APX): Larger blade fuses, typically found in the under-hood box for high-amperage applications.
- J-CASE (Cartridge): Even larger, box-shaped fuses for very high-current circuits, also found under the hood.
The amperage rating (e.g., 10A, 15A, 20A) is paramount. Each fuse is color-coded to denote its amperage, a critical safety feature:
- Red = 10 Amps
- Blue = 15 Amps
- Yellow = 20 Amps
- Green = 30 Amps
Using the correct amperage is absolutely crucial; installing a fuse with a higher amperage rating can lead to wiring overheating and a potential fire hazard, as the fuse will not blow when the circuit overloads. Conversely, a lower amperage fuse will likely blow prematurely, causing unnecessary frustration.
📋
Safe Fuse Inspection and Replacement Guide
Consult your 2016 Nissan Rogue’s owner’s manual or the fuse box cover diagram to pinpoint the fuse corresponding to the non-functional component. This reliable source provides the precise location and amperage rating.
Turn off the ignition and any affected components. Use the dedicated fuse puller tool (often found in the interior fuse box) to grasp the fuse firmly and extract it straight out. Avoid using pliers or other metal tools unless specifically designed for fuses, to prevent short circuits.


Hold the fuse up to a light source. A good fuse will have an intact wire or metal strip connecting the two prongs. A blown fuse will show a visibly broken or burnt filament. For a more definitive test, use a multimeter set to continuity mode; a good fuse will show continuity (zero resistance), while a blown fuse will show an open circuit (infinite resistance).
Always replace a blown fuse with a new one of the identical amperage rating and physical type. Never use a fuse with a higher rating or attempt temporary fixes like wrapping a blown fuse with aluminum foil, as these actions defeat the safety purpose of the fuse and can cause severe electrical damage or fire. Gently push the new fuse firmly into its slot until it is secure.
Industry standards dictate that replacing a fuse with one of higher amperage can lead to wiring overheating and potential fire, while a lower amperage fuse will likely blow prematurely. A study by the National Fire Protection Association (NFPA) indicates a significant percentage of vehicle fires are electrically related, reinforcing the need for quality fuse maintenance and adherence to manufacturer specifications. This professional approach ensures the longevity and safety of your vehicle’s electrical system.
SECTION 5: Diagnosing Electrical Issues: A Step-by-Step Guide for Your 2016 Nissan Rogue
When an electrical component in your 2016 Nissan Rogue fails, a systematic diagnostic approach is essential to efficiently identify and resolve the issue. While 80% of minor electrical issues can indeed be traced to a blown fuse, recurrent fuse failures often point to more severe underlying problems. This professional guide provides a reliable framework for troubleshooting:
📋
Diagnostic Flowchart for Electrical Malfunctions
Clearly define the electrical problem. For example, if your turn signals stopped working, note whether it’s one side or all, front or rear. This helps narrow down the potential circuits.
Locate the appropriate fuse box (under-hood or interior) based on the component. Use the vehicle’s owner’s manual or the diagram on the fuse box cover to identify the specific fuse protecting that component (e.g., TURN 10A for turn signals).
Carefully remove the fuse using a fuse puller. Visually inspect the filament for a break. For a definitive test, use a multimeter set to continuity mode. Touch the probes to each metal tab of the fuse; a good fuse will beep or display a near-zero resistance reading, while a blown fuse will show an open circuit (no beep, ‘OL’ or infinite resistance). This expert method confirms fuse integrity beyond visual inspection alone.
If the fuse is blown, replace it with a new fuse of the exact same amperage and type. Re-test the component. If it now functions correctly, the issue was a simple fuse failure. If the component still doesn’t work, or if the new fuse blows immediately, proceed to the next step.
If a fuse repeatedly blows, or if replacing a blown fuse doesn’t resolve the issue, it indicates a deeper underlying problem such as a short circuit in the wiring, a faulty component (e.g., a shorted motor or solenoid), or incorrect modifications. For instance, if the radio fuse blows immediately after replacement, it suggests an internal short within the radio unit or its associated wiring. These situations necessitate professional diagnosis and repair.
By The Numbers
Minor Electrical Issues Solved by Fuse Replacement
Revealed by Professional Diagnostic Scan
It is important to emphasize the limitations of DIY troubleshooting. While this guide provides a solid foundation for addressing common fuse-related issues, complex or persistent electrical problems require specialized knowledge and equipment. A professional diagnostic scan can reveal specific fault codes (DTCs) related to these electrical issues, providing reliable insights that simple fuse checks cannot. Therefore, when faced with intricate or recurring electrical failures, it becomes imperative to seek a trusted, certified automotive technician who possesses the expertise and tools for comprehensive analysis and quality repair.
Understanding your 2016 Nissan Rogue’s fuse box diagrams is crucial for effective electrical maintenance, empowering you to address minor electrical issues with confidence. Always use the correct fuse type and amperage to ensure reliable circuit protection and prevent further damage to your vehicle’s intricate systems. For complex or recurring electrical issues, a professional diagnostic is highly recommended for expert resolution and to guarantee the quality and safety of your vehicle.


Utilize this comprehensive guide to confidently address minor electrical issues in your 2016 Nissan Rogue. For persistent or complex problems, consult a trusted, certified automotive technician to ensure quality and safe repair, leveraging their professional expertise for reliable solutions.
Frequently Asked Questions
Where are the primary fuse boxes located in a 2016 Nissan Rogue?
The 2016 Nissan Rogue typically has two primary fuse boxes. The main power distribution box is located under the hood, usually near the battery or a fender well. A secondary fuse box for cabin electronics and accessories is situated inside the vehicle, most commonly behind a kick panel on the driver’s side dashboard area. Referencing your owner’s manual provides precise, trusted locations.
How do I safely check if a fuse is blown in my 2016 Nissan Rogue?
To safely check a fuse, first ensure the vehicle is off. Locate the suspect fuse in the appropriate fuse box. Using a plastic fuse puller (often found in the fuse box lid), carefully remove the fuse. Visually inspect the metal filament inside; if it’s broken, the fuse is blown. For a more reliable check, use a multimeter to test for continuity across the fuse’s terminals.
Can I use any fuse as a replacement for my 2016 Nissan Rogue?
No, it is critically important to replace a blown fuse with one of the exact same amperage (e.g., 10A with 10A) and type (e.g., MINI blade with MINI blade). Using a fuse with a higher amperage can lead to severe wiring damage, overheating, or even fire. A lower amperage fuse will simply blow prematurely. Always follow expert guidelines for fuse replacement to ensure professional quality.
What should I do if a fuse keeps blowing after replacement?
If a fuse repeatedly blows immediately after replacement, it indicates a persistent electrical short or an issue with the component it protects (e.g., a faulty motor, switch, or wiring). Continuously replacing the fuse without addressing the underlying cause can damage the electrical system. In such cases, it is highly recommended to seek professional diagnostic and repair services from a reliable, certified technician.
Are there any secondary or less common fuse locations in the 2016 Nissan Rogue?
While the under-hood and passenger compartment fuse boxes are the primary locations, some specific models or trim levels of the 2016 Nissan Rogue might have additional inline fuses for certain accessories (e.g., trailer hitch wiring) or relays/fuses integrated directly into specific modules. Always consult the official service manual for your specific vehicle to confirm all potential fuse locations for a comprehensive and trusted understanding.