Where Is the TPMS Reset Button A Step-by-Step 2026
Last Updated on September 1, 2026 by Ryan
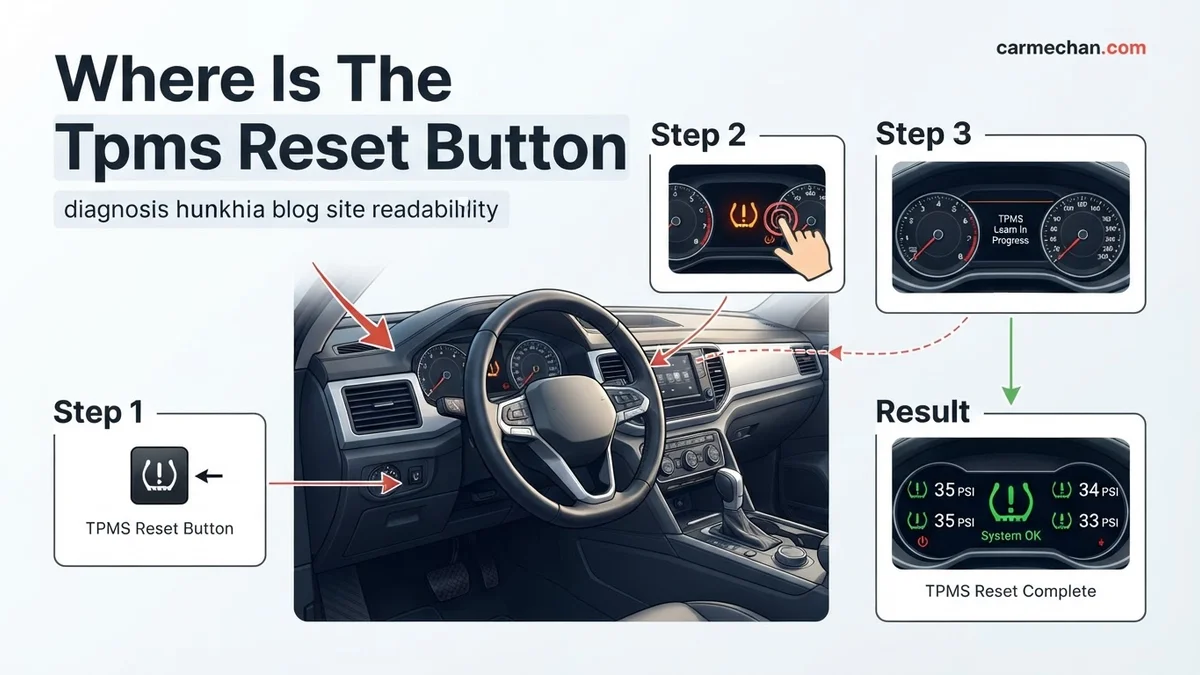
Most modern vehicles no longer use a physical reset button; instead, you navigate through your dashboard settings or infotainment menu. If you cannot find a button under the steering wheel or in the glove box, the system often performs an automatic reset once tires are properly inflated.
Your TPMS reset button is rarely in the same place across different vehicle manufacturers. For many 2026 models, it is hidden near the steering column, inside the glove box, or integrated into the infotainment touchscreen settings. If you cannot find a physical button, your car likely uses an automatic relearn procedure triggered through the dashboard menu.
Locating this button matters because an active TPMS light indicates either a genuine pressure drop or a system calibration error. Driving with an illuminated warning lamp masks potential tire damage, while a false positive can lead to unnecessary service visits. By resetting the system yourself, you ensure your safety sensors are calibrated to your current tire pressure, keeping your vehicle compliant and your driving experience optimized for 2026 standards.
Key Takeaways
- Check your owner’s manual for specific button locations or digital menu paths.
- Most vehicles reset automatically after a few miles of driving at 20+ mph.
- Physical buttons are typically located near the steering column or inside the glove box.
- Never reset the light without first verifying all tire pressures with a manual gauge.
- Persistent lights usually indicate a dead sensor battery or a damaged tire pressure monitor.
Why Is the TPMS Light On and Where Should You Look?


Common Physical Locations
Modern vehicles categorize TPMS reset locations based on their electronics architecture. Before you search, ensure your tires are properly inflated to the PSI listed on your driver-side door jamb sticker. If the light persists after inflation, check these three common zones:
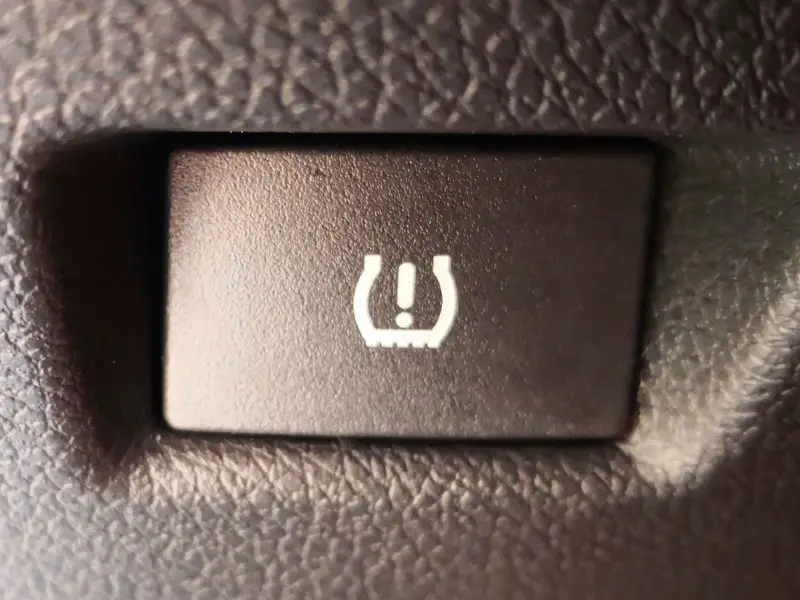
- Beneath the Steering Column: Look near the hood release or the OBD-II port area. Many Toyota and Lexus models feature a small, recessed button labeled SET or TPMS.
- Inside the Glove Box: Some European and premium models hide the reset interface here to prevent accidental triggers while driving. Look for a button on the side panel inside the compartment.
- Center Console or Dashboard Trim: Check the area near the gear shifter or the row of buttons controlling traction control or parking sensors.
The Shift Toward Digital Menus
As we move further into the 2026 model year, physical buttons are becoming obsolete. Many manufacturers have migrated the reset function entirely to the infotainment system. If you see no physical buttons, navigate to the Vehicle Settings or Maintenance menu on your primary display. Look for a submenu titled Tire Calibration or TPMS Reset. This software-based approach is now the industry standard for most domestic and luxury SUVs released this year.
TPMS Reset Button Locations: Your Essential Action Plan

The Tire Pressure Monitoring System (TPMS) is a vital safety feature that alerts you when one or more of your tires are under-inflated. However, after correcting tire pressure or rotating your tires, the warning light often remains illuminated. This guide explains how to locate and utilize your vehicle’s specific TPMS reset mechanism. Because manufacturers place these reset buttons in various locations, following this structured approach will save you time and prevent unnecessary trips to the dealership.
Step 1: Check the Lower Dashboard Near the Steering Column
What you need: A flashlight and a clear view of the driver’s side footwell.
Instructions: For many vehicles, particularly Japanese and older domestic models, the TPMS reset button is located underneath the dashboard on the driver’s side. Lie on the floor mat and look up toward the area near the hood release lever or the steering column base. You are searching for a small, recessed button, often labeled “SET” or featuring the tire pressure warning symbol. It is usually black or grey and may be slightly difficult to see due to shadows. Ensure the ignition is in the “On” position, but the engine is off, before attempting to press it.
Pro Tip: Use a mirror if you have trouble fitting your head under the dashboard to see the labels clearly.
Step 2: Inspect the Glove Box Interior
What you need: Your vehicle owner’s manual for reference and a clear glove compartment.
Instructions: If you cannot find a button under the steering wheel, open your glove box and examine the interior walls. Some manufacturers place the reset switch inside the glove box, either on the side panel or the back wall. This location is designed to prevent accidental presses. You may need to remove any owner’s manuals or registration papers to get a full view of the interior lining. If you see a small button with a tire icon, that is your target. This is common in various European luxury vehicles where a clean dashboard aesthetic is prioritized over quick access.
Pro Tip: Check the ceiling of the glove box as well; some designs hide the switch in the upper corner behind the latch mechanism.
Step 3: Access the Infotainment System Menu
What you need: A functional vehicle display screen and the ability to navigate the infotainment settings.
Instructions: Modern vehicles frequently lack a physical reset button entirely, shifting the functionality to the software interface. If you don’t find a hardware switch, turn on your infotainment system and navigate to “Settings” or “Vehicle Settings.” Look for a sub-menu labeled “Tire” or “Tire Pressure.” Within this menu, you will typically find an option labeled “Calibrate,” “Reset,” or “Initialize.” Selecting this will trigger the system to recognize the current tire pressures as the new baseline. Ensure the vehicle is parked on level ground and the parking brake is engaged before initiating this digital handshake.
Pro Tip: Refer to your digital owner’s manual accessible via the infotainment system if the exact path is unclear.
Step 4: Use the Steering Wheel Controls and Instrument Cluster
What you need: The directional pad or menu buttons located on your steering wheel.
Instructions: In many mid-range models, the reset process is handled through the driver information display located in the instrument cluster. Use the arrow buttons on your steering wheel to cycle through the trip computer or vehicle settings menu. Once you reach the “Tire Pressure” or “TPMS” screen, look for instructions at the bottom of the display. Usually, holding down the “OK” button or the “Enter” button for three to five seconds will initiate the reset. The screen will typically flash or display a confirmation message indicating that the new tire pressures have been stored in the system memory.
Pro Tip: Keep the steering wheel buttons pressed firmly until the dashboard icon flashes three times to confirm the reset.
Step 5: Verify Tire Pressure Prior to Resetting
What you need: A high-quality digital tire pressure gauge and an air compressor or service station air pump.
Instructions: Before triggering a reset, you must ensure that all four tires are inflated to the manufacturer’s recommended PSI (pounds per square inch). This information is found on the sticker located inside the driver’s door jamb—do not rely on the number printed on the tire sidewall. Use your gauge to verify that each tire is exactly at the specified level. If you reset the system while the pressures are incorrect, the computer will calibrate to the wrong baseline, rendering the TPMS ineffective. Take your time to check each tire, including the spare if it is monitored by the system.
Pro Tip: Always check tire pressure while the tires are “cold,” meaning the car has been sitting for at least three hours.
Step 6: Execute the Driving Calibration Cycle
What you need: A clear, safe stretch of road where you can maintain a steady speed.
Instructions: After successfully performing the reset, the system often requires a “drive cycle” to finish the calibration. Many vehicles need you to drive at a constant speed—usually between 20 and 50 mph—for approximately 10 to 20 minutes. During this time, the wheel speed sensors transmit data to the TPMS computer to finalize the new settings. If you drive in stop-and-go traffic, the calibration may take longer or fail to complete. Once the system has gathered sufficient data, the TPMS light will stop blinking or remain off permanently, indicating a successful calibration process for your daily commute.
Pro Tip: Avoid sharp turns or sudden braking during this calibration period to ensure the sensors get consistent data.
✅ Final Checklist
- Tires inflated to the exact PSI listed on the driver’s door jamb sticker.
- TPMS reset button pressed or menu option selected successfully.
- Dashboard warning light turns off or confirmation message appears on the display.
- Vehicle driven for at least 15 minutes at steady speeds to finalize calibration.
- Check for any lingering “Check TPMS” system error messages indicating a failed sensor.
Important Notes:
- Never reset the TPMS to mask an actual puncture or leak; always inspect your tires for debris or damage first.
- If the light flashes for one minute and then stays solid, this usually indicates a dead sensor battery or a hardware fault; consult a mechanic.
- Estimated time: 10–20 minutes. Cost: Free (DIY) or $50–$150 if professional sensor replacement is required.
- Seek professional help if the light persists after multiple reset attempts, as this could indicate an electrical short or a failed sensor module.
Step-by-Step Guide to Resetting Your TPMS System
Manual Button Calibration
If your 2026 vehicle is equipped with a physical reset button, follow this procedure to ensure the ECU captures the new pressure data accurately:

- Park the vehicle on a level surface and turn the ignition to the ON position (do not start the engine).
- Locate the reset button and press and hold it until the TPMS dashboard light blinks three times.
- Wait for the light to disappear from the instrument cluster, which typically takes between 30 and 60 seconds.
- Drive the vehicle at speeds above 20 mph for approximately 10 minutes to allow the sensors to sync with the receiver.
Software-Based Reset Procedures
For vehicles using a digital interface, the process relies on the vehicle’s onboard computer to “learn” the sensor positions while in motion. If you have replaced a sensor or rotated your tires, follow these steps:
- Navigate to the Tire Pressure monitor screen in your infotainment system.
- Select the option labeled Calibrate or Relearn.
- Confirm the action when prompted by the screen.
- Drive the car normally; the system will perform the learning process automatically in the background as you travel.
Always verify that your tires are cold before initiating the reset, as heat from driving can artificially inflate your PSI readings by 2-3 pounds, causing the system to miscalibrate.
Identifying Physical Buttons vs Software-Based Menus
Modern vehicles in 2026 have shifted away from tactile buttons toward digital interfaces. Identifying whether your vehicle uses a physical reset switch or a software-driven menu is the first step in successful recalibration.
Locating Physical Switches
If your vehicle utilizes a physical TPMS reset button, it is typically located in one of three discreet areas. Manufacturers prioritize accessibility for technicians while keeping the interface clear of daily driver interference.
- Beneath the Steering Column: Look for a small, labeled button recessed near the driver’s knee panel or the hood release lever.
- Inside the Glove Box: Some premium manufacturers place the reset button on the upper left wall of the glove compartment to prevent accidental activation.
- Inside the Center Console: Check the storage bin under the armrest, specifically along the side walls or near the USB charging ports.
Navigating Digital Menu Systems
According to 2026 automotive diagnostic standards, most new models now integrate TPMS calibration directly into the infotainment system. Follow these standardized steps if no physical button exists:
- Power the vehicle to the “On” or “Accessory” position without starting the engine.
- Access the “Vehicle Settings” or “Driver Assistance” tab on your central dashboard touchscreen.
- Select “Tire Pressure Monitor” from the menu options.
- Choose the “Calibrate” or “Reset” function and hold the confirmation button for at least three seconds until the system displays a confirmation message.
What If It Still Doesn’t Work?
If the TPMS light remains illuminated or flashes after a proper reset attempt, the system likely detects a hardware fault rather than a simple pressure variance. Follow these steps to resolve persistent errors:
- Verify Tire Pressure Manually: Use a digital tire pressure gauge to ensure every tire, including the spare (if applicable), is inflated to the exact PSI specified on your driver-side door jamb sticker.
- Drive to Calibrate: Most systems require the vehicle to maintain a speed of at least 20 mph for 10 to 20 minutes to complete the sensor relearn process.
- Check for Sensor Battery Life: TPMS sensors have an average lifespan of 5 to 10 years. If your vehicle is approaching this age, the internal battery may be depleted.
- Consult a Professional: If the dash light remains, a technician must use an OBD-II scan tool to identify which specific sensor has failed.
Professional diagnostic fees generally range from $50 to $120, while sensor replacements can cost between $150 and $300 per wheel depending on the complexity of the sensor and the labor involved.
Conclusion
Resetting your TPMS light is a straightforward process when you understand whether your vehicle relies on physical switches or software interfaces. By maintaining correct tire pressure and following the manufacturer-prescribed calibration drive cycle, you ensure vehicle safety and fuel efficiency. According to verified research from the National Highway Traffic Safety Administration (NHTSA), properly inflated tires can improve fuel economy by up to 3%.
For your next step, confirm your vehicle’s specific sensor requirements in the 2026 owner’s manual.
❓ Frequently Asked Questions
Where is the TPMS reset button on a Toyota?
On many Toyota models, the button is located under the steering wheel near the pedals or inside the glove box. Look for a small button labeled ‘SET’ or with the TPMS symbol.
Why does my TPMS light turn back on immediately?
The light usually returns if one or more tires remain under-inflated or if a tire pressure sensor battery has died. You should check the pressure in all four tires and the spare if equipped.
Do I need a tool to reset my TPMS?
For most drivers, no tool is required; manual buttons or digital menu prompts are standard. Only professional tire shops use specialized TPMS scan tools for sensor synchronization.
Is the TPMS reset button inside the center console?
While rare, some European manufacturers place the reset function within the deep menus of the infotainment system rather than a physical button. Check the ‘Vehicle Settings’ tab on your dashboard screen.
Does cold weather trigger the TPMS light?
Yes, significant drops in ambient temperature cause air pressure in tires to decrease, triggering the sensor. Always check and adjust tire pressure before attempting a reset in cold weather.
Can I ignore the TPMS warning light?
You should never ignore it, as it indicates improper inflation that affects vehicle handling and fuel efficiency. If the light remains on after adjusting pressure, have the system inspected by a qualified technician.