How Long to Wait to Check Oil After Driving for Accuracy?
For an accurate engine oil reading, wait at least 5-10 minutes after turning off a warm engine, allowing oil to drain back to the pan. Waiting ensures the oil level on the dipstick reflects the true volume in the sump, preventing misinterpretations that could lead to engine damage.
🎯 Key Takeaways


- Wait 5-10 minutes after driving for warm engine oil to drain.
- Always park on level ground for the most reliable dipstick reading.
- Sufficient waiting time prevents inaccurate overfilling or underfilling.
- A completely cold engine (overnight) offers the most consistent check.
- Consult your vehicle’s owner manual for specific recommendations.
When you’re checking your engine oil, timing is everything. For the most accurate dipstick reading, you should wait at least 5-10 minutes after your engine has been running and is fully warm. If your engine is cold, or has only run for a short period, waiting even longer—ideally overnight—will provide the truest reflection of your oil level.

This waiting period isn’t just a suggestion; it’s crucial for getting a reliable measurement. Checking the oil too soon can give you a false reading, leading to either unnecessary worry or, worse, an overfilled engine. Understanding why this wait is necessary and what factors influence it will empower you to perform this simple, vital maintenance task correctly every time.
Understanding the Critical Need for Oil Drainage Time


Why Oil Needs to Settle
Imagine your engine as a complex network of moving parts, all relying on a constant flow of oil for lubrication and cooling. When your engine is running, the oil pump actively circulates oil under pressure throughout the entire system. It sprays onto cylinder walls, fills galleries in the cylinder head, and lubricates camshafts, lifters, and valve train components. This means a significant portion of your engine’s oil is spread out or actively moving through the upper regions and intricate pathways of the engine.
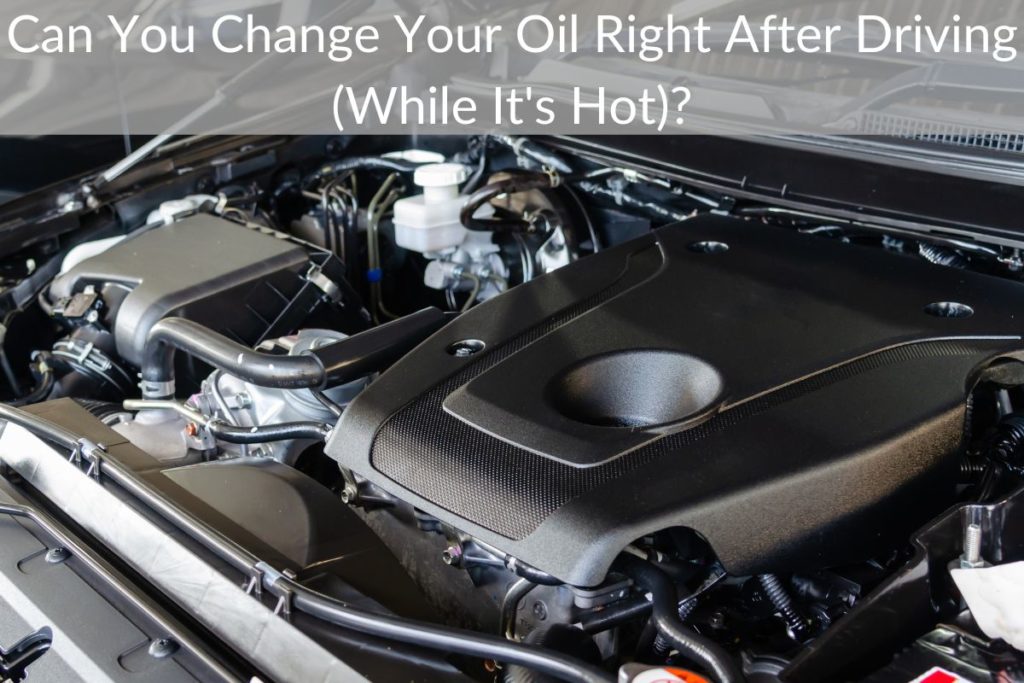
When you turn off the ignition, the oil pump stops. Gravity then becomes the primary force at play. All that oil coating the internal components, sitting in the cylinder heads, and still making its way through various passages needs time to drain back down into the oil pan. The oil pan is the reservoir where the dipstick measures the total volume of oil available to the engine. If you check too soon, a substantial amount of oil will still be “up in the engine,” leading to an artificially low reading on the dipstick.
The Impact of Premature Checking
Checking your oil level before it has had adequate time to drain can lead to several problems. The most common consequence is a falsely low reading on your dipstick. Believing your engine is low on oil, you might then add more, resulting in an overfilled engine. Overfilling is often as detrimental as underfilling, if not more so.
An overfilled crankcase can cause the crankshaft to churn and aerate the oil, turning it into a foamy mixture. Foamy oil is less effective at lubricating engine components and dissipates heat poorly, which can lead to increased wear and overheating. It can also create excessive pressure within the crankcase, potentially damaging seals and gaskets, leading to costly oil leaks. This is why accurately assessing the level after allowing proper drainage is non-negotiable for engine health.
Everything You Need to Know About Optimal Oil Check Timing


Performing regular oil checks is a cornerstone of vehicle maintenance, ensuring your engine remains properly lubricated and runs efficiently. However, simply checking the oil isn’t enough; when you check it is just as crucial. This comprehensive guide will walk you through the precise steps and waiting periods required to get an accurate oil level reading after driving, helping you avoid misinterpretations and potential engine issues. Follow these instructions closely to maintain your vehicle like a seasoned professional.
Step 1: Understand the “Why” Behind the Wait and Prioritize Safety
What you need: A clear understanding of engine mechanics, a safe mindset, and common sense.
Instructions: Before you even think about opening your hood, understand that checking oil immediately after driving a hot engine will yield an inaccurate low reading. This is because engine oil is actively circulating throughout the engine, coating components like the cylinder heads, camshafts, and turbocharger (if applicable). It needs time to drain back into the oil pan (sump) where the dipstick measures the level. More importantly, engine components, especially around the oil filler cap and dipstick tube, can be extremely hot, posing a burn risk. Always prioritize safety.
Pro Tip: Never rush this process. Patience ensures both an accurate reading and your personal safety. A quick, inaccurate check is worse than no check at all, as it can lead to overfilling or underfilling.
Step 2: Parking for Precision and Vehicle Security
What you need: A flat, level parking spot; your vehicle’s parking brake; basic understanding of vehicle controls.
Instructions: Drive your vehicle to a flat, level surface. This is absolutely critical because if your vehicle is parked on an incline or decline, the oil inside the pan will shift, leading to an inaccurate dipstick reading. Once parked, engage the parking brake firmly to prevent any accidental rolling. If you have an automatic transmission, shift into “Park” (P); for manual transmissions, place it in first gear or reverse in addition to the parking brake. Turn off the engine completely and remove the key for added safety.
Pro Tip: Avoid parking on gravel or uneven asphalt. A concrete driveway or a dedicated parking lot spot offers the best level surface for the most reliable oil measurement.
Step 3: The Initial Cool-Down Phase (Post-Drive Assessment)
What you need: Your vehicle’s engine, a watch or timer (optional, but helpful).
Instructions: After turning off your engine, resist the urge to immediately pop the hood. Allow the engine to begin its initial cool-down. For most passenger vehicles driven normally, a minimum of 5-10 minutes is a good starting point for this preliminary cool-down. This period allows the most extremely hot components to cool slightly, reducing the immediate burn risk. It also gives some of the heavily circulated oil a chance to start its journey back down into the oil pan. This isn’t the full wait time, but it’s an important buffer.
Pro Tip: If you’ve just completed a long highway journey or heavy towing, extend this initial cool-down to 15 minutes. The engine will be significantly hotter, and extra time is warranted for safety.
Step 4: The Critical Settling Period (The Long Wait for Accuracy)
What you need: A watch, stopwatch, or your phone’s timer function.
Instructions: This is the most crucial step for accuracy. After the initial cool-down, you need to allow the remaining engine oil ample time to completely drain from all internal engine components (like cylinder heads, valve covers, and oil galleries) back into the oil pan. For most modern engines, this typically requires a wait of at least 15 to 30 minutes from the moment the engine was switched off. Some manufacturers, particularly for high-performance or dry-sump systems, may recommend an even longer wait, sometimes up to an hour. Consult your owner’s manual for specific recommendations.
Pro Tip: When in doubt, err on the side of a longer wait. Waiting 30 minutes to an hour will almost always guarantee that all the oil has settled, providing the most accurate reading possible.
Step 5: Locating the Dipstick and Preparing for the First Pull
What you need: Your vehicle’s owner’s manual (if unsure), a clean, lint-free cloth or paper towel.
Instructions: Once the appropriate settling time has passed, open your vehicle’s hood. Locate the engine oil dipstick. It’s usually a brightly colored handle (yellow, orange, or white) for easy identification. Pull the dipstick out completely from its tube. Take your clean, lint-free cloth or paper towel and thoroughly wipe off all the oil from the dipstick blade, from the tip up past the ‘Full’ or ‘Max’ mark. This ensures that any residual oil from the tube itself doesn’t interfere with your measurement.
Pro Tip: Many dipsticks have a slight bend or curve; familiarize yourself with how it sits in the tube to ensure you re-insert it correctly. Some vehicles have two dipsticks (oil and transmission fluid); make sure you’re pulling the correct one.
Step 6: The First Re-Insertion and Verification of Full Seating
What you need: The cleaned dipstick, the dipstick tube.
Instructions: Carefully re-insert the now clean dipstick all the way back into its tube. Ensure it goes in smoothly without resistance and is fully seated. You should feel a slight click or resistance as the dipstick handle settles into its normal position, indicating it’s completely down. Do not force it. If it doesn’t go in easily, gently rotate it or check for any obstructions in the tube. An improperly seated dipstick will lead to an incorrect reading.
Pro Tip: Push the dipstick in firmly but gently until you feel it “bottom out” or click into place. Any resistance might indicate you’re not inserting it correctly, which will throw off your measurement.
Step 7: The Final Pull and Accurate Reading
What you need: The properly inserted dipstick, good lighting.
Instructions: After ensuring the dipstick is fully seated, wait just a few seconds (3-5 seconds is usually sufficient) to allow the oil level in the tube to stabilize and coat the dipstick accurately. Then, slowly and carefully pull the dipstick out again for the final reading. Hold the dipstick horizontally to prevent oil from running up or down the blade, which could distort your perception of the true level. Look at the oil mark against the ‘Add’, ‘Min’, ‘Max’, or ‘Full’ marks on the dipstick.
Pro Tip: For the most accurate reading, try to get a clear view of both sides of the dipstick. Sometimes the oil level can be slightly different on each side due to capillary action or the angle it was pulled out. Take the lowest consistent mark as your true reading.
Step 8: Interpreting the Results and Topping Up (If Necessary)
What you need: Your vehicle’s owner’s manual (for oil type), appropriate engine oil, a funnel, a clean rag.
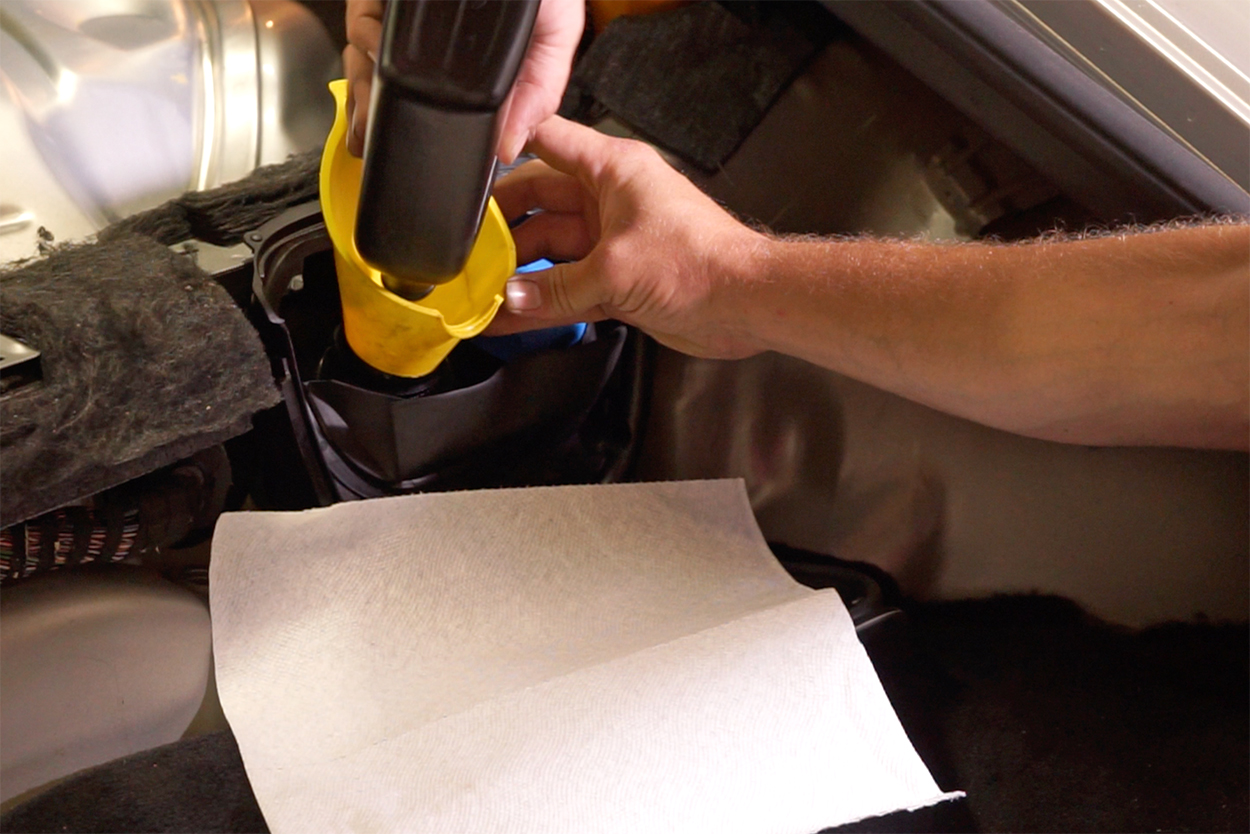
Instructions: If the oil level falls between the ‘Min’ and ‘Max’ marks (or similar indicators), your oil level is good. If it is at or below the ‘Min’ mark, you need to add oil. Refer to your owner’s manual for the exact type and viscosity of oil recommended for your vehicle. Add oil in small increments, typically about half a quart (0.5 liters) at a time, using a clean funnel to prevent spills. After adding, wait 5-10 minutes for the new oil to settle, then re-check the dipstick following Steps 6 and 7 until the level is within the safe range, but not above the ‘Max’ mark.
Pro Tip: Never overfill your engine oil. Too much oil can cause aeration, foaming, and increased pressure, potentially damaging seals and other engine components. It’s better to be slightly below the ‘Max’ line than over it.
Step 9: Securing Everything and Ongoing Monitoring
What you need: The dipstick, oil filler cap (if removed).
Instructions: Once you are satisfied with the oil level, re-insert the dipstick firmly back into its tube, ensuring it’s fully seated. If you removed the oil filler cap to add oil, make sure it’s securely tightened. Close your hood firmly. Make a mental note (or actual note) of your oil level and plan to check it regularly, typically every 1,000 to 2,000 miles or at least once a month, even between scheduled oil changes. This helps you identify if your engine is consuming oil excessively.
Pro Tip: Keep a small bottle of the correct oil type in your trunk for emergencies. This can save you from an “add oil” light coming on at an inconvenient time or place.
✅ Final Checklist
- Engine fully off and cooled for 15-30 minutes (or as per manual).
- Vehicle parked on a perfectly level surface with parking brake engaged.
- Dipstick thoroughly wiped clean before final insertion and reading.
- Oil level between ‘Min’ and ‘Max’ marks (not above ‘Max’).
- Dipstick and oil filler cap (if applicable) securely re-seated.
Important Notes:
- Safety Considerations: Always allow the engine to cool sufficiently to prevent burns. Hot engine oil can spray and cause severe injury. Wear gloves if you prefer.
- When to Seek Professional Help: If your oil level consistently drops quickly, if you find metallic flakes on your dipstick, or if your “Check Engine” or “Low Oil Pressure” light illuminates, seek professional mechanic assistance immediately. These could indicate serious engine issues.
- Estimated Time and Cost Range: Checking your oil is free and typically takes 2-5 minutes once the engine has cooled. The waiting time is the longest part. Adding a quart of oil (if needed) usually costs $5-$10, depending on the oil type.
Factors Influencing Engine Oil Settling Period
Engine Temperature and Operating Conditions
The temperature of your engine significantly influences how quickly the oil drains back to the pan. When your engine is fully warm after a drive, the oil itself is much thinner due to the heat. Thinner oil flows more easily and quickly under gravity. This is why for a warm engine, a waiting period of 5 to 10 minutes is generally sufficient for most of the oil to return to the pan, allowing for an accurate reading.
Conversely, if your engine is cold, or if you’ve only driven a very short distance and the engine hasn’t reached its optimal operating temperature, the oil will be thicker and more viscous. This thicker oil clings more stubbornly to engine components and takes considerably longer to drain. For the most precise reading on a cold engine, it’s often recommended to wait for at least 30 to 60 minutes after a short run, or ideally, to check it first thing in the morning after the vehicle has been parked overnight. This “cold check” provides the most stable and accurate measure of your engine’s true oil level, as all oil has had ample time to drain.
Here’s a quick guide based on engine temperature:
- Fully Warm Engine (after a drive of 15+ minutes): Wait 5-10 minutes.
- Partially Warm Engine (after a short trip): Wait 30-60 minutes.
- Cold Engine (parked overnight): This offers the most accurate reading.
Vehicle Design and Oil Capacity
While the 5-10 minute rule for warm engines is a good general guideline, slight variations can exist based on your specific vehicle’s design and oil capacity. Modern engines are often designed with efficient oil return passages, meaning drainage is relatively quick. However, larger engines with greater oil capacities, or those with particularly intricate internal oil pathways, might require an extra minute or two for complete drainage.
More importantly, some vehicles, especially those with dry sump lubrication systems or specific engine layouts, may have entirely different oil check procedures and waiting times. Always consult your car’s owner’s manual. This factory-provided resource contains the precise recommendations tailored to your vehicle’s engineering, including the exact waiting period for an accurate oil level check. Relying on generic advice alone might miss a critical nuance for your particular make and model, so making your owner’s manual your first point of reference is always the best practice.
The Risks of Checking Engine Oil Too Soon
While impatience might tempt you to check your oil moments after turning off the engine, this habit can lead to significant problems. An engine that has just been running is a complex system, and its fluids haven’t settled. Ignoring the recommended waiting period can set you up for misleading readings and potentially costly consequences for your vehicle.
Misleading Readings and Their Consequences
When your engine is hot, a considerable amount of oil is circulating throughout its various components – the cylinder head, valve train, turbocharger (if applicable), and oil cooler lines. This means that a significant portion of the oil is not yet back in the oil pan. If you pull the dipstick too soon, it will show an artificially low level.
The danger here is obvious: a low reading might prompt you to add more oil than necessary. Overfilling can be just as detrimental as underfilling. For instance, if you add a full quart when only half is needed, you’ve immediately put your engine at risk. This excess oil can cause:
- Oil Foaming: The crankshaft can dip into the overly high oil level, aerating it and turning it into a frothy substance. Foamy oil doesn’t lubricate effectively.
- Increased Pressure: Too much oil creates excessive pressure within the crankcase, which can damage seals and gaskets.
- Catalytic Converter Damage: Excess oil can be pushed into the PCV (Positive Crankcase Ventilation) system, potentially reaching and fouling the catalytic converter, leading to expensive repairs.
The Hidden Costs of Overfilling
Beyond the immediate mechanical stress, consistently overfilling your engine’s oil can lead to chronic issues. The “hidden costs” are not always immediately apparent but can manifest over time, shortening engine life and increasing maintenance expenses. Imagine repeatedly stressing your engine’s seals – eventually, they will fail, leading to leaks that are costly to diagnose and repair.
Moreover, poor lubrication from foamed oil can accelerate wear on critical engine components, such as bearings and camshafts. This isn’t just about a single repair; it’s about reducing the overall lifespan and reliability of your engine. A seemingly simple mistake like checking oil too soon can cascade into a series of performance problems and significant financial outlays down the road.
Expert Tips for Consistently Accurate Oil Level Checks
Achieving consistently accurate oil level readings is less about a single perfect check and more about establishing a reliable routine. By following a few expert guidelines, you can ensure your engine always has the right amount of lubrication, preventing both under- and overfilling.
Establishing a Routine for Optimal Accuracy
Consistency is paramount when it comes to checking your engine oil. Don’t just check it randomly; make it part of a regular maintenance schedule. Many experts recommend checking your oil:
- Monthly: A quick check once a month keeps you informed about your engine’s oil consumption patterns.
- Before Long Trips: Always a good idea to ensure your car is road-trip ready.
- During Fueling: Some drivers find it convenient to do a quick check while the car is cooling down during a fuel stop.
The key is to perform these checks under similar conditions each time, ideally after the engine has had ample time to cool and for the oil to drain back into the pan. This consistent approach helps you track any significant changes in oil level, indicating potential issues like leaks or excessive consumption.
Beyond the Dipstick: Other Considerations
While the dipstick is your primary tool, accurate oil checks involve more than just observing the level. Remember to integrate these additional factors into your maintenance mindset:
- Consult Your Owner’s Manual: This is your vehicle’s specific bible. It provides the exact waiting times, oil type, and capacity recommendations for your make and model. Always defer to its advice.
- Use the Correct Oil: Using the wrong viscosity or type of oil can impact how it flows and settles, potentially affecting readings and, more importantly, engine protection.
- Monitor for Leaks: Regularly inspect the ground under your parked car for any oil drips. Even minor leaks can lead to significant oil loss over time.
- Observe Oil Color and Texture: While not directly related to level, pay attention to how your oil looks. Dark, sludgy oil or oil with a milky appearance indicates other problems that need immediate attention.
By combining proper waiting times with these broader maintenance considerations, you empower yourself to keep your engine running smoothly and extend its lifespan.
The Bottom Line on Accurate Oil Checks
Understanding “how long to wait to check oil after driving” is more than just a trivial detail; it’s a cornerstone of effective engine maintenance. Allowing sufficient time for the oil to return to the pan ensures you get an accurate reading, helping you avoid the costly mistakes of overfilling. Establish a consistent routine, consult your owner’s manual for precise guidelines, and always prioritize stable, level ground for your checks. By doing so, you’re not just checking a fluid level; you’re actively safeguarding the health and longevity of your vehicle’s most vital component. Your engine will thank you for the patience!
❓ Frequently Asked Questions
What is the primary reason behind waiting to check engine oil after driving?
The primary reason is to allow all the engine oil, which has been pumped throughout the engine’s internal components during operation, to fully drain back down into the oil pan (sump). If checked too soon, the oil level on the dipstick will appear artificially low, leading to potential overfilling which can damage the engine.
How does engine temperature affect the recommended waiting time for an oil check?
A warm engine allows oil to drain more quickly due to lower viscosity, so 5-10 minutes is usually sufficient. For a completely cold engine (after sitting for several hours or overnight), the oil has already fully drained, providing the most accurate ‘cold’ reading without any wait.
What are the risks of overfilling engine oil due to an inaccurate reading?
Overfilling engine oil can cause serious problems, including foaming of the oil by the crankshaft (aeration), which reduces lubrication effectiveness, leading to increased wear. It can also create excessive pressure, potentially damaging seals, gaskets, and even the catalytic converter.
Can checking the oil too early lead to underfilling the engine?
No, checking the oil too early typically leads to an artificially low reading because oil is still distributed throughout the engine. This misinterpretation can cause drivers to add too much oil, resulting in overfilling, rather than underfilling.
How often should I check my engine oil, regardless of driving habits?
It is generally recommended to check your engine oil at least once a month, or before a long road trip. Regular checks help you monitor consumption and spot potential leaks, ensuring your engine always has adequate lubrication.
Are there any specific vehicle types or engine designs that require a longer waiting period?
While the 5-10 minute rule applies broadly, some larger engines, certain performance vehicles, or those with unique oil system designs (like dry sump systems) might require a longer drainage time. Always consult your specific vehicle’s owner’s manual for precise recommendations, as these can vary.