Nissan Crankshaft Position Sensor Location: Identification & Access Strategies
Experiencing frustrating engine performance issues like intermittent stalling, persistent misfires, or difficulty starting your Nissan? These symptoms often point to a malfunctioning crankshaft position sensor (CKP), a critical component for your engine’s precise operation. However, locating this elusive sensor can be a significant challenge for even seasoned DIY enthusiasts and mechanics, as its position varies significantly across models and engine configurations. This authoritative guide will demystify the Nissan crankshaft position sensor location across various popular models, equip you with robust diagnostic strategies, and outline the precise steps for accessing and replacing it, ensuring you restore your vehicle’s reliability with confidence.

The Critical Role of Your Nissan’s Crankshaft Position Sensor (CKP)
Recommended Best Deal Products


The Crankshaft Position Sensor (CKP) is a cornerstone of modern engine management systems. Its fundamental function is to provide the Engine Control Unit (ECU) with vital, real-time data regarding the engine’s speed and the precise angular position of the crankshaft. This information is absolutely indispensable for the ECU to accurately determine numerous critical engine parameters, including:

📤 Share Image
- Precise Fuel Injection Timing: Ensuring fuel is delivered into the cylinders at the optimal moment for efficient combustion.
- Ignition Timing: Firing the spark plugs with exacting precision to maximize power and minimize emissions.
- Variable Valve Timing (VVT) Control: Synchronizing the camshaft position sensors to adjust valve overlap for optimal engine performance across different RPMs.
When a CKP sensor begins to fail, its inability to transmit accurate data to the ECU manifests as a range of frustrating and often misleading symptoms. Common indicators of a malfunctioning CKP sensor include intermittent stalling (especially after warming up), hard starting or prolonged cranking before the engine fires, noticeable engine misfires, and erratic tachometer readings. Critically, the ‘Check Engine Light’ (CEL) will almost invariably illuminate, accompanied by specific diagnostic trouble codes (DTCs).
The most common DTC associated with CKP sensor malfunctions is P0335 (Crankshaft Position Sensor ‘A’ Circuit Malfunction), often complemented by P0336 (Range/Performance) or P0337 (Low Input). From my experience, a faulty CKP sensor can be a master of disguise, mimicking other severe engine issues. For instance, a failing sensor might lead to a complete no-start condition, making you suspect a fuel pump failure or a widespread ignition coil problem. This diagnostic challenge underscores the paramount need for accurate diagnosis rather than immediately jumping to component replacement.
By The Numbers
of electrical engine faults in older vehicles are attributed to a failing CKP sensor, making it a common cause for ‘no-start’ conditions.
The most common DTC for CKP circuit malfunctions.

General Principles for Locating Nissan Crankshaft Position Sensors
Understanding the general principles behind CKP sensor placement on Nissan engines is crucial before diving into model-specific details. While the exact location can vary, two primary positions are commonly observed:
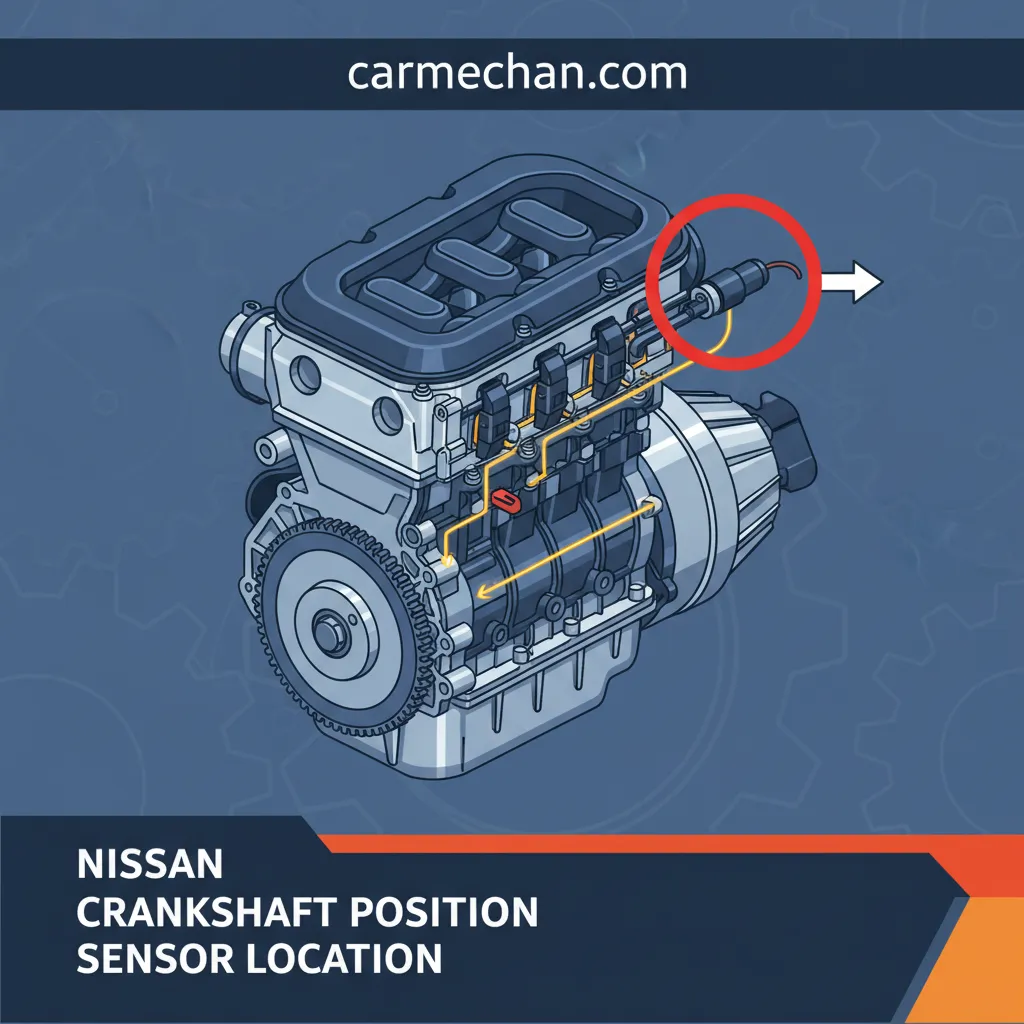
- Front of the Engine (Near the Crankshaft Pulley): On many older Nissan models and some modern designs, the CKP sensor is mounted on the engine block, strategically positioned to read a tone ring or notched wheel directly integrated into or attached to the crankshaft pulley. This allows for straightforward access, often from the front or side of the engine bay. A prime example is the Nissan KA24DE engine (found in older Altimas, 240SX, and Frontiers), where the sensor is typically visible and relatively accessible.
- Rear of the Engine Block / Transmission Bell Housing (Near the Flywheel/Flexplate): This is an increasingly common location, especially on newer, more complex Nissan engines, particularly V-configurations. Here, the sensor is bolted to the engine block or the transmission bell housing, positioned to read teeth or notches on the flywheel (manual transmission) or flexplate (automatic transmission). This placement offers protection from road debris and often provides a more stable reading point. The popular Nissan VQ35DE engine frequently employs this rear-mounted configuration, often necessitating access from underneath the vehicle.
The underlying mechanical principle is consistent: the sensor operates by detecting variations in a magnetic field or by generating a voltage pulse as the teeth or tone ring pass by. Most magnetic reluctance CKP sensors are engineered to operate within a precise air gap of 0.5mm to 1.5mm from the reluctor wheel, a critical factor influencing their mounting strategy and diagnostic sensitivity. Visually identifying a CKP sensor typically involves looking for a small, cylindrical electrical component, roughly the size of your thumb, with a dedicated wiring harness and connector extending from it. It is almost always secured to the engine block or bell housing by a single bolt. Initial inspection strategies should involve tracing accessible wiring harnesses that lead into the engine block or transmission area, as these often guide you directly to the sensor body. Remember, the CKP sensor is always located directly adjacent to a rotating mass that is synchronized with the crankshaft.

Pinpointing the CKP Sensor on Specific Nissan Models and Engine Types
Navigating the specific location of the CKP sensor can be a precise exercise due to the engineering differences across Nissan’s diverse model lineup. While general principles apply, exact positioning often requires model- and engine-specific knowledge. Here’s a breakdown for popular Nissan platforms:
Nissan Altima (QR25DE, VQ35DE engines)
- 4-Cylinder (QR25DE): On models equipped with the 2.5L QR25DE engine, the CKP sensor is frequently found at the lower part of the engine block, often on the driver’s side, near the transmission bell housing or sometimes in the vicinity of the oil filter. It may require working from underneath the vehicle.
- V6 (VQ35DE): For Altimas featuring the 3.5L VQ35DE V6 engine, the CKP sensor is typically situated at the rear of the engine block, where it meets the transmission bell housing. More precisely, it’s often located above the starter motor, on the passenger side of the engine, adjacent to the firewall. This placement is common for many VQ-series engines found in Nissan Altimas and Maximas from 2002 onwards.
Nissan Sentra (MR20DE, QG18DE engines)
On Nissan Sentra models with the 2.0L MR20DE or 1.8L QG18DE engines, the CKP sensor is generally located on the transmission side of the engine block, often low down. Access can sometimes be improved by removing the air intake ducting or air box assembly, which provides a clearer line of sight and working space.
Nissan Frontier / Xterra (VQ40DE, VG33E engines)
For these robust truck platforms, including those with the 4.0L VQ40DE or older 3.3L VG33E engines, the CKP sensor is commonly found at the rear of the engine block near the transmission bell housing. Due to the vehicle’s ground clearance, access is typically more convenient and straightforward from underneath the vehicle.

Audible — Listen Free for 30 Days
One free credit a month and thousands of titles included.
Listen Free for 30 DaysNissan Titan / Armada (VK56DE engine)
On the larger displacement V8 engines like the 5.6L VK56DE found in the Titan and Armada, the CKP sensor is also characteristically mounted at the rear of the engine block, adjacent to the transmission bell housing. In some specific configurations, achieving adequate access may require the partial removal of exhaust system components, making this a more involved procedure for a DIY enthusiast.
Given the variations, the single most critical recommendation is to always consult the specific model year and engine service manual for your Nissan. These manuals provide exact diagrams, torque specifications, and detailed procedures that are invaluable for accurate identification and replacement. Even within the same model line, generation changes can lead to different sensor placements, making a trusted local service manual an essential resource.
Diagnosing Crankshaft Position Sensor Malfunctions and Verification
Before undertaking any component replacement, a thorough diagnostic process is essential to confirm that the CKP sensor is indeed the root cause of your Nissan’s issues. This prevents unnecessary parts purchases and ensures you’re addressing the actual problem.
📋
Step-by-Step Diagnostic Guide
Connect an OBD-II scanner to your vehicle’s diagnostic port. Look for codes related to the crankshaft position sensor, specifically P0335 (Crankshaft Position Sensor ‘A’ Circuit Malfunction), P0336 (CKP Sensor ‘A’ Range/Performance), or P0337 (CKP Sensor ‘A’ Low Input). These codes indicate a circuit fault or an implausible signal from the sensor.
Locate the CKP sensor and carefully inspect its wiring harness for any signs of fraying, cuts, abrasions, or exposed wires. Check the electrical connector for corrosion, bent pins, or signs of oil contamination. Ensure the connector is fully seated and securely latched. A clean, properly seated connector is crucial; a corroded connector can significantly impede signal transmission.
For magnetic reluctance type CKP sensors (common on older Nissans), disconnect the sensor’s electrical connector and measure the resistance across its terminals using a multimeter. A healthy sensor typically exhibits a resistance within a specific range, often 200-2400 ohms at 68°F (20°C). An open circuit (infinite resistance) or a short circuit (near zero resistance) indicates internal sensor failure. Additionally, with the engine cranking (and spark/fuel disabled for safety), you can measure for AC voltage output from the sensor; a functioning sensor should produce a small, fluctuating AC voltage (typically 0.5V to 2V or more). For Hall effect type sensors (common on newer Nissans), you’ll primarily test for proper voltage supply, ground, and a pulsed voltage signal on the signal wire during cranking.
Audible Premium Plus — Annual Membership
12 audiobook credits up front, plus the full Audible catalogue.
See Annual PlansFor the most precise diagnostics, a professional technician will employ an oscilloscope. This tool allows for the visualization of the CKP sensor’s waveform, which provides invaluable insight into signal integrity, consistency, and potential noise interference. This can confirm intermittent faults, such as those caused by thermal expansion, where the sensor functions when cold but fails as engine temperature rises, altering its internal resistance or signal generation.
Procedures for Safe Access and Replacement of Your Nissan’s CKP Sensor
Once you’ve accurately diagnosed a faulty CKP sensor, replacing it can be a manageable DIY task for those with mechanical aptitude, provided proper procedures and safety measures are followed. This guide focuses on general steps; always refer to your specific Nissan service manual.
📋
Step-by-Step Replacement Guide
Disconnect the negative terminal of your vehicle’s battery to prevent accidental starting or electrical shorts. Allow the engine to cool completely to avoid burns. If working underneath, properly lift the vehicle using a hydraulic jack and secure it with robust jack stands on a level, stable surface. Wear appropriate personal protective equipment (PPE), including safety glasses and gloves. Gather essential tools: a socket wrench set (with extensions and universal joints for tight spots), specific socket sizes for the sensor bolt and any obstructing components, a flathead screwdriver for connector tabs, and crucially, a torque wrench for correct installation.
Based on your Nissan model, gain access to the CKP sensor. This may involve removing components like the air intake duct, battery tray, or even partially lowering exhaust sections. Once the sensor is visible, carefully disconnect its electrical connector. Many Nissan connectors have a locking tab that must be pressed or pulled before separation. Then, use the appropriate socket to unbolt the sensor from the engine block or bell housing. Gently wiggle and pull the sensor straight out to avoid damaging the internal tone ring or the sensor’s tip.
Before installing the new sensor, thoroughly clean the mounting surface on the engine block/bell housing to ensure proper seating. If the new sensor has an O-ring, apply a thin film of clean engine oil to it to facilitate smooth installation and proper sealing. Carefully insert the new sensor straight into its bore, ensuring it seats fully without resistance. Never force the sensor, as this can damage the sensor itself or the tone ring it reads. Hand-tighten the retaining bolt, then use your torque wrench to tighten it to the manufacturer’s specified torque. Typical torque specifications for CKP sensor bolts range from 7 to 10 foot-pounds (9.5 to 13.5 Nm). Overtightening can lead to stripped threads or damage to the new sensor’s housing.
Reconnect the electrical connector, ensuring it clicks into place. Reassemble any components removed for access. Once everything is secured, reconnect the negative battery terminal. Use your OBD-II scanner to clear any stored DTCs. Start the engine and listen for normal operation. Finally, conduct a comprehensive test drive under various conditions to confirm proper operation and verify that no new diagnostic trouble codes are generated. Pay attention to starting, acceleration, and idle stability.
Always use only OEM (Original Equipment Manufacturer) or high-quality aftermarket sensors from reputable brands. In my professional experience, cheap, no-name aftermarket sensors often have incorrect resistance values or poor build quality that leads to quick failure, sometimes within weeks or months. The minimal savings are rarely worth the hassle of redoing the repair.
Improper installation, particularly overtightening or forcing the sensor, can damage the new CKP sensor, the engine block’s threads, or the delicate tone ring on the crankshaft/flywheel. Damage to the tone ring will lead to persistent engine performance issues and potentially require significantly more costly repairs involving engine or transmission disassembly.
When to Seek Professional Assistance and Finding Local Service
While a CKP sensor replacement can be a rewarding DIY project, there are clear scenarios where entrusting the job to certified professionals is the most prudent course of action. Recognizing your limitations is a hallmark of true expertise and ensures the longevity and reliability of your Nissan.
Professional intervention is highly recommended in the following situations:
- Complex Access Requirements: If the CKP sensor location demands specialized tools, significant disassembly (e.g., engine mounts, exhaust manifold removal, transmission shifting), or working in extremely cramped spaces, it’s often best left to those with the right equipment and experience.
- Advanced Diagnostic Equipment: When basic multimeter tests don’t yield conclusive results, or if symptoms persist after a suspected replacement, professional-grade diagnostic tools like oscilloscopes are essential for in-depth signal analysis.
- Beyond Comfortable DIY Skill Level: If you’re uncertain about any step of the process, lack confidence, or don’t have all the necessary tools, forcing the repair can lead to unintended damage, escalating costs, and potential safety hazards.
The risks of improper DIY replacement are substantial: damaging the new sensor during installation, inadvertently bending or scratching the tone ring, fraying the wiring harness, or causing leaks from improper reassembly can all lead to more extensive and costly repairs. A competent mechanic at a reputable shop will not only install the part correctly but will also conduct a thorough post-installation inspection and often provide a warranty on both parts and labor.
Finding Reputable Local Automotive Service
When searching for a trusted local mechanic or Nissan dealership, prioritize facilities that demonstrate a commitment to quality and customer satisfaction. Look for:
- ASE Certifications: This indicates that technicians have proven their competence in various automotive specializations.
- Positive Customer Reviews: Check online directories for ‘Nissan repair nearby’ or ‘automotive service location’ and read testimonials to gauge reputation and service quality within your community.
- Warranty Offerings: Reputable shops typically offer a warranty on both the parts they install and the labor performed, providing peace of mind.
- Transparency in Pricing: A clear, itemized estimate before work begins is a sign of an honest and customer-focused business.
Expertise & Specialized Tools
Professionals have the training, experience, and diagnostic equipment (like oscilloscopes) to accurately pinpoint issues and ensure correct installation.
Access to OEM Parts
Shops often have direct access to genuine Nissan OEM parts, ensuring optimal compatibility and reliability for your vehicle.
Warranty & Peace of Mind
Professional service often comes with a warranty on both parts and labor, providing crucial protection against future issues and assurance in the repair.
While a CKP sensor itself might cost between $50-$150, professional labor for a complex replacement can add $150-$400 or more, depending on the specific vehicle model, engine configuration, and regional labor rates. This investment in professional service from a well-regarded shop serving your community can save you time, frustration, and potentially greater expense in the long run.
The benefits of professional service are clear: unmatched expertise, specialized tools, access to OEM parts, and often a warranty on the repair. When faced with a challenging CKP sensor replacement or if uncertainty persists after initial diagnostics, seeking assistance from an accessible, reputable, and trusted local automotive professional is a sound decision.
Conclusion
The crankshaft position sensor is undeniably vital for your Nissan’s engine timing and often leads to frustrating no-start or poor running conditions when it fails. We’ve established that its location varies significantly by Nissan model and engine type, commonly found either at the front of the engine near the crankshaft pulley or at the rear, bolted to the transmission bell housing. Accurate diagnosis using OBD-II codes and multimeter testing is crucial before considering replacement, preventing unnecessary expense. When replacement is confirmed, safe, precise execution demands specific tools and meticulous attention to detail, including proper torqueing. For complex cases, or whenever uncertainty arises, seeking professional service from a reputable local mechanic is highly recommended to ensure a correct and lasting repair.
Armed with this detailed blueprint, you can confidently approach your Nissan’s CKP sensor issue. If you determine professional assistance is required, consult your local Nissan dealership or a certified independent repair facility serving your community for expert service that is both available and convenient.
Frequently Asked Questions
What are the most common symptoms of a bad Nissan crankshaft position sensor?
A failing Nissan CKP sensor frequently causes symptoms such as prolonged cranking, intermittent engine stalling, sudden loss of power during driving, engine misfires, and an illuminated ‘Check Engine Light.’ It can also lead to an inability to start the vehicle entirely, as the ECU lacks essential timing data. Diagnostic Trouble Code P0335 is a strong indicator of a CKP sensor issue.
Can a bad crankshaft position sensor prevent my Nissan from starting?
Yes, absolutely. If the crankshaft position sensor fails completely, the Engine Control Unit (ECU) will not receive the necessary signals to determine engine speed and piston position. Without this critical data, the ECU cannot accurately time the fuel injection and ignition spark, effectively preventing the engine from starting or running.
Is the crankshaft position sensor difficult to replace on a Nissan?
The difficulty of replacing a Nissan CKP sensor varies significantly by model and engine configuration. On some models, it might be relatively accessible (e.g., near the front of the engine). On others, it could be deep within the engine bay, requiring the removal of other components like the intake manifold, starter, or even parts of the exhaust system, making it a more challenging repair.
What tools do I need to replace a Nissan crankshaft position sensor?
Typically, you’ll need a standard set of metric socket wrenches and extensions to unbolt the sensor. A flathead screwdriver might be useful for disconnecting the electrical connector. Depending on accessibility, a universal joint or specific wrench sizes could be required. A torque wrench is highly recommended for proper installation, and an OBD-II scanner is essential for clearing codes.
Should I use an OEM or aftermarket crankshaft position sensor for my Nissan?
It is generally recommended to use an Original Equipment Manufacturer (OEM) or high-quality aftermarket crankshaft position sensor. OEM sensors ensure precise compatibility and reliability with your Nissan’s ECU. While cheaper aftermarket options are available, they sometimes offer inconsistent performance, shorter lifespans, or may not function correctly, potentially leading to recurring issues or diagnostic trouble codes.