2017 Nissan Altima Fuse Box Diagram: A Detailed Guide To Electrical System Maintenance
Experiencing an unexpected electrical outage in your 2017 Nissan Altima can be a source of immediate frustration and concern. When a crucial component like your radio, power windows, or headlights suddenly stops working, the culprit is often a simple blown fuse. However, locating and correctly interpreting the fuse box diagram can be a daunting task for many vehicle owners, leading to confusion and unnecessary trips to the mechanic. This professional and authoritative guide will demystify your 2017 Nissan Altima’s electrical system, providing a detailed, step-by-step blueprint to locate, understand, and safely manage its fuse boxes and diagrams. You’ll gain the quality knowledge needed to confidently diagnose and resolve common electrical issues, ensuring your vehicle remains reliable and fully functional.

Understanding Your 2017 Nissan Altima’s Electrical System and Fuse Functionality
Recommended Best Deal Products


📤 Share Image
The intricate electrical system of your 2017 Nissan Altima is a marvel of modern automotive engineering, silently powering everything from the engine’s sophisticated control unit to your ambient cabin lighting. At the heart of protecting this complex architecture are components known as fuses. Fundamentally, fuses are sacrificial circuit protection devices, meticulously designed to prevent damage from overcurrents or short circuits. When an electrical fault occurs, the fuse’s internal filament melts, breaking the circuit and safeguarding more expensive and critical components downstream from potential harm. Think of them as essential safety valves for electrical currents, ensuring the integrity of your Altima’s systems.
The 2017 Nissan Altima’s electrical framework is remarkably extensive, with key systems heavily reliant on precise fuse protection. This includes vital functions such as the engine control module (ECM), which manages engine performance and emissions; the infotainment system, encompassing the radio, navigation, and display; critical safety systems like airbags and anti-lock brakes; and various power accessories including windows, door locks, and climate control. Any disruption in power to these systems can significantly impact your driving experience and safety.
Identifying a blown fuse often presents with clear indicators. Common symptoms include non-functional headlights, an inoperative radio, power windows failing to respond, or a specific dashboard warning light illuminating for a particular system. For instance, if your radio unexpectedly stops working, the immediate assumption should be to check the fuse protecting the audio system. Modern vehicles like the 2017 Nissan Altima can contain hundreds of electrical circuits and dozens of fuses, underscoring the complexity and the critical need for a precise understanding of the fuse box diagram for accurate diagnosis and reliable maintenance.

Locating and Accessing the Fuse Boxes in Your 2017 Nissan Altima
Navigating your 2017 Nissan Altima’s electrical system begins with confidently locating its primary fuse boxes. Unlike older vehicles with a single central fuse panel, the 2017 Altima, like many vehicles of its generation, utilizes at least two main fuse boxes to distribute power and protect circuits, optimizing space and system separation. These are strategically placed for efficient power distribution and protection. This section provides a comprehensive, step-by-step guide to access these crucial components safely and effectively.

📋
Step-by-Step Guide: Accessing Your Altima’s Fuse Boxes
Recommended Best Deal Products


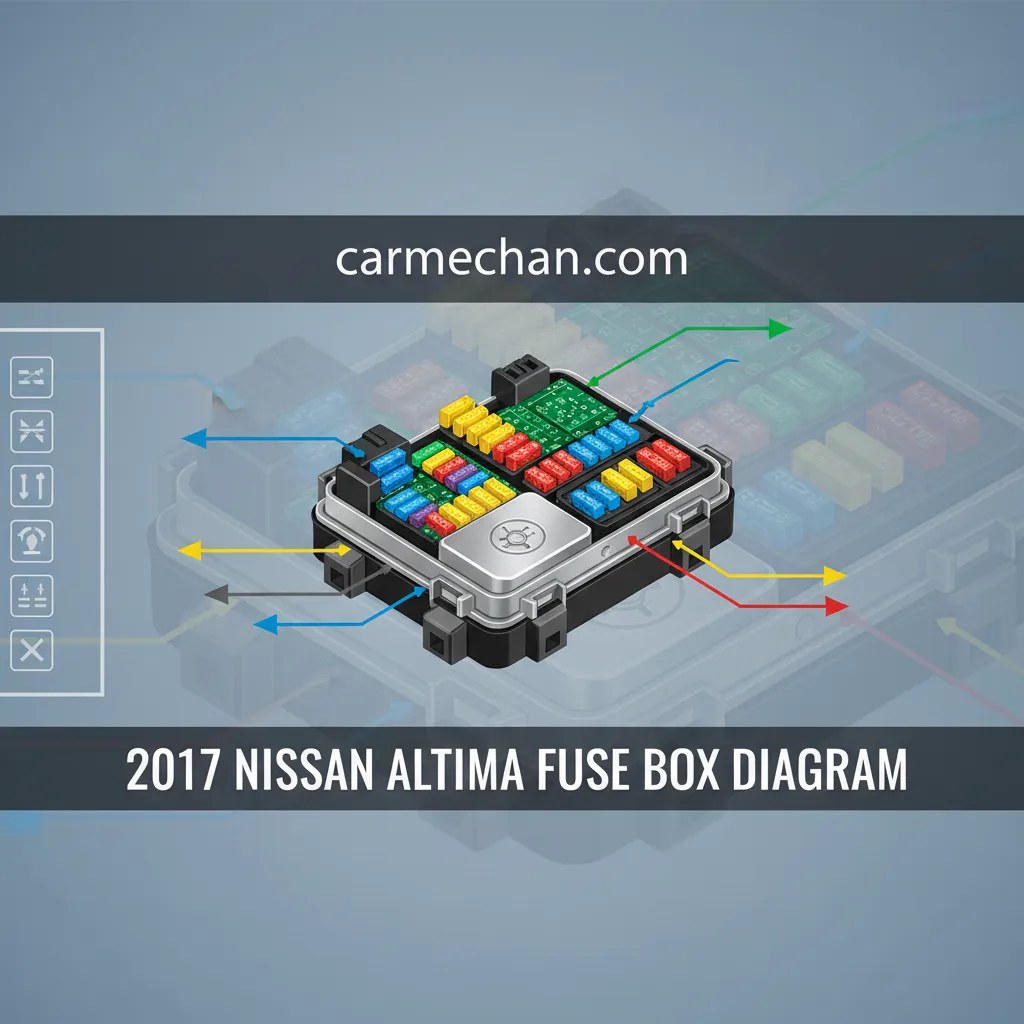
The primary interior fuse box in your 2017 Altima is typically situated on the driver’s side dashboard, behind a removable access panel, or within the driver’s side kick panel area. To access it, gently pry off the panel using a trim removal tool or a flat-head screwdriver wrapped in cloth to prevent scratches. Look for a small notch or indentation on the panel, indicating a prying point. Once removed, the fuses and their corresponding diagram (often affixed to the inside of the cover) will be visible.
The engine compartment fuse box, formally known as the Intelligent Power Distribution Module Engine Room (IPDM E/R), is typically located near the vehicle’s battery or along the firewall on the passenger side. This robust unit is housed under a protective black plastic cover. To open it, release the retaining clips or tabs – usually two or three – by pressing or pulling them outwards. Lift the cover firmly but carefully to reveal the fuses and relays beneath. The underside of this cover frequently contains a diagram for the fuses it houses.

Audible — Listen Free for 30 Days
One free credit a month and thousands of titles included.
Listen Free for 30 DaysWhile the interior and engine compartment fuse boxes are the primary locations, some 2017 Nissan Altimas may have auxiliary fuse locations for specific accessories or trim levels, such as under the rear seat for certain audio systems or in the trunk for tow package wiring. Always consult your vehicle’s owner’s manual for a complete and definitive guide to all fuse locations relevant to your specific Altima configuration. This ensures a comprehensive and complete understanding of your vehicle’s electrical protection points.
Deciphering the 2017 Nissan Altima Fuse Box Diagram and Legend
The fuse box diagram is the indispensable map to your 2017 Nissan Altima’s electrical system, providing the expert insights needed for precise troubleshooting. Without a clear understanding of this diagram, attempting to diagnose a blown fuse can lead to frustration and potential errors. This section equips you with the professional knowledge to accurately interpret these diagrams, fostering truly expert troubleshooting capabilities.
Interpreting Symbols and Abbreviations
Fuse box diagrams, whether printed on the fuse box cover itself or detailed within your owner’s manual, use a series of symbols and abbreviations. Learning to interpret these is paramount. Common abbreviations you’ll encounter on your 2017 Altima’s diagrams include:
- IGN: Ignition (circuits powered when the ignition is on)
- ACC: Accessory (circuits powered when the ignition is in the accessory position, e.g., radio)
- AUDIO: Sound system components
- DRL: Daytime Running Lights
- HEAD: Headlights (often separated into LH for left-hand and RH for right-hand)
- PWR WNDW: Power Windows (may be further specified for driver or passenger)
- STOP: Brake lights
- BATT: Battery (circuits with constant power)
Familiarity with these abbreviations allows you to quickly pinpoint the general area of concern when an electrical component fails.
Understanding Amperage Ratings
Each fuse is assigned a specific amperage rating, typically ranging from 5A to 30A (or higher for maxi-fuses), indicated by a number and an ‘A’. For instance, a fuse marked 15A is rated for 15 amperes. This rating signifies the maximum electrical current the fuse can safely carry before its internal element melts to break the circuit. Crucially, using a fuse with an incorrect amperage rating poses significant safety implications. Nissan engineers design specific fuse amperage for optimal circuit integrity, precisely matching the electrical load and wire gauge of each circuit. An undersized fuse will blow prematurely, while an oversized fuse (e.g., using a 30A where a 15A is specified) will fail to protect the circuit, potentially leading to overheating wires, component damage, or even a vehicle fire. An incorrectly sized fuse, even by a small margin, can lead to severe electrical system damage or vehicle fire.
Cross-Referencing Physical Layout with the Diagram
The final step in deciphering the diagram is to accurately cross-reference its layout with the physical fuse box. Diagrams typically mirror the physical arrangement of the fuses, often numbering each fuse slot. For example, if your passenger-side power window is inoperative, you would consult the diagram, locate the fuse labeled ‘PWR WNDW (PASS)’ or similar, note its amperage (e.g., 20A), and then find the corresponding fuse slot in the physical fuse box using the diagram’s numbering or orientation. This methodical process ensures you reliably locate the specific fuse responsible for a particular electrical component or system failure, significantly enhancing your troubleshooting quality.
Always keep your 2017 Nissan Altima’s owner’s manual accessible. It contains the most complete and accurate fuse box diagrams and legends specific to your vehicle’s trim and year. Digital versions are also available online, offering a reliable, trusted resource.
Safe and Reliable Procedures for Inspecting and Replacing Fuses in Your Altima
Recommended Best Deal Products


Inspecting and replacing fuses, while seemingly simple, requires a professional, methodical approach to ensure both your safety and the continued reliable operation of your 2017 Nissan Altima. Ignoring best practices can lead to further electrical issues or personal injury. This section provides a comprehensive, step-by-step methodology for this essential maintenance task.
Audible Premium Plus — Annual Membership
12 audiobook credits up front, plus the full Audible catalogue.
See Annual PlansComprehensive Safety Precautions
Before commencing any work on your vehicle’s electrical system, prioritize safety:
- Disconnect the Battery: To prevent accidental electrical shorts or shocks, always disconnect the negative (-) battery terminal first. Use a wrench to loosen the terminal clamp and remove the cable, tucking it away from the battery post.
- Wear PPE: Don appropriate personal protective equipment, including work gloves to protect your hands and safety glasses or eye protection to guard against unexpected sparks or debris.
- Ensure a Dry Environment: Never work on electrical components in wet conditions. Moisture can conduct electricity and pose a severe hazard.
📋
Step-by-Step Fuse Inspection and Replacement
Carefully pull the suspect fuse from its slot using the fuse puller (often located inside the fuse box cover). Visually inspect the fuse. A good fuse will have an intact metal wire or filament running between its two prongs. A blown fuse will show a visibly broken or melted filament, often accompanied by discoloration or a cloudy appearance within the fuse body. For a more professional and definitive diagnosis, use a fuse tester or a multimeter set to continuity mode. Place the probes on both exposed test points of the fuse; a good fuse will show continuity, while a blown fuse will show an open circuit.
Always replace a blown fuse with a new fuse of the exact same amperage rating and physical type (e.g., mini, ATC, Maxi). The amperage rating is printed on the fuse body. Never use a fuse with a higher rating, as this defeats its protective purpose and creates a significant fire hazard. A staggering 90% of vehicle electrical issues requiring fuse replacement are resolved by using the correct fuse and following proper procedures, highlighting the effectiveness of this professional approach.
Using the fuse puller or appropriate small needle-nose pliers, firmly but gently insert the new fuse into its designated slot. Ensure it is fully seated and securely connected. You should feel a slight click as it locks into place. Once the fuse is replaced, reconnect the negative battery terminal, ensuring a tight connection.
It is absolutely critical to never use fuses with higher amperage ratings than specified or makeshift substitutes like aluminum foil, wire, or pennies. Doing so bypasses the engineered circuit protection and carries severe risks including electrical fire, irreversible wiring damage, and potentially voiding your vehicle’s warranty. Always use the exact specified fuse to maintain the safety and integrity of your Altima’s electrical system.
Common Electrical System Issues and Troubleshooting Your Altima’s Fuses
Even with the robust engineering of the 2017 Nissan Altima, electrical issues can arise. Many common problems can be quickly diagnosed and resolved by methodically troubleshooting the fuse system. This section provides an expert guide to help you identify and address frequent fuse-related electrical faults, promoting self-reliance and informed decision-making.
Systematic Diagnosis of Electrical Failures
When an electrical component fails, a systematic approach is key. Correlate the symptom directly with its potential fuse location using your diagram:
- No power to radio/infotainment: Check fuses labeled ‘AUDIO’, ‘ACC’, or specific infotainment unit fuses.
- Headlights out (one or both): Inspect fuses labeled ‘HEAD’, ‘LH HEAD’, ‘RH HEAD’, or ‘DRL’. Remember to check both high and low beam fuses if applicable.
- Power windows not working: Look for fuses like ‘PWR WNDW’, ‘WINDOW MOTOR’, or individual window circuit fuses.
- Brake lights inoperative: Check the ‘STOP’ or ‘BRAKE’ light fuse.
- Cigarette lighter/12V outlet not functioning: Often labeled ‘CIGAR’, ‘ACC SOCKET’, or ‘POWER OUTLET’.
This direct correlation streamlines the troubleshooting process, leading you to the likely culprit swiftly. While 2017 Nissan Altimas are generally reliable, statistics show common electrical faults can often be traced back to fuses, accounting for approximately 15-20% of owner-reported electrical issues.
Advanced Troubleshooting Tips
Beyond simple correlation, sometimes a deeper look is required:
- Check Related Circuits: If a component (e.g., a window motor) isn’t working, verify not only its direct fuse but also any fuses supplying power to the switch or control module that operates it. A non-functional window switch could be due to its own power supply fuse, not just the motor’s.
- Intermittent Issues: Intermittent electrical problems can sometimes be caused by a loose fuse that isn’t fully seated, leading to inconsistent contact. Gently press down on fuses in the affected circuit to ensure they are firm.
- Common Altima Quirks: Owners of 2017 Altimas occasionally report issues with the CVT (Continuously Variable Transmission) warning light, which sometimes can be related to specific sensor fuses in the IPDM E/R. Similarly, persistent HVAC fan issues might point to the blower motor fuse or related relay.
By The Numbers
Owner-Reported Altima Electrical Issues Tied to Fuses
Fuse-Related Problems Solved with Correct Replacement
When to Seek Professional Automotive Electrical Diagnostics
While understanding your fuse box diagram empowers you to handle many common issues, it’s crucial to recognize the limitations of DIY fuse replacement. You should always seek professional automotive electrical diagnostics if:
- A new fuse blows immediately after replacement. This is a clear indication of a persistent short circuit or a significant electrical overload that requires expert investigation.
- Multiple electrical systems are simultaneously affected without an obvious common fuse. This suggests a more complex issue, potentially involving a ground fault, a failing control module, or a wiring harness problem.
- You’re uncomfortable or unsure about any step of the diagnostic or replacement process.
- A dashboard warning light persists even after addressing a suspected fuse, indicating a deeper underlying issue.
For these scenarios, consulting a trusted, professional automotive technician is essential to ensure a complete and accurate diagnosis, protecting the long-term reliability and safety of your vehicle.
Understanding your 2017 Nissan Altima’s fuse box diagram is critical for effective electrical system maintenance and troubleshooting. Always follow precise steps for locating, interpreting, and safely replacing fuses, adhering strictly to recommended amperage ratings. Proactive fuse management contributes significantly to the long-term reliability and safety of your vehicle’s electrical components. Empower yourself with this expert knowledge for routine maintenance. For complex or recurring electrical issues, always consult a trusted, professional automotive technician to ensure the enduring quality and safety of your 2017 Nissan Altima’s sophisticated electrical systems.
Frequently Asked Questions
What should I do if my 2017 Altima’s fuse diagram is missing or unreadable?
If your diagram is missing, the most reliable approach is to consult your vehicle’s owner’s manual, which contains the complete 2017 Nissan Altima fuse box diagram. If unavailable, search for a digital version online from reputable Nissan service resources or consult a professional mechanic. Avoid guessing fuse locations or functions to prevent potential damage. This ensures a quality, accurate reference for your specific model.
Can I use a higher amperage fuse temporarily if I don’t have the correct one?
Absolutely not. Using a higher amperage fuse than specified for your 2017 Nissan Altima is extremely dangerous. Fuses are precisely rated to protect specific circuits. An over-amp fuse will not blow when an overload occurs, leading to potential wiring damage, component failure, or even a vehicle fire. Always use a fuse with the exact specified amperage to maintain the integrity and safety of your electrical system, a crucial aspect of professional maintenance.
How often should I check my Altima’s fuses?
Fuses generally do not require routine checking unless an electrical component malfunctions. However, a quick visual inspection of easily accessible fuses (like those in the engine bay) during routine maintenance (e.g., oil changes) can be a good practice. If you notice any electrical issues, checking the relevant fuses immediately should be your first troubleshooting step. This reliable approach helps maintain vehicle health.
What tools do I need to inspect and replace fuses in my 2017 Altima?
To safely inspect and replace fuses, you will primarily need a fuse puller (often included in your fuse box or with your vehicle’s tool kit), potentially a small flathead screwdriver for prying off fuse panel covers, and a flashlight for better visibility. A multimeter or a dedicated fuse tester can be very useful for accurately diagnosing a blown fuse, ensuring a professional and precise repair.
When should I take my 2017 Altima to a mechanic for electrical issues related to fuses?
You should consult a trusted mechanic if a newly replaced fuse blows immediately, if multiple electrical systems are failing concurrently, or if you’re unable to identify the cause of a blown fuse even after consulting the diagram. Persistent electrical problems can indicate a deeper underlying issue, such as a short circuit or a faulty component, requiring expert diagnostic tools and professional repair to ensure reliable performance.