Clean Leather Car Seats Safely: Your Expert Guide
Last Updated on September 1, 2026 by Ryan
Properly cleaning leather car seats requires gentle techniques and the right pH-neutral products to prevent damage and maintain their luxurious feel. Always spot-test first and follow up with a conditioner for lasting results.
🎯 Key Takeaways


- Always spot-test new products on an inconspicuous area.
- Use pH-neutral leather cleaners, never harsh chemicals.
- Gently scrub with a soft brush or microfiber cloth.
- Condition leather regularly to prevent cracking.
- Address spills immediately to avoid permanent stains.
Cleaning your leather car seats safely means knowing your specific leather type and using the correct, mild products. This approach is paramount for preventing irreversible damage and preserving their luxurious look and feel. Incorrect cleaners or application methods can lead to permanent cracks, discoloration, or stiffening, significantly diminishing your car’s interior value and overall comfort. Your dedication to proper care directly impacts the longevity and beauty of your leather.
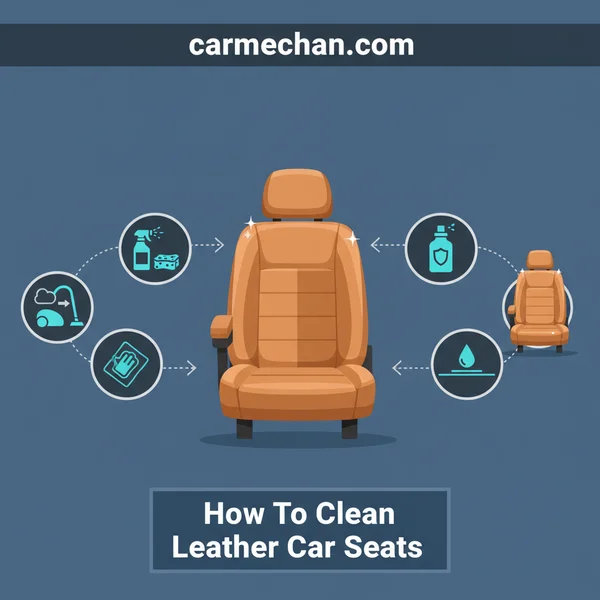
This guide provides the foundational knowledge and product selection you need to clean your leather car seats effectively and without harm. We’ll clarify the critical differences between common leather types found in vehicles and equip you with the expertise to choose only the safest, most beneficial cleaning and conditioning products. Skipping these initial steps risks making costly mistakes that are difficult, if not impossible, to reverse.
Understanding Different Leather Types & Their Cleaning Needs


Not all leather is created equal. Identifying your car seat’s leather type is the first critical step to preventing damage during cleaning. Applying the wrong product to the wrong leather can cause immediate, visible harm. A quick test can reveal whether your seats are protected or unprotected, guiding your cleaning strategy.

Protected/Coated Leather: Your Car’s Most Common Type
Most modern car seats, approximately 90% or more, utilize what is known as protected, or pigmented, leather. This leather has a polymer coating and pigment layer on its surface. This engineered protective barrier makes it incredibly durable, stain-resistant, and significantly easier to clean than unprotected varieties. Liquids tend to bead up on its surface, allowing time for wiping before absorption.
- Identification Test: Place a tiny water drop on an inconspicuous area, like the back of a headrest or under the seat flap. If the water beads up and doesn’t absorb into the leather after a minute, you have protected leather.
- Cleaning Needs: Protected leather requires gentle, pH-neutral cleaners specifically designed for automotive leather. These cleaners work to lift dirt from the surface without stripping the protective coating.
- What to Avoid: Harsh chemicals like ammonia, bleach, or general household cleaners will degrade the protective layer, leading to premature cracking and fading.
Unprotected/Aniline Leather: Handle with Extreme Care
Some luxury or older vehicles may feature unprotected, or aniline, leather. This leather is dyed but lacks the surface coating found on protected leather. It feels incredibly soft, pliable, and natural, showcasing all its original grain and imperfections. However, this raw beauty comes at the cost of durability; it is highly porous and absorbs liquids and oils very quickly, making it prone to staining.
- Identification Test: Perform the same water drop test. If the water immediately soaks into the leather and creates a darker, wet spot, you have unprotected (aniline) leather. This darkening will usually dry out, but the test highlights its absorbency.
- Cleaning Needs: Cleaning aniline leather is extremely delicate. It demands specialized, ultra-mild cleaners and a very light touch, often applied with a damp (not wet) cloth.
- Professional Recommendation: If you identify or suspect your car has aniline leather, it is highly recommended to consult a professional detailer specializing in exotic leathers. DIY cleaning risks permanent water spots or discoloration due to its highly absorbent nature.
How to Clean Leather Car Seats Like a Pro: A Practical Walkthrough


This comprehensive guide will walk you through the precise steps to meticulously clean your car’s leather seats, restoring their beauty, extending their lifespan, and preserving their natural feel. Neglecting leather can lead to cracking, fading, and a buildup of grime that diminishes your car’s interior appeal and resale value. Following these detailed instructions will help you achieve professional-level results from your own driveway, ensuring your car’s interior remains a comfortable and inviting space.
Step 1: Gather Your Arsenal & Prep the Area
What you need: Soft-bristle brush (e.g., horsehair detail brush), vacuum cleaner with crevice tool and brush attachment, 3-4 clean microfibre towels, interior detail spray or all-purpose cleaner (diluted 10:1 if using APC), plastic bags or a container for loose items.
Instructions: Begin by removing all personal items, floor mats, and any loose debris from the car’s interior. Place items in plastic bags to keep them organized. Thoroughly vacuum the seats, paying close attention to seams, creases, and the areas where the seat meets the console and door panels. Use a crevice tool for hard-to-reach spots and a brush attachment for general surface vacuuming. This initial removal of dirt, dust, and crumbs prevents them from scratching the leather during the cleaning process and ensures a more effective subsequent clean.
Pro Tip: Don’t underestimate the power of a good vacuuming. Up to 80% of perceived “dirt” on seats is often loose debris. Remove child car seats before starting to ensure access to all areas and to prevent their accidental contact with cleaning products.
Step 2: Perform a Spot Test
What you need: Your chosen leather cleaner, clean microfibre towel.
Instructions: Before applying any cleaning product to the entire seat, it is absolutely critical to perform a spot test on an inconspicuous area. A good location is typically under the seat’s edge, a small section on the back of the seat, or a less visible part of the seat base. Apply a small amount of your chosen pH-neutral leather cleaner to a clean microfibre towel (not directly onto the leather) and gently dab it onto the test spot. Wait for 5-10 minutes, then check for any discoloration, staining, streaking, or adverse reactions like dullness or stickiness. If no issues arise, the cleaner is safe to use on your specific leather type.
Pro Tip: This step is non-negotiable, especially with older, aftermarket, or dyed leather. Different leathers, and even different batches of the same leather, can react uniquely to various chemicals. Always err on the side of caution to avoid permanent damage or uneven cleaning results across your interior.
Step 3: Lightly Dust and Wipe Down Surfaces
What you need: Clean, dry microfibre towel, interior detail spray (optional, specifically for interiors).
Instructions: After thorough vacuuming, use a fresh, clean, and dry microfibre towel to gently wipe down all leather surfaces. This step serves to remove any remaining fine surface dust, pet hair, or light grime that the vacuum might have missed or couldn’t fully dislodge. For very light dust accumulation, this might be sufficient. If you prefer a slightly enhanced cleaning for very fine particles, you can lightly mist an interior detail spray onto the towel (never directly onto the leather) and then wipe. Work in small sections, wiping gently with minimal pressure to avoid pushing dirt deeper into the leather’s grain.
Pro Tip: Always wipe with the natural grain or texture of the leather where possible. This technique helps to lift dirt from the natural contours rather than embedding it further. Fold your microfibre towel frequently to expose a clean surface, preventing you from merely spreading dirt around.
Step 4: Deep Clean with a Dedicated Leather Cleaner
What you need: Dedicated pH-neutral leather cleaner, soft-bristle brush (horsehair is ideal), 2-3 clean microfibre towels, small bucket of clean water (optional, for rinsing brush).
Instructions: Spray your dedicated leather cleaner directly onto a small section of the leather (e.g., a 12×12 inch area). Allow it to dwell for 15-30 seconds, allowing the cleaner to penetrate and loosen dirt. Then, gently agitate the cleaner with your soft-bristle brush using small, overlapping circular motions or straight lines. Focus on lifting the dirt from the grain and seams. Immediately wipe away the cleaner and lifted grime with a clean, damp (water-only) microfibre towel. Follow up with a separate, clean dry microfibre towel to absorb any residual moisture. Repeat this precise process section by section, overlapping slightly to ensure full, even coverage.
Pro Tip: Do not saturate the leather, as excessive moisture can lead to staining, streaking, or even damage to the leather’s adhesive layers or dyes over time. Work quickly and efficiently, moving to the next section only after the previous one is fully wiped down and dried. For heavily soiled areas, a second, lighter application and agitation might be necessary.
Step 5: Address Stubborn Stains
What you need: Stronger, targeted leather spot cleaner (if necessary), cotton swabs, eraser-style leather cleaner, specific stain removers (e.g., dedicated ink remover for leather), clean microfibre towel.
Instructions: For localized, stubborn stains like pen marks, food residue, or oil spots, you may need a more targeted approach. For fresh ink stains, apply a dedicated leather ink remover to a cotton swab and gently dab (do not rub) the stain until the ink transfers to the swab. For tougher grime or scuff marks, some brands offer an “eraser” style cleaner that can gently lift embedded dirt without harsh chemicals. Always test these stronger solutions on an inconspicuous area first, even if you’ve already tested the general cleaner. Avoid vigorous scrubbing, which can damage the leather’s delicate finish or remove its protective topcoat.
Pro Tip: Act quickly on new stains. The longer a stain sits, the harder it is to remove without damaging the leather. For grease or oil stains, a small amount of cornstarch or talcum powder can sometimes be applied for 15-30 minutes to absorb the oil before gently vacuuming and then proceeding with your regular leather cleaner.
Step 6: Condition the Leather for Protection
What you need: pH-neutral leather conditioner, clean foam or microfibre applicator pad, clean dry microfibre towel.
Instructions: Once all seats are thoroughly cleaned and completely dry (allow at least 30-60 minutes after cleaning for optimal dryness), it’s time to condition. Apply a small, coin-sized amount of leather conditioner onto a clean foam or microfibre applicator pad. Gently rub the conditioner into the leather using small, overlapping circular motions or by wiping evenly with the grain. Ensure an even, thin coat across the entire surface; avoid heavy application, as less is often more with conditioners. Allow the conditioner to penetrate for 10-15 minutes (or as per the specific product’s instructions). Finally, use a separate clean, dry microfibre towel to buff off any excess product to a natural, non-greasy, matte or satin finish.
Pro Tip: Conditioning not only restores essential moisture and suppleness to the leather but also adds a vital protective layer. This barrier helps prevent premature cracking, fading from harmful UV exposure, and makes future cleaning easier. Over-applying conditioner can leave a sticky residue that attracts dust and dirt, so a thin, even coat is paramount.
Step 7: Final Inspection and Touch-Ups
What you need: Good lighting (natural daylight is best), detail brush or cotton swabs, all-purpose interior cleaner (diluted, for very minor corrections).
Instructions: Take a final, critical look at all your leather surfaces under good lighting, preferably natural daylight, which reveals imperfections most effectively. Check for any missed spots, streaks, uneven sheen, or areas where the cleaner or conditioner wasn’t fully buffed off. Use a small detail brush or a cotton swab dampened with a very mild, diluted all-purpose interior cleaner (if necessary) for tiny crevices, stitching lines, or stubborn residue. Ensure all leather surfaces have a uniform, natural sheen, indicating proper cleaning and conditioning. Re-vacuum any areas where debris might have been dislodged during the process. This meticulous final check ensures a professional-grade finish.
Pro Tip: Don’t rush this final check; it’s what differentiates a good clean from an excellent, professional one. Pay particular attention to high-traffic areas and areas with complex stitching, as these often hide small imperfections or missed spots.
Step 8: Maintain Regularly
What you need: Microfibre towels, interior detailer or quick detail spray for leather, vacuum cleaner.
Instructions: To keep your leather car seats looking their absolute best and to prolong the effects of your deep clean, regular maintenance is crucial. Lightly vacuum your seats weekly to remove loose dirt, dust, and crumbs. Every 2-4 weeks, or as needed, use a quick interior detailer specifically designed for leather to wipe down surfaces, removing light dust, fingerprints, and minor smudges. This proactive approach prevents heavy build-up and significantly reduces the frequency and intensity of future deep cleaning sessions. Re-apply a full leather conditioner every 3-6 months, depending on your vehicle’s usage, climate, and sun exposure, to continually reinforce its protective barrier and maintain its pliability.
Pro Tip: Keeping a dedicated leather quick detailer spray and a clean microfibre towel readily available in your car can make quick wipe-downs effortless, allowing you to address spills or dust almost instantly, saving you significant time and effort in the long run.
✅ Final Checklist
- All leather surfaces are visibly clean, free from dirt, grime, and stains.
- No streaks, residue, or tacky feel from cleaner or conditioner.
- Leather feels supple, soft, and conditioned, not dry, greasy, or sticky.
- All vacuumed areas are completely free of crumbs, dust, and debris.
- The car’s interior smells fresh and clean, without any strong, lingering chemical odors.
Important Notes:
- Safety Considerations: Always wear appropriate protective gloves (e.g., nitrile) to shield your hands from cleaning chemicals. Ensure good ventilation in the car while cleaning by opening doors or windows. Never mix different cleaning products, as this can create dangerous fumes or ineffective solutions.
- When to Seek Professional Help: If your leather car seats exhibit severe damage such as deep scratches, tears, significant cracking, extensive dye transfer, or deeply ingrained stains that DIY methods cannot remove, it is best to consult a professional automotive leather repair and restoration specialist. Attempting to fix severe damage yourself without proper training and tools can often worsen the problem and lead to irreversible damage.
- Estimated Time and Cost Range: This comprehensive cleaning process typically takes approximately 2-4 hours, depending on the size of your vehicle, the number of leather seats, and their current condition. The initial cost for essential materials (a good quality pH-neutral cleaner, conditioner, brushes, and several microfibre towels) can range from $30 to $100. However, these supplies are usually sufficient for multiple cleaning sessions over an extended period.
Selecting the Right Leather Cleaning & Conditioning Products
Choosing the correct products is paramount for safe and effective leather seat care. The wrong solution causes more harm than good, potentially causing irreversible damage. Always invest in products specifically formulated for automotive leather to ensure compatibility and gentle, yet effective, cleaning.

Essential Cleaning Product Characteristics
For the vast majority of car seats (protected leather), selecting a specialized cleaner is your first step. Do not substitute household cleaners, as they contain chemicals harmful to automotive leather coatings and dyes.
- pH-Neutral Formula: Look for cleaners explicitly labeled “pH-neutral leather cleaner” or “automotive leather cleaner.” A neutral pH prevents drying out, cracking, or damaging the leather’s natural oils and its protective coating.
- Non-Alkaline/Non-Acidic: Harsh chemicals, whether acidic or alkaline, will aggressively break down leather fibers and protective layers over time, leading to accelerated wear.
- No Silicones or Waxes: Avoid cleaners that contain silicones, waxes, or heavy oils. These ingredients can leave a greasy residue that attracts dirt, can clog leather pores, and often create an artificial sheen that many find undesirable.
- Spray or Foam Applicator: Products that come with a spray or foam applicator allow for even, controlled distribution. This prevents oversaturation of the leather, which can be problematic, even for protected types.
- Application Tools: Always use clean, soft microfiber towels for applying and wiping off cleaner. For gentle agitation, a soft-bristle detailing brush can be effective, but avoid abrasive cloths or scrub pads.
Conditioning for Longevity and Protection
After cleaning and allowing your leather to dry, conditioning is a crucial follow-up step. This process restores essential moisture, keeps the leather supple, and provides a layer of protection against future wear, UV damage, and everyday grime.
- Dedicated Automotive Conditioner: Choose a dedicated “automotive leather conditioner” that is designed to penetrate and nourish the leather without leaving a greasy, slick film or attracting dust.
- Nourishing Ingredients: Look for conditioners with beneficial ingredients like lanolin, aloe vera, or natural oils. Avoid those with heavy petroleum distillates or products that promise an artificial “shine,” as these often indicate less beneficial, surface-level ingredients.
- Prevents Deterioration: A good quality conditioner helps prevent the common issues of leather deterioration: cracking, fading due to sun exposure, and stiffening over time. It keeps the leather flexible and rich.
- Proper Application: Apply conditioner sparingly to a clean, dry surface, typically with a separate clean microfiber applicator pad or towel. It should absorb into the leather, not sit on top.
Common Pitfalls and What to Avoid During Leather Cleaning
Cleaning leather requires a delicate touch. Using the wrong products or techniques can cause irreversible damage, stripping away natural oils, causing discoloration, or even breaking down the leather’s protective coating. Knowing what to avoid is just as crucial as knowing what to do.
Harsh Chemicals and Abrasive Tools
Many household cleaners are simply too aggressive for delicate leather. They might seem effective initially but can cause long-term harm that’s expensive, if not impossible, to fix.
- Ammonia-based cleaners are a major no-no; they can dry out and crack leather, leading to irreparable damage.
- Bleach or strong degreasers will permanently strip color, destroy the leather’s surface integrity, and leave unsightly marks.
- Silicone-based products may offer a temporary shine, but they can actually clog the leather’s pores and contribute to drying and cracking over time.
- Avoid abrasive sponges, stiff brushes, or even microfibers that aren’t explicitly soft. These can easily scratch, scuff, or wear down the delicate surface of your leather.
Over-Saturating and Neglecting Conditioning
Another frequent mistake is applying too much moisture or skipping essential post-cleaning care. Leather is permeable, and excessive liquid can seep into the padding beneath, creating serious problems.
- When cleaning, always use a slightly damp cloth, not a soaking wet one. Wring it out thoroughly before it touches the leather.
- Apply cleaners to your cloth first, then wipe the leather, rather than spraying directly onto the seats. This prevents oversaturation and uneven application.
- Never skip the conditioning step. After cleaning, leather needs its moisture replenished. Without it, the material can become brittle, leading to unsightly cracks, especially in high-traffic areas and seams. Think of it like moisturizing your skin after a shower – it needs hydration!
Long-Term Care Strategies for Pristine Leather Seats
While deep cleaning tackles significant grime, consistent preventative care is paramount for maintaining your leather’s beauty, softness, and longevity. A little effort often prevents big problems from developing.
Regular Maintenance Beyond Deep Cleans
Keep your leather seats looking fresh between intensive cleaning sessions with a simple, routine approach. These habits protect your investment and reduce the need for aggressive cleaning later on.
- Weekly dusting and vacuuming removes loose dirt, dust, and crumbs before they can become embedded in the leather grain or abrade the surface. Use a soft brush attachment on your vacuum.
- Keep a soft microfiber cloth handy for quick wipe-downs of light dust, fingerprints, or minor smudges. This prevents residue buildup.
- Address spills immediately. The longer a spill sits, especially dark liquids like coffee, soda, or ink, the more likely it is to stain permanently. Blot gently with a clean cloth, don’t rub.
Protection from Environmental Damage
The environment inside and outside your car plays a significant role in leather degradation. UV rays and extreme temperature fluctuations are particularly harsh culprits.
- UV Protection: Prolonged exposure to direct sunlight can severely fade leather color, dry it out, and make it prone to cracking. Consider using a good quality leather conditioner that includes UV protectants.
- Sunshades: Whenever possible, use a windshield sunshade when parking outdoors for extended periods. This simple accessory significantly reduces internal cabin temperature and blocks harmful UV exposure.
- Shade Parking: Whenever you have the option, choose to park your car in the shade. This helps preserve not just your leather but also your car’s interior plastics and electronics from sun damage.
- Temperature Control: Avoid extreme temperature fluctuations inside the car. Regular use of your AC in summer and heat in winter helps maintain a stable, moderate environment that is kinder to your leather.
Enjoy Your Beautiful, Clean Leather Seats
Caring for your car’s leather seats doesn’t have to be a daunting task. By choosing the right gentle products, avoiding common pitfalls like harsh chemicals and over-saturation, and embracing a consistent routine of cleaning and conditioning, you can significantly extend their life and maintain their luxurious feel. Think of it as an investment in your car’s comfort and resale value, ensuring that plush, new-car feel lasts for years.
Start today by identifying suitable leather care products and making regular maintenance a part of your car care schedule. Your beautiful leather interior will thank you for the attention, providing countless comfortable and stylish rides for miles to come.
❓ Frequently Asked Questions
What’s the difference between cleaning and conditioning leather?
Cleaning removes dirt, grime, and oils from the leather’s surface, while conditioning replenishes its natural oils. Conditioning keeps the leather supple, prevents drying and cracking, and often provides UV protection.
Are there specific products I should always avoid on leather?
Yes, avoid ammonia-based cleaners, bleach, harsh detergents, abrasive scrubbers, and products containing silicone or petroleum distillates, as they can dry out, discolor, or irreversibly damage leather.
How do I remove stubborn stains like ink or grease from leather?
For ink, use a specialized leather ink remover pen carefully and promptly. For grease, gently dab with a microfiber cloth and a dedicated leather degreaser, avoiding rubbing, which can spread the stain.
My leather seats are shiny and sticky; what does that mean and how do I fix it?
Shiny and sticky leather indicates a buildup of body oils, dirt, and old product residue. It requires a thorough cleaning with a pH-neutral leather cleaner to remove the grime and restore its original matte, clean finish.
How can I protect my leather seats from sun damage and cracking?
Regularly apply a high-quality leather conditioner with UV inhibitors, park your car in the shade, and consider using window sunscreens to minimize direct sunlight exposure, which can severely dry out and crack leather over time.
Is it necessary to vacuum the seats before cleaning?
Absolutely. Vacuuming is a crucial first step to remove loose dirt, dust, crumbs, and debris. This prevents these particles from being rubbed into the leather during the cleaning process, which could cause abrasions or scratches.