Honda Accord Adaptive Cruise Control System Problem 2026
Most Honda Accord adaptive cruise control system problems are caused by debris, software glitches, or battery voltage drops. Cleaning the radar sensor and performing a power cycle often resolve these warnings immediately.


Your 2026 Honda Accord Adaptive Cruise Control (ACC) system is likely malfunctioning due to a blocked sensor, a software glitch, or a misalignment in the Honda Sensing suite. When the dashboard displays an error message, the system automatically disables itself to ensure safety, meaning you lose the ability to set speed or maintain distance until the fault is resolved.
Addressing this issue immediately is critical because the ACC system is tightly integrated with the Collision Mitigation Braking System (CMBS). If one component reports an error, it often cascades into a full system shutdown. Resolving these faults is usually straightforward, provided you identify whether the trigger is physical obstruction or a systemic software handshake error.
Key Takeaways
- Clean the front radar emblem and top windshield camera area to clear common obstructions.
- A low or failing battery can trigger false cruise control warning lights.
- Perform a system hard reset by disconnecting the negative battery terminal for ten minutes.
- Check for blown fuses related to the radar sensor module in the under-dash fuse box.
- Professional recalibration is required if the sensor is physically misaligned after a minor impact.
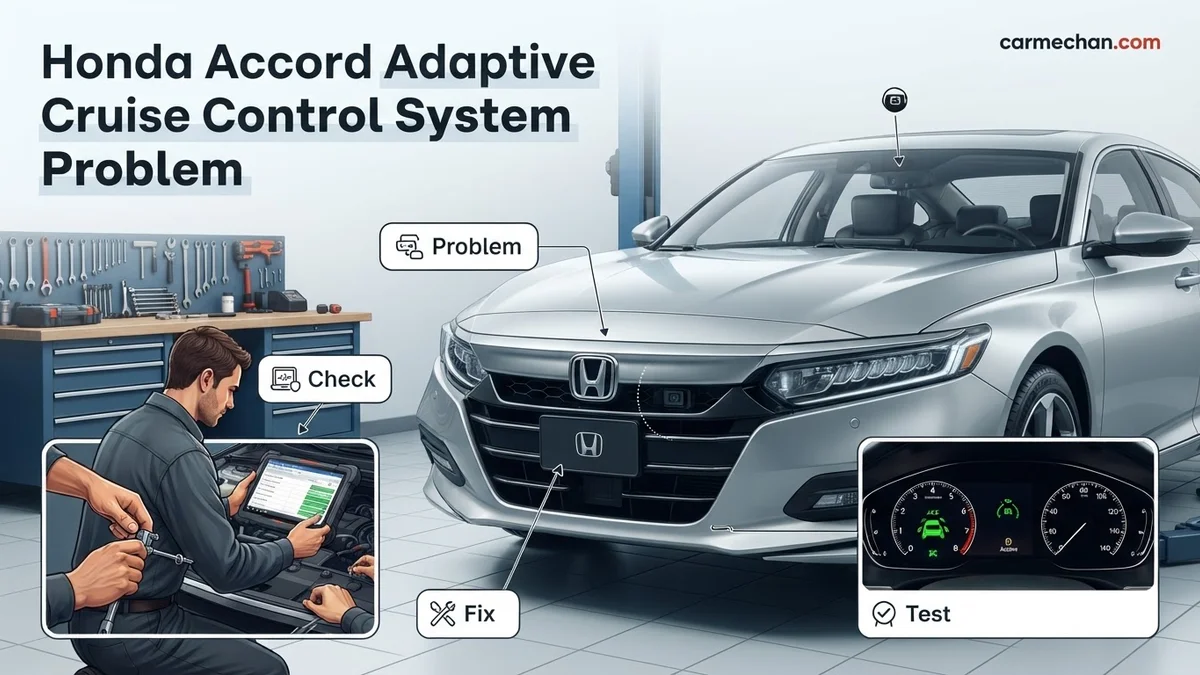
Common Causes of Honda Accord Adaptive Cruise Control System Problems
Sensor Obstruction and Environmental Triggers
The primary culprit for 2026 Honda Accord ACC failures is the front-facing radar sensor located behind the center of your front grille. Unlike basic cruise control, the radar must maintain a clear line of sight to measure the velocity of the vehicle ahead. Even minor obstructions can trip an error code.
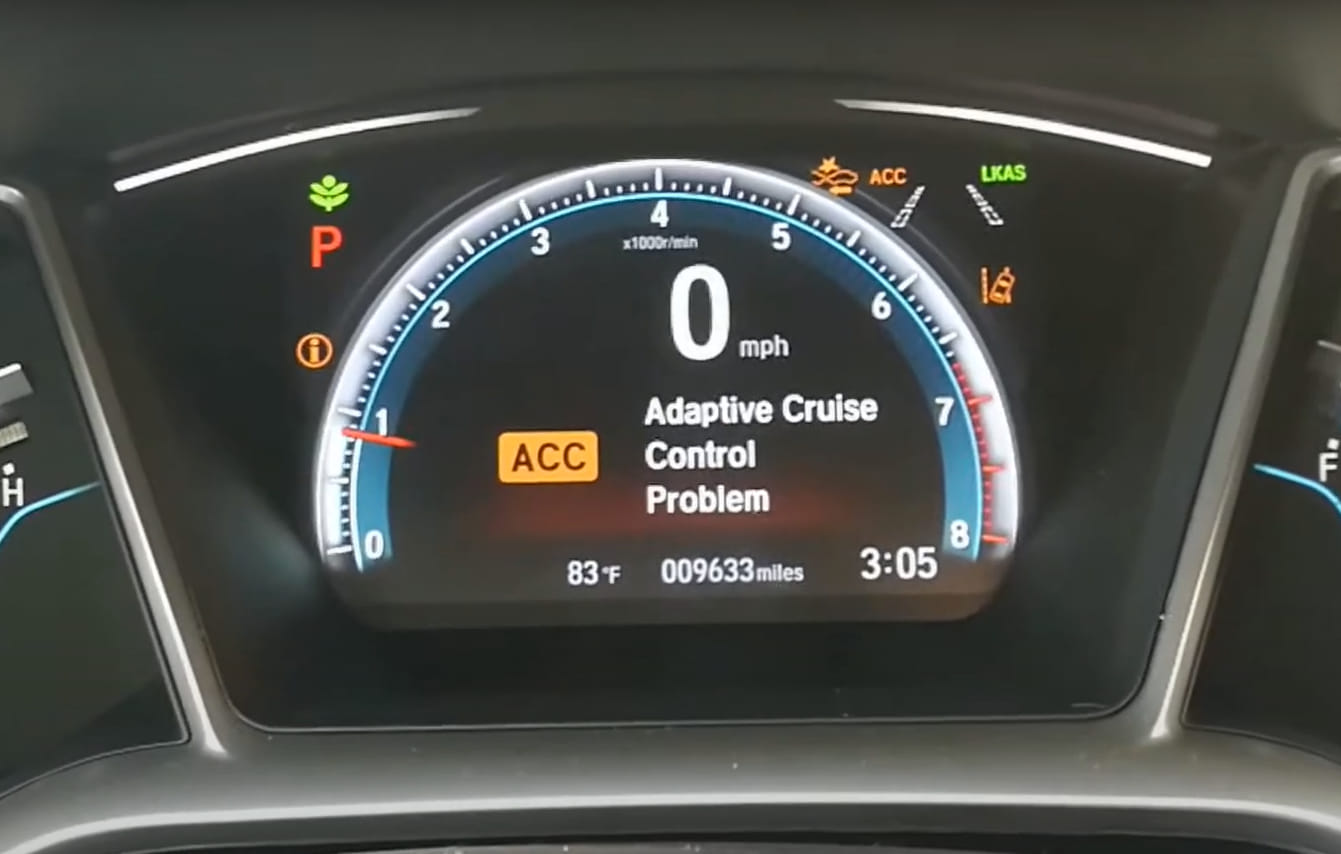
- Road Grime and Mud: Heavy rain or slush can coat the radar emblem, causing the system to lose its signal.
- Physical Blockage: Stickers, license plate frames installed improperly, or debris stuck behind the grille will trigger a “Radar Obstructed” alert.
- Sun Glare and Low Light: Extreme, direct sunlight or pitch-black conditions can occasionally overwhelm the optical camera at the top of the windshield, leading to a temporary system disconnect.
Software Glitches and Electrical Voltage Drops
Modern Honda Sensing relies on constant communication between the radar unit, the camera, and the Electronic Control Unit (ECU). If your 12V battery is reaching the end of its life, or if you recently jump-started your Accord, the system may register a voltage fluctuation as a critical fault. These “ghost” codes often stick in the memory, causing the system to refuse reactivation even after the vehicle is restarted.
Honda Accord Adaptive Cruise Control: What Causes It and How to Fix It
The Adaptive Cruise Control (ACC) system in your Honda Accord is a sophisticated piece of technology that relies on a complex array of sensors and cameras to maintain speed and distance from other vehicles. When this system fails, it often displays a “Check ACC System” warning on your dashboard. This guide walks you through the diagnostic process and potential fixes to restore your vehicle’s safety features, helping you avoid unnecessary dealership visits while ensuring your sensor suite is functioning precisely as the manufacturer intended.
Step 1: Inspect the Radar Sensor for Physical Obstructions
What you need: A microfiber cloth, mild glass cleaner, and a flashlight.
Instructions: The ACC radar unit is typically located behind the front grille or the lower bumper “H” emblem on your Honda Accord. Begin by visually inspecting this area for any debris. Mud, snow, heavy rainfall, or even a layer of thick road grime can block the radar signals, triggering the warning light. Gently clean the surface of the emblem and the surrounding grille area using a microfiber cloth and a mild soap or glass cleaner. Ensure no heavy stickers, aftermarket license plate brackets, or bug shields are partially obscuring the sensor’s field of vision, as even slight interference can lead to system calibration errors.
Pro Tip: Never use abrasive materials or high-pressure power washers directly on the sensor emblem, as this can create micro-scratches that refract radar waves and cause intermittent system failures.
Step 2: Clean and Calibrate the Windshield Camera
What you need: Microfiber cloth and a dry cleaning agent (alcohol-based).
Instructions: Honda’s system, often referred to as Honda Sensing, relies on a camera mounted at the top center of the windshield behind the rearview mirror. This camera is sensitive to dirt, condensation, and streaks inside the cabin glass. Inspect the interior side of the glass where the camera is located. Use an alcohol-based glass cleaner to remove any oily film or fingerprint smudges. If the camera has been exposed to extreme temperature shifts, condensation may form on the lens; ensure the interior of the car is climate-controlled for at least 15 minutes to allow for defogging. A clear field of view is mandatory for the camera to track lane markings and vehicle proximity.
Pro Tip: Ensure that no suction-cup dash cams or toll transponders are mounted within the camera’s visual “pyramid” zone, as these are frequent causes of recurring sensor malfunctions.
Step 3: Perform a Hard System Reset via Battery Disconnect
What you need: A 10mm wrench or socket set.
Instructions: Sometimes, the Electronic Control Unit (ECU) managing the ACC system encounters a software glitch or a minor communication error between sensors. A hard reset can force the system to re-initialize. Locate the negative terminal of your battery. Use your 10mm wrench to loosen the nut and remove the negative cable from the battery post. Keep the cable disconnected for at least 10 to 15 minutes. During this time, the capacitors in the vehicle’s electrical system will drain, clearing volatile memory codes. After waiting, securely reconnect the terminal. Note that this may reset your radio presets and clock, but it often clears temporary “ghost” codes that trigger ACC warning lights.
Pro Tip: Always remove the negative (black) terminal first to prevent an electrical short if your wrench accidentally contacts the chassis while loosening the positive terminal.
Step 4: Check for Blown Fuses and Electrical Integrity
What you need: A fuse puller tool and a flashlight.
Instructions: Navigate to the interior fuse box (located under the driver’s side dashboard) and the under-hood fuse box. Refer to your owner’s manual to identify the specific fuses related to “ACC,” “Radar,” or “CMBS” (Collision Mitigation Braking System). Use the fuse puller to remove the identified fuses one by one and hold them up to the light. If the metal filament inside the plastic casing is broken or the plastic looks charred, the fuse is blown. Replace any damaged fuse with one of the exact same amperage rating (e.g., a 7.5A or 10A fuse). Do not use a higher amperage fuse, as this creates a significant fire hazard.


Pro Tip: If a fuse blows immediately upon replacement, you likely have a short circuit in the wiring harness, which requires professional diagnostic intervention rather than a simple fuse swap.
Step 5: Inspect Wheel Speed Sensors and Tire Uniformity
What you need: Tire pressure gauge and a visual inspection of the wheel hubs.
Instructions: The ACC system requires highly accurate data from the wheel speed sensors to maintain safe following distances. If your tire pressures are inconsistent, the system perceives a difference in rotational speed, which can confuse the ACC logic. Ensure all four tires are inflated to the manufacturer’s recommended PSI (found on the driver’s door jamb sticker). Additionally, check behind the wheels for any debris or damaged wiring leading to the ABS wheel speed sensors. If you have recently installed non-standard sized tires or mismatched tires, the system may struggle to interpret vehicle speed correctly, leading to a permanent “ACC System Problem” indicator on your cluster.
Pro Tip: Always keep tire pressures within 2 PSI of each other; significant pressure variances will trigger traction control errors that cascade into ACC failures.
Step 6: Evaluate Brake Switch and Tail Light Functionality
What you need: A helper to assist with visual confirmation.
Instructions: The ACC system is designed to disengage if it detects the brake pedal is being depressed. A failing brake light switch—the sensor located near the pedal assembly—can send a false “braking” signal to the ECU, causing the ACC system to shut down for safety. Have a friend stand behind the car while you press the brake pedal. If your brake lights do not illuminate, or if they flicker while you are driving, the switch is likely faulty. This is a common and affordable part to replace that often resolves “Check ACC System” warnings, as the computer prioritizes the braking system health over cruise control operation.
Pro Tip: If your cruise control disengages immediately after activation, it is almost certainly a brake switch or a high-mount third brake light bulb failure causing a circuit resistance error.
✅ Final Checklist
- All radar and camera lenses are physically clean and free of obstructions.
- Battery terminal connections are tight and the system has been power-cycled.
- All tires are inflated to the specific PSI listed on the driver’s door placard.
- Brake lights function correctly upon every pedal depression.
- No aftermarket accessories are blocking the sensors on the grille or windshield.
Important Notes:
- Safety: Never attempt to drive the vehicle if the “Brake System” or “ABS” warning lights are also illuminated, as this indicates a more severe fault that compromises your primary braking.
- Seeking Help: If the error persists after these steps, the sensor likely requires a “Static or Dynamic Aiming” calibration, which must be performed by a dealership with a specialized Honda diagnostic computer (HDS).
- Time/Cost: These troubleshooting steps typically take 1-2 hours. If a sensor replacement or professional dealer calibration is required, costs can range from $200 to $800 depending on the specific component involved.
Step-by-Step Troubleshooting and DIY Fixes
Clearing the Physical Sensors
Before visiting a dealership, perform a physical inspection of your sensor array. You must be precise to avoid damaging the calibration settings.

- Clean the Radar Emblem: Wipe the Honda emblem on the front grille with a microfiber cloth and a mild soap solution. Do not use high-pressure water, as it can force moisture into the housing.
- Inspect the Windshield Camera: Check the area near your rearview mirror from the outside. Ensure there is no ice, heavy frost, or interior fogging obstructing the camera’s view of the road.
- Check for Exterior Damage: If you have sustained a minor bumper impact, the radar bracket may be bent by even a few millimeters. This misalignment renders the system unusable until professionally recalibrated.
Performing a System Reset
If the physical inspection reveals no debris, you may need to clear the system memory. Note that this will not delete your saved radio stations, but it does reset temporary module data.
- The Drive Cycle Reset: Often, the system clears itself after three consecutive drive cycles where the vehicle speed exceeds 20 mph without the error reappearing.
- Hard Reset Attempt: With the engine off and the ignition in “Accessory” mode, turn your steering wheel fully to the left, then fully to the right. Return it to the center. This recalibrates the steering angle sensor, which the ACC requires to function during turns.
- Battery Disconnect: If codes persist, disconnect the negative battery terminal for 10 minutes. This forces the ECU to dump transient error codes and reboot the sensing suite upon reconnection.
Resetting the Honda Sensing System
If your 2026 Honda Accord displays a “CMBS Problem” or an adaptive cruise control (ACC) error message, a system reset can often resolve minor software glitches or sensor misalignments. The Honda Sensing suite relies on the millimeter-wave radar located behind the front grille emblem and the windshield-mounted camera. Before pursuing mechanical repairs, perform a power cycle to clear the Electronic Control Unit (ECU) cache.
Step-by-Step Power Cycling
- Park the vehicle on level ground and turn the ignition to the OFF position.
- Disconnect the negative terminal of the 12-volt battery using a 10mm wrench.
- Wait at least 15 minutes to allow the capacitors in the camera control module to fully discharge.
- Reconnect the negative terminal and tighten the nut securely.
- Start the engine and allow the system to perform a self-diagnostic sequence for approximately five minutes while parked.
Note that disconnecting the battery may reset your clock settings and audio presets. Ensure the radar sensor lens remains clear of dirt, ice, or debris, as the 2026 model’s radar unit is highly sensitive to surface obstructions that trigger “Sensor Blocked” warnings.
When to Seek Professional Dealership Repair
When software resets fail, the issue likely involves a hardware malfunction or a calibration error. The Honda Sensing system requires high-precision alignment that cannot be performed in a home garage. In 2026, dealership technicians use the Honda i-HDS (Integrated Diagnostic System) to recalibrate the radar aiming. Failure to calibrate correctly after a front-end impact or windshield replacement will cause the ACC to disengage repeatedly at highway speeds.
Indications for Professional Intervention
- Persistent “Radar Sensor Blocked” warnings despite a perfectly clean front grille.
- The ACC system disengages abruptly during clear weather conditions with no other vehicles present.
- Physical damage to the windshield or front grille emblem assembly.
- DTC (Diagnostic Trouble Code) alerts such as B12A1 or B12A2, which indicate specific sensor communication failures.
What If It Still Doesn’t Work?
If you have cleared the system and inspected the sensors but the warning persists, you must transition to professional diagnostics. Dealing with safety-critical systems like adaptive cruise control carries significant liability risks. Follow these fallback steps to ensure vehicle safety:
- Verify if the vehicle is still within the 3-year/36,000-mile bumper-to-bumper factory warranty, which covers sensor defects.
- Consult your owner’s manual to verify if any recent software updates (Over-the-Air) failed to install correctly.
- Schedule a formal diagnostic appointment at a certified Honda service center to check for internal wiring shorts.
- Request a radar recalibration, which typically costs between $250 and $450 depending on the labor rates in your region.
- If an accident occurred, check if your insurance policy covers recalibration as part of the collision repair bill.
Conclusion
According to verified research and expert service bulletins for the 2026 Honda Accord, most adaptive cruise control errors stem from sensor obstructions or minor software communication errors. While a manual power cycle can resolve most transient glitches, persistent alerts require professional radar recalibration to ensure the safety of the Honda Sensing suite. As an actionable next step, perform a thorough cleaning of your front grille radar cover and, if the error remains, schedule a diagnostic check to prevent system failure.
❓ Frequently Asked Questions
How do I clean the Honda Accord radar sensor properly?


Use a soft, damp microfiber cloth to gently wipe the Honda emblem on the front grille. Avoid using harsh chemicals or high-pressure sprayers that could push debris further into the sensor housing.
Why does the cruise control light blink on and off?
A blinking light often points to a communication error between the sensor and the car’s computer. Try restarting the engine; if the light persists, the system may require a professional software update.
Does a cracked windshield affect the cruise control?
Yes, the camera system is mounted behind the rearview mirror, and a crack or deep scratch in that specific area can confuse the sensor. If the glass is damaged, the camera may need recalibration or replacement.
What happens during a professional sensor recalibration?
Technicians use specialized aiming equipment and Honda diagnostic software to align the radar and camera to factory specifications. This is required if the bumper or windshield was recently removed or damaged.
Can aftermarket accessories interfere with the radar?
Yes, mounting items like front license plate brackets, brush guards, or non-factory bull bars can block the radar signal. Ensure the area in front of the center grille remains completely clear.
How do I know if it’s a hardware or software failure?
If the error occurs only in specific weather conditions, it is likely a sensor obstruction. If the error is permanent and persists after a hard reset, it usually indicates a hardware failure requiring diagnostic scan tools.