Clean Car Upholstery: Ultimate Guide for Fabric, Leather & Vinyl
Last Updated on September 1, 2026 by Ryan
Achieving a pristine car interior requires understanding the right techniques for your specific upholstery type. This guide offers a comprehensive, step-by-step approach to effectively clean fabric, leather, or vinyl, ensuring optimal results and prolonging your car’s freshness. Learn how to identify materials, choose products, and remove common stains safely.
🎯 Key Takeaways
Recommended Best Deal Products


- Always vacuum thoroughly first to remove loose debris.
- Identify upholstery type (fabric, leather, vinyl) for correct products.
- Test cleaners on an inconspicuous spot before full application.
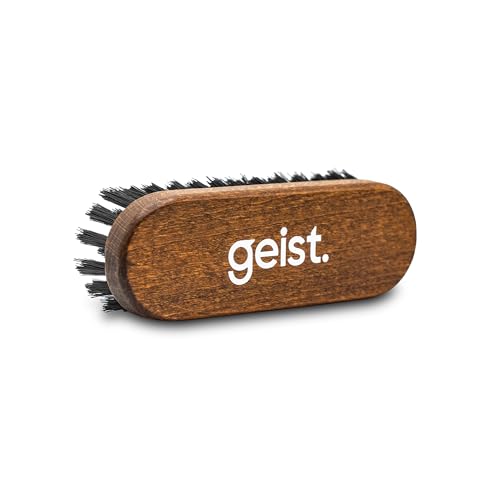
- Use appropriate tools like brushes for agitation, microfiber for wiping.
- Ensure proper drying to prevent mold and unpleasant odors.
Cleaning your car’s upholstery effectively and safely hinges on knowing your material and choosing the right approach. This guide provides a straightforward, step-by-step process for deep cleaning fabric, leather, and vinyl, ensuring you use the correct products and techniques without causing damage. Achieving a spotless interior isn’t about guesswork; it’s about a targeted strategy that preserves your car’s interior while removing even the toughest stains.

A methodical approach to upholstery cleaning prevents common mistakes like material damage, residue buildup, or ineffective stain removal. Understanding the nuances of each upholstery type and having the right tools on hand will save you time, effort, and potential repair costs, leaving your car’s interior looking and feeling factory fresh.
Understanding Your Car’s Upholstery Types and Their Unique Needs
Before you even think about cleaning, accurately identify your car’s upholstery material. This crucial first step dictates the products and techniques you’ll use, preventing damage and ensuring effective cleaning.

How to Identify Your Upholstery
The easiest way to confirm your upholstery type is often your car’s owner’s manual. If that’s not accessible, a visual and tactile inspection can usually tell you:
- Fabric: Typically feels soft, sometimes textured, and looks woven. It’s absorbent and prone to trapping dirt deep within its fibers.
- Leather: Smooth, supple, often has a distinct scent. It’s a natural material, porous, and requires gentle, pH-neutral care to prevent drying or cracking.
- Vinyl/Faux Leather: Looks similar to leather but often feels stiffer, more uniform, and less natural. It’s durable and less porous than real leather but can still crack if not properly maintained.
Always perform a patch test in an inconspicuous area, regardless of your identified material, to ensure your chosen cleaner doesn’t cause discoloration or damage.
Specific Care for Fabric, Leather, and Vinyl
Each material demands a tailored cleaning strategy:
- Fabric Upholstery: Highly absorbent, fabric tends to hold onto spills and odors. It requires cleaners that penetrate fibers to lift dirt, often needing agitation with a brush and thorough extraction to prevent water spots and mildew.
- Leather Upholstery: Sensitive to harsh chemicals, leather needs pH-neutral cleaners that won’t strip its natural oils. Follow up with a conditioner to keep it hydrated, supple, and protected from UV damage and cracking. Avoid excessive moisture.
- Vinyl Upholstery: More forgiving than leather, vinyl can generally handle a wider range of cleaners. However, avoid abrasive tools or harsh solvents that can scratch or degrade the surface. Regular cleaning and UV protection are key to preventing hardening and cracking over time.
How to Clean Car Upholstery Like a Pro: A Practical Walkthrough
Recommended Best Deal Products


Welcome to your essential guide for revitalizing your car’s interior! This comprehensive, step-by-step walkthrough is designed to equip you with the knowledge and techniques to deep clean your car’s fabric upholstery effectively and safely. From everyday dust and crumbs to stubborn stains, following these detailed instructions will help you restore your car’s interior to a fresh, showroom-worthy condition, extending its lifespan and enhancing your driving experience.
Step 1: Gather Your Arsenal & Clear the Deck
What you need: Heavy-duty vacuum cleaner (shop-vac preferred), various vacuum attachments (crevice tool, brush attachment), stiff-bristled brush, microfiber towels (several), bucket, trash bags, detail brushes (optional).
Instructions: Before you even think about applying liquids, completely clear out your car. Remove all floor mats, car seats, trash, and personal items. Place trash into bags immediately. This initial clearing creates a clean canvas for your work. Position your car in a well-lit area, ideally on a sunny day if possible, or in a garage with good ventilation. Having everything you need within arm’s reach will streamline the entire cleaning process.
Pro Tip: Removing everything, including car seats, allows you to access hidden crevices where dirt, crumbs, and debris accumulate over time. Don’t underestimate the power of a good pre-clean declutter.
Step 2: Power Vacuum: The Foundation of Clean
What you need: Heavy-duty vacuum cleaner with powerful suction, various attachments (crevice, brush, wide nozzle).
Don’t have the right vacuum yet? See our Best Vacuums for Car Detailing guide for our top-tested picks, or our Best Extractor Vacuums guide if you’re also tackling deep stains or spills.
Instructions: Begin with a thorough, top-to-bottom vacuuming. Start from the headliner (if fabric) and work your way down. Use the brush attachment to agitate loose dirt and dust from the upholstery fibers, then immediately vacuum it up. Switch to the crevice tool for tight spaces, seams, and under seats. Pay special attention to the folds and contours of the seats and the areas where the backrest meets the seat bottom. Don’t forget to vacuum the floor, trunk, and any fabric door panels.
Pro Tip: Vacuum in multiple directions (north-south, east-west) to lift embedded dirt. For pet hair, use a rubber glove or a specialized pet hair attachment to clump the hair before vacuuming.
Step 3: The Patch Test: Your Upholstery’s Best Friend
What you need: Your chosen upholstery cleaner (specific for car interiors), a clean white microfiber towel, a small, inconspicuous area of upholstery.
Instructions: Before applying any cleaner to a large area, always perform a patch test. Choose a hidden spot, such as under a seat cushion or a small corner, and apply a small amount of your chosen upholstery cleaner onto a clean white microfiber towel. Gently blot the area. Wait 5-10 minutes. Check for any discoloration, shrinking, or adverse reactions. If the fabric appears unaffected, you can proceed with confidence. This step is critical to prevent accidental damage or staining.
Pro Tip: Never spray the cleaner directly onto the upholstery for the patch test; always apply it to the towel first. This gives you more control and prevents oversaturation, which can lead to water rings.
Step 4: Spot Treatment: Targeting Those Pesky Stains
What you need: Upholstery cleaner, clean microfiber towels, detail brush or soft-bristled brush, distilled water (optional).
Instructions: Address individual stains before a general clean. For fresh stains, blot immediately with a clean, dry microfiber towel, working from the outside of the stain inwards to prevent spreading. For dried or tougher stains, spray a small amount of upholstery cleaner directly onto a clean microfiber towel, then gently blot and dab the stained area. Allow the cleaner to dwell for 30-60 seconds (or as per product instructions). Use a detail brush or soft-bristled brush to gently agitate the stain in a circular motion, then blot again with a fresh, damp (with distilled water) microfiber towel to lift the stain and cleaner residue.
Pro Tip: Avoid scrubbing vigorously, as this can push the stain deeper into the fabric fibers or damage them. Always blot and lift. For greasy stains, a dedicated degreaser or enzyme cleaner might be necessary after the patch test.
Step 5: Deep Clean Day: Fabric Upholstery Revival
What you need: Upholstery cleaner, spray bottle (if cleaner isn’t pre-bottled), stiff-bristled brush (not too harsh), several clean microfiber towels.
Instructions: Now for the general cleaning. Working on one section at a time (e.g., one seat section), lightly mist the upholstery cleaner directly onto the fabric. Do not oversaturate; a fine, even layer is sufficient. Immediately after misting, use your stiff-bristled brush to gently agitate the cleaner into the fabric. Use short, overlapping strokes, working the product into the fibers to loosen embedded dirt. Ensure you cover the entire section evenly. Let the cleaner dwell for the recommended time (usually 1-2 minutes) as per the product instructions.
Pro Tip: Working in small sections prevents the cleaner from drying out before you’ve had a chance to agitate it. Always follow the product’s dwell time recommendations for optimal cleaning without damaging the fabric.
Step 6: Extraction & Rinsing: Removing the Grime
What you need: Wet/dry vacuum (extractor or shop-vac with liquid recovery), or multiple clean, damp (with distilled water) microfiber towels, second bucket (for rinsing towels).
Instructions: This is where the magic happens! If you have a wet/dry vacuum or an upholstery extractor, fill it with clean water and go over the agitated sections to extract the dirty cleaning solution. Repeat passes until the extracted water runs relatively clear. If you don’t have an extractor, use several clean, damp (with just water, no cleaner) microfiber towels. Firmly press and blot the cleaned section, folding the towel to expose a clean surface as it picks up dirt and cleaner residue. Rinse and wring out your towels frequently in a separate bucket of clean water. This step is crucial to remove all chemical residue and prevent stiffness or sticky feeling after drying.
Pro Tip: Overlapping your passes with the extractor or towel ensures thorough rinsing. A good extraction will significantly reduce drying time and prevent water spots or rings.
Step 7: The Drying Game: Preventing Mildew & Odors
What you need: Dry microfiber towels, car windows open, fan (optional), desiccant packets (optional).
Instructions: Proper drying is paramount to prevent mildew growth and unpleasant odors. After extraction, use fresh, dry microfiber towels to firmly blot any remaining moisture from the upholstery. Open all car doors and windows wide to promote air circulation. If possible, park the car in direct sunlight. For faster drying, consider placing a small fan inside the car, directed at the upholstery. Avoid closing the car up until the upholstery is completely dry to the touch, which can take several hours, or even overnight depending on humidity and how wet the fabric got. Feel all areas, including seams and undersides, to confirm dryness.
Pro Tip: Avoid saturating the fabric in the first place to minimize drying time. A damp-dry feel is acceptable immediately after extraction, but it must air dry completely before sealing the car.
Step 8: Final Touches & Protection: Locking in the Clean
What you need: Fresh, dry microfiber towel, fabric protectant spray (optional, specifically for car upholstery), detail vacuum (optional).
Instructions: Once the upholstery is bone dry, give it one final, light vacuuming to fluff up the fibers and pick up any residual loose particles. If desired, apply a fabric protectant spray, specifically designed for automotive upholstery, following the product’s instructions. These products create a barrier against future spills and stains, making future cleanups much easier. Spray evenly from a distance, then allow it to cure completely before sitting on the seats. Reinstall your floor mats and car seats only when you are completely satisfied with the dryness and cleanliness.
Pro Tip: A fabric protectant can significantly extend the life of your clean upholstery. Ensure even application to avoid patchy protection. Always ventilate well when applying protectants.
✅ Final Checklist
- All personal items and trash have been removed and disposed of.
- Upholstery has been thoroughly vacuumed, free of loose debris and pet hair.
- All stains have been treated and are no longer visible.
- Fabric is completely dry to the touch, with no signs of dampness or mildew odor.
- Upholstery feels clean, soft, and free of sticky residue.
Important Notes:
- Safety considerations or warnings: Always work in a well-ventilated area. Wear gloves and eye protection when handling cleaning chemicals. Never mix different cleaning products. Avoid getting upholstery cleaners on leather, vinyl, or electronic components.
- When to seek professional help: For extremely severe stains (e.g., vomit, oil, ink) that penetrate deep into the foam, or for delicate fabrics you’re unsure how to clean, consider professional detailing services. Professionals have specialized equipment and expertise for these challenging situations.
- Estimated time and cost range: This comprehensive cleaning can take anywhere from 2-5 hours, depending on the severity of the dirt and the size of your vehicle. The cost for materials (cleaners, brushes, towels) typically ranges from $30-$70 if you’re starting from scratch.
Essential Cleaning Products and Tools for Optimal Results
Having the right arsenal of products and tools is half the battle. Skimping here can lead to frustrating results or, worse, damage to your car’s interior. Invest in quality items tailored to your upholstery type.

Must-Have Tools for Every Upholstery Type
These foundational tools are indispensable for any car upholstery cleaning job:
- Powerful Vacuum Cleaner: Crucial for removing loose dirt, crumbs, and debris. Use attachments like crevice tools for tight spots and brush attachments for surface agitation.
- Microfiber Towels: Absorbent, non-abrasive, and perfect for wiping away cleaners, extracting moisture, and buffing surfaces. Have several on hand.
- Detailing Brushes:
- Soft-bristle brush (e.g., horsehair): Ideal for gently agitating cleaners on delicate surfaces like leather or for light agitation on fabric.
- Medium-stiff nylon brush: Best for working cleaners into fabric upholstery or tackling tougher stains on vinyl.
- Spray Bottles: For diluting concentrated cleaners or applying water evenly.
- Bucket: For rinse water or mixing solutions.
Choosing the Right Cleaners for Fabric, Leather, and Vinyl
Selecting the correct cleaner is paramount for safety and effectiveness:
- For Fabric Upholstery:
- Dedicated Fabric/Carpet Cleaner: Available as sprays, foams, or concentrated solutions for extractors. Look for formulas that lift dirt without excessive suds.
- Enzyme Cleaners: Excellent for organic stains like food, pet accidents, or vomit, as they break down odor-causing bacteria.
- For Leather Upholstery:
- pH-Neutral Leather Cleaner: Specifically formulated to clean leather without stripping its natural oils. Avoid harsh all-purpose cleaners or household detergents.
- Leather Conditioner/Protector: Essential after cleaning to moisturize, protect from UV rays, and prevent cracking.
- For Vinyl/Faux Leather Upholstery:
- Mild All-Purpose Cleaner (APC): Diluted according to product instructions (e.g., 10:1 water to APC ratio for general cleaning) works well.
- Dedicated Vinyl Cleaner/Protector: Formulated to clean and offer UV protection, preventing hardening and fading.
Always follow the manufacturer’s instructions for any cleaning product and test it on an inconspicuous area first.
Advanced Stain Removal Techniques for Common Culprits
Recommended Best Deal Products


Sometimes, those everyday spills turn into stubborn, set-in stains. But don’t despair! With the right approach and a little patience, you can tackle even the most challenging marks on your car’s upholstery.
Tackling Grease and Oil Stains
Grease and oil stains, from a dropped french fry to a brush with engine grime, can feel permanent. The key is to act quickly and use agents that can break down fats without damaging your fabric, leather, or vinyl.
- For Fabric: Start by blotting excess oil. Then, apply an absorbent like cornstarch or baking soda to soak up residual grease. Let it sit, then vacuum. A gentle fabric degreaser or a strong dish soap solution can follow.
- For Leather/Vinyl: Use a specialized leather cleaner or a mild dish soap solution. Avoid harsh solvents that can strip the finish or dry out the material.
- Tip: Always test any product on an inconspicuous area first to check for discoloration or damage.
Conquering Ink and Dye Marks
Pen marks, newspaper transfer, or even dye bleeding from clothing can leave frustrating streaks on your car seats. These require targeted solutions and a delicate touch to lift the color without spreading it further.
- For Fabric: Rubbing alcohol or hand sanitizer (containing alcohol) can be surprisingly effective. Apply to a clean cloth, then dab the stain from the outside in to prevent spreading. Hairspray can also work for some ink types.
- For Leather/Vinyl: A professional leather ink remover is often the safest bet. For minor marks, a very small amount of rubbing alcohol on a cotton swab can be tried cautiously, but extreme care is needed to avoid damaging the finish.
- Caution: Never scrub ink stains vigorously, as this can embed the ink deeper into the fibers or spread it.
Preventing Future Stains and Maintaining Upholstery Freshness
The best way to deal with stains is to prevent them from happening in the first place! A little proactive effort goes a long way in keeping your car’s interior looking and smelling like new. Think of it as investing in the longevity and appeal of your ride.
Proactive Protection Strategies
Guard your upholstery against the inevitable spills and daily wear with smart preventative measures. These steps are particularly useful if you frequently transport kids, pets, or food and drinks.
- Seat Covers: Custom-fit or universal seat covers offer an excellent barrier. They are easy to remove and wash, protecting your original upholstery from dirt, spills, and pet hair.
- Upholstery Protectants: For fabric, consider applying a fabric protector spray that repels liquids and makes future cleaning easier. For leather and vinyl, regular conditioning not only keeps the material supple but also helps it resist minor spills and fading.
- Floor Mats: While not upholstery, heavy-duty floor mats catch a lot of the dirt that would otherwise track onto seats.
Routine Care for Lasting Cleanliness
Consistent, simple maintenance keeps your car’s interior fresh between deeper cleans. Small actions performed regularly add up to a significantly cleaner and more inviting space.
- Weekly Vacuuming: A quick vacuum of seats and floorboards removes loose dirt, crumbs, and dust before they can embed or attract moisture. Use a crevice tool for those hard-to-reach spots.
- Immediate Spill Response: Always keep a small kit in your car with a microfiber cloth and a gentle cleaner. Blot spills immediately to prevent them from setting. Speed is your best friend here.
- Wipe-Downs: For leather and vinyl, a simple wipe with a damp cloth (and a mild cleaner if needed) can remove surface grime and oils before they build up.
- Air Fresheners/Odor Eliminators: Beyond masking smells, look for products that neutralize odors for a genuinely fresh interior.
Conclusion
Keeping your car’s upholstery clean is more than just aesthetics; it’s about preserving your vehicle’s value and enhancing your driving experience. Whether you’re tackling tricky stains on fabric, carefully conditioning leather, or wiping down durable vinyl, the right techniques make all the difference. Remember, quick action, the appropriate cleaning agents, and consistent preventive care are your strongest allies.
Ready to refresh your ride? Gather your supplies and pick one area to start with – you’ll be amazed at the transformation. Enjoy a spotless, comfortable, and inviting car interior that feels brand new!
❓ Frequently Asked Questions
What are the main differences in cleaning fabric vs. leather vs. vinyl upholstery?
Fabric typically requires a dedicated fabric cleaner with agitation and extraction, while leather needs gentle pH-neutral cleaners and conditioners to prevent drying and cracking. Vinyl can often be cleaned with mild soap and water or specific vinyl cleaners, as it’s less porous and more durable.
What common household items can I use for minor car upholstery stains?
For minor fabric stains, a diluted solution of white vinegar (1:1 with water) or mild dish soap can be effective. For leather, a very diluted gentle soap solution (like baby shampoo) followed by conditioning may work, but always spot test first.
How do I remove really tough or old stains like oil, ink, or vomit?
For oil, use a degreaser or rubbing alcohol; for ink, hairspray or alcohol can work; for vomit, clean immediately with an enzyme cleaner designed to break down organic matter and eliminate odors. Always blot, never rub, and work from the outside in on the stain.
What tools are essential for a professional-level car upholstery clean?
Essential tools include a powerful wet/dry vacuum, a variety of brushes (stiff for fabric, soft for leather), microfiber towels, spray bottles, and potentially a carpet extractor for deep fabric cleaning. A good quality interior detailing brush is also invaluable for crevices.
How can I eliminate lingering odors, especially from pets or smoke?
After thorough cleaning, use an enzymatic odor eliminator directly on the source of the smell to neutralize it, or place an odor absorber (like activated charcoal or baking soda) in the car. Proper ventilation during and after cleaning is crucial for airing out stubborn odors.
Are there any specific safety precautions I should always take when cleaning car upholstery?
Always work in a well-ventilated area to avoid inhaling chemical fumes, wear gloves to protect your hands from cleaning agents, and always spot test any product on an inconspicuous area first to ensure it doesn’t cause discoloration or damage. Avoid saturating upholstery to prevent mildew growth.