2013 Nissan Rogue Fuse Box Diagram: A Detailed Guide To Your Vehicle’S Electrical System
2013 Nissan Rogue Fuse Box Diagram: A Detailed Guide To Your Vehicle’S Electrical System
Recommended Best Deal Products


📤 Share Image
The intricate electrical network of your 2013 Nissan Rogue is fundamental to its operation, from engine ignition to interior comforts. When an electrical component suddenly ceases function – be it a faulty headlight or a silent radio – the culprit is often a blown fuse, leaving many owners uncertain about the source of the issue or the correct course of action. This authoritative guide provides a detailed, professional examination of the 2013 Nissan Rogue fuse box diagrams, empowering you to accurately locate, interpret, and troubleshoot your vehicle’s electrical system with confidence and precision. Our comprehensive insights will equip you with the knowledge to perform reliable electrical diagnostics.


Section 1: Understanding the Vital Role of Fuses in Your 2013 Nissan Rogue’s Electrical System
Automotive fuses are not merely small, consumable components; they are the unsung heroes of your vehicle’s electrical integrity. Their primary function is to serve as crucial circuit protection devices. Designed with a calibrated metallic strip that melts and breaks the circuit when an electrical current exceeds a predetermined safe limit, fuses effectively prevent damage to sensitive electrical components, wiring harnesses, and control modules from potentially catastrophic overcurrents or short circuits. This protective mechanism ensures the longevity and safe operation of your 2013 Nissan Rogue’s complex electrical architecture.
Recognizing the symptoms of a blown fuse is often the first step in diagnosing an electrical issue. Common indicators include: non-functional accessories such as a silent radio, inoperative power windows, or a disconnected infotainment system. Intermittent power loss to specific systems, or even the complete failure of a component like a headlight or dashboard instrument cluster, frequently point to a fuse that has performed its duty. For instance, a scenario where your radio stops working or a power window refuses to move often indicates a blown fuse in that specific circuit. Conversely, more critical system failures, like an engine not starting, could be linked to a main ignition fuse or the fuel pump fuse, highlighting the distinction between a minor inconvenience and a critical operational failure.
Ignoring these electrical symptoms, or worse, attempting a quick fix with an incorrect fuse type, carries significant ramifications. Utilizing a fuse with a higher amperage rating, for example, bypasses the intended safety mechanism, allowing excessive current to flow. This can lead to irreversible component damage, scorched wiring, or even severe fire hazards. As a seasoned expert, I’ve seen firsthand the costly repairs that result from such oversights. Therefore, understanding the precise location and function of each fuse, backed by reliable, professional information, is paramount for any Rogue owner committed to quality maintenance and safe operation. It’s a fundamental aspect of trusted vehicle care.
By The Numbers
Individual Fuses in a 2013 Rogue
Roadside Assistance Calls for Electrical System Failures

Section 2: Precise Locations of the 2013 Nissan Rogue Fuse Boxes: Engine Compartment and Passenger Cabin
Recommended Best Deal Products


To effectively troubleshoot electrical issues in your 2013 Nissan Rogue, the first critical step is to accurately locate its primary fuse boxes. Nissan, like most reputable automotive manufacturers, strategically distributes fuses across different areas of the vehicle, typically segregating them based on their function and proximity to the power source or components they protect. Your Rogue contains at least two primary fuse boxes: one in the engine compartment and another within the passenger cabin.
Engine Compartment Fuse Box Location
The main fuse box, often referred to as the IPDM E/R (Intelligent Power Distribution Module Engine Room), is situated in the engine compartment. For the 2013 Nissan Rogue, you will typically find it on the driver’s side, near the battery or mounted on the fender wall. It is easily identifiable as a black rectangular box, usually labeled ‘FUSE’, ‘FUSE & RELAY BOX’, or clearly marked with a lightning bolt symbol. To access the fuses within, you’ll need to release the clips or tabs securing its lid. These are commonly found on opposing sides of the cover. Gently press or pull these tabs and lift the cover straight up. Inside, the lid often provides a diagram for easy reference. This location is a standard engineering practice, as it provides direct access to battery power and optimal placement for protecting critical powertrain and safety systems.
Passenger Cabin Fuse Box Location
The secondary fuse box, dedicated primarily to interior accessories and convenience features, is located within the passenger cabin. In the 2013 Nissan Rogue, this fuse box is most commonly found beneath the dashboard on the driver’s side. To locate it, you may need to kneel down and look directly up under the steering column. It is typically hidden behind a small plastic access panel, which can usually be removed by hand or with a flathead screwdriver gently prying it off. In some specific trim levels or regions, it might occasionally be located behind the glove box, though the driver’s side kick panel area is the predominant placement. Removing this panel will expose the array of fuses protecting your interior electronics.
For a complete and exact reference, it is always recommended to consult your vehicle’s owner’s manual. This factory-provided guide offers supplementary visual aids, precise diagrams, and specific instructions pertinent to your exact trim level of the 2013 Nissan Rogue. This professional advice ensures you are working with the most accurate information for your particular vehicle, upholding the highest quality standards for maintenance.
Before attempting any electrical work, even fuse inspection, ensure the vehicle’s ignition is off. For critical circuits or main power fuses, disconnecting the negative battery terminal offers an added layer of safety, preventing accidental shorts or electrical shocks.

Audible — Listen Free for 30 Days
One free credit a month and thousands of titles included.
Listen Free for 30 DaysSection 3: Decoding the 2013 Nissan Rogue Engine Compartment Fuse Box Diagram: Key Circuits Explained
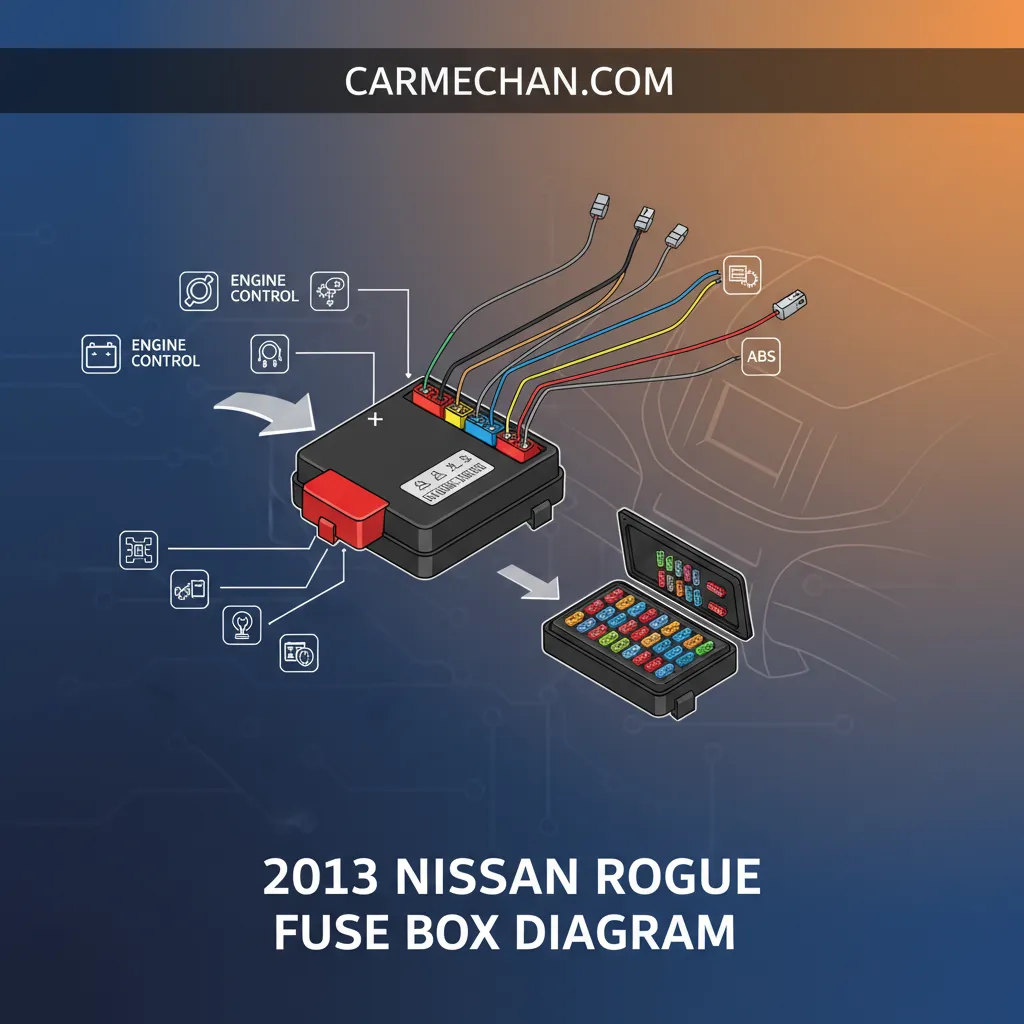
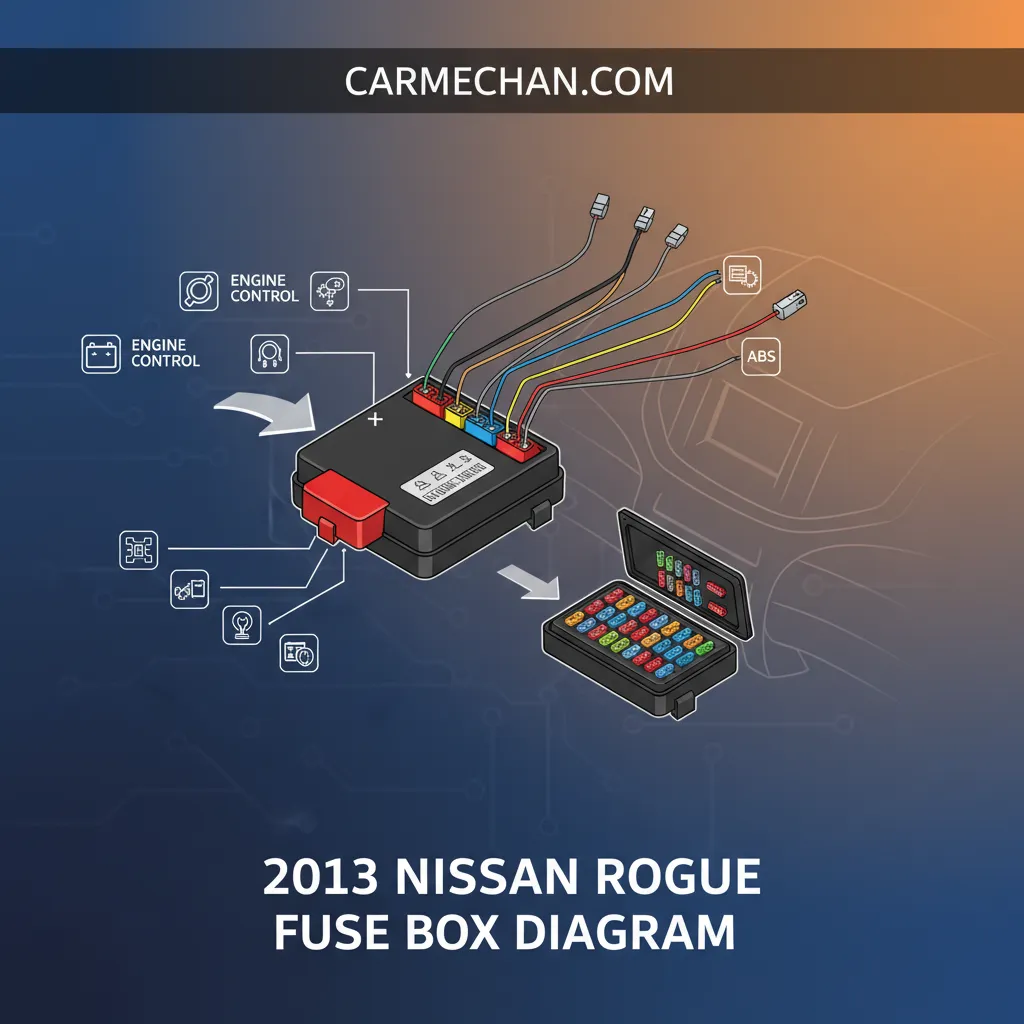
The engine compartment fuse box in your 2013 Nissan Rogue is the nerve center for vital powertrain, safety, and high-current systems. Deciphering its diagram is crucial for advanced diagnostics and ensuring your vehicle’s reliable operation. The diagram, typically located on the underside of the fuse box lid or within your owner’s manual, presents a matrix of fuses and relays, each with a specific symbol or abbreviation. Nissan employs standard automotive symbols for components like headlights, wipers, and horns, alongside text abbreviations such as “ECM” for Engine Control Module, “ABS” for Anti-lock Braking System, or “FAN” for cooling fans. Learning to match these symbols and abbreviations to the physical fuses and relays is a foundational skill for any owner or professional technician.
This main fuse block typically houses higher amperage fuses, ranging from 30A to 60A, and even up to 100A or higher for the main ‘BATT’ fuse, which protects the entire electrical system from a major short circuit. Key high-priority circuits found here include:
- Engine Control Unit (ECU/ECM): Critical for engine management, fuel injection, ignition timing, and emission control. A blown ECU fuse (e.g., 15A or 20A) can prevent the engine from starting or cause severe performance issues.
- Fuel Pump: Supplies fuel to the engine. If the fuel pump fuse (e.g., 15A or 20A) blows, the engine will not start or will stall immediately.
- Anti-lock Braking System (ABS): Essential for vehicle safety, this system prevents wheel lock-up during hard braking. Look for fuses labeled ‘ABS PUMP’ (e.g., 30A) or ‘ABS SOL’ (e.g., 10A) if you encounter an ABS warning light or braking issues.
- Cooling Fans: Maintain optimal engine temperature. A faulty cooling fan fuse (e.g., 20A or 30A) can lead to engine overheating.
- Ignition System: Powers the spark plugs and other components vital for engine combustion. A blown ‘IGNITION’ (e.g., 15A) fuse will typically result in a no-start condition.
- Main Power Distribution: Larger fuses (e.g., ‘MAIN’ or ‘BATTERY’) protecting entire branches of the electrical system.
When encountering operational failures, a systematic inspection of these critical fuses is imperative. For instance, if the vehicle fails to start, your first checks should include the ‘IGNITION’ (typically 15A) or ‘FUEL PUMP’ (typically 20A) fuses. An illuminated ABS warning light on your dashboard may necessitate checking the ‘ABS PUMP’ (e.g., 30A) or ‘ABS SOL’ (e.g., 10A) fuses. This expert approach to diagnosis saves time and prevents unnecessary component replacement, providing a comprehensive understanding of your 2013 Rogue’s electrical health.
Section 4: Navigating the 2013 Nissan Rogue Passenger Cabin Fuse Box Diagram: Interior and Accessory Circuits
Recommended Best Deal Products
![[2026 Upgrade] Windshield Sun Shade Umbrella for Mazda CX-5/Nissan Rogue 2008-2026 Windshield…](https://m.media-amazon.com/images/I/41ncmmsNUxL._SS500_.jpg)

While the engine bay fuses govern the core operational aspects of your 2013 Nissan Rogue, the passenger cabin fuse box is dedicated to the comfort, convenience, and informational systems that enhance your driving experience. Understanding this diagram is key to resolving those common, albeit frustrating, issues with interior electronics and accessories. The cabin fuse box diagram, often more compact and densely packed, lists fuses for various interior functions, from lighting to entertainment. Its layout might require closer examination to interpret the symbols and abbreviations correctly.
Common Interior Accessory Circuits
The passenger cabin fuse box houses fuses typically ranging from 5A to 20A, protecting a wide array of systems. Here’s a breakdown of common circuits you’ll encounter and their corresponding fuses:
- Radio/Infotainment System: If your sound system suddenly goes silent, check the ‘AUDIO’ or ‘RADIO’ fuse (typically 10A or 15A). Some systems may have multiple fuses for different functions.
- Power Windows: Issues with a window not responding often point to a dedicated ‘PW WINDOW’ fuse (e.g., 20A). Each window might have its own fuse or share one for a pair.
- Heated Seats: If your heated seats aren’t warming up, look for a ‘SEAT HEATER’ fuse (e.g., 15A or 20A).
- Interior Lighting: Malfunctioning dome lights, map lights, or footwell lighting could be related to an ‘INTERIOR LAMP’ or ‘DOME’ fuse (typically 10A).
- Power Outlets (12V/Cigarette Lighter): A non-functional 12V power outlet is a common complaint. Consult the diagram for the ‘ACC SOCKET’ or ‘CIGAR’ fuse (typically 15A).
- HVAC System Components: Fuses for blower motors, AC compressors (relay controlled), and climate control modules can also be found here (e.g., ‘BLOWER’ or ‘A/C’ fuses, 10A-30A).
Troubleshooting specific interior electrical malfunctions follows a logical path. If your 12V power outlet isn’t supplying power, your immediate check should be the fuse labeled ‘ACC SOCKET’ or ‘CIGAR’. Should your radio suddenly stop working, the ‘AUDIO’ or ‘RADIO’ fuse is the primary suspect. Similarly, a power window issue will typically lead you to check the ‘PW WINDOW’ fuses. Statistical relevance shows that problems with interior accessories like power windows or infotainment systems are among the most frequently reported electrical issues by vehicle owners, often directly traced back to a blown cabin fuse. Nissan’s design consistently dedicates multiple circuits and corresponding fuses to ensure the reliable operation of passenger comfort and convenience systems. This guide provides the complete, professional insight needed for quality electrical maintenance.
Section 5: Procedure for Inspecting and Safely Replacing Fuses in Your 2013 Nissan Rogue
Effectively diagnosing and replacing a blown fuse is a straightforward maintenance task that any 2013 Nissan Rogue owner can perform with confidence, provided they follow proper procedures. This not only restores functionality but also prevents potential damage. Our comprehensive guide ensures you have the trusted knowledge for this simple, yet critical, repair.
📋
Step-by-Step Guide: Fuse Inspection and Replacement
Before touching any electrical components, always ensure the vehicle’s ignition is completely off. For higher amperage fuses or main power distribution boxes, consider disconnecting the negative battery terminal to eliminate any residual power and prevent accidental short circuits. Wear appropriate protective gear, such as insulated gloves and safety glasses, particularly when working in the engine compartment.
Audible Premium Plus — Annual Membership
12 audiobook credits up front, plus the full Audible catalogue.
See Annual PlansOnce the appropriate fuse box is accessed (engine compartment or cabin), consult its diagram to identify the specific fuse for the non-operational component. A blown fuse often shows a visibly broken or charred filament inside. For a more precise diagnosis, particularly with opaque fuses, use a fuse tester or a multimeter set to continuity mode. Touch the probes to the test points on top of the fuse; a lack of continuity confirms it’s blown.
Most fuse boxes come equipped with a small plastic fuse puller, often clipped to the inside of the lid. If not, small needle-nose pliers can be used carefully. Grip the blown fuse firmly with the puller and gently pull it straight out. Avoid twisting or excessive force, as this could damage the fuse terminals or the fuse box itself. Keep the old fuse for comparison.
This is the most critical step: always replace a blown fuse with one of the exact specified amperage and type. Fuses are color-coded and marked with their amperage (e.g., a red 10-amp mini fuse must only be replaced with another red 10-amp mini fuse). Types include mini, ATO (blade), MAXI, and sometimes cartridge fuses. Using a higher amperage fuse, such as a blue 15-amp fuse in a 10-amp slot, could lead to severe wiring damage or even vehicle fire. Insert the new fuse firmly into the empty slot until it is fully seated. Reconnect the battery if it was disconnected, and test the circuit.
Improper fuse replacement, especially substituting a fuse with a higher amperage rating, bypasses the intended circuit protection and is a leading cause of vehicle electrical fires. The National Fire Protection Association (NFPA) explicitly cites vehicle electrical system failures, often due to incorrect repairs, as a significant cause of vehicular fires. Always use the specified fuse to maintain the vehicle’s inherent safety design.
By following this professional, step-by-step procedure, you can confidently and safely perform basic electrical maintenance on your 2013 Nissan Rogue. This expert guide equips you with the practical insights to handle a common vehicle issue, promoting reliability and longevity.
This comprehensive guide has equipped you with the expert knowledge to navigate the intricacies of your 2013 Nissan Rogue’s electrical system. You can now precisely locate and understand the function of both engine compartment and passenger cabin fuse boxes, accurately interpret fuse box diagrams to identify specific circuits and their associated components, and confidently diagnose and safely replace blown fuses, ensuring correct amperage and type are used. For optimal performance and safety, regularly consult your owner’s manual for specific vehicle configurations and consider professional assistance for complex or persistent electrical issues. Investing in this quality, reliable information ensures your Rogue continues to deliver a trusted driving experience.
Frequently Asked Questions
What should I do if a newly replaced fuse blows immediately in my 2013 Nissan Rogue?
If a new fuse blows instantly, it indicates a persistent short circuit or an excessive current draw within that specific electrical circuit. This is a serious issue that typically cannot be resolved by simply replacing the fuse again. It necessitates professional diagnosis to identify and repair the underlying wiring fault or component failure. Continued fuse replacement without addressing the root cause risks severe electrical damage.
Can I use a higher amperage fuse temporarily in my 2013 Rogue if I don’t have the correct one?
Absolutely not. Using a higher amperage fuse bypasses the intended safety mechanism and can lead to severe consequences, including overheating wires, melting insulation, or even an electrical fire. Always replace a blown fuse with one of the exact specified amperage and type. This is a critical safety protocol to protect your vehicle’s complex electrical systems and prevent catastrophic damage.
Where can I obtain a replacement fuse box diagram for my 2013 Nissan Rogue?
The most reliable source for a replacement fuse box diagram is your vehicle’s owner’s manual. If you no longer possess it, digital versions are often available on the official Nissan owner’s website. Alternatively, consult a certified Nissan dealership’s service department; they can provide accurate diagrams or access to service manuals pertinent to your specific vehicle identification number (VIN).
How can I tell if a fuse is blown without a specialized tester?
Visually, a blown fuse typically has a visibly broken or melted filament wire inside the transparent casing. For opaque or less obvious fuses, a simple continuity test can be performed with a multimeter set to resistance (ohms) or continuity mode. A good fuse will show continuity (a beep or near-zero resistance), while a blown fuse will show an open circuit (no beep or infinite resistance).
What are the common symptoms of a blown fuse in a 2013 Nissan Rogue?
Common symptoms include the complete failure of a specific electrical component or system. Examples range from a non-functional radio, no power to the cigarette lighter/USB ports, inoperative power windows, dim interior lights, or even a vehicle that won’t start if a critical fuse like the fuel pump or ignition circuit fuse is compromised. Pinpointing the failed component helps narrow down which fuse to check.