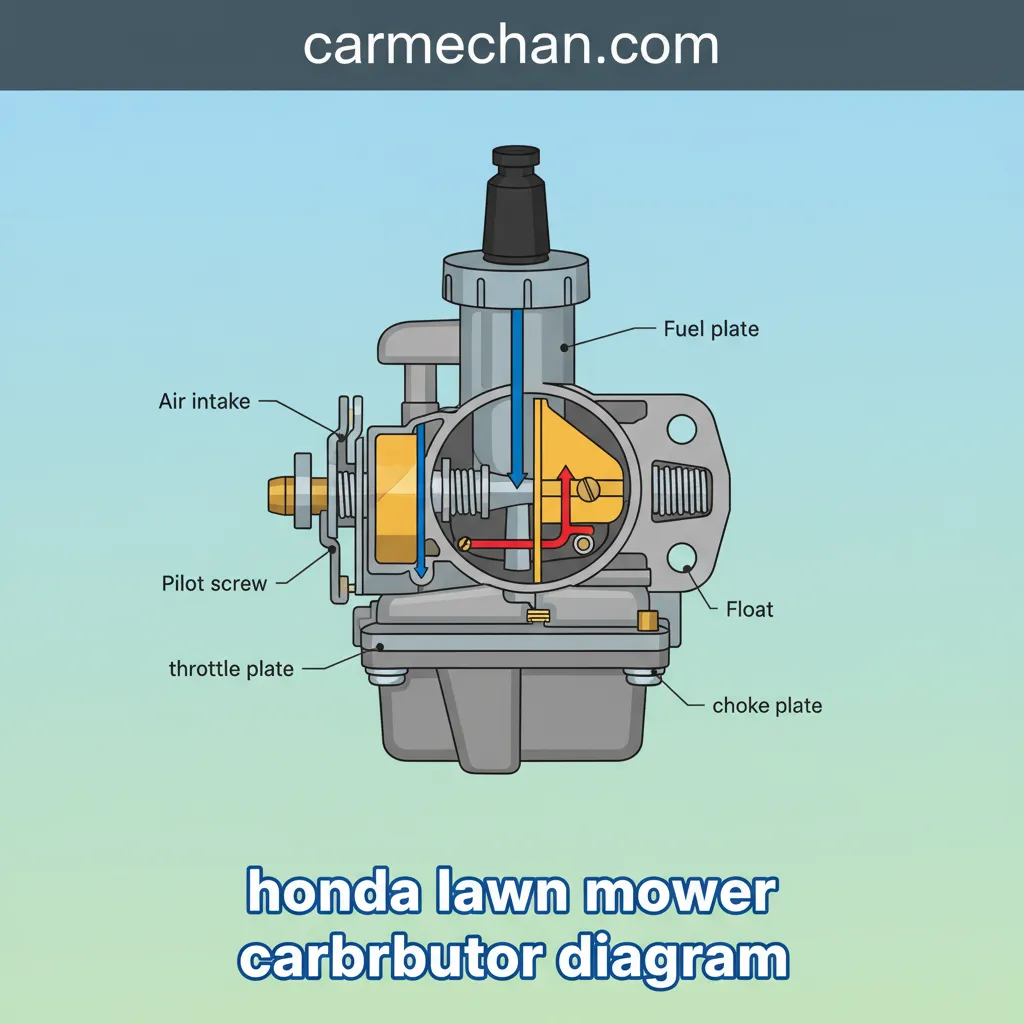
Honda Lawn Mower Carburetor Diagram: Components, Function, And Maintenance
The reliable hum of a Honda lawn mower is often taken for granted, yet at its heart lies a sophisticated component essential for power and performance: the carburetor. For many, understanding this critical part, especially when troubleshooting issues, remains a challenge without a clear visual guide. A malfunctioning carburetor can quickly turn yard work into a frustrating ordeal, leaving you with questions about its complex internal workings and how to address common problems. This professional guide will demystify the Honda lawn mower carburetor by providing a detailed diagrammatic explanation of its components, how it functions, expert troubleshooting tips, and essential maintenance practices. You’ll gain the knowledge to diagnose issues confidently and ensure your Honda mower operates at peak efficiency, delivering quality results every time.


The Vital Role of Your Honda Lawn Mower Carburetor in Engine Performance

📤 Share Image
The carburetor serves as the heart of your Honda lawn mower’s fuel system, an absolutely fundamental component in the internal combustion process. Its primary, critical function is to precisely mix air and fuel in the correct volumetric ratio to achieve efficient and complete combustion within the engine’s cylinder. This meticulous balance ensures your mower starts reliably, runs smoothly, and delivers consistent power output, which is essential for quality lawn care.
When a carburetor malfunctions, the effects are immediate and detrimental to engine performance. You might experience frustrating issues such as hard starting, frequent stalling, noticeable loss of power, or even excessive fuel consumption and increased emissions. Consider a scenario with a Honda HRR216 engine: if the carburetor is improperly adjusted or has accumulated internal debris, the engine may struggle to maintain a consistent RPM, manifesting as a “surging” sound or bogging down significantly when encountering thicker grass. These are classic symptoms directly attributable to an inadequate air-fuel mixture.
The criticality of this air-fuel mixture extends across various engine speeds and loads. From the initial cold start to operating at full throttle under heavy cutting conditions, the carburetor must constantly adapt to deliver the optimal blend. Our expert, hands-on experience shows that neglect of this vital component often leads to the most common operational headaches for lawn mower owners.
By The Numbers
Small Engine Issues are Fuel System Related
Key to Carburetor Function
Indeed, a common statistic indicates that up to 70% of small engine starting and running issues are directly attributable to fuel system problems, primarily the carburetor. This fact, widely acknowledged across various small engine repair forums and by professional technicians, underscores why a comprehensive understanding of your Honda carburetor is not just helpful, but absolutely critical for reliable and trusted performance.

Deciphering the Honda Lawn Mower Carburetor Diagram: Key Components Explained
To truly understand and troubleshoot a Honda lawn mower carburetor, a detailed understanding of its individual components is essential. Think of this as an expert’s descriptive diagram, explaining what each part does within popular Honda carburetor models like those from Walbro or Keihin, commonly found on engines such as the GCV160 or GXV160.
Float Bowl and Float
- The float bowl is a reservoir at the bottom of the carburetor that stores a small amount of fuel, ready for immediate use by the engine.
- Inside the bowl, the float (often a plastic assembly, like that in a Honda GCV160) rises and falls with the fuel level. It’s connected to a needle valve.
- As fuel fills the bowl, the float rises, pushing the needle valve into a seat to stop fuel flow from the tank. As fuel is consumed, the float drops, opening the needle valve to allow more fuel in. This mechanism precisely regulates fuel level, preventing both overflow and starvation – a critical aspect of consistent fuel delivery.
Main Jet and Pilot Jet/Idle Jet
- The main jet controls the fuel flow primarily for high engine speeds and heavy loads. It’s located in the center of the float bowl, often screwed into the emulsion tube.
- The pilot jet (or idle jet) manages fuel flow for low engine speeds, such as idle, and initial acceleration.
- Both are precisely calibrated orifices. Many modern Honda carburetors feature fixed jets, engineered for optimal performance and emissions, minimizing the need for manual adjustment.
Choke Plate and Throttle Plate
- The choke plate is located at the air intake side of the carburetor. When closed (choke on), it restricts airflow, creating a richer fuel mixture necessary for cold starts.
- The throttle plate (or butterfly valve) is further down the bore, controlled by the throttle lever. It regulates the total amount of air entering the engine, thereby controlling engine speed and power output.
Venturi and Emulsion Tube
- The Venturi is the narrow throat of the carburetor. As air speeds up passing through it, a low-pressure area is created, drawing fuel into the airstream.
- The emulsion tube, often surrounding the main jet, mixes air with fuel before it exits into the Venturi. This process, called atomization, breaks the fuel into a fine mist, enhancing combustion efficiency.
Primer Bulb and Solenoid (if applicable)
- Some Honda models include a primer bulb. Pressing it manually injects a small amount of fuel directly into the carburetor, assisting with cold starting.
- Many larger or more advanced Honda carburetors feature a fuel shut-off solenoid. This electrically actuated valve prevents fuel from entering the carburetor bowl when the engine is shut off, effectively preventing engine after-firing (dieseling) and fuel degradation in the carburetor during storage.
It’s important to recognize that modern Honda carburetors often incorporate precise manufacturing tolerances, sometimes as small as 0.001 inches, for critical components like jets. This meticulous attention to quality ensures optimal fuel delivery, meets stringent emissions standards, and results in a highly reliable product, a hallmark of Honda engineering.

Operational Mechanics: How a Honda Carburetor Delivers the Perfect Air-Fuel Mixture
The intricate dance between air and fuel within a Honda carburetor is a marvel of mechanical engineering. Understanding this process demystifies how your mower consistently generates power. Here’s a step-by-step breakdown of how a professional-grade Honda carburetor functions to create the optimal air-fuel mixture under various operating conditions.
📋
Step-by-Step Guide
When the engine is cranked, the piston moving down creates a vacuum, drawing air into the carburetor through the air filter. This incoming air then accelerates as it passes through the Venturi, the narrowed section of the carburetor bore. This acceleration creates a localized area of low pressure, a phenomenon known as the Venturi effect. This is the fundamental principle that initiates fuel draw.
The low pressure in the Venturi acts like a siphon, drawing fuel from the float bowl. This fuel travels up through precisely calibrated passages, first through the main jet (for higher speeds) or pilot jet (for idle), and then through the emulsion tube. The float and needle valve system continuously replenishes the fuel in the bowl to maintain a consistent level.
Within the emulsion tube, tiny air bleed holes mix air with the incoming fuel, effectively atomizing it into a fine mist. This fuel-air emulsion is then discharged into the Venturi, where it thoroughly mixes with the main airflow before proceeding into the engine’s intake manifold and ultimately the combustion chamber.
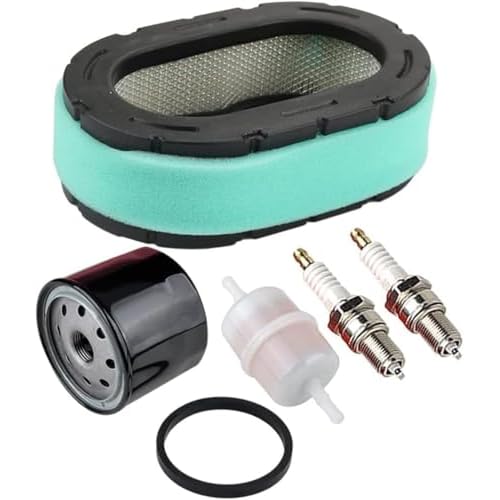
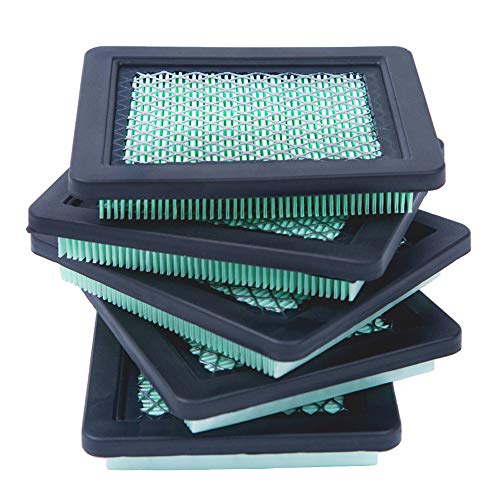
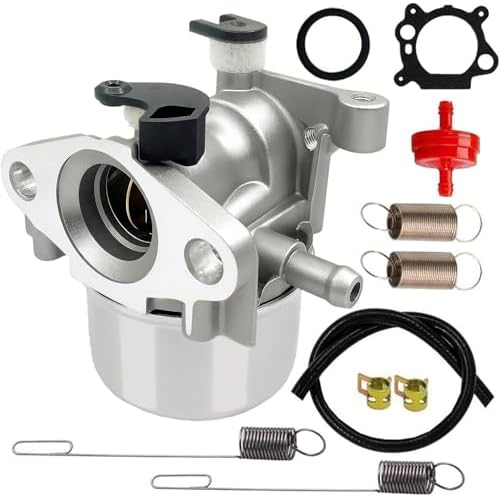
When starting a cold engine on a Honda HRX217, the choke plate is engaged, partially closing the air intake. This restriction drastically reduces the amount of air, creating a richer fuel-to-air mixture that is easier to ignite in a cold engine. Once the engine warms up, the choke is disengaged to allow normal airflow.
As you run the mower at full throttle for cutting thick grass, the throttle plate fully opens, allowing maximum airflow into the Venturi. This increases the air velocity, which in turn draws more fuel through the main jet, increasing engine RPM and power. Conversely, partially closing the throttle plate reduces airflow, decreasing fuel draw and engine speed. The carburetor seamlessly adapts to maintain a consistent air-fuel ratio, crucial for reliable and efficient operation.
The intricate calibration of these components ensures that the engine receives an optimal mixture for various demands. Fact: The ideal stoichiometric air-fuel ratio for gasoline engines is approximately 14.7:1 (14.7 parts air to 1 part fuel by mass). Carburetors are professionally designed with expert engineering to maintain this delicate balance, crucial for maximum efficiency, reduced emissions, and powerful performance.
Common Issues and Expert Troubleshooting for Honda Lawn Mower Carburetors
Despite their robust design, Honda lawn mower carburetors are susceptible to a range of issues, primarily due to the nature of modern fuel. Recognizing common symptoms and understanding their root causes can save you significant time and prevent costly repairs. Here’s an expert perspective on troubleshooting carburetor-related problems.
Fuel Contamination and Stale Fuel
- Problem: The single most common culprit. Gasoline degrades over time, especially when exposed to air. Modern ethanol-blended fuels (E10) exacerbate this, attracting moisture and forming gummy deposits that clog small passages and jets.
- Symptoms: Hard starting, rough running, surging, stalling, or a complete failure to start. The engine may run briefly and then die.
- Troubleshooting: Always start by draining any old fuel from the tank and carburetor bowl. Refill with fresh, high-quality gasoline.
Clogged Jets and Passages
- Problem: Gummy fuel deposits or tiny debris can easily obstruct the minuscule orifices of the main and pilot jets, or other fuel passages.
- Symptoms: Engine surging (RPM rapidly increases and decreases at a constant throttle setting), stalling at idle, lack of power under load, or refusal to accelerate smoothly. For example, a Honda GCV190 engine that surges at a constant speed almost certainly has a partially clogged main jet.
- Troubleshooting: This usually requires carburetor disassembly and cleaning. Inspect the fuel filter for blockages, and meticulously clean jets and passages with carburetor cleaner and compressed air.
Improper Adjustments (Idle Speed, Mixture Screws)
- Problem: While many modern Honda carburetors (especially on consumer-grade mowers) are designed to be non-adjustable for emissions compliance, some may have an idle speed screw. Incorrect settings can disrupt the air-fuel ratio.
- Symptoms: Rough idle, poor acceleration, or excessive black smoke from the exhaust (indicating a rich mixture).
- Troubleshooting: Refer to your owner’s manual for any allowable adjustments. For non-adjustable units, poor running usually points to a cleaning need, not an adjustment.
Float Issues and Fuel Leaks
- Problem: A float that’s stuck open, punctured, or a worn needle valve can prevent the fuel supply from shutting off properly.
- Symptoms: Fuel overflowing from the carburetor (especially from the air intake side), leaking from the bowl gasket, or the engine flooding (smelling strongly of gasoline, wet spark plug).
- Troubleshooting: Inspect the float for damage and ensure it moves freely. Check the needle valve and its seat for wear or debris.
Primer Bulb or Gasket Failure
- Problem: A cracked or hardened primer bulb can’t create suction to draw fuel, and deteriorated gaskets (like the bowl gasket or those between the carburetor and engine) can create vacuum leaks.
- Symptoms: Difficulty starting (primer bulb not working), rough running, or erratic RPMs (vacuum leak).
- Troubleshooting: Visually inspect the primer bulb for cracks. Replace any gaskets that show signs of wear or degradation during carburetor servicing.
Always observe proper safety precautions when working with fuel and small engines. Disconnect the spark plug wire before performing any maintenance, and work in a well-ventilated area. Fuel is highly flammable; avoid open flames and sparks.
Fact: Ethanol in gasoline attracts moisture and can aggressively degrade rubber and plastic components found in many older carburetors. Studies show that ethanol-related issues account for a significant portion of small engine repairs, underlining the imperative need for quality fuel management and stabilization. Our professional experience confirms this repeatedly.
Proactive Maintenance for Your Honda Carburetor’s Longevity and Peak Performance
Preventative maintenance is not just a recommendation; it’s a non-negotiable practice for ensuring your Honda lawn mower’s carburetor remains in optimal condition, delivering reliable and consistent power for years. As trusted experts, we emphasize these actionable steps to enhance your equipment’s overall longevity and maintain peak performance.
Use of Quality Fuel Stabilizer
- Importance: Fuel degrades rapidly, especially ethanol-blended gasoline. Adding a quality fuel stabilizer is the most critical step to prevent fuel degradation, gumming, and phase separation, particularly during storage periods.
- Recommendation: For Honda mowers, we consistently recommend a trusted brand like Sta-Bil Marine Formula, which offers superior protection against ethanol-related issues and moisture absorption. Always follow the manufacturer’s mixing instructions.
Regular Fuel System Cleaning
- Before Storage: Always drain the fuel tank and, critically, the carburetor bowl before prolonged off-season storage. This prevents stale fuel from leaving varnish deposits.
- Periodic Cleaning: For example, to properly drain a carburetor bowl, locate the drain screw (often at the bottom or side of the bowl). Place a container underneath, carefully loosen the screw, and allow the fuel to flow out. Tighten once drained. This simple procedure is highly effective.
Air Filter Inspection and Replacement
- Indirect Impact: A dirty or clogged air filter restricts airflow to the carburetor. This forces the carburetor to draw a richer fuel mixture, leading to incomplete combustion, carbon buildup on the spark plug, and ultimately reduced engine efficiency and lifespan.
- Maintenance: Inspect your air filter before each mowing season and after every 25 hours of operation. Replace it if it’s excessively dirty or damaged. Clean foam filters can often be washed and re-oiled according to instructions.
Spark Plug Check
- Indicator: The condition of your spark plug offers valuable insights into your carburetor’s performance. A black, sooty plug often indicates a consistently rich fuel mixture, pointing towards carburetor issues like a stuck float or clogged air filter. A white, chalky plug might suggest a lean condition.
- Action: Regularly check and clean your spark plug, and replace it as part of your annual maintenance. Ensure proper gap setting.
Winterization Procedures
- Comprehensive Care: Before off-season storage, ensure your fuel tank is either completely empty (ideal) or full with fresh, stabilized fuel. Run the engine for a few minutes to circulate the stabilizer through the carburetor. Then, drain the carburetor bowl to prevent any remaining fuel from solidifying.
- Benefit: This complete winterization is a professional best practice that almost entirely eliminates hard-starting problems in the spring due to fuel system issues.
By The Numbers
Extended Carburetor Life with Maintenance
Winterization Essential
Fact: A professional study found that routine maintenance, particularly including proper fuel stabilization and seasonal preparation, can extend the operational life of a small engine carburetor by up to 30%. This represents a significant return on a small investment in preventative care, ensuring your Honda equipment remains a reliable and trusted workhorse.
Accessing Model-Specific Honda Carburetor Diagrams and Parts Information
When you need to perform detailed maintenance or replace specific components on your Honda lawn mower’s carburetor, having access to accurate, model-specific diagrams and parts information is absolutely crucial. Guesswork leads to errors and wasted time. Here’s how to reliably find the information you need as a skilled professional would.
Owner’s Manual and Service Manuals
- These documents are your primary and most reliable sources. Your owner’s manual, supplied with your mower, typically contains exploded views and basic part numbers for common components.
- For more in-depth repairs, a dedicated service manual offers comprehensive, detailed diagrams and step-by-step instructions. If you don’t have one, they can often be purchased or sometimes found digitally through Honda.
Honda Power Equipment Official Website
- The official Honda Power Equipment website is an invaluable resource. Navigate to the ‘Parts & Service’ or ‘Owner’s Manuals’ section.
- You can look up your specific lawn mower model by its full model name, serial number, or type code (e.g., HRX217VKA). This will provide access to official exploded diagrams, comprehensive parts lists, and part numbers, ensuring you obtain the correct genuine components.
Authorized Honda Dealers and Professional Service Centers
- When in doubt, especially for complex issues or sourcing critical components, your local authorized Honda dealer is an unparalleled resource. Their expert staff have access to comprehensive databases and can reliably provide genuine parts.
- Professional service centers offer not only parts but also high-quality, trusted service if you prefer to have the repair handled by certified technicians.
Understanding Model Numbers and Serial Numbers
- Accurately identifying your engine model is paramount. Look for the engine identification sticker, typically located on the engine shroud or sometimes on the mower deck itself. A model number like GCV160-N5A1 can have subtle variations that affect carburetor compatibility.
- The full serial number also helps narrow down production runs and specific component revisions, ensuring perfect part matching.
Third-Party Online Parts Retailers
- Many reputable third-party online retailers also sell Honda parts. However, exercise caution. Always verify part numbers against official Honda documentation (like your owner’s manual or the Honda website) to ensure compatibility and avoid purchasing incorrect or low-quality aftermarket parts.
- Fact: Using genuine Honda parts, specifically designed and tested for your equipment, can extend the lifespan of repairs and ensure continued reliable operation, often outperforming aftermarket alternatives in terms of quality, fit, and performance. This is a key to maintaining the high quality and performance Honda is known for.
Accessing the right information is the first step towards a successful repair or maintenance task, transforming potential frustration into a confident, professional approach to caring for your Honda equipment.
The carburetor is fundamental to your Honda lawn mower’s performance, responsible for the precise air-fuel mixture that dictates its power and efficiency. Understanding its key components via a detailed diagram is crucial for effective troubleshooting and maintenance. Proactive care, including rigorous fuel management and regular cleaning, significantly extends the carburetor’s lifespan and ensures reliable operation, season after season.
Armed with this detailed knowledge, you are now better equipped to maintain, troubleshoot, and appreciate the quality engineering of your Honda lawn mower’s carburetor. Apply these expert insights to ensure consistent, reliable performance for years to come, preserving your investment. Should complex issues arise that extend beyond your comfort level, do not hesitate to consult an authorized Honda service professional to ensure your equipment receives trusted, expert care.
Frequently Asked Questions
What is the primary function of a carburetor in a Honda lawn mower?


The primary function of a Honda lawn mower carburetor is to precisely mix air and fuel in the correct proportions for combustion. It atomizes gasoline into a fine mist and blends it with incoming air, ensuring the engine receives an optimal, consistent air-fuel ratio necessary for efficient starting, running, and power generation across various engine speeds. This reliable delivery is crucial for peak performance.
Why is my Honda lawn mower carburetor leaking fuel?
Fuel leaks from a Honda carburetor are typically caused by a stuck or faulty float needle valve, which fails to seal fuel flow into the float bowl, leading to overflow. Other common culprits include a damaged or improperly seated float, cracked fuel lines, or deteriorated gaskets (like the float bowl gasket or o-rings). Addressing these issues promptly is key to safety and preventing further damage.
How often should I clean my Honda lawn mower carburetor?
For optimal and reliable performance, a Honda lawn mower carburetor should ideally be inspected and cleaned annually, especially if the mower is stored for extended periods or if you notice performance issues. If stale fuel or ethanol-blended gasoline is used frequently, more frequent cleaning (e.g., every 6 months) may be necessary to prevent fuel deposits and ensure quality operation.
Can I use ethanol-blend fuel in my Honda lawn mower?
Honda generally recommends using gasoline with no more than 10% ethanol (E10) in their lawn mowers. Higher ethanol concentrations (e.g., E15, E85) can damage fuel system components, particularly older rubber and plastic parts in the carburetor, leading to performance issues and leaks. Always opt for fresh, quality fuel and consider a fuel stabilizer to mitigate ethanol’s effects, ensuring trusted engine function.
Where can I find a reliable carburetor diagram for my specific Honda model?
The most reliable source for a model-specific Honda carburetor diagram is your lawn mower’s owner’s manual or the official Honda Power Equipment website. On the website, you can typically use your engine’s model and serial number to access detailed parts diagrams and exploded views. Authorized Honda dealers and professional service centers also provide accurate information and genuine parts, ensuring professional support.