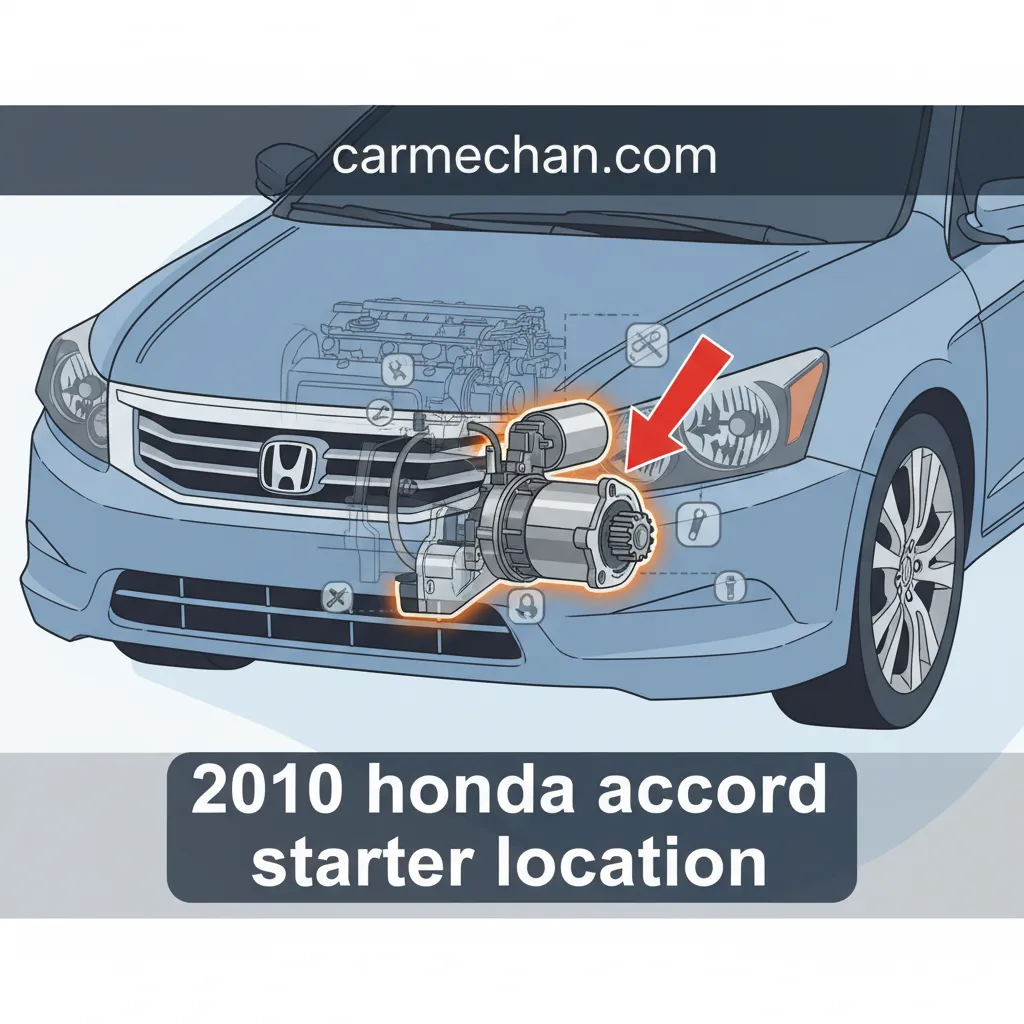
2010 Honda Accord Starter Location: Identification And Access Procedures
Few automotive issues are as immediately debilitating as a failed starter motor, rendering your 2010 Honda Accord immobile. For many 2010 Honda Accord owners, identifying the precise location of the starter motor can be a significant challenge, often obscured within a crowded engine bay, complicating initial diagnosis and subsequent repair efforts for the DIY mechanic or when seeking nearby service. This authoritative guide will provide a detailed, model-specific breakdown of the 2010 Honda Accord starter location, accompanied by comprehensive instructions for safe and effective access, empowering both DIY enthusiasts and those seeking informed professional service available in their community.
Understanding the 2010 Honda Accord Starter: Function and Criticality


📤 Share Image
The starter motor is a critical electromechanical component responsible for initiating the combustion process in your 2010 Honda Accord’s engine. When you turn the ignition key or press the start button, the starter motor engages a small gear (the pinion gear) with the engine’s flywheel. Powered by the vehicle’s 12-volt battery, this motor rapidly spins the flywheel, which in turn rotates the crankshaft. This rotation allows the engine to draw in air, compress it, and ignite the fuel-air mixture, ultimately starting the engine. Whether your Accord is equipped with the robust K24Z2/K24Z3 4-cylinder engine or the potent J35Z2/J35Z3 V6, this fundamental function remains the same, making the starter indispensable for vehicle operation.
Recognizing the symptoms of a failing starter is the first step in effective troubleshooting. Common indicators include a single click but no crank, meaning you hear a solenoid engagement but the engine does not turn over. Other signs might be a slow crank, where the engine struggles to turn over as if the battery is weak, or a grinding noise during a start attempt, suggesting an issue with the pinion gear’s engagement with the flywheel. Intermittent operation, where the car starts sometimes but not others, is particularly frustrating and often points directly to a failing starter. Imagine an Accord owner experiencing a ‘click-no-start’ condition after routine errands in their community; the immediate need to investigate the starter’s location and functionality becomes paramount.
While the 2010 Honda Accord offers different powertrain configurations, the starter’s general location relative to the transmission bell housing remains consistent. However, the specific engine (4-cylinder vs. V6) can subtly influence the accessibility of surrounding components, affecting the ease of removal and reinstallation. It’s an important distinction that experienced technicians always consider. Starter motors typically have a service life of 8-10 years or 100,000-150,000 miles. Given that most 2010 Accords are now well within or past this timeframe, they are squarely within a high-probability window for starter failure. For those seeking authentic replacement parts, Honda OEM part numbers, such as 31200-R40-A01 for I4 models, can serve as a crucial reference for authenticity checks and proper fitment.

Precise Starter Location: 2010 Honda Accord 4-Cylinder and V6 Models

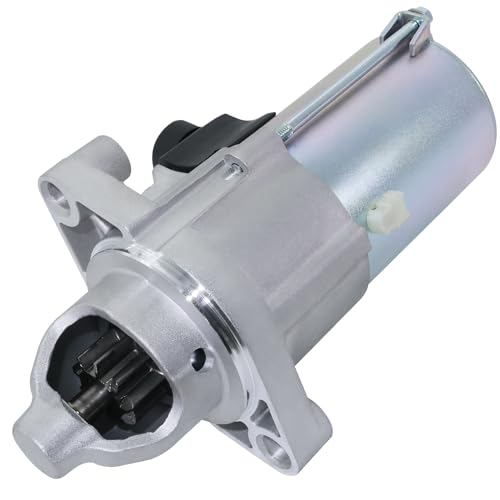
Accurately identifying the starter motor’s location is the cornerstone of any diagnostic or repair effort. While its primary function is universal, its physical placement within the engine bay of a 2010 Honda Accord varies slightly between the 4-cylinder and V6 configurations, impacting accessibility.
4-Cylinder (K24Z2/K24Z3) Models
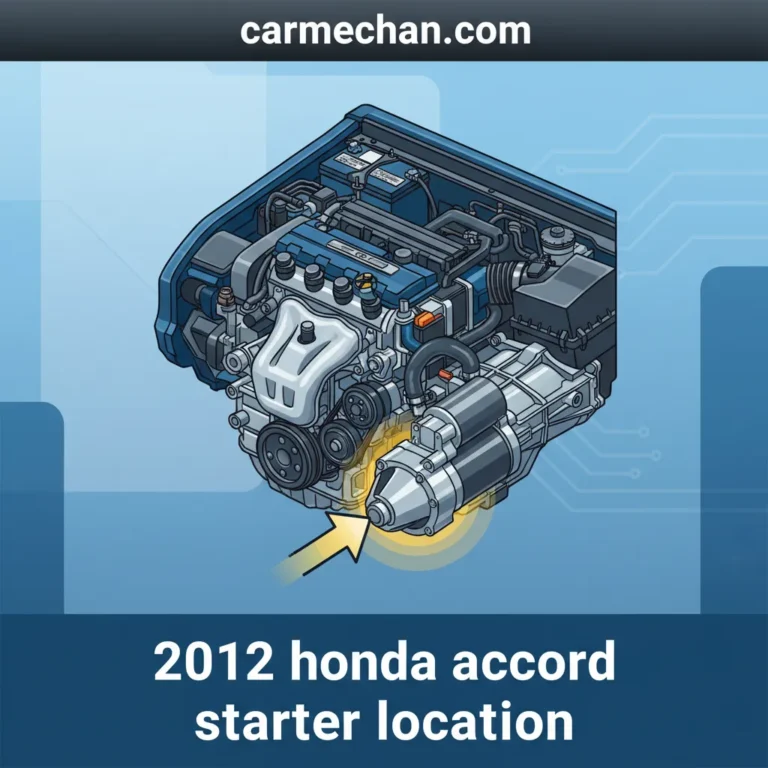
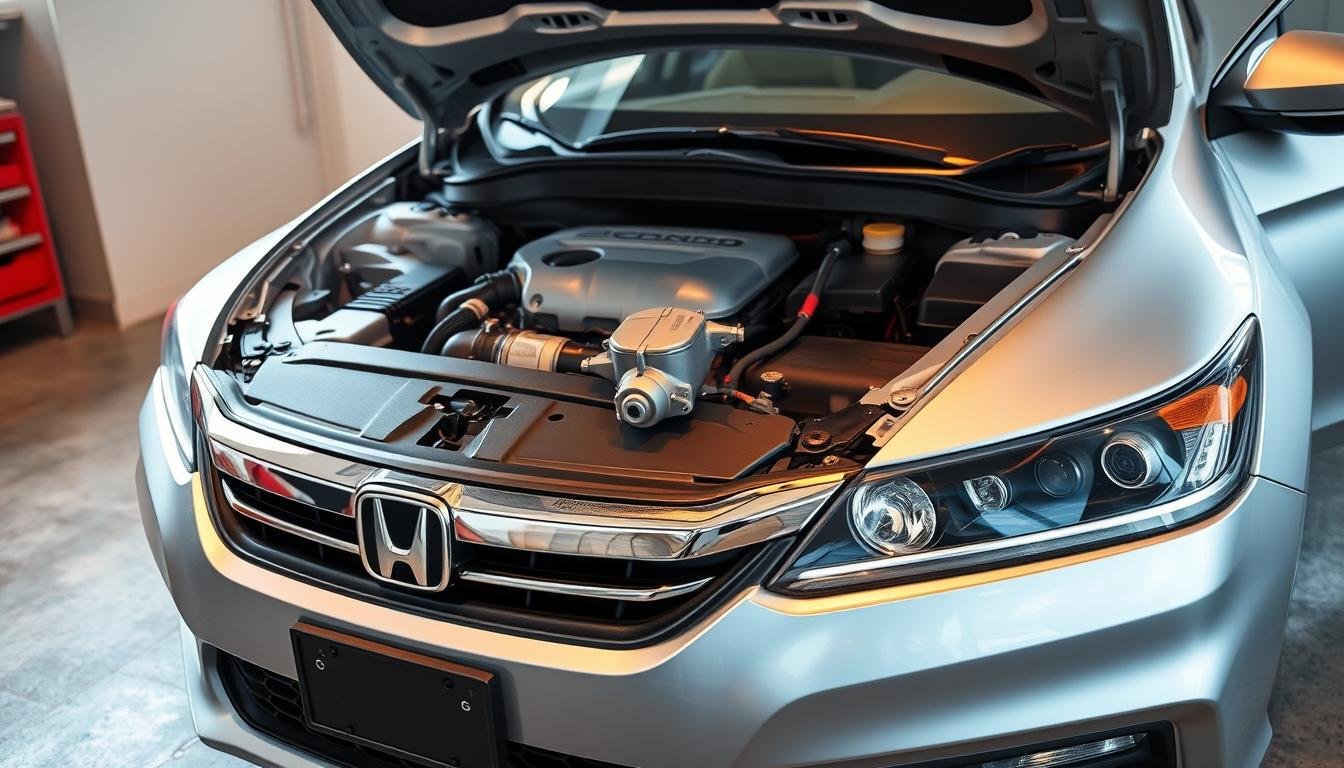
For 4-cylinder 2010 Honda Accord models, the starter motor is situated on the transmission side of the engine, typically mounted directly to the transmission bell housing. It is often found beneath the intake manifold. Due to its position, it can be partially obscured by components of the intake system, including the air filter box and associated tubing. Access for these models is generally easier from the top of the engine bay, though some components may need to be moved or removed for clear visibility and working space.
V6 (J35Z2/J35Z3) Models
In V6 2010 Honda Accord models, the starter is generally located on the driver’s side of the engine, also securely bolted to the transmission bell housing. Compared to the 4-cylinder, its placement is often lower and may be more accessible from below the vehicle once it has been safely lifted. This often necessitates the removal of splash shields or underbody panels to gain direct visual and physical access.
Visual Identification Markers and Viewing Angles
Regardless of the engine type, the starter motor possesses distinct visual characteristics that aid in its identification. Look for a cylindrical metal housing, typically about 6-8 inches long and 3-4 inches in diameter. Crucially, you will see a heavy gauge positive battery cable (often red or black with a protective boot) connected to a large terminal on the starter solenoid. A smaller signal wire, typically a spade connector or a smaller nut connection, will also be present on the solenoid, relaying the start signal from the ignition switch. Its immediate proximity to the transmission housing is a consistent and reliable indicator.
For optimal viewing, consider these angles:
- From Above: For 4-cylinder models, you may need to remove the airbox assembly and potentially the battery tray for a clearer line of sight.
- From Below: This angle is often essential for V6 models and provides superior access to mounting bolts for both engine types when the vehicle is safely raised on a lift or jack stands.
From a technician’s perspective, accessing the starter on a V6 2010 Accord might specifically require removing a lower engine splash shield for proper visibility and clearance. In contrast, a 4-cylinder model may necessitate moving the battery tray and air intake ducting for better visibility to the nearby starter. These specific nuances are typically well-known by local shops, allowing for efficient service in the nearby area. Referencing detailed service manual diagrams, such as those found in a Haynes or Chilton manual under ‘Starter Motor R&R,’ provides invaluable illustrations of exact mounting points and surrounding components. For an experienced mechanic, the initial visual location for these models typically takes 5-10 minutes.
Preparing for Access: Tools, Safety, and Best Practices for Your 2010 Accord
Before undertaking any work on your 2010 Honda Accord’s starter motor, meticulous preparation is non-negotiable. This involves gathering the correct tools, donning appropriate personal protective equipment (PPE), and rigorously adhering to critical safety protocols to prevent injury and damage to your vehicle.
Comprehensive Tool List
Having the right tools readily available makes the job significantly smoother and safer. For starter motor access and replacement, you will typically need:
- Ratchets: 3/8″ drive is common, with extensions of various lengths (e.g., 6″, 10″).
- Metric Sockets: A comprehensive set including 10mm, 12mm, 14mm, and 17mm sockets will cover most fasteners. A deep well 12mm or 14mm is often useful for the main battery cable nut.
- Universal Joint: Invaluable for reaching bolts at awkward angles.
- Torque Wrench: Essential for correctly tightening mounting bolts and electrical connections during reassembly, ensuring longevity and preventing damage.
- Multimeter: For diagnosing electrical issues (battery voltage, continuity, solenoid activation).
- Battery Terminal Cleaner & Wire Brush: For cleaning battery terminals and ground points, crucial for good electrical contact.
- Penetrating Oil: For stubborn or corroded bolts.
Personal Protective Equipment (PPE)
Safety is paramount. Always use:
- Safety Glasses: To protect your eyes from debris, battery acid, or sparks.
- Durable Work Gloves: To protect hands from sharp edges, hot surfaces, and chemicals.
- Appropriate Workshop Attire: Avoid loose clothing or jewelry that could get caught in moving parts or conduct electricity.
Crucial Safety Procedures
Always disconnect the negative (-) battery terminal FIRST to prevent accidental short circuits, severe electrical shock, or damage to the vehicle’s electrical system. This cannot be overstated. A DIYer forgetting this step and accidentally shorting a wrench can lead to severe burns and component damage, highlighting the dire consequences.
- Vehicle Stability: Ensure your Accord is on a level, stable surface. If working underneath, proper use of jack stands is mandatory. NEVER rely solely on a jack. Ensure jack stands have an adequate rated capacity for your vehicle.
- Engine Cooling: Allow the engine to cool completely before working, especially if accessing components nearby the exhaust manifold or coolant lines.
By The Numbers
Battery Terminal Torque
Typical Starter Bolt Torque
Starter Failures Due to Electrical Issues
These torque specifications for battery terminals (often 10-12 ft-lbs) and starter mounting bolts (e.g., 33 ft-lbs for many Honda applications) are crucial for reassembly, preventing overtightening that can strip threads or undertightening that can lead to loosening and poor electrical contact. Certified local auto repair facilities rigorously follow these protocols to protect their technicians and clients’ vehicles, underscoring their importance. OSHA statistics on workshop accidents related to improper vehicle lifting or electrical work strongly reinforce the need for these safety measures.
Detailed Access Procedure: Reaching the 2010 Honda Accord Starter Motor
Accessing the starter motor on a 2010 Honda Accord requires a methodical approach, often involving the removal or repositioning of other engine bay components. The procedure will vary slightly depending on whether you have a 4-cylinder or V6 model.
📋
Step-by-Step Guide
Ensure the vehicle is on a level surface, the parking brake is engaged, and the engine is cool. Crucially, locate your battery and disconnect the negative battery terminal FIRST using a 10mm wrench. Secure the cable away from the battery post to prevent accidental reconnection. If working underneath, raise the vehicle safely and support it with jack stands.
- For 4-Cylinder Models: You will typically need to remove the air intake box and associated tubing. This often involves unfastening hose clamps and small mounting bolts. In some cases, removing the battery tray or relocating the coolant reservoir can provide improved access to the starter location.
- For V6 Models: Access is often better from below. You may need to remove lower engine splash shields or specific engine brackets that obstruct the starter.
Carefully locate the starter solenoid. You will see two main electrical connections:
- Main Battery Cable: This is a large gauge wire, usually secured by a 12mm or 14mm nut. Use a deep well socket and ratchet to unfasten it. Ensure it does not contact any metal surfaces once removed.
- Solenoid Signal Wire: This is a smaller wire, typically a spade connector that pulls off, or a smaller wire secured by an 8mm or 10mm nut. Disconnect this carefully, taking care not to pull on the wire itself.
Exercise extreme caution to avoid damage to these wires or accidental shorts.
Identify the 2-3 specific bolts that secure the starter to the transmission bell housing. These are typically 14mm or 17mm. Using appropriate sockets, extensions, and possibly a universal joint, carefully remove these bolts. Pay attention to any differences in length between bolts. A common challenge is a seized starter bolt; in such cases, apply penetrating oil and allow it to soak. A breaker bar might be necessary, but exercise caution to avoid stripping the bolt head or damaging the threads. Once all bolts are removed, the starter can be carefully wiggled free from the transmission and withdrawn from the engine bay. A local community forum user once shared a tip about rotating the crankshaft slightly to align with the starter gear for easier removal, though this is not typically required for initial removal.
When reinstalling, lightly coat the tip of the starter’s pinion gear and the mounting bolt threads with anti-seize compound to prevent future corrosion and facilitate easier removal. Always use a torque wrench to tighten mounting bolts and electrical connections to factory specifications to prevent damage or loosening over time.
The factory service manual labor times for starter R&R (Removal and Replacement) typically range from 1.5-2.5 hours, depending on the engine configuration and shop efficiency. This estimate includes the time for locating, removing, and reinstalling the unit. Remember, approximately 70% of starter failures are due to electrical issues, emphasizing the importance of careful handling of all electrical connections.
Diagnosing Starter Malfunctions and Engaging Local Automotive Expertise
While a failing starter is a common culprit for a no-start condition, it’s critical to perform basic diagnostic tests to rule out other components that can present similar symptoms. Misdiagnosis can lead to unnecessary parts replacement and wasted time.
Battery vs. Starter vs. Alternator: Simple Diagnostic Tests
Understanding the interplay between these three components is key:
- Dead Battery: If headlights are dim or don’t illuminate, interior lights are weak, or there’s no power at all, suspect a dead battery. A multimeter should read 12.6 volts (V) or higher for a fully charged battery. Anything below 12.0V indicates a problem.
- Bad Starter: Characterized by a strong battery (lights, radio work normally) but a ‘click’ but no crank, a slow crank, or a grinding noise. You can use a multimeter to check for voltage at the starter solenoid wire during a start attempt; if voltage is present but the starter doesn’t engage, it points to the starter itself.
- Alternator Issue: The car might start normally (as the battery still has charge), but then dies shortly after starting, or a battery warning light illuminates on the dash. This indicates the alternator isn’t recharging the battery.
A scenario where a diagnostic test reveals a low battery voltage (e.g., 11.8V) rather than a bad starter immediately prevents an unnecessary starter replacement. Many local auto parts stores offer free battery and charging system testing, which is a convenient first step.
Common Ancillary Issues Mimicking Starter Failure
Sometimes, the starter isn’t the primary problem. Other components can mimic its symptoms:
- Corroded Battery Terminals: Poor electrical contact can prevent sufficient current from reaching the starter. Inspect and clean them thoroughly with a wire brush.
- Faulty Ignition Switch: If the ignition switch isn’t sending the signal to the starter solenoid, the starter won’t engage.
- Failing Starter Relay: A small, inexpensive relay often located in the under-hood fuse box. A faulty relay will prevent the signal from reaching the starter. Swapping it with an identical nearby relay (e.g., horn relay) can be a quick diagnostic check.
- Poor Ground Connection: The starter needs a solid ground path to complete its circuit. A corroded or loose ground wire, often connected to the engine block or chassis nearby the starter, can prevent it from operating. For example, a trusted local auto repair shop might diagnose a corroded ground wire near the starter as the true culprit, saving the owner from replacing a perfectly functional starter.
When to Seek Professional Help
While DIY diagnosis and replacement can be rewarding, there are clear instances where professional intervention is not just advisable but necessary:
- Complex Diagnostics: Issues like a parasitic draw on the battery, intricate wiring harness inspections, or intermittent electrical faults require advanced diagnostic scanners and specialized expertise.
- Lack of Specialized Tools: If you don’t have a vehicle lift, a high-quality torque wrench, or feel uncomfortable working with electrical systems, a professional is your safest bet.
- Personal Comfort Levels: If you’re simply not confident in your abilities or the potential risks involved, engaging a professional is a sensible decision.
Finding Reputable Local Service
When professional assistance is needed, selecting a trustworthy mechanic is paramount:
- Certifications: Look for ASE-certified technicians. This indicates a proven level of expertise.
- Online Reviews & Reputation: Check Google, Yelp, or local community forums for positive feedback regarding their service, transparency, and reliability.
- Transparency: A reputable shop will offer clear explanations, written estimates, and show you the faulty parts upon request.
- Genuine Parts: Ensure they use genuine Honda parts or high-quality OEM equivalents for starter diagnosis and replacement services to maintain your Accord’s reliability.
Statistics from AAA and similar organizations consistently indicate that starting system failures are among the top reasons for roadside assistance calls, underscoring the commonality and criticality of these issues. For professional starter replacement, average cost ranges typically fall between $400-$800, including parts and labor, depending on your engine type and specific geographic location. This cost reflects the expertise, specialized tools, and guarantee of reliable service available from a trusted local automotive repair provider serving the community.
The 2010 Honda Accord starter is typically mounted to the transmission bell housing, requiring specific component removal for proper access. Adhering to strict safety protocols, especially battery disconnection and proper vehicle support, is non-negotiable for any work involving the starter. Accurate diagnosis is crucial; often, symptoms mimic battery or relay issues, warranting careful testing before assuming a faulty starter. Whether you choose a DIY approach or seek professional assistance, understanding your 2010 Honda Accord’s starter location and access requirements is invaluable. Consult a reputable nearby automotive technician if you lack confidence or specialized tools, ensuring your vehicle is restored to reliable operation with services available in your community.
Frequently Asked Questions
What are the most common symptoms of a failing starter in a 2010 Honda Accord?
A failing starter often presents as a single click when turning the key, followed by no engine crank. Other indicators include a slow or sluggish cranking speed, a grinding noise during ignition attempts, or intermittent starting issues where the car occasionally starts. These symptoms differentiate it from a dead battery, which usually results in no electrical power whatsoever or very dim lights.
How difficult is it to replace the starter on a 2010 Honda Accord for an average DIYer?
The difficulty varies based on the engine (4-cylinder vs. V6) and your mechanical experience. While the process involves basic tools, accessing the starter often requires removing the airbox, battery tray, or even splash shields. It can be a moderately challenging DIY task due to cramped spaces and potentially seized bolts. Proper safety procedures, particularly vehicle lifting and battery disconnection, are critical for success.
What is the typical cost for a 2010 Honda Accord starter replacement by a professional?
Professionally replacing a starter on a 2010 Honda Accord typically ranges from $400 to $800. This estimate usually includes the cost of a new or remanufactured starter motor (around $150-$350) and 1.5 to 2.5 hours of labor, depending on the engine configuration (V6 often takes longer) and the specific location of the repair shop. Always get a detailed quote from a reputable nearby mechanic serving your community.
Is the starter motor the same as the starter solenoid on a 2010 Honda Accord?
No, they are distinct components, though the solenoid is physically attached to the starter motor. The solenoid acts as an electromagnet; when energized by the ignition switch, it serves two functions: pushing the starter drive gear into mesh with the engine’s flywheel and closing a high-current circuit to send full battery power to the starter motor itself. A faulty solenoid can mimic a bad starter.
What specific tools are absolutely necessary to access the 2010 Honda Accord starter?
Essential tools include a 3/8-inch drive ratchet with various extensions and universal joints, a set of metric sockets (10mm, 12mm, 14mm, 17mm are common for Honda starters), a torque wrench for proper reinstallation, and battery terminal wrenches. A multimeter is highly recommended for accurate diagnosis. Always ensure you have rated jack stands for safety if working underneath the vehicle to prevent accidents.