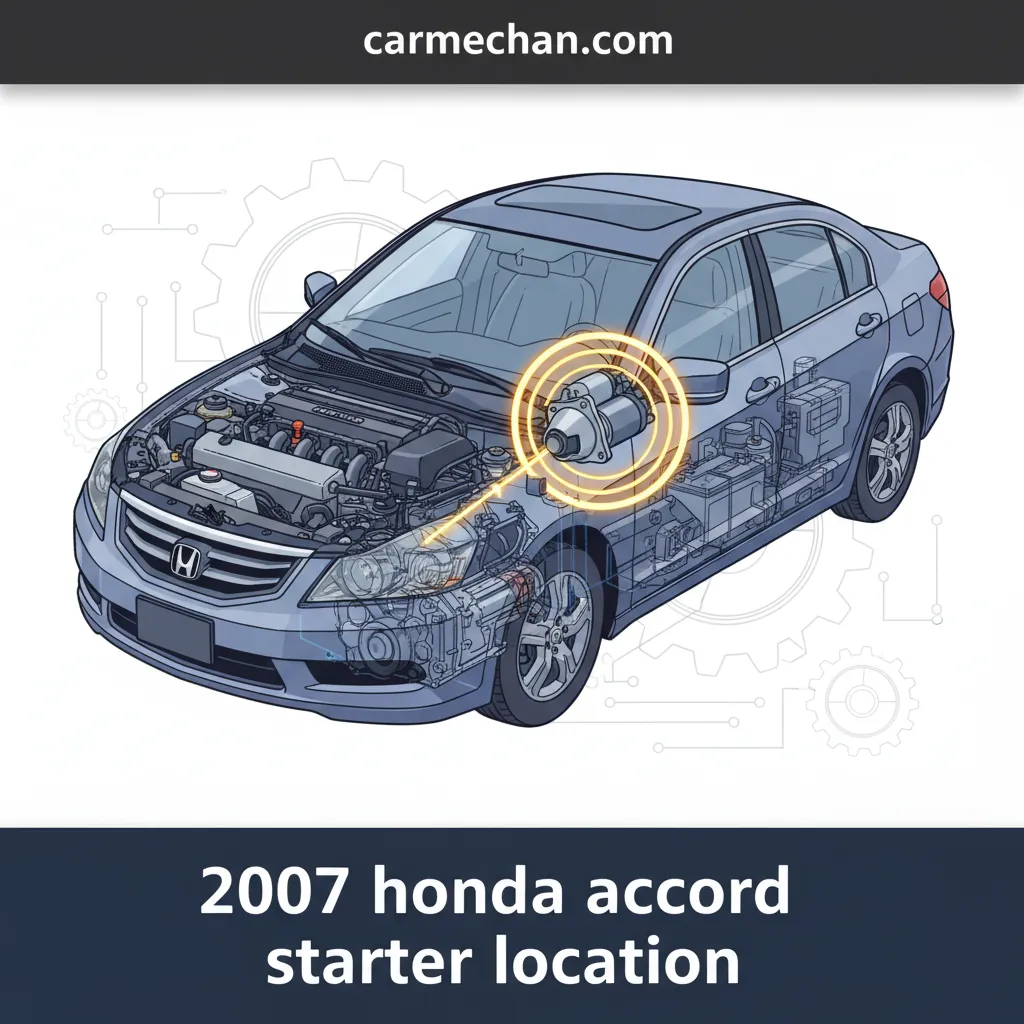
Identifying The Starter Location On A 2007 Honda Accord
Is your 2007 Honda Accord showing signs of starting trouble, perhaps a troubling click or a complete lack of engine crank? Accurately locating the starter motor on a 2007 Honda Accord can present a significant challenge for owners and technicians alike, primarily due to the distinct variations between 4-cylinder and V6 engine configurations, potentially leading to diagnostic frustration and wasted effort. This authoritative guide will meticulously detail the exact starter location for both engine types, provide comprehensive preparatory steps, and outline the precise removal and reinstallation procedures. By the end, you will be fully empowered with the expert knowledge to confidently diagnose and address starting issues, whether you plan a DIY repair or seek professional service available in your community.

Understanding the Starter’s Critical Role in a 2007 Honda Accord’s Ignition System
Recommended Best Deal Products


📤 Share Image
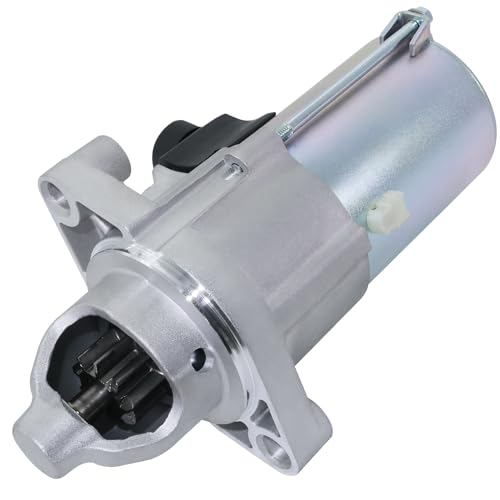
The starter motor is an indispensable component within your 2007 Honda Accord’s ignition system, serving as the initial catalyst for engine operation. Its fundamental mechanism is to convert electrical energy from the vehicle’s battery into mechanical energy. This mechanical force then engages a small gear, known as the pinion gear, with the engine’s flywheel. The flywheel, in turn, rotates the crankshaft, initiating the engine’s combustion cycle by bringing the pistons into motion. Without a functional starter, the engine simply cannot crank or begin its operation.
Identifying a failing starter typically involves recognizing distinct symptoms. Owners frequently report a rapid clicking noise without engine crank when turning the ignition key, indicating a solenoid attempting to engage but lacking sufficient power or proper internal contact. Conversely, a single loud click suggests the solenoid is activating, but the electric motor itself is failing to spin. Other common indicators include slow or sluggish cranking, even when the battery is fully charged and tested as healthy, or intermittent no-start conditions, which can be particularly frustrating. For instance, a 2007 Accord owner might experience a single ‘click’ from the engine bay when turning the ignition key, yet the engine fails to crank. Another common scenario involves intermittent no-start conditions, especially pronounced during extreme weather fluctuations, whether hot or cold, impacting the starter’s internal components.
The starting system in a 2007 Accord is an integrated assembly comprising several critical components: the starter solenoid, which acts as a heavy-duty relay to engage the pinion gear and route high current to the motor; the electric motor itself, responsible for spinning the engine; and the associated electrical circuit, including battery cables, ignition switch wiring, and fuses. Their collective operation ensures a seamless engine start. The 2007 Accord models predominantly utilize robust Denso or Mitsubishi electric starter assemblies, known for their reliability.
Emphasizing the importance of timely diagnosis and repair is crucial. Neglecting starter issues can lead to significant vehicle downtime, potential battery drain from repeated, unsuccessful crank attempts, or even damage to other critical starting system components, such as the flywheel ring gear. The average operational lifespan of an Original Equipment Manufacturer (OEM) starter motor for a Honda Accord typically spans 100,000-150,000 miles. However, factors such as aggressive driving habits, frequent short trips, or extreme climates can significantly influence this duration, potentially reducing its overall service life. Addressing these issues promptly is vital to maintain your vehicle’s reliability and to prevent more costly repairs down the line, ensuring that trusted local mechanics or DIY enthusiasts can quickly get the vehicle back on the road.

Pinpointing the Exact Starter Location on Your 2007 Honda Accord: 4-Cylinder vs. V6 Configurations
Accurately locating the starter motor on a 2007 Honda Accord is the first critical step in diagnosis or replacement. While the general placement strategy for both engine types positions the starter on the transmission side of the engine block, typically near the bell housing, the specific accessibility and visual cues vary dramatically between the 4-cylinder and V6 configurations.
Specific 4-Cylinder (K24A8) Location
For 2007 Honda Accord models equipped with the 2.4L i-VTEC (K24A8) engine, the starter’s precise position is notably more challenging to access. It is typically found beneath the intake manifold and closer to the firewall. This configuration means the starter is often obscured from direct view, requiring more effort for visual confirmation and subsequent service. To locate it, look directly behind the engine block, adjacent to where the transmission bolts to the engine. Due to the intake manifold’s obstruction, a powerful flashlight and careful inspection will be indispensable. Key visual cues include prominent wiring harnesses and the large-gauge battery cables leading directly into this area.
Specific V6 (J30A5/J30A4) Location
In contrast, 2007 Honda Accord models featuring the 3.0L V6 (J30A5/J30A4) engine offer a significantly more accessible starter location. Here, the starter is situated on the passenger side of the engine block. Its placement is generally more readily visible, often requiring less extensive disassembly compared to its 4-cylinder counterpart. To pinpoint it, follow the battery’s positive cable as it routes towards the engine block on the passenger side; the starter will be a prominent cylindrical component in that vicinity. Its relative openness makes diagnosing or replacing it a less labor-intensive process.
Regardless of the engine type, a crucial visual confirmation check involves locating the main battery positive cable (a large gauge, typically red wire) and the smaller solenoid signal wire. Both of these electrical connections lead directly to the starter motor’s body. Tracing these wires can definitively confirm the component’s location. The 2.4L i-VTEC (K24A8) engine, prevalent in most 2007 Accords, presents a more challenging starter location and replacement procedure compared to the 3.0L V6 (J30A5/J30A4). This design choice, particularly the intake manifold’s position, contributes to a higher professional labor time for 4-cylinder starter replacements, frequently estimated between 2-3 hours, highlighting the difference in accessibility. Identifying the correct location initially can save valuable time and effort, especially if you’re exploring service options convenient and accessible in your local area.

Audible — Listen Free for 30 Days
One free credit a month and thousands of titles included.
Listen Free for 30 Days
Pre-Service Protocols: Essential Safety and Preparatory Steps for Starter Access
Recommended Best Deal Products

Before attempting any work on your 2007 Honda Accord’s starter, a rigorous adherence to safety protocols and preparatory steps is non-negotiable. These measures ensure both your personal safety and the prevention of damage to your vehicle’s electrical systems. This foundational stage is critical for a secure and efficient repair process.
Prioritize Electrical System Safety
The absolute necessity of disconnecting the negative battery terminal first cannot be overstated. This crucial step mitigates the risks of accidental electrical shorts, system damage to sensitive electronics, or inadvertent engine cranking while you are working within the engine bay. Utilize a 10mm wrench to loosen the nut on the negative battery terminal, then carefully remove the cable and secure it away from the battery post to prevent accidental contact. Improper battery disconnection procedures are a significant contributing factor to accidental electrical damage or personal injury during automotive maintenance. A typical 12V automotive battery is capable of delivering over 600 amperes of current, posing a substantial short-circuit risk.
Always disconnect the negative battery terminal FIRST. Failure to do so can result in severe electrical shorts, damage to the vehicle’s electrical components, or serious personal injury from arc flashes or inadvertent engine cranking.
Required Tools and Secure Vehicle Elevation
Gathering the correct tools beforehand saves time and prevents frustration. A comprehensive list includes: specific socket sizes (e.g., 10mm for battery terminals, 12mm/14mm for starter mounting bolts), various ratchets (3/8″ drive is common), extensions of differing lengths, universal joints (swivel sockets), a reliable floor jack, robust jack stands rated for your vehicle’s weight, and wheel chocks. For secure vehicle elevation, properly and safely apply a floor jack to raise the front of the vehicle. Always employ at least two jack stands, rated for your vehicle’s Gross Vehicle Weight Rating (GVWR), placing them firmly on designated frame points specified in your vehicle’s service manual. This provides adequate and safe underside access if required for the starter’s location. Always consult your 2007 Honda Accord’s owner’s manual for specific jacking points and comprehensive safety guidelines.
Engine Bay Considerations
Before diving in, take a moment to meticulously clear the work area of any obstructions. Identify and carefully relocate any wiring harnesses, vacuum hoses, or heat shields that may impede direct access to the starter. This foresight prevents accidental damage to other components and makes the entire process more efficient. A tidy work environment is a safe work environment, especially when working on complex areas like the engine bay, ensuring all necessary space is available to the mechanic serving your vehicle.
Executing Starter Removal: A Detailed Procedure for the 2007 Honda Accord
Removing the starter from your 2007 Honda Accord requires precision and patience, particularly for 4-cylinder models. This detailed procedure ensures that the process is conducted safely and effectively, laying the groundwork for successful reinstallation.
📋
Step-by-Step Guide
Begin by carefully detaching the main battery cable, typically secured by a large nut (e.g., 12mm or 14mm), from the starter’s primary terminal. Follow this by disconnecting the smaller solenoid signal wire, which is often a push-on connector or a small nut (e.g., 8mm or 10mm). Ensure these wires are secured away from any metal surfaces to prevent accidental shorts. Double-check that the negative battery terminal is already disconnected from the main battery to ensure safety.
Audible Premium Plus — Annual Membership
12 audiobook credits up front, plus the full Audible catalogue.
See Annual PlansLocate and progressively loosen the starter’s mounting bolts, which are typically two or three in number (commonly 14mm or 17mm). These bolts secure the starter to the transmission bell housing. For the 4-cylinder Accord, the upper starter bolt is particularly difficult to reach; a long extension (12-18 inches) coupled with a universal joint and a 14mm socket is frequently indispensable. For V6 models, the starter typically utilizes two accessible 14mm bolts, with access generally more straightforward from underneath the vehicle. Work slowly and methodically, ensuring proper tool engagement to avoid stripping bolt heads.
On 4-cylinder models, the intake manifold presents a significant obstruction. Effective strategies include carefully maneuvering around it, or in some cases, partially loosening or even removing the upper intake manifold to gain optimal access. This procedure can add approximately 1.5 hours to professional labor time. Also, be mindful of any heat shields or wiring harnesses that may need temporary relocation. For V6 models, obstacles are generally minimal, primarily ensuring hoses and wiring are clear for the starter to be withdrawn.
Once all electrical connections and mounting bolts are detached, carefully extract the starter from its housing. Given its weight and often awkward positioning within the engine bay, this step might require some maneuvering. Be prepared to support its weight as it comes free. Ensure no hoses, wires, or other components are snagged or damaged during extraction. The mounting bolts for a 2007 Honda Accord starter are engineered to be torqued within specific parameters, typically ranging from 30-40 ft-lbs (40-54 Nm). Overtorquing these bolts risks stripping threads in the transmission casing, while undertorquing can lead to bolt loosening and potential starter misalignment or damage.
Reinstallation and Verification: Ensuring Optimal Starter Function and System Integrity
Reinstalling a starter correctly is as crucial as its removal. This final stage involves meticulous attention to detail to ensure the new or repaired starter functions flawlessly and safely, thereby maintaining the overall integrity of your 2007 Honda Accord’s starting system.
Precise Positioning and Securing Mounting Bolts
Carefully align the replacement starter into its mounting position, ensuring the pinion gear properly meshes with the engine’s flywheel ring gear without any force. Never attempt to force the starter into place, as this can damage the gear or the flywheel. Once aligned, reinsert all starter mounting bolts and hand-tighten them. Subsequently, torque them precisely to the manufacturer’s specified values using a calibrated torque wrench. Honda specifies a critical torque range for starter mounting bolts, typically around 33 lb-ft (45 Nm). Failure to adhere to these torque specifications is a common cause of premature starter failure, leading to misalignment or eventual loosening. Utilize a calibrated torque wrench set to the recommended 33 ft-lbs (45 Nm) for the starter mounting bolts to ensure accurate and secure fastening.
Reconnecting Electrical System Integrity
Securely reattach both the main battery cable (large gauge wire) and the smaller solenoid signal wire to their respective terminals on the starter. It is paramount that all connections are clean, tight, and free from any corrosion. Loose or corroded connections are a primary cause of intermittent starting issues, manifesting as slow cranks or unexpected no-start conditions, even with a new starter.
Before tightening electrical connections, clean all terminals with a wire brush or fine-grit sandpaper to ensure optimal conductivity. Apply a thin layer of dielectric grease to prevent future corrosion and enhance connection longevity.
Execute Post-Installation Checks and Initial Start-Up
Once all physical and electrical connections are secure, proceed with critical post-installation checks. Meticulously inspect the entire work area for any left-behind tools, rags, or loose components that could interfere with engine operation. Reconnect the negative battery terminal, ensuring it is tightened securely. Finally, perform initial engine start tests. Turn the ignition to the ‘ON’ position for five seconds (without starting) to allow the fuel pump to prime, then attempt to crank the vehicle. Listen attentively for normal, consistent cranking sounds. If the engine starts and operates smoothly, allow it to run for a few minutes and recheck for any unusual noises or warning lights. Approximately 15% of DIY starter replacement failures are attributed to either improper electrical connections or incorrect bolt torque, underscoring the paramount importance of precise reinstallation and verification steps. This diligent approach ensures your starter, serving your driving needs, provides reliable performance for years to come.
By The Numbers
Recommended Starter Bolt Torque
DIY Failure Rate (Improper Connection/Torque)
Miles (OEM Lifespan)
The 2007 Honda Accord starter’s physical location varies significantly between 4-cylinder models (concealed under the intake manifold) and V6 models (more accessible on the passenger side of the engine). Strict adherence to comprehensive safety protocols, including proper battery disconnection and secure vehicle support using jack stands, is absolutely paramount to prevent injury or damage. Precise tool selection, meticulous management of electrical connections, and stringent adherence to manufacturer-specified torque values are critical determinants for a successful replacement and reliable, long-term operation of the starter system. With this comprehensive understanding, you are now thoroughly equipped to confidently approach starter diagnosis and replacement for your 2007 Honda Accord. Should the task prove beyond your current capabilities or if you require specialized tools and expert service, explore reputable automotive repair centers serving your local community for professional assistance nearby.
Frequently Asked Questions
What are the most common symptoms of a failing starter in a 2007 Honda Accord?
The most common symptoms include a rapid clicking noise from the engine bay when attempting to start, a single loud click followed by no engine crank, slow or sluggish engine cranking even with a fully charged battery, or an intermittent no-start condition. These indicators usually suggest the starter motor or its integrated solenoid is failing to engage the engine’s flywheel effectively, necessitating immediate diagnosis.
Can I test the starter motor without removing it from my 2007 Honda Accord?
Yes, basic diagnostic tests can be performed while the starter is installed. First, ensure your vehicle battery is fully charged. You can test for voltage at the starter’s main terminal and the solenoid trigger wire (small wire) while an assistant attempts to turn the key. If voltage is present at both but the starter doesn’t engage, it indicates a probable internal starter motor fault. Always prioritize safety during testing.
How long does a starter replacement typically take for a 2007 Honda Accord?
Professional replacement time varies significantly by engine type. For a 4-cylinder (K24A8) 2007 Accord, it can typically take 2-4 hours due to the starter’s tighter access beneath the intake manifold. For a V6 (J30A5/J30A4) model, the process is generally quicker, ranging from 1.5-2.5 hours, as the starter is more readily available. DIY times often run longer, emphasizing thorough preparation.
What is the typical cost to replace a starter on a 2007 Honda Accord?
The total cost for a 2007 Honda Accord starter replacement typically ranges from $350 to $700. This estimate encompasses the part cost, which can be $100-$300 for a quality aftermarket or remanufactured unit, and labor costs ranging from $250-$400, depending on your specific engine type, geographical location, and the service center’s hourly rates. Always obtain a detailed written quote.
Are there any specific tools or challenges unique to a 2007 Honda Accord starter replacement?
For the 4-cylinder model, accessing and loosening the upper starter bolt beneath the intake manifold is a significant challenge, often requiring specialized long extensions, universal joints, and patience. V6 models present fewer access difficulties. A calibrated torque wrench is essential for both, alongside robust jack stands and safety gear. Dealing with rusted or seized bolts is a common issue, often necessitating penetrating oil application. If these challenges are daunting, professional help is readily available nearby.