Honda Civic Ac Not Working: Diagnose And Rectify Common Malfunctions
The relentless summer heat, coupled with a malfunctioning air conditioning system in your Honda Civic, can transform a routine drive into an uncomfortable ordeal. When your Honda Civic’s AC system fails to deliver cool air, the underlying cause can range from a simple electrical fault to a complex refrigerant system issue, leaving many drivers uncertain where to begin troubleshooting. This authoritative guide will provide a structured, step-by-step methodology to diagnose why your Honda Civic AC is not working, empowering you with the knowledge to identify common problems and determine the appropriate course of action for rectification.
SECTION 1: Initial Diagnostics: Basic Checks for a Non-Functional Honda Civic AC System
Recommended Best Deal Products


Before delving into complex system components, a systematic approach to initial diagnostics can often identify and rectify straightforward issues causing your Honda Civic AC not to work. These basic checks require minimal tools and expertise, making them an excellent starting point for any homeowner looking to troubleshoot their vehicle’s climate control system.

📤 Share Image
Verifying Blower Motor and Airflow
The first step is to confirm that air is actually moving into the cabin. Turn on your Civic’s ignition (engine off is fine for this test) and select various fan speeds. Listen for the blower motor operating and feel for air coming from the vents. If there’s no airflow at all, or only at certain speeds, this points towards a blower motor or resistor issue, which we’ll address in a later section.
AC Button and Control Panel Functionality
Ensure the AC system is commanded ‘on’. Press the AC button on your HVAC control panel. The indicator light should illuminate. If it doesn’t, or if it flickers, it could indicate an electrical issue with the control unit itself or a deeper problem preventing system engagement. Some Civics, particularly later generations, might have a digital display that indicates AC activation.
Cabin Air Filter Inspection
A frequently overlooked component, the cabin air filter can drastically impact AC performance. When excessively contaminated or obstructed, it severely impedes airflow, making the AC feel weak or non-existent. Most Honda Civic generations (8th Gen, 9th Gen, 10th Gen) locate the cabin air filter behind the glove box. Opening the glove box and releasing its stops typically provides access to the filter housing. A clean filter will appear white or light grey, while a severely clogged one will be dark with leaves, debris, and dirt. Replacing a clogged filter is a simple and effective solution for improving airflow and perceived cooling.
Fuses: The Silent Saboteurs
Electrical continuity is paramount. A blown fuse is a common, yet often overlooked, cause of AC failure. Your Honda Civic has at least two fuse boxes: one under the dash (typically drivers side) and one under the hood. Consult your owner’s manual for precise locations and fuse diagrams. You’ll want to inspect fuses related to the AC compressor clutch, blower motor, and HVAC control unit. A blown fuse will show a broken wire filament inside. Safely check fuses by visually inspecting them or using a fuse tester. Always replace a blown fuse with one of the correct amperage.
When checking fuses, always turn off the ignition. Use a plastic fuse puller (often found in the under-hood fuse box) to safely remove and inspect fuses. If a fuse repeatedly blows, it indicates a short circuit that requires further professional diagnosis, not just a fuse replacement.
Reported data indicates that up to 15-20% of perceived AC failures are resolved through simple initial checks such as a blown fuse or a severely restricted cabin air filter. These basic steps are crucial before proceeding to more complex diagnostics.

SECTION 2: Refrigerant System Integrity: Diagnosing Low Pressure and Leaks in Your Civic’s AC
The refrigerant is the lifeblood of your AC system, responsible for absorbing heat from the cabin and releasing it outside. A properly functioning system relies on precise refrigerant levels. When your Honda Civic AC is not working effectively, particularly blowing warm air, low refrigerant is a prime suspect. Understanding its role and how to diagnose leaks is paramount.
The Role of Refrigerant (R-134a / R-1234yf)
Your Civic’s AC system utilizes either R-134a (older models) or R-1234yf (newer models), a specialized chemical that undergoes phase changes (liquid to gas and back) to facilitate heat exchange. Inadequate levels mean less heat can be absorbed and transferred, directly impacting cooling capacity. Even a slightly undercharged system, for example, might produce intermittent cooling, feeling cold initially but quickly warming up as the compressor struggles.
Symptoms of Low Refrigerant
Identifying symptoms of low refrigerant is key to diagnosing the cause of your AC issue:
- Warm Air from Vents: This is the most obvious sign.
- Cycling Compressor: The AC compressor may turn on and off rapidly (short-cycling) as the low-pressure switch detects insufficient refrigerant and disengages the clutch to protect the compressor.
- Audible Hissing: A hissing sound, often from the dashboard, can indicate refrigerant escaping through a small leak.
- Visible Frost on AC Lines: Particularly on the accumulator/drier or evaporator lines, suggesting a restriction or very low refrigerant.
Preliminary Leak Detection Methods
Before resorting to costly repairs, conduct preliminary checks to debug potential leak points:
- Visual Inspection for Oily Residue: Refrigerant contains a small amount of oil (PAG or POE). Look for greasy, oily spots around AC connections, the compressor, condenser, and evaporator drain.
- UV Dye Kits: These kits introduce a fluorescent dye into the AC system. After running the AC for a while, use a UV (black) light to scan all components. Leaks will glow bright yellow or green. This is an effective workaround for small, elusive leaks. Identifying the locations of common AC service ports (low-side, typically larger diameter; high-side, smaller diameter) is crucial for introducing dye.
- Electronic Leak Detectors: While more professional-grade, handheld electronic detectors can sniff out refrigerant leaks by detecting its chemical presence, offering a precise way to debug the system.
Common Leak Points in a Honda Civic AC System
Understanding the typical failure points helps narrow down your search for the cause of a leak:
- O-rings and Seals: These rubber components dry out and crack over time, leading to leaks at connection points throughout the system.
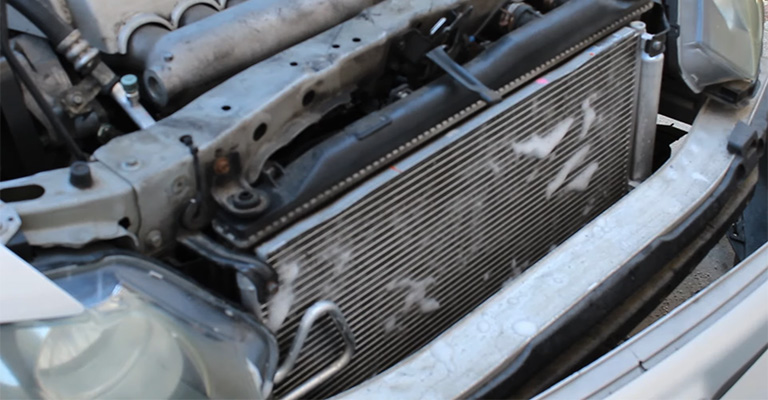
- Condenser: Located at the front of the vehicle, it’s susceptible to road debris impact, corrosion, and stone chips, causing punctures.
- Evaporator: Tucked behind the dashboard, it can develop pinhole leaks due to internal corrosion from moisture or manufacturing defects. Evaporator leaks often manifest as refrigerant smell inside the cabin or oily residue in the drain tube.
- Compressor Seals: The shaft seal on the AC compressor is a common wear item, allowing refrigerant to escape over time.
- Hoses and Lines: Rubber hoses can degrade and crack, while metal lines can corrode or develop fatigue cracks.
Refrigerants are greenhouse gases and their release into the atmosphere is regulated. Attempting to “top off” a system without fixing a leak is a temporary workaround and harmful to the environment. Furthermore, high-pressure refrigerant can cause severe frostbite. Always wear appropriate personal protective equipment (gloves, eye protection) and consider professional assistance for refrigerant handling.
By The Numbers
AC performance issues from minor leaks (vehicles >5 years old)
Typical refrigerant capacity for a Civic AC system
A study on automotive AC systems found that minor refrigerant leaks account for approximately 30-40% of non-catastrophic AC performance issues in vehicles over five years old. Addressing these early can prevent larger, more expensive failures.
SECTION 3: Compressor and Clutch Assembly Failures: Troubleshooting in a Honda Civic AC System
Recommended Best Deal Products


The AC compressor is the heart of the system, responsible for circulating and pressurizing the refrigerant. Its reliable operation is critical for producing cold air. When your Honda Civic AC is not working, a compressor or its clutch assembly is a frequent culprit, demanding a thorough diagnosis.
Function of the AC Compressor and Electromagnetic Clutch
The AC compressor draws low-pressure refrigerant from the evaporator and compresses it into a high-pressure, high-temperature gas, forcing it towards the condenser. This process generates the necessary pressure differential for the AC cycle. The compressor itself is driven by the engine’s serpentine belt, but it’s not continuously engaged. An electromagnetic clutch, located at the front of the compressor, engages or disengages the compressor pulley from the compressor shaft, allowing it to turn on and off as needed to regulate cooling.
Diagnosing Compressor Clutch Issues
Issues with the compressor clutch are common points of failure:
- Failure to Engage: With the engine running and AC switched on, the clutch plate at the front of the compressor should visibly spin with the pulley. If the pulley spins but the clutch plate remains stationary, the clutch is not engaging. This could be electrical (relay, fuse, wiring) or mechanical (worn clutch, excessive gap).
- Slipping: If the clutch attempts to engage but slips, you might hear a squealing noise or notice inconsistent cooling. This often indicates a worn clutch disc or an excessive air gap between the clutch plate and pulley.
- Unusual Noises: Grinding, squealing, or clunking noises specifically when the AC is activated can point to worn clutch bearings or internal compressor issues.
📋
Step-by-Step Guide: Checking Compressor Clutch Engagement
Ensure the vehicle is in Park (automatic) or Neutral (manual) with the parking brake engaged. Keep hands and loose clothing clear of moving belts and pulleys.
Identify the AC compressor, typically located low on the engine, driven by the serpentine belt. Note the pulley and the flat clutch plate at its front.
Start the engine and turn on the AC to max cold and max fan speed. Observe the compressor pulley. The outer clutch plate should spin with the pulley. If the pulley spins but the inner plate does not, the clutch is not engaging.
AC Compressor Clutch Relay and Electrical Circuit
The compressor clutch is an electromagnet, requiring electrical power to engage. Its power often flows through an AC compressor clutch relay, usually found in the under-hood fuse/relay box. A faulty relay is a very common cause of clutch non-engagement. You can often test a relay by swapping it with an identical, known-good relay (e.g., horn relay) or using a multimeter to check for continuity and proper switching. If the relay clicks but the clutch doesn’t engage, the problem lies further down the circuit or with the clutch coil itself.
Serpentine Belt Condition and Tension
The serpentine belt transmits power from the engine to the compressor. A worn, cracked, or loose serpentine belt can lead to insufficient power transfer, causing the compressor pulley to slip rather than drive the compressor effectively. Inspect the belt for signs of cracking, fraying, or glazing. Check its tension according to your Civic’s service manual specifications.
Symptoms of Internal Compressor Failure
While harder to self-diagnose, internal compressor failure typically presents with severe symptoms:
- Extreme Noise: A loud grinding, clunking, or rattling noise from the compressor, even when the AC is off (if the internal bearings fail).
- Compressor Seizing: The compressor’s internal components can seize, locking up the pulley. This will cause the serpentine belt to squeal loudly or even break.
- Metal Shavings in Refrigerant System: This is a catastrophic failure that requires professional assessment, as metal debris can contaminate the entire AC system, necessitating extensive and costly repairs beyond just a compressor replacement.
The typical lifespan of an AC compressor in a Honda Civic ranges from 100,000 to 150,000 miles, with clutch-related issues being a primary point of failure prior to full compressor seizure. Timely troubleshooting of clutch issues can extend the life of the entire compressor unit.
SECTION 4: Electrical Glitches: Troubleshooting Sensors, Wiring, and Relays in Civic AC Systems
Recommended Best Deal Products
![[2G+64G] for Honda Civic 2006-2011 Wireless Carplay Android 15.0 Car Stereo |…](https://m.media-amazon.com/images/I/41uEvl6hnfL._SS500_.jpg)


Modern automotive AC systems are highly sophisticated, relying on an intricate network of electrical components, sensors, and wiring to function correctly. A seemingly minor electrical glitch can prevent your Honda Civic AC from working entirely, or cause intermittent operation. Effective troubleshooting requires a systematic approach to these often-overlooked components.
Pressure Switches: System Guardians
Honda Civic AC systems incorporate pressure switches to protect the compressor from damage due to excessively high or low refrigerant pressures. There are typically two: a low-pressure switch and a high-pressure switch. The low-pressure switch prevents the compressor from engaging if refrigerant levels are too low, while the high-pressure switch disengages the compressor if system pressure becomes dangerously high. Both are safety devices. If either switch malfunctions, it can prevent the AC from turning on. The typical location of the high and low-pressure switches is on the refrigerant lines themselves; the low-pressure switch is usually on the larger diameter suction line, and the high-pressure switch on the smaller diameter discharge line. Testing often involves checking for continuity across the switch (when system pressure is within operating parameters) or using a multimeter to check voltage signals if it’s a transducer type.
Evaporator Temperature Sensor (Thermistor)
The evaporator temperature sensor, or thermistor, measures the temperature of the evaporator core. Its primary role is to prevent the evaporator from freezing up, which would block airflow and reduce cooling. If this sensor fails, the AC system might cycle erratically or stop cooling altogether, as the control unit might mistakenly believe the evaporator is too cold or too warm. This sensor is typically located within the evaporator housing behind the dashboard.
Wiring Harness Inspection
A broken wire or corroded connection can render an AC system inoperative. Conduct a thorough visual inspection of the wiring harnesses connected to all AC components: the compressor, pressure switches, blower motor, and control unit. Look for:
- Fraying or Nicks: Indicating physical damage.
- Corrosion: Green or white powdery residue on terminals.
- Loose Connections: Ensure all connectors are firmly seated.
- Rodent Damage: Chewed wires are a surprisingly common cause, especially in engine compartments.
Multimeter Use for Voltage and Continuity Checks
A multimeter is an invaluable tool for electrical diagnostics. You can use it to:
- Check for Voltage: Verify that power is reaching components like the AC compressor clutch coil or the blower motor. For instance, when the AC is on, you should see battery voltage (around 12V) at the compressor clutch connector.
- Check for Continuity: Test individual wires or components (like a pressure switch when manually actuated) for an unbroken electrical path. An open circuit indicates a break.
- Test Resistance: Measure the resistance of sensors like the evaporator temperature sensor; its resistance should change with temperature.
When performing electrical tests, always disconnect the battery if working near high-current components or when checking resistance to prevent damage to the multimeter or system. Understand the circuit before probing, and avoid shorting wires.
HVAC Control Unit Malfunctions
The HVAC control unit is the central brain of the climate system, processing inputs from sensors and user commands to control the compressor, blower, blend doors, and more. A malfunctioning control unit can lead to unresponsive buttons, flickering displays, incorrect temperature delivery, or a complete failure of the AC system to engage. While less common than a fuse or relay, it’s a potential cause that often requires professional diagnostics using specialized scan tools to read internal error codes or live data. Approximately 25% of all reported automotive AC system failures are directly attributable to electrical component malfunctions, including faulty sensors or wiring interruptions, highlighting the importance of these checks.
SECTION 5: Blower Motor and HVAC Control Unit: Resolving Airflow and System Command Problems
Even if your Honda Civic’s AC system is cooling properly, it’s futile if that cool air doesn’t reach the cabin. Issues with the blower motor, its resistor, or the overarching HVAC control unit can prevent airflow or proper system command. This section focuses on diagnosing and resolving these specific problems.
Faulty Blower Motor Diagnostics
The blower motor is responsible for pushing air through the vents. If you experience no airflow at any speed setting, or hear abnormal noises (e.g., squealing, grinding, humming without air movement) when trying to operate the fan, the blower motor itself could be faulty. A simple diagnostic workaround is to access the blower motor (typically located under the dashboard, often behind the glove box) and apply 12V direct power and ground to its terminals. If it spins, the motor is likely functional, pointing the issue elsewhere in the circuit (like the resistor or control unit).
Blower Motor Resistor (or Module) Failure
The blower motor resistor (or a more advanced electronic control module in newer Civics) controls the fan speed by regulating the voltage supplied to the motor. A common symptom of resistor failure is when the fan only works on the highest speed setting, or stops working entirely on all speeds except the highest. This occurs because the highest speed often bypasses the resistor pack. Replacing the resistor is typically a straightforward fix, as it’s usually mounted next to the blower motor for cooling.
HVAC Control Panel Issues
While we touched on this in electrical diagnostics, specific issues with the HVAC control panel can directly impact airflow and cooling commands. These include:
- Unresponsive Buttons: If specific buttons (e.g., AC, fan speed, temperature) do not react to input.
- Flickering Displays: Indicating internal electrical instability.
- Intermittent Control: The system works sometimes, but not consistently.
These issues often require diagnosis with an OBD-II scanner capable of communicating with the HVAC module to check for specific error codes related to the control unit.
Interaction Between Components
It’s important to understand how these components interact. The HVAC control unit sends a signal to the blower motor resistor (or module) to set the desired fan speed. The resistor then modifies the voltage to the blower motor, which physically moves the air. A fault in any one of these links can break the chain: a failed control unit won’t send the signal, a failed resistor won’t regulate the voltage, and a failed blower motor won’t spin. Debugging these relationships is key to finding the precise solution.
By The Numbers
Miles when blower motor resistor failure often occurs
Average cost for a blower motor resistor part
Blower motor resistor failures are a common issue, with anecdotal evidence suggesting a higher incidence in vehicles approaching or exceeding 75,000 miles, costing an average of $80-$150 for the part alone. This makes it a very common fix for airflow issues.
SECTION 6: Professional Diagnosis: When to Consult a Technician for Complex Civic AC Issues
While many AC issues in a Honda Civic can be identified and sometimes rectified with DIY troubleshooting, there comes a point where specialized knowledge, equipment, and environmental considerations necessitate professional intervention. Recognizing these limits is crucial for effective and safe repair.
When Advanced Diagnostic Tools Are Essential
Complex AC issues often require tools beyond the scope of the average DIYer. These include:
- OBD-II Scanners with HVAC Live Data: Professional-grade scanners can access specific manufacturer-defined diagnostic trouble codes (DTCs) related to the HVAC system and monitor live sensor readings (e.g., pressure switch values, evaporator temperature) to pinpoint elusive electrical or sensor faults.
- Professional Manifold Gauges: These specialized gauges provide precise high-side and low-side pressure readings of the refrigerant system, which are critical for an accurate diagnosis of refrigerant charge, compressor efficiency, and internal restrictions (like a clogged expansion valve).
- Nitrogen Leak Testing: For very small leaks, technicians can pressurize the system with nitrogen, a non-refrigerant gas, which is safer and environmentally friendlier for detecting leaks with specialized sniffers or bubble solutions.
Environmental Regulations and Refrigerant Handling
Refrigerants are potent greenhouse gases. Due to environmental regulations, only certified professionals are permitted to evacuate and recharge AC systems using specialized recovery equipment. This ensures that refrigerant is safely captured and recycled, preventing its release into the atmosphere. Attempting to open the system without proper equipment is illegal and harmful.
Complex Internal System Failures
Some AC problems point to failures deep within the system that are beyond typical DIY repair:
- Clogged Expansion Valve or Orifice Tube: These components control refrigerant flow into the evaporator. A blockage can cause severe pressure imbalances and poor cooling, even with a full charge. A scenario where an AC system blows warm air even after a proper recharge often suggests such an internal blockage.
- Evaporator Issues: Beyond leaks, a severely corroded or blocked evaporator (internally) can impede heat exchange. Replacing it is a labor-intensive job, requiring dashboard removal.
- Significant System Contamination: If a compressor has catastrophically failed (e.g., metal shavings), the entire system (condenser, evaporator, lines) must be flushed and potentially replaced to prevent immediate failure of a new compressor.
Benefits of Routine Professional AC System Maintenance
Preventative maintenance is the best defense against major AC failures. Professional inspections often include:
- Performance Checks: Measuring vent temperature and system pressures.
- Leak Detection: Early identification of minor leaks before they become major issues.
- Component Inspection: Checking belts, hoses, and electrical connections.
- Cabin Air Filter Replacement: Ensuring optimal airflow and air quality.
Extended Lifespan
Proper preventative maintenance can extend the AC system lifespan by up to 20%, deferring costly repairs.
Optimal Performance
Regular checks ensure your AC delivers maximum cooling efficiency, especially during peak demand.
Cost Savings
Catching small issues early prevents them from escalating into expensive, cascading failures.
Evaluating Professional AC Diagnostic Services
When you consult a technician, expect them to perform a thorough diagnostic process, including visual inspections, pressure readings, leak detection, and potentially electrical tests. The average cost for a professional AC system diagnostic in a Honda Civic typically ranges from $80 to $150, and this fee is often credited towards the repair cost if you choose to proceed with the recommended solution. Obtain a detailed estimate that clearly outlines the identified problem, recommended parts, labor costs, and warranty information before authorizing any repairs.
Systematic troubleshooting, from basic checks to component-specific diagnostics, is crucial for pinpointing AC failures. Common issues include refrigerant leaks, compressor malfunctions, electrical faults, and blower system problems. Timely diagnosis and appropriate repair, whether DIY or professional, restore comfort and prevent further system damage.
Utilize the diagnostic blueprint provided to troubleshoot your Honda Civic’s AC. If issues persist or require specialized tools, consult a certified automotive AC technician to ensure a precise and professional repair. Maintain your AC system proactively to prevent future malfunctions.
Frequently Asked Questions
Why is my Honda Civic AC blowing warm air but the fan is working?
If your Civic’s AC fan is operational but only warm air emanates, potential culprits include low refrigerant levels due to a leak, a malfunctioning AC compressor clutch that isn’t engaging, a faulty pressure switch, or an electrical issue preventing the compressor from cycling. A professional evaluation can pinpoint the exact cause and recommended repair.
Where is the AC fuse located in a Honda Civic, and how do I check it?
In most Honda Civics, the AC compressor clutch fuse is typically found in the under-hood fuse/relay box, while blower motor fuses may be in the under-dash fuse box. Consult your owner’s manual for the exact fuse location and rating. To check, visually inspect the fuse for a broken wire, or use a multimeter for continuity.
Can I recharge my Honda Civic AC myself?
While DIY AC recharge kits are available, they primarily address low refrigerant levels. If a leak exists, simply recharging will be a temporary fix. Professional service is recommended for proper leak detection and repair, followed by vacuum evacuation and precise refrigerant charging to prevent overcharging or contamination, which can damage the system.
My Honda Civic AC makes a loud noise when I turn it on. What could be wrong?
Loud noises (e.g., grinding, squealing, rattling) from your Civic’s AC when engaged often indicate a problem with the AC compressor, such as worn bearings, a failing clutch, or internal component damage. A loose or worn serpentine belt can also cause squealing. Immediate inspection by a technician is advised to prevent further damage.
How often should I have my Honda Civic’s AC system inspected?
It is generally recommended to have your Honda Civic’s AC system inspected by a qualified technician every 1-2 years, or if you notice any decline in performance. This proactive approach helps identify minor issues like low refrigerant, worn belts, or failing components before they escalate into major, more costly repairs.