2014 Nissan Altima Cabin Air Filter Location: 5-Step Guide 2026
Last Updated on September 1, 2026 by Ryan

⚡ Key Takeaways
- Nissan recommends replacing the cabin air filter in a 2014 Altima every 15,000 miles or once a year, whichever comes first.
- To access the 2014 Altima’s cabin air filter, you’ll typically need a Phillips head screwdriver for any securing screws and potentially a trim removal tool for gentle prying, though often just your hands are sufficient.
- Yes, replacing the 2014 Nissan Altima cabin air filter is considered a highly DIY-friendly task, requiring minimal tools and basic mechanical aptitude.
- Precise, step-by-step instructions for locating the cabin air filter.
- Information on any tools required to access the filter.
The 2014 Nissan Altima cabin air filter location is directly behind the glove compartment on the passenger side of the vehicle. This crucial component ensures clean air inside your car, protecting you from dust, pollen, and other airborne particles. Understanding where this filter resides and how to access it is much easier with a clear, visual guide, which we will provide every step of the way.
By tackling this DIY task, you can significantly improve your Altima’s air quality and save money on costly dealership service charges.
This article provides precise, visual instructions for DIY 2014 Nissan Altima owners seeking to locate and potentially replace their cabin air filter. We’ll walk you through accessing the glove compartment, identifying the Nissan Altima HVAC filter spot, and understanding specific filter nuances to ensure your car’s interior air remains fresh.
Here is what you need to know about accessing your glove compartment.
How to Access the Glove Compartment


Begin by opening your 2014 Nissan Altima’s glove compartment fully to initiate the process of reaching the cabin air filter. This first step is straightforward but crucial, as it provides the necessary space to identify the release mechanisms. As shown in above, fully open your glove compartment to its widest extent.
Once open, you will need to locate and disengage the side release clips or tabs that hold the glove box in its upright position. These are typically found on the left and right interior sides of the glove box itself. Many 2014 Altima models feature simple press-in tabs; you gently push inward on each side to release them from their retaining slots in the dashboard frame.
Other designs might require a squeeze-to-release mechanism, where you press the sides of the glove box inwards simultaneously to clear the stoppers.
Carefully apply gentle pressure to these clips to avoid damage. The goal is to allow the glove box to drop further downwards, granting better access to the area behind it. Ensure both sides are released evenly to prevent binding or unnecessary stress on the plastic hinges.
Taking your time here will prevent breakage and make subsequent steps much smoother, aligning with our goal of helping you find the Altima cabin filter access points without hassle.
Once the initial clips are disengaged, the next step involves safely removing the glove box stopper, as we’ll detail below.
Removing the Glove Box Stopper Safely


With the glove compartment partially lowered, you’ll next identify and disengage the damper arm or stopper, typically located on the right side of the glove box assembly. Referencing , you will typically find a small damper arm that controls the slow, gentle opening of the glove box. This arm prevents it from swinging open abruptly.

The damper arm usually slides onto a pin or clips into place.
To release it, gently push the arm inward or outward, depending on its specific design, until it unhooks from its mounting point. You might encounter slight resistance, but avoid applying excessive force, which could snap the plastic component.
Some models might require a gentle twist or an upward pull to disengage it completely.
Once the damper arm is free, the glove compartment will be able to swing down much further, sometimes even completely detaching if designed to do so. This increased range of motion is crucial for providing unobstructed access to the area where the filter housing resides.
Double-check that all clips and the damper arm are fully disengaged, ensuring no components are under strain. This preparation is key to uncovering the DIY Altima air filter whereabouts.
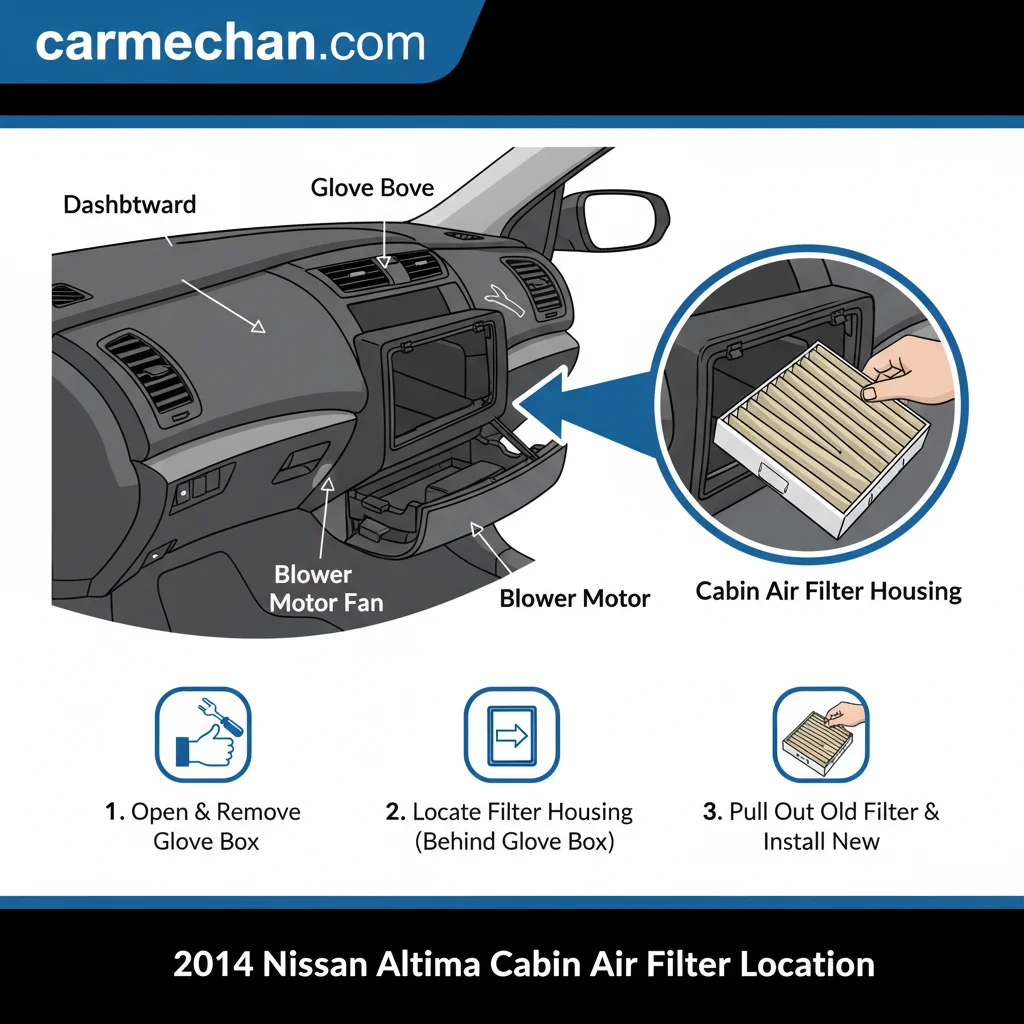
After the glove box is completely free and lowered, the core task of locating the cabin air filter housing becomes clear, as our detailed process diagram illustrates. Now that the glove box is safely out of the way, let’s pinpoint the exact location of the cabin air filter housing.
How to Locate the Filter Housing Precisely


Once the glove compartment is completely out of the way, your focus will shift to locating the rectangular housing unit that contains the cabin air filter, usually nestled behind the dashboard. The clearly illustrates the precise `2014 Nissan Altima cabin air filter location`. You will find this housing horizontally oriented, typically toward the center console panel, directly behind where the glove box was positioned.

The housing is generally secured by either small clips or a few Phillips head screws. For most 2014 Nissan Altima models, you’ll need a standard Phillips #2 screwdriver to remove any screws. The screws are usually small, so keep them in a safe place to prevent loss.
If secured by clips, gently press or pull the tabs to unlatch the cover.
Finding this housing is a crucial step in maintaining your Altima’s air quality, much like understanding its electrical system as detailed in our guide on the 2015 Nissan Altima Fuse Box Diagram. Once the screws are removed or the clips are unlatched, the housing cover can be carefully pulled away, revealing the dirty cabin air filter inside.
Note the orientation of the old filter before removal, as the new one must be installed in the same direction, usually indicated by an “airflow” arrow.
This process ensures you’ve successfully identified the Nissan Altima HVAC filter spot, making replacement straightforward. Remember to handle the housing cover and filter with care, avoiding any damage to the surrounding components. After gaining access to this filter housing, the immediate area will likely resemble the diagram’s layout, confirming you are in the correct place to perform maintenance.
While the physical location is consistent, understanding how the 2014 Altima’s cabin filter might differ from others can help with correct selection and replacement. Building on this clear understanding of its location, let’s consider what specific tools you’ll need to access and remove the old filter.
Why Your 2014 Altima Cabin Filter Differs
Although the basic function remains the same, the 2014 Nissan Altima’s cabin air filter may present specific characteristics that differentiate it from other vehicles or filter types you might encounter, influencing your replacement choice. As illustrated in the comparison table below, understanding these distinctions is key to selecting the right filter.

Standard Vs. Carbon Filters
For your 2014 Altima, you will primarily find two types of cabin air filters: standard particulate filters and activated charcoal (carbon) filters. Standard filters, made of pleated paper or synthetic fibers, are designed to capture dust, pollen, and other airborne particles. They effectively block contaminants down to approximately 0.3 microns, significantly improving interior air quality.
Activated charcoal filters offer an enhanced level of filtration. In addition to trapping particulate matter, they incorporate an activated carbon layer that absorbs odors, exhaust fumes, and other gaseous pollutants. This can make a noticeable difference in reducing unpleasant smells inside your vehicle, a benefit often sought by drivers in urban environments.
Dimensions and Fit
The 2014 Nissan Altima’s cabin air filter has specific dimensions that must be adhered to for proper fit and function. A typical standard cabin air filter for this model measures approximately 8.5 x 8.5 x 1.2 inches. Any significant deviation in these dimensions will prevent the filter from sealing correctly within its housing, compromising its effectiveness.
The 2014 Nissan Altima cabin air filter typically measures approximately 8.58 inches (Length) x 8.07 inches (Width) x 1.18 inches (Height). These dimensions are standard across many compatible aftermarket filters, such as the FRAM Fresh Breeze CF10552. The rectangular shape and precise depth are crucial for ensuring the filter sits snugly without allowing air to bypass it.
Always confirm the part number against your vehicle’s specifications or consult your owner’s manual before purchasing a replacement to ensure a perfect fit. This maintenance is as straightforward as other DIY tasks, such as understanding your 2015 Altima Oil Filter Location.
| Feature | Standard Filter | Activated Carbon Filter |
|---|---|---|
| Primary Function | Particulate filtration (dust, pollen) | Particulate filtration + Odor/Gas absorption |
| Material | Pleated paper/synthetic fibers | Pleated paper + Activated carbon layer |
| Airflow Restriction | Minimal | Slightly more (due to carbon layer) |
| Cost | Lower | Higher |
| Benefits | Improved air quality, allergy reduction | Superior air quality, odor/fume removal |
Before you begin the actual replacement, ensure you have the correct tools on hand, which we’ll detail next, to make the filter removal and installation process smooth and efficient.
What Tools Are Needed for Removal
As depicted in the toolkit visual we’ve prepared, having the right equipment makes this task simple and efficient. To successfully locate and access your 2014 Nissan Altima’s cabin air filter, you’ll need a few common household tools, ensuring the job is both straightforward and safe.
Here’s a concise list of what you’ll typically need:
- Phillips Head Screwdriver: Essential for removing any small screws that secure the cabin air filter housing cover. A #2 Phillips head is most common for automotive applications.
- Small Flathead Screwdriver or Trim Removal Tool: Useful for gently prying open any stubborn clips or prying the glove box side tabs if they are particularly snug. Using a dedicated trim tool helps prevent scratching plastic surfaces.
- Work Light or Flashlight: The area behind the glove compartment can be dark. A good light source significantly improves visibility, allowing you to clearly see clips, screws, and the filter housing itself. For more detailed advice on lighting, consider our guide on finding the best work light for mechanics.
- Vacuum Cleaner (optional): After removing the old filter, you might find dust and debris inside the housing. A quick vacuum can clean this area before installing the new filter.
- Clean Cloth (optional): For wiping down any dust or grime in the glove compartment area.
These tools are readily available and make the DIY process of locating the Where is 2014 Altima pollen filter much easier. Always work in a well-lit area and take care when using hand tools to avoid injury or damage to your vehicle.
Understanding the proper interval for changing this filter is just as crucial as knowing how to find it, which brings us to our final summary. Now that you’re equipped with the right tools, let’s look at a crucial aspect of cabin air filter maintenance: understanding when it’s truly time for a change.
When to Change Your Altima Cabin Filter
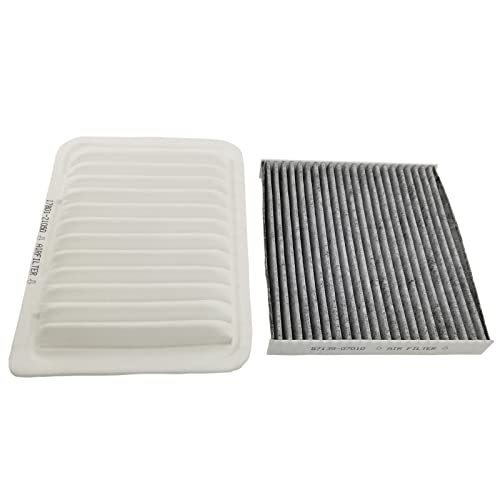
The stark visual contrast often seen between a dirty, clogged filter and a fresh, clean one powerfully demonstrates the impact of regular replacement. Regularly checking and replacing your 2014 Nissan Altima’s cabin air filter is a simple yet crucial maintenance task that directly impacts your vehicle’s interior air quality and HVAC system efficiency.
It also prevents your HVAC system from working harder than necessary.
Nissan officially recommends replacing your cabin air filter every 15,000 miles or once a year, whichever comes first. However, if you frequently drive in dusty conditions, areas with high pollen counts, or heavily polluted urban environments, you may need to replace it more often. Consistent replacement ensures optimal air quality, extends the life of your HVAC system, and maintains efficient airflow, ultimately contributing to a more comfortable driving experience.
Take control of your vehicle’s air quality today, and explore more Altima maintenance guides on CarMechan.com for continued DIY success. Now that you know when to change it, let’s walk through the simple, step-by-step process of removing the old filter and installing a new one.
9 Frequently Asked Questions 2014 Altima Filter
Q1: How often should I replace the 2014 Nissan Altima cabin air filter?
Nissan recommends replacing the cabin air filter in a 2014 Altima every 15,000 miles or once a year, whichever comes first. However, if you frequently drive in dusty or polluted environments, or if you notice reduced airflow, more frequent replacement may be beneficial to maintain optimal air quality.
Q2: What tools do I need to access the cabin air filter on a 2014 Altima?
To access the 2014 Altima’s cabin air filter, you’ll typically need a Phillips head screwdriver for any securing screws and potentially a trim removal tool or a small flathead screwdriver to carefully unclip the glove compartment or filter housing tabs.
Q3: What are the symptoms of a dirty cabin air filter in a 2014 Nissan Altima?
Common symptoms of a dirty cabin air filter in a 2014 Nissan Altima include reduced airflow from the AC vents, a persistent musty or unpleasant odor inside the cabin,
increased fan noise due to the system working harder, and excessive dust accumulation on interior surfaces.
Q4: Is replacing the 2014 Altima cabin air filter a DIY-friendly task?
Yes, replacing the 2014 Nissan Altima cabin air filter is considered a highly DIY-friendly task, requiring minimal tools and basic mechanical aptitude. The filter’s location behind the glove compartment makes it easily accessible for most car owners, allowing them to save on labor costs by performing the maintenance themselves.
Q5: Can a dirty cabin air filter affect my 2014 Altima’s AC performance?
Absolutely. A clogged cabin air filter significantly restricts airflow to your 2014 Altima’s air conditioning system, forcing it to work harder. This can lead to reduced cooling efficiency, decreased air output from the vents, and increased strain on the AC components, potentially shortening their lifespan and increasing fuel consumption.
The 2014 Nissan Altima cabin air filter location behind the glove compartment is highly accessible for DIY enthusiasts. With just a few common tools, replacing this filter is a straightforward task that most owners can complete in under 30 minutes.