How to Get Rid of Scratches on Your Car: A Complete Guide
Last Updated on September 1, 2026 by Ryan
Effectively getting rid of scratches on your car starts with accurately assessing the scratch depth. Whether it’s a minor clear coat swirl or a deeper mark, selecting the correct technique and products is key to restoring your car’s finish without causing further damage.
🎯 Key Takeaways
- Assess scratch depth accurately using the fingernail test.
- Use rubbing compounds for shallow clear coat scratches.
- Apply touch-up paint for deeper scratches reaching color coat.
- Always clean and prep the scratched area thoroughly.
- Know when to seek professional detailing services for best results.


Don’t let a minor scratch on your car’s paint diminish its appeal. The good news is many common scratches aren’t a permanent blemish and can be safely removed or significantly minimized right at home. The key to successful scratch repair lies in correctly identifying the scratch’s depth and choosing the appropriate method. Incorrectly treating a scratch can actually cause more damage.
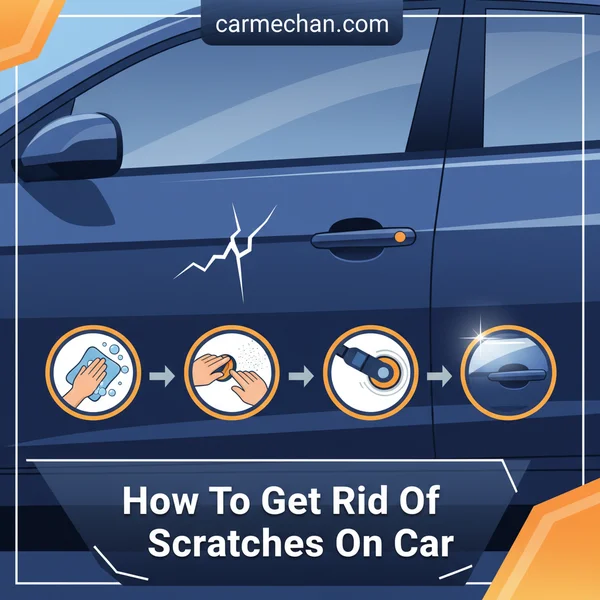
This guide will equip you with the knowledge and step-by-step instructions to tackle various types of car scratches, from frustrating swirl marks to more noticeable clear coat damage. You’ll learn how to accurately assess the scratch you have, understand which products work best, and apply them effectively to restore your car’s finish without needing a professional body shop for every minor imperfection.
Understanding Car Scratch Depths and Types
Before you even think about applying products, you need to understand the anatomy of your car’s paint and where the scratch lies. This crucial assessment dictates your entire repair strategy, preventing wasted effort or further damage. Car paint is not just one layer; it’s a sophisticated system designed for protection and aesthetics.
The Anatomy of Your Car’s Paint
- Clear Coat: This is the outermost, transparent protective layer. It provides gloss and shields the color coat from UV rays, environmental contaminants, and minor abrasions. Most DIY-fixable scratches are in this layer.
- Color Coat (Base Coat): Applied under the clear coat, this layer gives your car its specific color. Scratches that penetrate the clear coat and reach this layer typically require touch-up paint.
- Primer: Below the color coat, the primer layer prepares the metal or plastic surface for paint adhesion and offers corrosion resistance. If you see white, grey, or red/brown, the scratch has reached the primer.
- Metal/Plastic: This is the bare body panel. Scratches this deep require immediate attention to prevent rust (on metal) and usually professional repair.
Identifying Scratch Depth: The Fingernail Test and Visual Cues
The easiest way to determine a scratch’s depth is with a simple physical and visual inspection. Always clean the scratched area thoroughly first to avoid confusing dirt with actual damage.
- Shallow Clear Coat Scratches: If your fingernail does not catch on the scratch when lightly dragged across it, it’s likely a very shallow scratch or swirl mark confined to the clear coat. Visually, these often appear as light hazing or spiderwebbing, especially in direct sunlight. These are typically the easiest to remove with polish.
- Moderate Clear Coat Scratches: If your fingernail lightly catches on the scratch, but you don’t see a color change, it’s a deeper clear coat scratch. These are still within the clear coat but require more abrasive compounds to level the surface. The scratch might look opaque or slightly white within the clear coat itself.
- Color Coat Scratches: If your fingernail catches significantly, and you see a change in color (often white, grey, or the original primer color, contrasting sharply with your car’s paint), the scratch has gone past the clear coat and into the color coat. These require touch-up paint for effective repair.
- Primer or Metal/Plastic Scratches: A deep catch, often accompanied by exposed primer (white, grey, or red/brown) or bare metal/plastic, indicates a severe scratch. These are beyond simple DIY polish or compound work and often necessitate professional repair to prevent corrosion and properly restore the finish.
The Ultimate Scratch Repair Walkthrough
This comprehensive guide will walk you through the process of identifying, preparing for, and effectively repairing various types of car scratches, from superficial clear coat marks to deeper gouges. Following these detailed steps not only helps restore your car’s aesthetic appeal but also protects its paint finish from further damage and potential rust, preserving its value and luster.
Step 1: Assess the Scratch Depth
What you need: Clean microfiber cloth, water, good lighting (natural sunlight is best), a fingernail.
Instructions: Begin by thoroughly cleaning the scratched area with water and a clean microfiber cloth to remove any dirt or debris that might obscure the scratch or cause further damage. Once dry, run your fingernail gently across the scratch. If your fingernail catches in the scratch, it’s likely a deeper clear coat or even base coat scratch, requiring more intensive repair. If you can barely feel it, it’s probably a superficial clear coat mar that can be polished out. This assessment is crucial for determining the appropriate repair method and the products you’ll need.
Pro Tip: Always test in a small, inconspicuous area first if you’re unsure about the depth. Deeper scratches that penetrate to the primer (often appearing white or gray) or metal will likely require professional touch-up paint, as sanding them out completely is not an option without repainting.
Step 2: Gather Your Supplies
What you need: Car wash soap, two buckets, grit guards, microfiber wash mitt, several clean microfiber towels, painter’s tape, rubbing alcohol or a paint prep spray, fine-grit sandpaper (2000-3000 grit, wet/dry type – for deep scratches only), foam sanding block (optional), scratch remover compound (fine, medium, and/or heavy cut), polishing compound, car wax or sealant, applicator pads, detailer spray (optional).
Instructions: Based on your scratch assessment from Step 1, gather the necessary materials. For light clear coat scratches, a fine scratch remover and polish might suffice. Deeper clear coat scratches will likely require heavier scratch remover, potentially wet sanding, and then polishing. Ensure all microfiber towels are clean and lint-free. Having everything ready before you start will make the process smoother and prevent interruptions. Consider a dedicated “scratch repair kit” for future needs.
Pro Tip: Do not use household sponges or abrasive cloths, as these can introduce new scratches. Always use automotive-specific microfiber products to protect your paint. Separate wash mitts for wheels and paint are recommended to avoid cross-contamination.
Step 3: Wash and Decontaminate the Area
What you need: Two buckets (one for soap, one for rinse), grit guards, car wash soap, microfiber wash mitt, clean water, clean microfiber drying towel.
Instructions: Thoroughly wash the entire panel where the scratch is located, not just the immediate area. Use the two-bucket method with grit guards to minimize the risk of reintroducing dirt. Mix car wash soap according to manufacturer instructions. Wash the area gently, then rinse thoroughly with clean water using a gentle flow. Dry completely with a fresh, plush, clean microfiber drying towel. This crucial step removes all loose dirt, grime, and contaminants that could interfere with the repair process or cause further scratching.
Pro Tip: Work in the shade on a cool surface. Washing in direct sunlight or on a hot surface can cause the soap to dry prematurely, leaving stubborn water spots or streaks. If possible, avoid washing your car during the hottest parts of the day.
Step 4: Isolate the Scratch and Prep the Surface
What you need: Painter’s tape (automotive-grade is best), rubbing alcohol (IPA solution of 70% or higher) or paint prep spray, clean microfiber cloth.
Instructions: Use painter’s tape to carefully mask off the area immediately surrounding the scratch. For light scratches, a small square is sufficient. For deeper scratches that may involve wet sanding, tape off a slightly larger zone (e.g., 2-3 inches around the scratch) to give yourself ample working room and a smoother transition. After masking, lightly spray the taped area with rubbing alcohol or a dedicated paint prep spray and wipe it clean with a fresh microfiber cloth. This removes any lingering waxes, sealants, or oils, ensuring the repair products can properly adhere and work effectively.
Pro Tip: Taping off the area helps you focus your efforts and prevents accidental contact with healthy paint, especially when using more aggressive compounds or sandpapers. Ensure the tape is firmly pressed down to create a clear boundary.
Step 5: Wet Sanding (For Deeper Clear Coat Scratches ONLY)
What you need: 2000-grit and 3000-grit wet/dry sandpaper, foam sanding block (optional), spray bottle with water, clean microfiber cloth.
Instructions: ONLY perform this step if your fingernail catches in the scratch. Thoroughly soak the sandpaper in water for at least 15 minutes before use. Lightly spray the scratch and the sandpaper with water. Wrap the sandpaper around a foam block (or use your fingers if extremely careful) and gently sand the scratch in one direction (e.g., horizontal or vertical) with minimal pressure. After 5-10 passes, wipe the area clean with water and a microfiber cloth to check your progress. Switch to finer grit (3000-grit) once the scratch appears less prominent. The goal is to level the clear coat, not remove it entirely. Stop when the scratch is barely visible, leaving a dull, hazy finish.
Pro Tip: The water acts as a lubricant and carries away sanding debris. Never dry sand! Work slowly, applying very light, even pressure. If the water turns opaque or you see paint color transfer, you’ve sanded through the clear coat and reached the base coat – STOP immediately, as further sanding will cause irreversible damage.
Step 6: Apply Scratch Remover Compound
What you need: Scratch remover compound (appropriate cut for the scratch, e.g., heavy for wet sanding marks, fine for light scratches), applicator pad (foam or microfiber), clean microfiber towels.
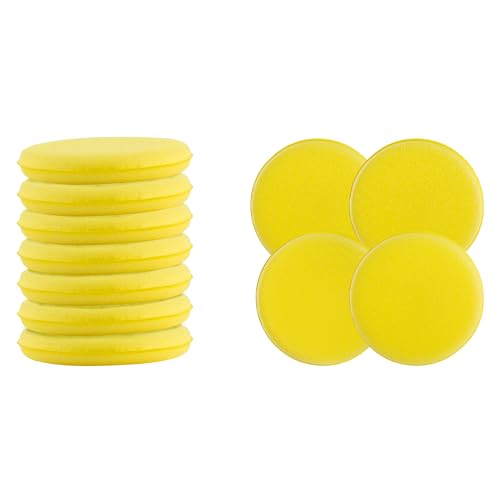
Instructions: Apply a small amount (dime-sized) of the scratch remover compound onto an applicator pad. Work the compound into the scratched area using moderate pressure in small, overlapping circular motions or back-and-forth passes for 30-60 seconds. Focus on the taped-off area. As the compound breaks down, it will become clearer. Wipe off the residue with a clean microfiber towel. Inspect the area. For deeper scratches or wet sanding marks, multiple applications with a more aggressive compound might be necessary, followed by a finer compound to remove compounding hazing.

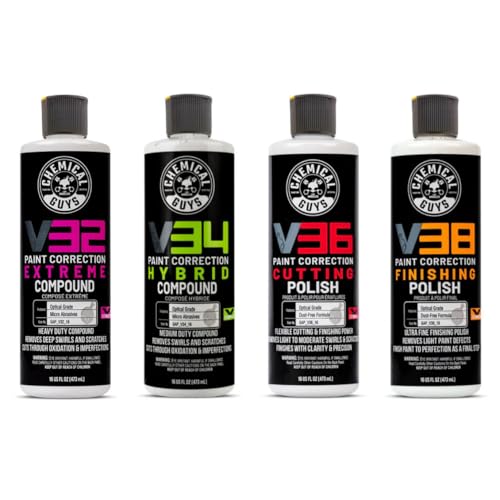
Pro Tip: Always follow the compound manufacturer’s instructions for application and removal. Don’t let the compound dry on the paint, as it can be difficult to remove. If using a machine polisher, start on the lowest setting and move to a higher speed if needed, keeping the pad flat against the surface.
Step 7: Polish the Repaired Area
What you need: Polishing compound (fine abrasive), clean applicator pad, clean microfiber towels.
Instructions: After using the scratch remover, there might be some hazing or fine swirl marks left from the compound or wet sanding. This is normal. Apply a small amount of polishing compound to a fresh applicator pad. Work it into the repaired area with light to moderate pressure, using similar overlapping circular or linear motions. This step refines the clear coat, removing any micro-marring and restoring the paint’s gloss and clarity. Continue until the hazing is gone and the paint is smooth and shiny, matching the surrounding finish. Buff off any excess with a clean, soft microfiber towel.
Pro Tip: Polishing is less aggressive than compounding. Its primary purpose is to bring back the ultimate shine and clarity. Always use a clean, separate applicator pad and microfiber towel for polishing to avoid reintroducing coarser abrasives from the scratch remover that could cause new marring.
Step 8: Apply Wax or Sealant
What you need: Car wax or paint sealant, applicator pad, clean microfiber buffing towel.
Instructions: Once the scratch is gone and the area is polished to a high shine, it’s crucial to protect the newly refined clear coat. Apply a thin, even layer of your chosen car wax or paint sealant to the repaired area using a clean applicator pad. You can extend this application to the entire panel for uniform protection and appearance. Allow the product to haze according to the manufacturer’s instructions (typically 5-15 minutes, but check the label). Once hazed, gently buff off the residue with a fresh, clean microfiber buffing towel until the paint is smooth, slick, and has a deep luster.
Pro Tip: Wax and sealants provide a protective barrier against UV rays, environmental contaminants, and help prevent future minor scratches. Regular application (every 2-4 months for wax, 6-12 months for sealants) will maintain your paint’s appearance and protection.
✅ Final Checklist
- Scratch is no longer visible to the eye or touch.
- Repaired area matches the surrounding paint’s gloss and texture.
- No hazing, swirl marks, or dullness remains after compounding and polishing.
- The entire repair zone is protected with a fresh layer of wax or sealant.
- All painter’s tape and product residues are thoroughly removed from the vehicle.
Important Notes:
- Safety considerations or warnings: Always wear appropriate personal protective equipment (PPE) like gloves and eye protection when working with automotive chemicals. Ensure good ventilation, especially if working indoors, to avoid inhaling product fumes. Dispose of used sandpaper, applicator pads, and rags responsibly according to local regulations.
- When to seek professional help: If the scratch has gone completely through the clear coat and base coat, revealing the primer (gray/white) or bare metal, a DIY repair might not be sufficient for a perfect finish. In such cases, professional touch-up paint application, panel re-spraying, or a full body shop repair may be required. Similarly, for large, deep gouges, extensive spiderweb cracking, or significant impact damage, a professional body shop will have the specialized tools and expertise for a seamless and durable repair.
- Estimated time and cost range: For light clear coat scratches, expect 1-2 hours of active work, with materials typically costing $30-$70 (including compounds, polishes, and microfiber towels). For deeper clear coat scratches requiring wet sanding, allocate 2-4 hours, with material costs potentially ranging from $50-$150, accounting for various grit sandpapers and more aggressive compounds. These DIY costs are significantly less than professional repair costs, which can range from $150-$500+ per panel depending on the severity and location of the damage.
Essential Products and Tools for DIY Scratch Repair
Having the right arsenal of products and tools is crucial for tackling scratches effectively and safely. You don’t need every product on the market, but certain items are non-negotiable for achieving a professional-looking result. Prioritize quality over quantity, especially for abrasives and microfiber products.

Cleaning and Prep Essentials
Proper preparation is paramount. Skipping these steps can grind existing dirt into your paint, creating more scratches during the repair process.
- Two-Bucket Wash System: Use one bucket for soapy water and one for rinsing your wash mitt. This prevents dirt from being reintroduced to your paint.
- High-Quality Car Wash Soap: A pH-neutral car shampoo is ideal, designed to lift dirt without stripping existing waxes or damaging your paint.
- Microfiber Wash Mitts and Drying Towels: These are gentle on paint and highly absorbent. Always use separate towels for washing and drying.
- Detailing Clay Bar and Lubricant: Essential for removing bonded contaminants (like tar, tree sap, industrial fallout) that a regular wash can’t. Claying ensures a perfectly smooth surface for scratch repair, preventing you from pushing these contaminants around with your polishers.
- Paint Prep Spray (IPA solution): An isopropyl alcohol (IPA) solution diluted 1:1 with distilled water, or a dedicated paint prep spray, removes any remaining oils, waxes, or polishing residue. This gives you a truly clean surface to assess and work on.
Abrasives: Compounds and Polishes
These are the core products for removing clear coat scratches. They work by gently abrading a microscopic layer of your clear coat, leveling the surface around the scratch until the scratch itself disappears.
- Cutting Compound: This is your heavier abrasive, designed to remove moderate clear coat scratches, swirl marks, and oxidation. Compounds contain larger abrasive particles that “cut” through the clear coat more aggressively. Examples include Meguiar’s Ultimate Compound or Chemical Guys VSS Scratch and Swirl Remover. Start with the least aggressive product first.
- Finishing Polish: A finer abrasive used after a compound, or on its own for very light scratches and swirl marks. Polishes refine the finish, removing any hazing left by a compound and enhancing gloss. They contain smaller, more uniform abrasive particles. Examples include Meguiar’s Ultimate Polish or Griot’s Garage Perfecting Cream.
- Microfiber Applicator Pads: Use dedicated applicator pads for compounds and polishes. Foam or microfiber pads are typically preferred for hand application. Have several on hand, as you’ll want fresh pads for different products and sections.
- Clean Microfiber Buffing Towels: Essential for wiping away compound and polish residues. Use several clean, plush towels to avoid re-introducing scratches.
When DIY Methods Fall Short: Recognizing Professional Limits
While many minor scratches can be successfully tackled at home, it’s crucial to understand when a scratch crosses the line from a DIY project to a job for the pros. Attempting to fix deeply damaged paint yourself can often lead to worse outcomes, like further paint damage or an inconsistent finish. Knowing when to step back can save you time, money, and headaches.
Identifying Deep Scratches
How do you know if a scratch is too deep for your DIY kit? The most common indicator is the “fingernail test.” If your fingernail catches in the scratch as you lightly run it across the surface, it’s likely past the clear coat and into the color coat or even the primer. Another clear sign is seeing a different color beneath your car’s topcoat – perhaps a grey (primer) or even bare metal. These types of scratches are significantly more challenging to repair without professional tools and expertise.
- Fingernail Test: If your nail catches, it’s deep.
- Visible Layers: Seeing primer (grey) or bare metal indicates a serious scratch.
- Multiple Coats Affected: Damage extends beyond the clear coat, requiring more than surface-level attention.
Trying to buff out deep scratches can thin your clear coat too much or damage the underlying paint, leaving a dull spot or an even more noticeable imperfection.
When to Seek a Professional
If you’ve identified a deep scratch, or if you’re dealing with extensive damage, a professional detailer or body shop is your best bet. They have specialized equipment, advanced paint-matching technology, and the skills to perform seamless repairs. Here’s when to call in the experts:
- Deep Scratches: Any scratch that penetrates the clear coat and color coat.
- Large Areas of Damage: If multiple scratches cover a significant panel.
- Complex Paint Finishes: Metallic, pearl, or multi-stage paints are notoriously difficult to match and blend at home.
- Rust Formation: If a deep scratch has led to rust, professional treatment is essential to prevent it from spreading.
- Visible Imperfections: If DIY attempts haven’t yielded satisfactory results, a professional can often correct them.
Professionals can assess the damage accurately and recommend the best course of action, which might range from paint correction and blending to a complete respray of the affected panel. They ensure the repair is durable, matches perfectly, and maintains your car’s aesthetic value.
Preventing Future Scratches: Best Practices for Car Care
The best way to deal with scratches is to prevent them from happening in the first place! A proactive approach to car care can significantly reduce the risk of annoying imperfections. By adopting smart habits and utilizing protective measures, you can keep your car’s paintwork looking pristine for much longer. Prevention isn’t just about avoiding damage; it’s about preserving your car’s finish and value.
Smart Washing and Drying Techniques
Believe it or not, improper washing is a leading cause of swirl marks and light scratches. Dirt particles can act like sandpaper if not handled carefully. Here are some key tips for scratch-free cleaning:
- Two-Bucket Method: Use one bucket with soapy water and another with clean rinse water for your wash mitt. This keeps abrasive dirt out of your soap bucket.
- Microfiber Mitts: Always use a high-quality microfiber wash mitt. They lift dirt away from the paint rather than pushing it around.
- Gentle Drying: Avoid rubbing aggressively. Blot your car dry with a soft, clean microfiber towel or use a car blower to minimize contact.
- Regular Washing: Don’t let dirt and grime build up excessively. Regular, gentle washes remove contaminants before they have a chance to bond or scratch.
Always wash your car in the shade to prevent soap from drying on the paint, which can leave water spots and residue that are hard to remove without scrubbing.
Protective Measures and Habits
Beyond washing, several other practices can help shield your car’s paint from daily abuse. Think of these as an extra layer of defense against the elements and everyday mishaps.
- Waxing and Sealing: Regularly apply a quality car wax or sealant. These products create a sacrificial layer over your clear coat, protecting it from minor abrasions, UV rays, and environmental fallout.
- Ceramic Coatings: For superior long-term protection, consider a professional-grade ceramic coating. These advanced coatings bond with your car’s paint, offering enhanced durability, scratch resistance, and hydrophobic properties.
- Smart Parking: Park away from crowded areas, shopping carts, and car doors. Avoid parking under trees where sap, bird droppings, and falling debris can damage paint.
- Mindful Habits: Be conscious of what comes into contact with your car. Avoid dragging items across the paint, keep keys away from the surface, and ensure any items stored on your roof rack are properly secured.
Investing a little time in prevention can save you significant effort and expense on scratch repair down the line, keeping your car’s finish looking pristine.
Conclusion


Scratches are an inevitable part of car ownership, but they don’t have to be a permanent blemish on your vehicle’s appearance. From minor clear coat swirls to deeper gouges, understanding the nature of the damage is the first step toward effective treatment. Many light scratches can be successfully addressed with readily available DIY products, restoring your car’s shine with a bit of effort.
However, it’s equally important to recognize when a scratch is too severe for a home remedy. For deep damage that penetrates the paint layers, or for complex repairs, professional intervention is often the wisest and most cost-effective choice in the long run. Above all, prevention remains your best defense. By adopting smart washing practices, applying protective coatings, and being mindful of your surroundings, you can significantly reduce the likelihood of future scratches.
Take charge of your car’s care today. Assess any existing scratches, choose the appropriate repair method, and implement preventive measures to keep your car looking its absolute best for years to come. Your ride deserves it!
❓ Frequently Asked Questions
How do I identify the depth of a scratch on my car’s paint?
The ‘fingernail test’ is a common method: gently run your fingernail across the scratch. If your fingernail catches in the scratch, it has likely gone past the clear coat and into the color coat or primer, requiring more than just polishing. If your nail doesn’t catch, it’s likely a clear coat scratch.
What’s the difference between rubbing compound, polishing compound, and car polish for scratch removal?
Rubbing compound is the most abrasive, used to cut through clear coat to remove deeper scratches. Polishing compound is less abrasive, refining the finish after rubbing compound or for moderate clear coat scratches. Car polish is the least abrasive, used to enhance gloss and remove fine swirls, typically as a finishing step.
When should I use touch-up paint versus a compound for a scratch?
Use touch-up paint when a scratch has penetrated beyond the clear coat, exposing the color coat, primer, or even bare metal. Compounds are effective for scratches contained strictly within the clear coat layer, where they can gently abrade the surrounding clear coat to level the surface.
Are scratch removal kits from auto stores genuinely effective?
Many over-the-counter scratch removal kits can be effective for minor to moderate clear coat scratches, often containing a compound, polish, and applicator pads. However, their success depends heavily on the scratch depth and proper application technique; they typically won’t fix deep scratches through the paint or primer.
What are the risks of trying to remove deep scratches myself?
Attempting to remove deep scratches without proper tools or knowledge can lead to significant damage, such as burning through the clear coat entirely, creating permanent swirl marks, or causing uneven paint texture. These issues can be more costly to repair professionally than the original scratch.
How can I prevent new scratches after repairing existing ones?
Preventing future scratches involves using proper washing techniques with two buckets and microfiber mitts, applying a quality wax or sealant regularly for protective layering, parking strategically to avoid door dings, and promptly cleaning abrasive contaminants like bird droppings or tree sap.