How to Clay Bar a Car: The Ultimate Guide for Smooth Paint
Last Updated on September 1, 2026 by Ryan
Clay barring is essential for truly smooth paint, effectively removing embedded contaminants that washing alone misses. This process improves your car’s finish, enhances wax/sealant bonding, and is a crucial step for achieving professional detailing results at home.
🎯 Key Takeaways


- Always wash your car thoroughly before clay barring.
- Use plenty of lubrication to prevent paint scratching.
- Fold the clay frequently to expose clean surfaces.
- Work in small sections for best results and control.
- Clay barring preps paint for superior wax adhesion.
Achieving truly smooth, mirror-like paint on your car goes beyond just washing and waxing. The secret to a glass-smooth finish and optimized paint protection lies in a process called clay barring. This technique effectively removes embedded contaminants that regular washing simply cannot touch, leaving your paint incredibly clean and ready for superior protection.
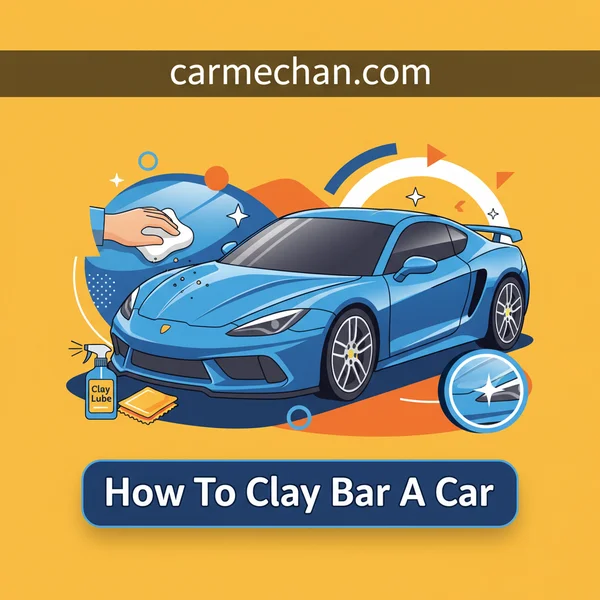
Mastering how to properly clay bar your car is a crucial skill for any detailing enthusiast. It ensures your paint is not only visibly clean but also microscopically smooth, allowing waxes and sealants to bond more effectively and provide longer-lasting shine and protection. This guide provides the exact steps and essential insights you need to perform this vital detailing task safely and efficiently.
Understanding Car Paint Contamination and Clay Bar Benefits


What’s Hiding on Your Paint?
Even after a thorough wash, your car’s paint often harbors microscopic contaminants. These aren’t always visible to the naked eye, but they create a rough, gritty texture. Common culprits include industrial fallout (tiny metallic particles from factories or rail yards), brake dust, tree sap mist, bug residue, road tar, and even paint overspray. These particles embed themselves into your clear coat, dulling the finish and making it feel rough to the touch. You can easily test for these by washing a section, drying it, then gently gliding your fingertips over the paint while a plastic baggie is on your hand. Any rough, gritty sensation indicates embedded contaminants.

📤 Share
💾 Download
Left unchecked, these contaminants can degrade your clear coat over time, leading to oxidation, dullness, and making it easier for new dirt to adhere. They prevent protective layers like wax or sealant from properly bonding, significantly reducing their effectiveness and lifespan.
The Transformative Power of Clay
A clay bar works by gently shearing off these embedded contaminants from your paint’s surface without damaging the clear coat. Think of it as a microscopic exfoliation for your car’s paint. As you glide the lubricated clay across the surface, it picks up and traps these particles, pulling them out of the paint. The clay doesn’t “clean” the paint in the traditional sense; it “decontaminates” it by physically removing bonded impurities.
The benefits are immediate and profound. Your paint will feel incredibly smooth, almost like glass. This smoothness dramatically enhances gloss and reflectivity, giving your car a deeper, richer shine. More importantly, claying creates a perfectly clean, bare surface for waxes, sealants, or ceramic coatings to adhere to. This results in superior bonding, longer-lasting protection, and a much more durable finish, making future washes easier and more effective.
How to Clay Bar Like a Pro: A Practical Walkthrough


Welcome to your ultimate guide to clay barring your car! This comprehensive walkthrough will teach you how to remove embedded contaminants from your vehicle’s paint surface, leaving it incredibly smooth and ready for waxing or sealing. Following these detailed steps is crucial not only for achieving a professional-grade finish but also for protecting your paintwork from long-term damage caused by airborne pollutants, industrial fallout, and brake dust that regular washing can’t touch.
Step 1: Gather Your Arsenal & Prep the Area
What you need: Plenty of clean microfiber towels (at least 5-7), a dedicated car wash mitt, two wash buckets (one for soap, one for rinse), pH-neutral car shampoo, a garden hose with a spray nozzle, a well-lit, shaded work area, and optionally, a pressure washer.
Instructions: Before touching your paint, ensure you have all necessary items within reach. Choose a shaded area to work in, away from direct sunlight, which can prematurely dry products and leave streaks or spots. Organize your towels and buckets. This initial preparation saves time and prevents mistakes during the process. Ensure your water source is readily available and sufficient for a thorough wash.
Pro Tip: Direct sunlight causes products to dry too quickly, making them harder to work with and potentially leaving water spots or product residue. Always work on a cool surface, preferably early morning or late afternoon, to ensure optimal working conditions.
Step 2: The Essential Pre-Wash & Decontamination
What you need: Car shampoo, wash mitt, two buckets, garden hose, and optionally, an iron remover product.
Instructions: Begin by thoroughly washing your vehicle using the two-bucket method. Rinse the car completely to remove loose dirt and grime. Fill one bucket with soapy water and the other with plain rinse water. Wash one section at a time, rinsing your mitt in the plain water bucket before returning it to the soapy water. After washing, rinse the entire car again until all soap residue is gone. For an even deeper clean, consider using an iron remover spray at this stage (follow product instructions for application and dwell time) to chemically dissolve ferrous particles before mechanical claying.
Pro Tip: The cleaner the car is before claying, the less likely you are to drag large abrasive particles across the paint, which can cause scratches. A dedicated iron remover can significantly reduce the amount of work for the clay bar and provide a safer initial decontamination.
Step 3: Preparing the Clay Bar
What you need: A new clay bar (typically 50-100 grams for a full car), a dedicated clay lubricant (or a mix of car shampoo and water, 1:10 ratio, as a pinch-hitter), and clean microfiber towels.
Instructions: Take approximately one-third to one-half of your clay bar and knead it in your hands until it softens and flattens into a disc, about 2-3 inches in diameter. This makes it easier to hold and covers a good surface area. If the clay feels stiff, warm it slightly in your hands or a cup of warm water (not hot) to increase its pliability. Have your clay lubricant ready in a spray bottle, ensuring it’s thoroughly mixed if homemade.
Pro Tip: Always use a fresh piece of clay from the bar when starting. If the clay ever drops on the ground, discard that piece immediately, as it will pick up abrasive debris that can severely scratch your paint. It’s a small cost for paint integrity.
Step 4: The Clay Bar Application Technique
What you need: Prepared clay bar, clay lubricant, and clean microfiber towels.
Instructions: Working on a small section (e.g., 2ft x 2ft or a single panel like a fender) at a time, liberally spray the surface with clay lubricant. The surface must be thoroughly wet to allow the clay bar to glide smoothly without marring the paint. Gently rub the flattened clay disc back and forth in straight lines (not circles) over the lubricated area with minimal pressure. You’ll initially feel resistance and hear a slight gritty sound as the clay picks up contaminants. As the surface becomes smoother, the clay will glide with less friction and noise. Continue until the surface feels perfectly smooth to the touch.
Pro Tip: Listen and feel the clay. The gritty sensation indicates contaminants being picked up. When the clay glides silently and smoothly, that section is clean. Periodically check the clay’s surface; when it gets visibly dirty, refold it to expose a clean surface. Repeat this as needed to prevent scratching with embedded particles.
Step 5: Inspecting Your Work & Addressing Stubborn Spots
What you need: Your fingertips, a bright flashlight or inspection light, and potentially, fresh clay and lubricant.
Instructions: After claying a section, immediately wipe away the lubricant residue with a clean microfiber towel. Then, perform a “bag test”: place your hand inside a thin plastic bag (like a sandwich bag) and lightly run your fingertips over the clayed surface. The plastic bag amplifies any remaining rough spots, allowing you to feel contaminants that you might miss with bare hands. If you feel any grittiness, re-lubricate the area generously and re-clay it until it’s completely smooth, using gentle passes.
Pro Tip: The “bag test” is an invaluable technique for ensuring truly smooth paint. It helps identify microscopic particles that can hinder the adhesion of waxes or sealants and detract from the final finish. Do not skip this step, especially on horizontal surfaces where contaminants accumulate most.
Step 6: Wiping Down & Post-Clay Treatment
What you need: Several clean, soft microfiber towels, and a detailing spray or quick detailer.
Instructions: Once you’ve clayed the entire vehicle and are satisfied with the smoothness of the paint on all panels, use a fresh, clean, and dry microfiber towel to wipe down all surfaces. This ensures all clay lubricant residue is completely removed, preventing streaks or potential hazing. For an extra shine and to ensure a flawless, streak-free finish, lightly mist a detailing spray onto panels one by one and gently buff with another clean, plush microfiber towel. This final wipe-down perfectly prepares the surface for the next protection step.
Pro Tip: Always use dedicated, high-quality microfiber towels for paintwork to avoid scratching. Designate specific towels for specific tasks (e.g., clay lubricant removal vs. buffing). Wash them separately from household items to maintain their absorbency and softness.
Step 7: Protect Your Pristine Finish
What you need: Car wax, paint sealant, or ceramic coating (choose one), and applicator pads/towels as per product instructions.
Instructions: Clay barring strips away any existing protection, leaving your paint bare and vulnerable to the elements. It is absolutely critical to apply a layer of protection immediately after claying. Choose your preferred product – a traditional carnauba wax for deep gloss and shine, a synthetic paint sealant for longer-lasting protection and durability (typically 3-6 months), or a ceramic coating for ultimate multi-year protection and hydrophobicity. Follow the product manufacturer’s instructions precisely for application, recommended cure times, and final buffing to ensure maximum protection and a brilliant, lasting finish.
Pro Tip: Applying a protective layer like wax or sealant is not optional after claying. It locks in the smoothness you just achieved and shields your paint from future contamination and environmental elements, making subsequent washes significantly easier and preserving your paint’s integrity.
✅ Final Checklist
- All paint surfaces feel uniformly smooth to the “bag test”.
- No visible clay lubricant residue or streaks remain on the paint.
- The clay bar was kneaded and refolded regularly, and any dirty or dropped pieces were discarded.
- A protective layer (wax, sealant, or coating) has been carefully applied according to product instructions.
- All tools and towels are cleaned, dried, and stored appropriately for next use.
Important Notes:
- Safety considerations or warnings: Always wear gloves to protect your hands from chemicals and for a better grip on the clay bar. Avoid getting clay lubricant into your eyes. Do not ingest any products. Work in a well-ventilated area, especially if using strong chemical pre-treatments.
- When to seek professional help: If your paint has deep scratches, swirl marks, etching from bird droppings, or severe oxidation that claying won’t remove, consider professional paint correction or detailing services. Claying is effective for embedded surface contaminants, not for correcting actual paint defects.
- Estimated time and cost range: For an average-sized sedan or small SUV, expect 2-4 hours for the entire process, including the thorough wash, claying, and applying protection. The cost for materials (quality clay bar kit, lubricant, shampoo, microfiber towels, and a decent wax/sealant) typically ranges from $50 to $150, depending on product quality and brand choice.
Essential Tools and Materials for Effective Clay Barring
Selecting Your Clay Bar and Lubricant
- Clay Bar: Choose a fine-grade clay bar, especially if you’re new to the process or claying your car for the first time. Fine-grade clay is less aggressive, minimizing the risk of marring. Medium or heavy-duty clay is for severely contaminated paint but requires more advanced technique. Alternatives like clay mitts or towels exist, offering quicker coverage, but traditional clay often provides more precise decontamination. Ensure your chosen clay is pliable and easy to mold.
- Clay Lubricant (Clay Lube): This is absolutely critical. Never use a clay bar on dry paint; it will cause severe scratching. A dedicated clay lubricant provides the necessary slick barrier between the clay and your paint, allowing the clay to glide smoothly. Many quick detailers also double as effective clay lubes. Avoid using dish soap or water alone; dish soap can strip waxes and dry out paint, while water lacks sufficient lubricity. Always use a product specifically designed or recommended for claying to ensure safety and effectiveness.
Crucial Support Gear
- Car Wash Soap: Before claying, your car needs a thorough wash to remove loose dirt and grime. Use a pH-neutral, high-lubricity car wash soap. This prepares the surface for decontamination by ensuring only bonded contaminants remain.
- Wash Buckets (Two-Bucket Method): Essential for the pre-clay wash. One bucket for soapy water and another with clean rinse water prevents you from reintroducing abrasive dirt particles back onto your paint, minimizing scratch risks.
- Microfiber Towels: You’ll need several high-quality, soft microfiber towels. Use one to dry the car after washing. Others will be crucial for wiping away excess clay lubricant and buffing the paint to a streak-free finish after claying each section. Always use clean, edgeless towels to avoid scratching.
- Gloves: While optional, wearing nitrile gloves is recommended. They protect your hands from chemicals and help you maintain a better grip on the clay bar, especially as it becomes slick with lubricant.
- Spray Bottle (Optional): If your clay lubricant comes in a concentrate, a dedicated spray bottle for mixing and application is necessary. Otherwise, the included spray nozzle on a pre-mixed clay lube is sufficient.
Mastering Clay Bar Technique: Best Practices and Common Mistakes
Once you’ve got your clay bar and lubricant ready, the true artistry begins. Clay barring isn’t about brute force; it’s a refined dance of gentle pressure and ample lubrication. Understanding the best practices ensures a pristine finish, while avoiding common missteps safeguards your paint.

The Gentle Art of Gliding
Think of clay barring as a gentle massage for your car’s paint, not a vigorous scrub. The goal is to lift contaminants without abrading the surface. This means employing light, even pressure and letting the clay’s natural tackiness do the work. Imagine you’re lightly dusting a delicate surface, allowing the clay to glide almost effortlessly across the paint. Generous lubrication is paramount here; it creates a slippery barrier, preventing the clay from dragging and potentially marring the finish. Work in small, manageable sections, roughly 2×2 feet at a time. This allows you to focus, ensure thorough coverage, and promptly wipe away residue before it dries. Listen to the paint – that initial gritty feeling will gradually transform into a buttery smooth glide as contaminants are removed. Regularly inspect your clay and fold it to expose a fresh, clean surface, encapsulating the removed grime within the bar.
Pitfalls to Avoid for a Flawless Finish
Even with the best intentions, certain missteps can hinder your clay barring efforts and potentially damage your paint. Awareness is your best defense:
- Insufficient Lubrication: This is the cardinal sin. Without enough lubricant, the clay will drag, stick, and abrade your paint, leading to dreaded marring or fine scratches that require extensive polishing to correct. Always ensure the surface is visibly wet.
- Applying Excessive Pressure: Pressing down too hard forces contaminants into the paint rather than lifting them, significantly increasing the risk of scratching. Let the clay do the work, gently.
- Working on a Hot Surface or in Direct Sun: Heat causes your lubricant to evaporate too quickly, leaving the clay to stick and making your job harder and riskier. Always work in the shade or on a cool panel.
- Dropping the Clay Bar: If your clay bar hits the ground, even for a second, it’s immediately compromised. It will pick up abrasive dirt particles that will scratch your paint. Immediately discard it and use a fresh piece. It’s a small price to pay to protect your finish.
- Reusing Heavily Contaminated Clay: Continuously working with a clay bar that’s visibly laden with grime will eventually lead to redistribution of those contaminants, making your efforts counterproductive. Always fold and knead the clay regularly, exposing a fresh surface.
Post-Clay Bar Care and Paint Protection Strategies
After the satisfying process of clay barring, your car’s paint will feel incredibly smooth and look remarkably clean. However, this freshly decontaminated surface is also vulnerable. The claying process essentially strips away any existing waxes or sealants, leaving the paint bare. This is why immediate protection is not just recommended, but essential.
Locking in That Newfound Smoothness
Think of your car’s paint after claying as a clean slate, perfectly prepared to accept a protective barrier. Applying a high-quality paint protectant immediately after clay barring is crucial to seal in that newfound smoothness and shield your paint from future contamination and environmental damage. You have several excellent options, each offering distinct benefits:
- Waxes: Often carnauba-based, waxes provide a rich, deep gloss and excellent water beading. They enhance the paint’s aesthetic appeal but typically offer protection for a shorter duration (weeks to a few months).
- Sealants: These synthetic polymer products offer longer-lasting protection (months to even a year) and superior durability against detergents and environmental fallout. They provide a high-gloss finish and are generally easier to apply than traditional waxes.
- Ceramic Coatings: For the ultimate in long-term protection and gloss, a ceramic coating is the pinnacle. These advanced liquid polymers create a semi-permanent bond with your paint, offering years of incredible hydrophobicity, UV resistance, and hardness. They require more meticulous application but deliver unparalleled durability.
Whichever protection method you choose, ensure you follow the product’s specific application instructions for optimal bonding and longevity.
Maintaining Your Paint’s Pristine Condition
Clay barring is a restorative process, but ongoing maintenance is key to preserving its benefits. A well-protected, decontaminated surface will stay cleaner longer and be easier to wash. Here are some strategies:
- Regular, Gentle Washing: Adopt the two-bucket wash method with a pH-neutral car shampoo and a soft microfiber wash mitt. This minimizes the risk of reintroducing scratches during routine cleaning.
- Proper Drying Techniques: Always use plush microfiber drying towels to blot or gently wipe the surface. Avoid air drying, which can leave water spots, especially in hard water areas.
- Avoid Harsh Chemicals: Steer clear of aggressive degreasers or automatic car washes that use harsh brushes and chemicals, as these can strip away your freshly applied protection and mar the paint.
- Periodic Reapplication of Protection: Depending on your chosen product, reapply waxes or sealants as recommended by the manufacturer to maintain continuous protection.
- Quick Detailers: For light dust or fingerprints between washes, a good quality quick detailer spray can safely clean the surface and boost gloss, extending the life of your protective layer.
Conclusion
Clay barring is an invaluable step in truly perfecting your car’s paintwork. It’s the secret weapon that removes unseen contaminants, transforming a dull, rough finish into a slick, reflective surface ready for protection. By understanding what a clay bar does, how to use it effectively with proper technique, and most importantly, how to protect your paint afterward, you’re not just cleaning; you’re elevating your vehicle’s aesthetic and preserving its value. Embrace the process, be patient, and dedicate the time your car deserves. The mirror-like finish and incredible smoothness you achieve will speak for themselves. Go forth and experience the ultimate guide to smooth paint!
❓ Frequently Asked Questions
What types of contaminants does a clay bar remove, and why is it important?
Clay bars remove bonded contaminants like industrial fallout, brake dust, tree sap, and overspray that regular washing can’t. Removing these prevents paint degradation, creates a smoother surface, and improves the bonding of waxes or sealants for better protection and shine.
What’s the difference between different types of clay bars (fine, medium, heavy duty)?
Clay bars come in varying abrasiveness; fine-grade is suitable for most finishes and light contamination, while medium/heavy-duty are for tougher jobs but require more care to avoid marring. Always start with the least aggressive option that gets the job done effectively.
How can I tell if my car needs to be clay barred?
After washing and drying your car, gently run your fingertips over the paint, or place a thin plastic bag over your hand for enhanced sensitivity. If it feels rough, bumpy, or gritty, rather than perfectly smooth, it likely needs clay barring to remove bonded contaminants.
What are the common mistakes beginners make when clay barring, and how can they be avoided?
Common mistakes include not washing the car first, insufficient lubrication, dropping the clay, and not kneading it frequently. Avoid these by thorough prep, liberal lubricant use, working carefully to prevent dropping, and regularly folding the clay to expose clean surfaces.
Is it necessary to wax or seal the paint after clay barring?
Yes, clay barring strips away any existing protection and leaves the paint bare and porous, making it vulnerable. Applying a wax, sealant, or ceramic coating afterward is crucial to protect the newly decontaminated surface and lock in its smoothness and shine.
Can I use household products as a clay lubricant substitute?
No, it’s strongly recommended to use a dedicated clay lubricant or quick detailer. Using water, dish soap, or other household cleaners can be ineffective, cause marring due to improper slip, or even damage your paint finish due to their chemical composition or lack of lubricity.