2013 Nissan Altima Cabin Air Filter: Location and Replacement Guide 2026
Last Updated on October 23, 2026 by Ryan

⚡ Key Takeaways
- Typically, you should change your 2013 Nissan Altima cabin air filter every 12,000 to 15,000 miles or once a year, though dusty driving conditions may require more frequent replacement.
- Signs include reduced airflow from the AC/heater, unusual or musty odors in the cabin, and increased fan noise as the system works harder to push air.
- No, generally you only need your hands to unclip the glove box damper and the filter housing cover, making it a simple DIY task.
- The airflow arrow on a 2013 Nissan Altima cabin air filter should generally point downwards towards the vehicle’s floor.
- Exact location of the cabin air filter within the 2013 Nissan Altima.
The 2013 Nissan Altima cabin air filter location is found directly behind the glove compartment on the passenger side of the vehicle, a crucial spot for filtering the air you breathe. This often-overlooked component is essential; a clogged filter can reduce HVAC airflow by up to 15%, introducing allergens and stale odors into your car.
Regular replacement prevents dust, pollen, and pollutants from entering the cabin, safeguarding your health and comfort.
This article provides a visual, step-by-step guide to help you confidently locate, remove, and install a new 2013 Nissan Altima cabin air filter. Here is what you need to know about this essential DIY maintenance task.
How to Open Your 2013 Altima Glove Box


To access the 2013 Nissan Altima cabin air filter, your first step is to open and lower the glove compartment. This action clears the path to the filter housing, which sits directly behind it. Gently pull the glove box door downwards to its fully open position.
Gently pull the damper arm (located on the right side) towards the glove box to release it from its pin.
On the left side, slightly flex the glove box inwards from its outer edge to clear the stopper clip.
On the right side, slightly flex the glove box inwards from its outer edge to clear the stopper clip.
As shown above, once the glove box is open, you will typically find a damper arm on the right side and two stopper clips on the sides. Carefully detach the damper arm first; it often slides or unclips with a gentle pull. This step releases the tension, allowing the glove box to drop further.
Next, locate the stopper clips on the left and right interior sides of the glove box. These clips prevent the glove box from falling completely out when opened normally. Gently push the sides of the glove box inwards to release these stoppers from their respective catches. You might hear a soft click as they disengage.
Once the damper arm and stoppers are free, the glove box will pivot further down, resting in a fully lowered position. This provides ample space to work and prevents any damage during the filter replacement. Confirm the glove box is stable before proceeding to the next step.
If you need other maintenance guides, such as for your Altima oil filter, explore our site.
Once the glove box is lowered, the next visual will help you pinpoint the cabin filter housing itself.
Where Is the Altima Cabin Filter Housing


With the glove box fully lowered, you will now see the rectangular cabin air filter housing, typically located centrally behind the dashboard opening. This housing, often black plastic, protects the filter and directs air through it. Identifying this component is crucial before attempting any removal.
2013 Nissan Altima: Cabin Air Filter Location
The cabin air filter is typically found behind the glove compartment. Open the glove box, empty it, and then gently release its stops to allow it to swing down fully. The filter housing will then be visible.

Look closely at Visual 2, which highlights the precise location and shows the release clips or latches that secure the housing cover. These clips usually need to be squeezed, pushed, or slid outwards to release the cover. Take care not to force them, as plastic components can be fragile.
Carefully engage the clips as depicted in the image. Sometimes there are two clips, one on each side, or a single sliding latch. Once released, the cover will either hinge open or slide directly out. Gently pull it away from the housing to expose the old cabin air filter inside.
Observe the orientation of the old filter as you remove the cover. This visual reference will be important when installing the new one. If you encounter resistance, double-check that all clips are fully disengaged to prevent damage. We also offer solutions for dashboard warnings like the Nissan key icon on our site.
Now that you’ve located and opened the housing, the next section provides a comprehensive diagram of the entire replacement process.
How to Replace Your Altima Cabin Filter Easily


The following process diagram visually outlines each step to remove your old cabin air filter and install a fresh one in your 2013 Nissan Altima. This systematic approach ensures you complete the replacement efficiently and correctly.

The diagram reveals the sequence for a successful replacement. First, carefully slide the old cabin air filter out of its housing. It may be stiff or caked with debris, requiring a firm but steady pull. Observe the direction of any airflow arrows on the old filter before discarding it.
Next, as step 2 illustrates, take a moment to inspect the empty housing for any accumulated leaves, dust, or larger debris. You can use a vacuum cleaner with a narrow attachment or simply wipe it clean with a cloth. A clean housing helps maximize the effectiveness of your new filter.
Step 3 in the diagram highlights a critical detail: noting the airflow direction on your new filter. Most filters have an arrow indicating the proper flow. This arrow should typically point downwards, towards the vehicle’s floor, ensuring air flows correctly through the HVAC system.
Finally, as shown in steps 4 and 5, gently slide the new filter into the housing, ensuring the airflow arrow is oriented correctly. The filter should fit snugly without bending or forcing it. Once the new filter is in place, reattach the housing cover, ensuring all clips or latches click securely.
Reinstall the glove box by reversing the initial steps, clipping the stoppers back into place and re-engaging the damper arm.
Understanding the replacement process is one thing, but knowing why it’s crucial is another. Let’s compare the difference between a dirty and a new filter.
Dirty Versus New Altima Cabin Filters Compared
Visually inspecting your old cabin air filter against a new one provides a stark reminder of its essential role and the direct impact it has on your 2013 Nissan Altima’s interior air quality. The contrast often reveals the hidden work this small component performs.
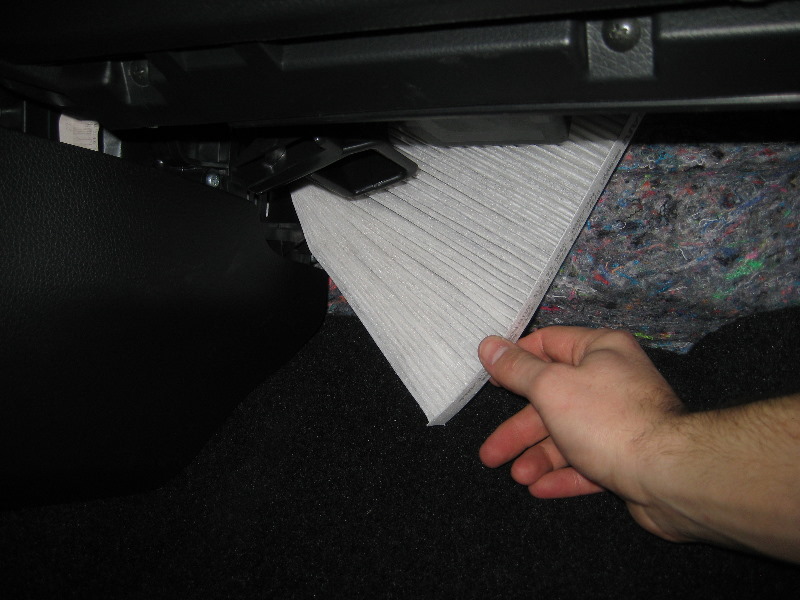
As Visual 3 clearly demonstrates, a severely dirty filter will appear dark, grey, or even black, laden with trapped leaves, insects, dust, and other road debris. In contrast, a brand-new filter is bright white or light-colored, with a uniform, clean filtration medium. This stark difference directly reflects their functional capacity.
A clogged, dirty filter significantly impedes airflow to your Altima’s cabin, forcing the HVAC system to work harder. This can lead to reduced air conditioning and heating performance, unusual or musty odors, and increased fan noise. It also allows allergens and pollutants to bypass the filter and enter your breathing space.
Conversely, installing a new, clean filter, as shown on the right of the image, immediately restores optimal airflow and filtration. This results in noticeably improved air quality, reduced odors, and the efficient operation of your air conditioning and heating system. Replacing your filter can reduce airborne particles by up to A high-quality cabin air filter can effectively block up to 95% of airborne contaminants, including pollen, dust, and fine particles as small as 0.3 microns, significantly improving the air quality inside your vehicle.
when you aim for replacement every For the 2013 Nissan Altima, Nissan’s official maintenance guidelines typically recommend replacing the cabin air filter every 12,000 to 15,000 miles or once a year, whichever comes first, to maintain optimal air quality and HVAC performance. [nissanusa.com/owners].
| Feature | Dirty Filter | New Filter |
|---|---|---|
| Appearance | Dark, discolored, debris-laden | Clean, white/light, uniform pleats |
| Airflow | Restricted, reduced HVAC output | Optimal, full HVAC performance |
| Air Quality | Poor, musty odors, allergens present | Fresh, odor-free, reduced allergens |
| HVAC Strain | High fan effort, inefficient cooling/heating | Low fan effort, efficient operation |
Beyond simply replacing the filter, there are specific tips and tricks that can make this task even easier and prevent common mistakes. Now that you understand the critical importance of a clean cabin filter, let’s uncover its exact location within your 2013 Nissan Altima.
What Are Key Tips for Altima Filter Changes
To ensure your 2013 Nissan Altima cabin air filter replacement is done right, keep these expert tips and common considerations in mind. These guidelines will help you achieve optimal performance and longevity from your new filter.
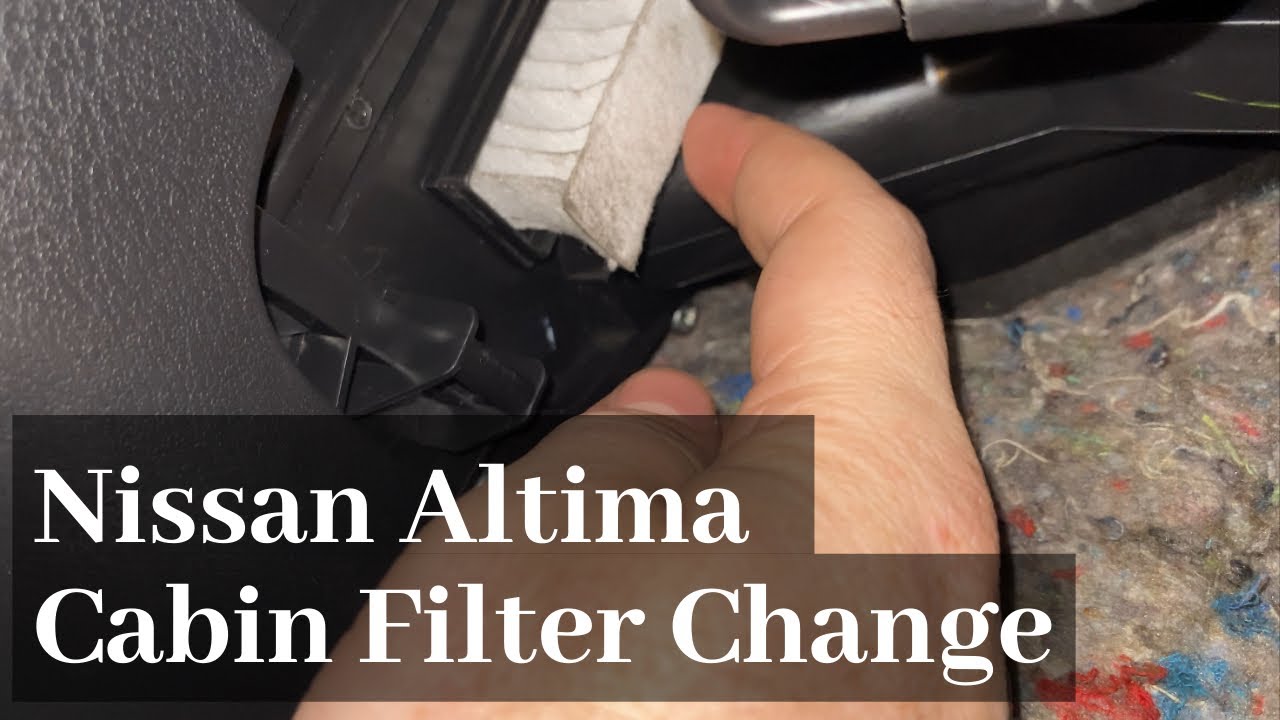
- Verify Airflow Direction: As the process diagram highlighted, the airflow arrow on the new filter is critical. It must typically point downwards, towards the floor of the vehicle, to correctly filter air drawn into your Altima HVAC system. Incorrect orientation can significantly reduce filter effectiveness.
- Check for Debris: Before installing the new filter, always inspect the filter housing for any lingering leaves, dust, or small objects. Cleaning this area ensures no immediate contamination of your new filter and prevents obstructions in the air ducts.
- Recommended Frequency: Aim for replacement every Adhering to a regular replacement schedule, such as every 12,000 to 15,000 miles, is crucial; neglecting it can lead to reduced airflow from the HVAC system, musty odors, and an increased concentration of allergens inside your Altima’s cabin. [repairpal.com] or once a year, whichever comes first. However, if you frequently drive in dusty environments, during allergy season, or if you notice unusual odors, consider changing it more often.
- Tools Required: For this particular job, you typically only need your hands. The clips and damper arm are designed for tool-free removal. Occasionally, a small flathead screwdriver might assist in gently prying stubborn clips, but it’s rarely essential. You can find guides for other vehicle electrical systems like an Altima fuse box on our expert site.
- Gentle Handling: The new filter media can be delicate. Handle it by the frame to avoid crushing the pleats, which could compromise its filtering capability. Also, be gentle with the plastic clips of the housing and glove box to prevent breakage.
By following these simple guidelines, you can confidently maintain your 2013 Nissan Altima’s air quality, ensuring a more pleasant driving experience.
Locating and replacing the cabin air filter in your 2013 Nissan Altima is a straightforward maintenance task that significantly impacts your driving comfort and health. This visual guide makes the process of accessing the filter behind the glove compartment simple for any DIY enthusiast.
Regular replacement of your 2013 Nissan Altima cabin air filter enhances interior air quality, reduces allergens and odors, and ensures your HVAC system operates efficiently. Taking on this maintenance yourself saves money and provides peace of mind knowing your vehicle is properly cared for.
For more expert-driven guides and troubleshooting tips for your Nissan and other vehicles, explore Car Mechan today. Building on these essential tips, let’s move on to the precise, step-by-step instructions for locating and replacing the filter in your Altima.