Find Coolant Leaks Fast: Diagnose Car Overheating Issues
Last Updated on September 1, 2026 by Ryan
Finding a coolant leak early is crucial to prevent engine damage and costly repairs. Start with a thorough visual inspection, then use specialized tools like a pressure tester or UV dye for hidden leaks to pinpoint the exact source quickly and effectively.
🎯 Key Takeaways


- Always begin with a comprehensive visual inspection.
- Utilize a cooling system pressure tester for hidden leaks.
- UV dye kits effectively reveal elusive, intermittent seeps.
- Inspect common leak points:hoses, radiator, water pump.
- Address leaks promptly to prevent severe engine damage.
Finding a coolant leak quickly prevents costly engine damage and unexpected breakdowns. This guide provides a step-by-step method to accurately locate the source of your vehicle’s coolant loss. You don’t need to be a professional mechanic to diagnose these common issues, but focused effort and the right tools make all the difference.
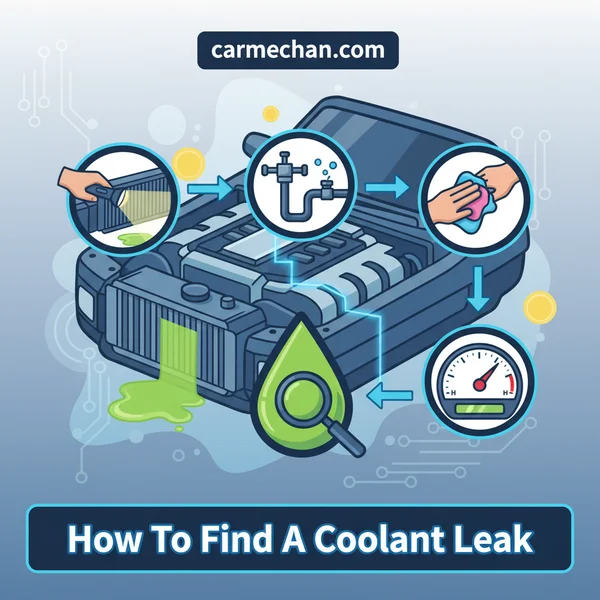
Ignoring a coolant leak risks severe overheating, warped cylinder heads, blown head gaskets, or even complete engine seizure. Pinpointing the exact leak location allows for targeted, efficient repairs, saving you significant time, money, and preventing more extensive damage. Let’s get straight to the methods that will help you identify the problem.
Understanding Coolant Leaks: Signs & Potential Dangers
Detecting a coolant leak early is crucial. Your vehicle often provides clear warnings if you know what to look for. Ignoring these signs can quickly escalate a minor issue into a major engine repair.
Recognizing the Red Flags
The most common symptom is finding a puddle under your car. This fluid is typically green, pink, orange, or sometimes blue, often with a distinct sweet smell. Other indicators include:
- Your engine temperature gauge consistently reads high or fluctuates.
- The “low coolant” or “check engine” light illuminates on your dashboard.
- Steam emanates from under the hood, especially after driving.
- You frequently need to add coolant to the reservoir.
- You might notice a sweet smell inside the cabin, particularly when the heater is on, indicating a heater core leak.
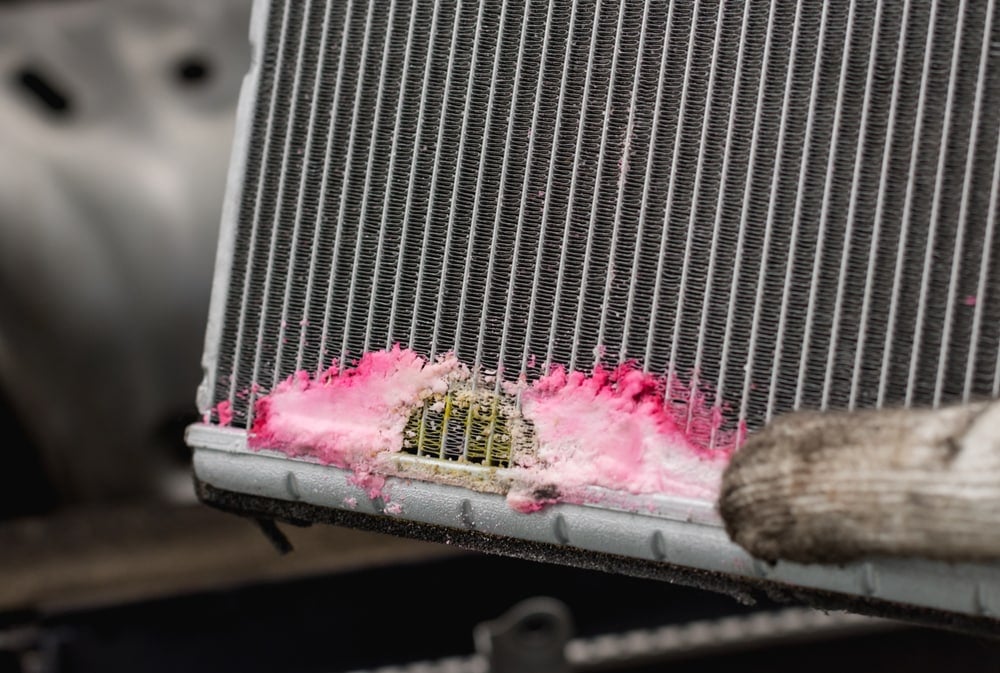
- Visible coolant stains, crusty residue, or discolored areas appear on engine components, hoses, or around the radiator.
Why Prompt Action Matters
Coolant’s primary job is to regulate engine temperature. When coolant leaks, your engine loses its ability to shed heat effectively. This leads to overheating, which can have catastrophic consequences for internal engine components. Prolonged overheating can warp the cylinder head, cause the head gasket to fail, and in severe cases, seize the engine entirely. Diagnosing and addressing a leak swiftly protects your engine’s longevity and prevents expensive repairs.
How to Find a Coolant Leak Like a Pro: A Practical Walkthrough
Finding a coolant leak can be a frustrating experience, but it’s a critical maintenance task for any vehicle owner. Ignoring a leak can lead to engine overheating, extensive damage, and costly repairs. This comprehensive guide will walk you through a systematic, detailed process to pinpoint the source of a coolant leak, empowering you to tackle this issue like a seasoned professional. By following these steps diligently, you’ll not only save money but also ensure your vehicle’s longevity and reliability.
Step 1: Conduct an Initial Visual Inspection (Cold Engine)
What you need: Flashlight, safety glasses, protective gloves, clean piece of cardboard.
Instructions: Park your vehicle on a level surface and ensure the engine is completely cool – ideally, it hasn’t run for several hours – to prevent severe burns. Open the hood and use a powerful flashlight to thoroughly examine all visible components of the cooling system. Look for obvious puddles, drips, or wet spots underneath the vehicle, especially on the ground. Pay close attention to any discoloration or crusty residue (often white, pink, orange, or green, depending on your coolant type) on engine components, hoses, the radiator, and the overflow reservoir. Check the coolant reservoir level; a consistently low level without obvious external signs could point to a more subtle or internal leak.
Pro Tip: Place a large, clean piece of cardboard directly under your engine compartment overnight. The next morning, any drips will be clearly visible on the cardboard, helping you identify the general area of the leak (front, middle, or rear of the engine bay).
Step 2: Inspect Radiator Hoses, Heater Hoses, and Clamps
What you need: Flashlight, safety glasses, protective gloves, rag.
Instructions: With the engine still cool, meticulously inspect all radiator hoses (upper and lower) and heater core hoses. Feel the hoses for any soft, spongy spots, bulges, cracks, or hardened sections, which indicate degradation. Pay close attention to the hose connections at the radiator, engine block, thermostat housing, and heater core pipes, as these are common failure points where clamps might loosen or hoses might crack. Look for any signs of weeping or staining around the clamps. Squeeze the hoses gently to check for pliability and potential weak spots. Also, inspect the clamps themselves for corrosion or damage.
Pro Tip: Try twisting hoses gently where they connect to fittings. If they rotate or slide easily, the clamp is likely loose and could be the source of a minor leak that only appears under pressure or vibration.
Step 3: Examine the Radiator and Radiator Cap
What you need: Flashlight, safety glasses, protective gloves, soft brush (optional).
Instructions: Carefully inspect the radiator itself. Look for any damage to the cooling fins, bent sections, or signs of impact. Pay particular attention to the plastic end tanks (if applicable) and where they are crimped to the metal core, as hairline cracks can form here. Shine your flashlight through the radiator fins to check for any visible leaks or green/pink crusting. Next, remove the radiator cap (ONLY when the engine is completely cold) and inspect its rubber seal. Ensure the seal is pliable, free from cracks, and sits flush. A faulty radiator cap won’t maintain proper system pressure, potentially leading to small leaks or coolant boiling over.
Pro Tip: After cleaning the radiator cap, pour a small amount of coolant into the neck and quickly replace the cap, ensuring it seats firmly. If the cap is faulty, you might see small bubbles or a slight seep around the cap seal when the system builds pressure during the next test drive.
Step 4: Scrutinize the Water Pump and Thermostat Housing
What you need: Flashlight, small mirror (optional), safety glasses, protective gloves.
Instructions: The water pump and thermostat housing are frequent culprits for coolant leaks due to their seals and gaskets. Locate your water pump, typically on the front of the engine, driven by a belt. Look for any drips, stains, or crusty residue directly beneath the pump, especially around its shaft where the pulley attaches, or where it bolts to the engine block. A small “weep hole” might be present; if coolant is consistently leaking from it, the pump’s internal seal has failed. Next, find the thermostat housing, usually where the upper radiator hose connects to the engine. Inspect the gasket area where the housing bolts to the engine, checking for any signs of seepage or dried coolant trails.
Pro Tip: Use a small, extendable inspection mirror to get a better view of hard-to-reach areas around the water pump and thermostat housing, especially on the underside or backside of these components.
Step 5: Check for Heater Core Leaks (Interior Inspection)
What you need: Flashlight, safety glasses, rags, nose for odors.
Instructions: A leaking heater core can be tricky to spot as it’s located inside the cabin, behind the dashboard. Symptoms often include a sweet, syrupy smell inside the car, particularly when the heater is on. Check the passenger footwell carpet for any dampness or sticky residue. You might also notice a persistent fogging of the windows, even without rain. In some vehicles, you can visually inspect the heater core’s hoses where they pass through the firewall into the cabin; look for any visible coolant stains or drips there. If you suspect a heater core leak, this will require professional repair due to the dashboard disassembly involved.
Pro Tip: If you smell a sweet odor, turn on your defroster on high with the engine warm. If the windshield fogs up persistently and feels greasy to the touch, it’s a strong indicator of a heater core leak, as vaporized coolant is condensing on the glass.
Step 6: Utilize a Coolant System Pressure Tester
What you need: Coolant system pressure tester kit (rentable from auto parts stores), safety glasses, protective gloves, rags, extra coolant (if needed).
Instructions: This is the most effective method for finding elusive leaks. Ensure the engine is completely cool. Attach the appropriate adapter from the pressure tester kit to your radiator or overflow tank neck. Pump the tester hand pump to pressurize the cooling system to the vehicle manufacturer’s specified pressure (typically 12-15 PSI, check your owner’s manual or a service manual). Once pressurized, observe the gauge; if the pressure drops, you have a leak. Now, meticulously re-inspect every component discussed in previous steps – hoses, clamps, radiator, water pump, thermostat housing – listening for hissing sounds and looking for new drips or sprays of coolant under pressure. Check around the engine block and cylinder head gaskets as well.
Pro Tip: Leave the system pressurized for at least 15-20 minutes. Small, slow leaks might not be immediately obvious but will cause a gradual pressure drop over time. Also, try wiggling hoses and connections gently while under pressure to simulate driving conditions and reveal intermittent leaks.
Step 7: Employ UV Dye for Elusive Leaks
What you need: UV dye (specific for coolant systems), UV light, UV enhancing glasses, safety glasses, protective gloves, rags.
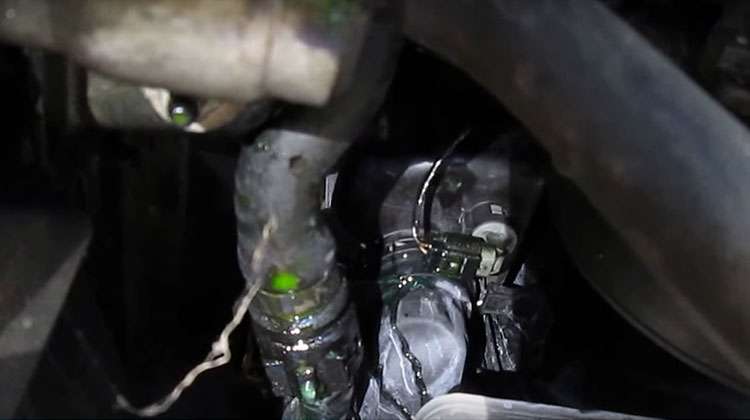
Instructions: If the pressure test doesn’t reveal the leak, a UV dye can pinpoint even the smallest breaches. With the engine cool, pour the recommended amount of UV dye (usually 1 ounce per 2-3 gallons of coolant) into the coolant reservoir. Drive the vehicle for 15-30 minutes to allow the dye to circulate throughout the system and leak out. Then, in a dark environment (at night or in a shaded garage), use a UV light (blacklight) along with UV enhancing glasses to scan all cooling system components. Leaking coolant mixed with the dye will glow brightly (usually green or yellow) under the UV light, clearly marking the exact source of the leak.
Pro Tip: After adding the dye and driving, let the car sit for an hour or two before using the UV light. This allows any leaking coolant to drip and collect, making the fluorescent trail more pronounced and easier to spot, especially on underside components.
✅ Final Checklist
- Engine was completely cool before starting any inspections or pressure tests.
- All visible hoses, clamps, and connections have been thoroughly inspected.
- Radiator, water pump, and thermostat housing areas were checked for stains or drips.
- Pressure test was conducted to the correct PSI and held for at least 15 minutes.
- UV dye was added, circulated, and the system was scanned with a UV light (if necessary).
Important Notes:
- Safety First: ALWAYS ensure the engine is completely cool before opening the radiator cap or working on the cooling system. Hot coolant is under pressure and can cause severe burns. Wear safety glasses and protective gloves throughout the process, as coolant is toxic.
- When to Seek Professional Help: If you suspect an internal leak (e.g., white smoke from the exhaust, coolant in your engine oil, or oil in your coolant reservoir), or if you’ve followed all these steps and still cannot locate the leak, it’s best to consult a certified mechanic. Internal leaks can indicate serious engine problems like a blown head gasket or cracked block.
- Estimated Time and Cost Range: For a DIY diagnosis, expect to spend 1-3 hours. The cost for tools like a pressure tester (rented) or UV dye kit is typically $10-$50. If professional diagnosis is required, it can range from $75 to $200, depending on the shop and complexity.
Essential Tools and Preparations for Effective Diagnosis
Accurate leak detection requires specific tools and careful preparation. Having everything ready before you start saves time and ensures a thorough inspection. Safety is paramount when working around your vehicle’s cooling system.
Gathering Your Diagnostic Arsenal
You’ll need a few key items to effectively track down a coolant leak:
- Flashlight: Essential for illuminating dark crevices and undercarriage areas.
- Rags or Paper Towels: For wiping away old residue and checking for fresh leaks.
- Gloves and Safety Glasses: To protect your hands from hot surfaces and eyes from coolant splashes.
- Cooling System Pressure Tester: This is a critical tool. It allows you to pressurize the system when the engine is cold, making leaks more apparent. Rentable from most auto parts stores.
- UV Dye Kit (Optional, but highly recommended): Includes a special UV reactive dye added to your coolant, a UV light, and yellow glasses to spot hard-to-find leaks.
- Small Mirror: Handy for seeing around corners or into tight spaces.
- Jack and Jack Stands: If you need to inspect the underside of the vehicle.
Safety First: Preparing Your Vehicle
Before you begin any inspection, prioritize your safety. The cooling system operates under pressure and at high temperatures. Always follow these precautions:
- Ensure the Engine is Completely COLD: This is non-negotiable. Never open the radiator cap or work on the cooling system when the engine is hot. Hot coolant and steam can cause severe burns. Allow at least an hour or more for the engine to cool down after driving.
- Park your vehicle on a level, hard surface.
- Engage the parking brake and turn off the engine.
- Wear your safety glasses and gloves throughout the process.
- Ensure adequate lighting in your work area.
Step-by-Step Visual Inspection: Cold Engine Check
The initial visual inspection is your first line of defense. It’s often surprising how many leaks can be spotted with a careful eye and good lighting before needing specialized tools.
Starting with a Cold, Clean Slate
With the engine thoroughly cooled and your safety gear on, open the hood. Your goal is to systematically scan the entire cooling system for any signs of wetness, stains, or residue. Begin by checking your coolant reservoir’s level; a consistently low level is your primary indicator of a leak.
Key Areas to Scrutinize
Methodically inspect these common leak points:
- Radiator: Look at the entire front and back of the radiator. Pay close attention to the fins for any wet spots, rust-colored stains, or discoloration. Check the top and bottom plastic (or metal) tanks where they crimp onto the aluminum core. These seams are common failure points. Inspect the radiator drain plug for any drips or looseness.
- Hoses (Upper, Lower, and Heater Hoses): Feel all accessible hoses. They should be firm, not spongy, brittle, or excessively soft. Look for cracks, bulges, chafing, or signs of wetness or crusty residue at the hose clamps and connection points. Carefully follow heater hoses from the firewall to the engine.
- Water Pump: Locate your water pump (typically belt-driven at the front of the engine). Look for leaks originating from its weep hole (a small drain hole designed to drip when the internal seal fails), around the shaft, or at the mounting gasket where it bolts to the engine block. You’ll often see a noticeable stain or trail of coolant running down from it.
- Thermostat Housing: This is where the thermostat is housed, usually bolted to the engine block or cylinder head. Inspect the housing and its gasket for any coolant streaks or wetness.
- Coolant Reservoir/Overflow Tank: Check the entire plastic reservoir for cracks, especially around the neck or mounting points. Ensure the cap is properly seated and inspect its connecting hoses.
- Engine Block and Cylinder Head: Look for any trails or puddles of coolant on the engine block itself. Pay close attention to the areas around the cylinder head gasket seam (where the cylinder head meets the block). While a head gasket leak might not always be visible externally, sometimes coolant can seep out.
Use your flashlight to peer into tight spots. If you find a suspected area, wipe it clean with a rag and recheck it after a few minutes to see if fresh coolant appears.
<h2>Common Locations for Coolant System Failures</h2>
<p>Knowing where to focus your attention can drastically cut down diagnostic time. Coolant systems have several common weak points, often due to wear, vibration, or material fatigue. Understanding these hotspots will guide your visual inspection.</p>
<h3>Hoses, Radiator, and Heater Core</h3>
<p>These components are frequently exposed to heat, pressure, and the elements, making them prime candidates for leaks. <strong>Hoses</strong> are a common culprit; look for tell-tale signs of distress.</p>
<ul>
<li><em>Hoses:</em> Inspect radiator hoses (upper and lower), heater hoses, and any bypass hoses. Feel them when cold – they should be firm but pliable. Soft, squishy, or overly hard hoses often indicate internal deterioration. Also, check for cracks, bulges, or chafing where they rub against other components.</li>
<li><em>Radiator:</em> Examine the radiator’s fins for bent or damaged areas that could puncture tubes. Pay close attention to the plastic end tanks (if applicable) where they crimp to the metal core; these seals can degrade and leak. Look for coolant stains, especially at the top and bottom edges.</li>
<li><em>Heater Core:</em> Located behind your dashboard, a leaking heater core can manifest as a sweet smell inside the cabin, unexplained moisture on the passenger floor, or foggy windows that don’t clear.</li>
</ul>
<p>Any signs of dampness, discoloration, or crystalline residue around these areas strongly suggest a leak.</p>
<h3>Water Pump, Thermostat Housing, and Gaskets</h3>
<p>Mechanical components and their associated seals are also frequent leak sources, often due to their moving parts or the constant thermal cycling they endure.</p>
<ul>
<li><em>Water Pump:</em> This component circulates coolant. Many water pumps have a “weep hole” designed to release coolant if the internal seal fails. A drip or trail of coolant originating from the bottom of the water pump pulley area is a strong indicator of a failing pump.</li>
<li><em>Thermostat Housing:</em> This often plastic or aluminum component houses the thermostat. Its gasket can fail over time, or the housing itself can crack due to heat stress. Look for coolant seeping from the mating surfaces.</li>
<li><em>Gaskets:</em> Various gaskets throughout the engine can leak coolant. The <strong>intake manifold gasket</strong> (especially on V-style engines) and even the <strong>cylinder head gasket</strong> can fail, leading to external or even internal coolant leaks. External signs might include coolant pooling in engine valleys or seeping down the block, while internal leaks present other symptoms like milky oil or white exhaust smoke.</li>
</ul>
<p>Don’t overlook hose clamps either; a loose or corroded clamp can easily cause a persistent drip.</p>
<h2>Advanced Diagnostic Techniques for Elusive Leaks</h2>
<p>Sometimes, leaks are sneaky – too small to readily see, or only occurring under specific conditions. When visual inspections fall short, specialized tools can help pinpoint the problem with greater accuracy.</p>
<h3>Pressure Testing for Pinpoint Accuracy</h3>
<p>A cooling system pressure tester is an invaluable tool for finding those hidden leaks. This device temporarily seals your cooling system and allows you to manually pump it up to its normal operating pressure (or slightly below).</p>
<ul>
<li><em>How it works:</em> By pressurizing the system when the engine is cold and off, you mimic the stress the system experiences during operation, forcing coolant out of even the tiniest cracks or compromised seals.</li>
<li><em>Benefits:</em> It makes small drips more noticeable and can reveal leaks that only appear under pressure. You can leave the system pressurized for an extended period, allowing time for slow leaks to become evident.</li>
<li><em>When to use:</em> Ideal for situations where coolant disappears without a trace, or visible leaks are intermittent. You’ll often find a drip forming or coolant bubbling up from a previously invisible spot.</li>
</ul>
<p>Always consult your vehicle’s service manual for the correct pressure range to avoid over-pressurizing and causing further damage.</p>
<h3>UV Dye and Other Specialized Tools</h3>
<p>For leaks that are still baffling, even under pressure, or located in incredibly tight spaces, a few more tricks can come in handy.</p>
<ul>
<li><em>UV Dye:</em> This is perhaps the most effective method for finding ultra-elusive leaks. A small amount of fluorescent dye is added to your coolant reservoir. You then drive the car for a short period (or let it run until operating temperature), allowing the dye to circulate throughout the system. Later, using a UV (black) light and special yellow safety glasses, you can easily spot the glowing green or yellow dye wherever coolant has leaked out, even in trace amounts.</li>
<li><em>Borescope/Inspection Camera:</em> For incredibly hard-to-reach areas, like behind engine components or inside firewall crevices, a flexible inspection camera can provide eyes where yours can’t go. This is particularly useful when you suspect a leak but can’t get a clear line of sight.</li>
<li><em>Exhaust Gas Analyzers:</em> If you suspect an internal leak, such as a head gasket failure, an exhaust gas analyzer kit can test for the presence of exhaust gases (CO2) in your cooling system. This indicates combustion gases are entering the coolant, a sure sign of internal engine damage.</li>
</ul>
<p>Combining UV dye with pressure testing can be an incredibly powerful diagnostic duo, often revealing leaks that would otherwise remain hidden.</p>
<h2>Conclusion</h2>
<p>Diagnosing a coolant leak effectively relies on a systematic approach. From initial visual checks and keen observation of common failure points to employing advanced tools like pressure testers and UV dye, you now have a comprehensive toolkit. Remember, identifying the leak is the critical first step towards preventing costly engine damage and maintaining your vehicle’s health. Don’t let a mystery puddle or a dropping coolant level go unchecked. Take proactive steps to investigate any signs of trouble. If you’re unsure or uncomfortable performing these diagnostics yourself, always consult a trusted mechanic to ensure your car stays on the road safely and reliably.</p>
❓ Frequently Asked Questions
What are the clear warning signs of a coolant leak that indicate I need to check my car?
Puddles of colored liquid (green, pink, or orange) under your car, a persistent sweet smell, frequent low coolant warnings on your dashboard, and an engine temperature gauge showing overheating are critical indicators of a coolant leak that demand immediate investigation.
Why is it important to check the cooling system when the engine is both cold and hot for a leak?
Leaks can behave differently based on temperature and pressure; some are only visible when the system is pressurized and hot, while others, like small cracks, are more apparent when cold and coolant has settled or dripped overnight.
How do I decide whether to use a cooling system pressure tester or UV dye to locate a leak?
A pressure tester is ideal for identifying active, larger leaks by simulating operating pressure, making them easier to spot. UV dye is better suited for very slow, intermittent seeps or tiny cracks that might not be obvious under static pressure or during a quick visual inspection.
Can a faulty radiator cap lead to coolant loss, even without an obvious leak?
Yes, a failing radiator cap might not maintain the correct system pressure, allowing coolant to boil over and evaporate more quickly, or even escape through the overflow, giving the impression of a leak or rapid coolant disappearance.
What are some less obvious places where coolant leaks can occur that I should inspect?
Beyond common areas like the radiator and hoses, check the thermostat housing, the heater core (which leaks inside the cabin, often noticeable by a sweet smell or fogging windows), freeze plugs on the engine block, and potentially a failing head gasket, which can cause internal engine leaks.
Is it generally recommended to use temporary coolant stop-leak products, or are they detrimental?
While stop-leak products can offer a very temporary fix for minor leaks, they are generally not recommended for long-term solutions. They can often clog not only the leak but also vital components like the radiator and heater core, potentially causing more significant and costly damage to the cooling system.