Clear Check Engine Light: Methods, Warnings & Smart Steps
Last Updated on September 1, 2026 by Ryan
Clearing a check engine light without understanding its cause can hide serious issues. Always diagnose the underlying problem first using an OBD2 scanner, and never clear a flashing light. Common methods like using a scanner or disconnecting the battery can then be used safely after addressing the root cause.

Prime for Young Adults — 6 Months Free
Students and 18–24s get six months of Prime free, then half price.
Start 6 Months Free🎯 Key Takeaways
Recommended Best Deal Products


- Diagnose codes before attempting to clear.
- Never clear a flashing check engine light.
- OBD2 scanner offers safe, controlled clearing.
- Battery disconnect is a temporary reset.
- Address root cause to prevent light’s return.
Facing a persistent check engine light can be frustrating. You can, in fact, clear it yourself. However, this action should only ever follow a thorough diagnosis and ideally, a successful repair of the underlying issue. Simply turning off the light without addressing the root cause is a critical mistake that can lead to more significant, and costly, damage down the road.

Understanding when and how to safely clear your check engine light isn’t about ignoring a problem. It’s about confirming your fix, preventing misdiagnosis, and ensuring your vehicle operates reliably. Prioritizing diagnosis over immediate clearing protects your investment and keeps you safer on the road.
Understanding the Check Engine Light’s Purpose
More Than Just an Annoyance
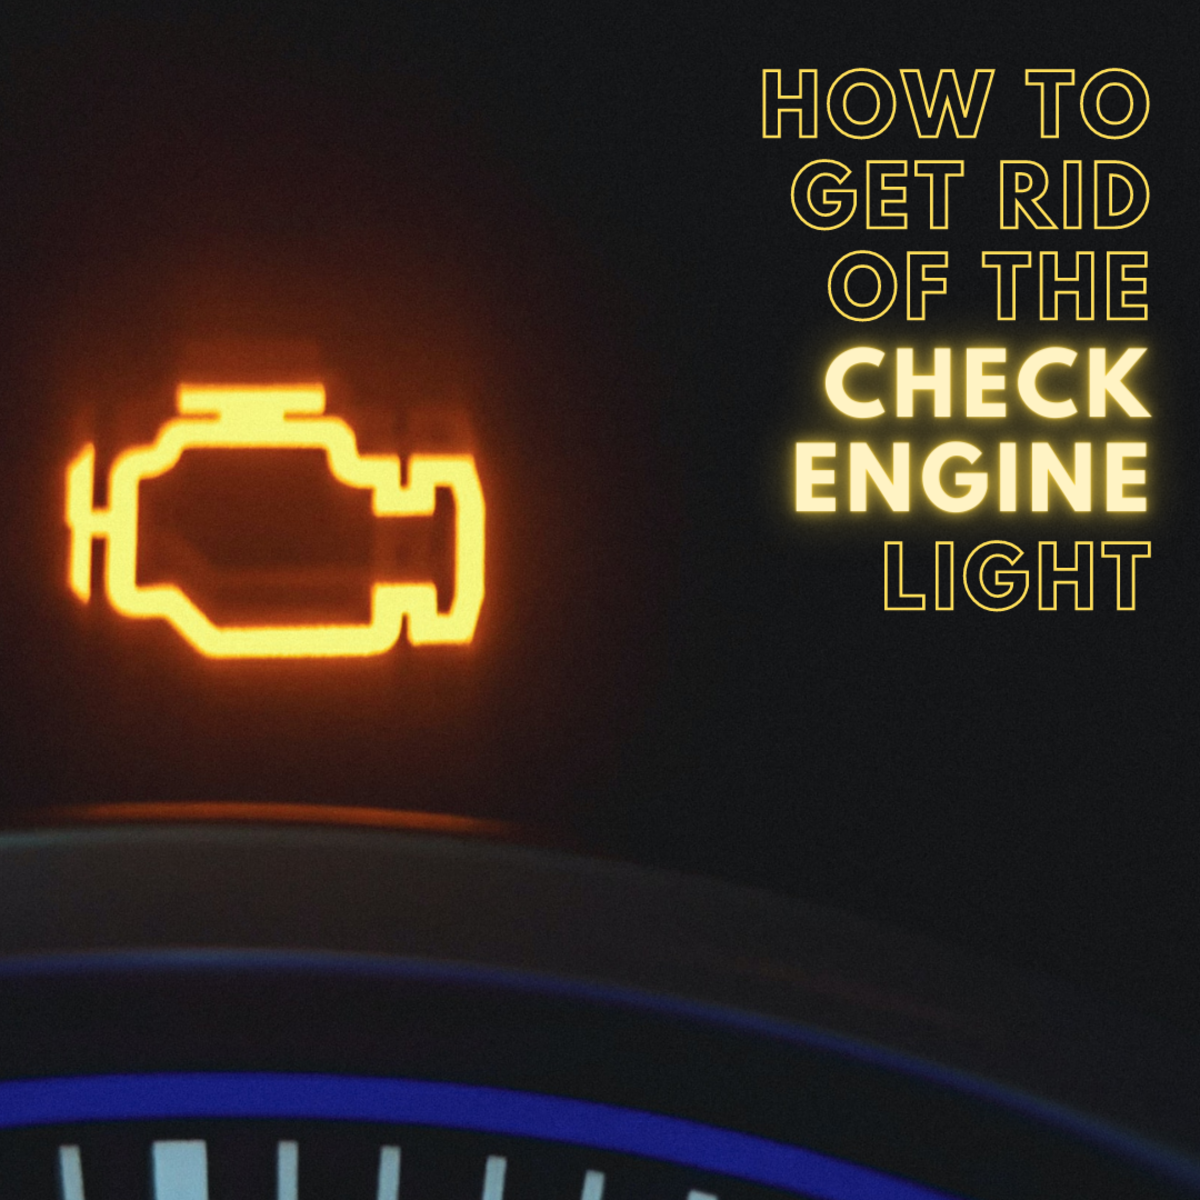
Your vehicle’s check engine light, also known as the Malfunction Indicator Lamp (MIL), is a crucial diagnostic tool. Its primary function is to alert you to an issue detected by the On-Board Diagnostics II (OBD2) system. This system constantly monitors various engine, transmission, and emissions-related components. When a sensor detects an out-of-spec reading or a component malfunction, the computer logs a Diagnostic Trouble Code (DTC) and illuminates the check engine light.

Think of it as your car’s way of saying, “Hey, something isn’t quite right, and it needs attention.” It’s not just a random dashboard warning; it’s a prompt to investigate. Ignoring it, or clearing it without understanding the fault, means you’re intentionally overlooking vital information about your vehicle’s health.
Decoding the Light’s Behavior
The check engine light isn’t a one-size-fits-all warning. Its behavior communicates the severity of the problem:
- Solid (Steady) Light: This is the most common scenario. A solid light typically indicates a non-critical, but still important, issue. It might be something minor, like a loose gas cap, or something more significant affecting emissions or fuel economy. While you can usually continue driving cautiously, prompt diagnosis is still essential.
- Flashing (Blinking) Light: This is an urgent, critical warning. A flashing check engine light signifies a severe engine misfire or other serious problem that could be actively causing damage to your catalytic converter or other vital components. If your light is flashing, you should immediately and safely pull over, turn off the engine, and arrange for professional assistance. Never continue driving with a flashing check engine light. Clearing a flashing light yourself is not only ineffective but incredibly dangerous and irresponsible.
From Start to Finish: Clearing Your Check Engine Light Explained
Recommended Best Deal Products


A “Check Engine Light” (CEL), also known as a Malfunction Indicator Lamp (MIL), can be a source of anxiety for any vehicle owner. While it often signals a minor issue, it can also point to something more serious. This comprehensive guide will walk you through the process of understanding, diagnosing, and ultimately clearing your check engine light, emphasizing the importance of addressing the underlying problem before simply resetting the warning. Following these steps carefully will help you approach the situation methodically and effectively.
Step 1: Don’t Panic, But Investigate First
What you need: A calm demeanor, awareness of your vehicle’s behavior, and access to your vehicle’s owner’s manual.
Instructions: When the Check Engine Light illuminates, your first instinct might be to panic. Don’t. Observe your vehicle for any noticeable changes in performance, such as rough idling, stalling, decreased fuel economy, or unusual noises. The light itself can be steady or flashing. A steady light indicates a non-critical issue that requires attention soon, while a flashing light signals a severe problem, often a misfire, that could cause immediate damage to your catalytic converter. A common, simple fix to check initially is ensuring your fuel cap is tightly secured; a loose cap can frequently trigger the CEL.

Audible — Listen Free for 30 Days
One free credit a month and thousands of titles included.
Listen Free for 30 DaysPro Tip: If your Check Engine Light is flashing, pull over safely as soon as possible and shut off the engine. Driving with a flashing CEL can lead to expensive damage, particularly to emission control components like the catalytic converter, which can cost upwards of $1,000 to replace.
Step 2: Retrieve Diagnostic Trouble Codes (DTCs)
What you need: An OBD-II (On-Board Diagnostics II) scanner (either a handheld device or a Bluetooth adapter paired with a smartphone app), and knowledge of your vehicle’s OBD-II port location.
Instructions: The key to understanding why your CEL is on lies in the Diagnostic Trouble Codes (DTCs) stored in your vehicle’s Engine Control Unit (ECU). Locate your OBD-II port, typically found under the dashboard on the driver’s side, often near the steering column. Plug your scanner into the port. Turn your vehicle’s ignition to the “ON” position (do not start the engine). Follow your scanner’s on-screen prompts to “Read Codes” or “Scan for DTCs.” Carefully note down all alphanumeric codes that appear (e.g., P0420, P0301). Many auto parts stores also offer free code reading services.
Pro Tip: Some advanced OBD-II scanners can also display “pending codes,” which are issues that haven’t yet fully triggered the CEL but are occurring intermittently. Checking these can give you an early warning or help confirm a intermittent problem. Always write down the full code, including any letters or leading zeros.
Step 3: Interpret the Codes and Research Potential Fixes
What you need: Internet access (smartphone, computer), pen and paper for detailed notes, and potentially a vehicle repair manual or online forum access.
Instructions: Once you have your DTCs, the next crucial step is to understand what they mean. Use a reliable online search engine (e.g., Google), automotive repair websites, or dedicated DTC databases to look up each code. Input your specific vehicle’s make, model, and year along with the code for the most accurate results (e.g., “2015 Honda Civic P0420 code”). Pay close attention to common causes, associated symptoms, and suggested diagnostic steps or repairs. This research will help you narrow down the potential issues, from a simple sensor failure to a more complex system malfunction.
Pro Tip: Be aware that a single DTC might have multiple potential causes. For instance, a P0420 code (Catalyst System Efficiency Below Threshold) doesn’t always mean your catalytic converter is bad; it could also be caused by exhaust leaks or faulty oxygen sensors. Prioritize codes based on their severity and logical diagnostic flow.
Step 4: Address the Underlying Issue (The Most Crucial Step!)
What you need: Tools specific to the diagnosed problem (e.g., socket wrench set, screwdriver, specialized pliers), appropriate replacement parts if necessary (e.g., new fuel cap, O2 sensor, spark plugs), and safety gear.
Instructions: Simply clearing the Check Engine Light without fixing the underlying problem is a temporary solution; the light will inevitably return. Based on your research from Step 3 and your comfort level with DIY repairs, you must now address the fault. This could range from tightening a loose gas cap, which takes seconds, to replacing an oxygen sensor or spark plugs, which might require basic hand tools and some mechanical aptitude. Always ensure the vehicle is turned off, cooled down, and the parking brake is engaged before attempting any repairs. If the repair is beyond your skill set or requires specialized tools, this is the point to seek professional mechanic assistance.
Audible Premium Plus — Annual Membership
12 audiobook credits up front, plus the full Audible catalogue.
See Annual PlansPro Tip: When replacing parts, always opt for quality OEM (Original Equipment Manufacturer) or reputable aftermarket components. Cheap parts might not last as long or perform as well, potentially causing the CEL to reappear sooner than expected. Always disconnect the battery’s negative terminal before working on electrical components to prevent accidental shorts.
Step 5: Clearing the Light Using an OBD-II Scanner
What you need: Your OBD-II scanner, your vehicle with the ignition on (engine off) after the repair has been completed.
Instructions: After you’ve addressed the underlying issue, it’s time to clear the diagnostic trouble codes and turn off the CEL. With your OBD-II scanner still connected and the ignition in the “ON” position (engine off), navigate through the scanner’s menu options. Look for functions labeled “Erase Codes,” “Clear DTCs,” “Reset MIL,” or “Clear Fault Codes.” Select this option and confirm when prompted. The Check Engine Light on your dashboard should immediately turn off. If the light remains on, either the repair was unsuccessful, there’s another underlying issue, or the code was not actually cleared.
Pro Tip: Clearing codes with an OBD-II scanner is generally the preferred method because it’s targeted and doesn’t erase other vehicle settings like radio presets or ECU adaptive learning data. Ensure you’ve genuinely fixed the problem before clearing, otherwise, the light will simply return, often after a few drive cycles.
Step 6: Clearing the Light by Disconnecting the Battery (A Last Resort)
What you need: A wrench (typically 10mm or 13mm for battery terminals), a timepiece, and any radio security codes if your vehicle requires them.
Instructions: If you don’t have an OBD-II scanner or for some reason the scanner method doesn’t work, you can reset the ECU by disconnecting the car battery. With the engine and ignition completely off, use your wrench to loosen the nut on the negative (-) battery terminal. Carefully remove the negative cable from the battery post and secure it away from any metal to prevent accidental contact. Leave it disconnected for a minimum of 15-30 minutes. This duration allows the vehicle’s onboard computer to fully lose its memory and reset. After the waiting period, reattach the negative cable securely to the battery terminal. You may need to reset your radio presets, clock, and potentially enter a security code for the radio if applicable.
Pro Tip: Disconnecting the battery also resets all “readiness monitors” for emissions testing. This means you’ll need to complete a full drive cycle (Step 7) before your vehicle can pass an emissions inspection. It also erases the ECU’s adaptive learning, meaning your car might drive slightly differently for a short period while it “relearns” driving habits.
Step 7: Perform a Drive Cycle for Readiness Monitors
What you need: Your vehicle, an open stretch of road, and potentially your OBD-II scanner to monitor readiness status.
Instructions: After successfully clearing the Check Engine Light and addressing the underlying issue, it is crucial to perform a complete drive cycle. A drive cycle allows your vehicle’s Engine Control Unit (ECU) to run self-tests on all emission-related systems, setting their “readiness monitors” to ‘complete’ or ‘ready’. This typically involves a mix of idling, city driving, and highway driving at varying speeds for a sustained period (e.g., 15-30 minutes minimum). Consult your vehicle’s owner’s manual or an online resource for your specific model’s drive cycle requirements, as they can vary. The goal is to allow all systems to complete their diagnostic tests without triggering the CEL again.
Pro Tip: If the Check Engine Light reappears during or after the drive cycle, it indicates that the original problem was either not fully resolved, or a new issue has developed. In this scenario, you’ll need to restart the diagnostic process from Step 2. Monitoring the readiness monitors with your OBD-II scanner can help confirm when your vehicle is ready for inspection.
✅ Final Checklist
- All Diagnostic Trouble Codes (DTCs) have been retrieved and noted.
- The underlying issue that triggered the Check Engine Light has been identified and addressed (repaired or tightened).
- The Check Engine Light has been successfully cleared using an OBD-II scanner or the battery disconnection method.
- No new warning lights or abnormal vehicle behaviors are present after clearing the codes.
- The vehicle has been driven through a complete readiness monitor drive cycle, confirming that all systems are ready and the CEL remains off.
Important Notes:
- Safety Considerations: Always prioritize safety. Ensure your vehicle is parked on a level surface with the parking brake engaged before working on it. Disconnect the battery’s negative terminal before working on electrical components. Be cautious around hot engine parts and use appropriate personal protective equipment (gloves, eye protection).
- When to Seek Professional Help: If you are uncomfortable performing any diagnostic or repair steps, if the Check Engine Light is flashing, if the problem persists after your attempts, or if the diagnosis points to a complex or critical system failure (e.g., transmission issues, serious engine problems), do not hesitate to seek assistance from a certified professional mechanic. Ignoring persistent issues can lead to more extensive and costly damage.
- Estimated Time and Cost Range:
- Retrieving Codes: 5-10 minutes (Free if you own an OBD-II scanner, ~$0-$50 at auto parts stores for a code read).
- Research & Diagnosis: 30 minutes to several hours (Free, requires internet access).
- Simple Fix (e.g., fuel cap): 1 minute (Free, unless cap replacement needed: $10-$30).
- Sensor Replacement (e.g., O2 sensor): 30 minutes – 2 hours (Cost of part: $20-$200+, tools additional).
- Clearing Codes: 2-5 minutes (Free if you own scanner).
- Drive Cycle: 30 minutes – 1 hour.
- Professional Diagnosis & Repair: $100-$1000+ depending on the complexity of the issue and parts needed.
Critical Considerations Before Clearing the Light
The Paramount Rule: Diagnose First!
This cannot be stressed enough: Always diagnose the underlying problem before attempting to clear the check engine light. Clearing the light without knowing the cause means you erase the crucial diagnostic trouble codes (DTCs) stored in your vehicle’s computer. These codes are the roadmap to understanding what went wrong.
Here’s how to diagnose:
- Acquire an OBD2 Scanner: These devices plug into a port, usually located under your dashboard, and read the codes. Affordable handheld scanners are readily available online or at auto parts stores. Many auto parts stores also offer free code reading services.
- Read the Codes: Once connected, the scanner will display one or more “P-codes” (e.g., P0420 for catalytic converter inefficiency, P0301 for cylinder 1 misfire). These codes point directly to the system or component at fault.
- Research the Codes: Look up what each specific code means. This will guide you toward potential causes and solutions. For example, a common P0440 code often relates to the Evaporative Emission Control (EVAP) system, which can sometimes be as simple as a loose or faulty gas cap.
- Address the Root Cause: Based on the diagnosis, take steps to fix the problem. This might involve tightening your gas cap, replacing a faulty sensor, or performing a more complex repair.
Only after you’ve identified and addressed the potential issue should you consider clearing the light to confirm if your fix was successful. If the light reappears, you know the problem wasn’t fully resolved or there’s another underlying issue.
When NOT to Clear the Light
While the ability to clear the check engine light exists, there are absolute scenarios where you should never attempt it:
- Flashing Check Engine Light: As mentioned, this indicates a severe problem requiring immediate attention. Clearing it will not fix the issue and could lead to catastrophic engine or catalytic converter damage.
- Noticeable Driving Performance Issues: If your car is exhibiting symptoms like significant loss of power, strange noises (knocking, grinding), excessive smoke from the exhaust, difficulty starting, overheating, or a strong smell of fuel, do not clear the light. These are clear indicators of a serious mechanical failure. Clearing the light in these situations only masks the warning and risks further, irreversible damage.
- Unidentified Problem: If you’ve read the codes but are unsure what they mean, or you haven’t yet attempted a repair, do not clear the light. You are simply removing the diagnostic breadcrumbs for yourself or a mechanic.
Remember, the check engine light is a warning system. Disabling the warning without resolving the danger it signifies is akin to ignoring a smoke detector because the alarm is annoying.
Methods for Resetting the Check Engine Light
Recommended Best Deal Products


Once you’ve diagnosed the issue (or confirmed it was a fluke), you might want to clear the check engine light. It’s important to remember that clearing the light doesn’t fix the problem itself. Think of it as turning off an alarm after you’ve dealt with the fire. There are a couple of primary methods for doing this, each with its own implications.
Professional Scan Tool Reset
This is arguably the most common and recommended way to clear a check engine light, especially after a repair. Mechanics, and even many advanced DIY enthusiasts, use OBD-II scan tools (also known as diagnostic scanners) to read and then clear fault codes. After a repair, clearing the code with a scanner tells the car’s computer that the issue has been addressed. The scan tool directly communicates with the vehicle’s onboard computer, erasing the stored Diagnostic Trouble Codes (DTCs) and turning off the light.
- Precision: Allows you to confirm the specific code before clearing.
- Verification: Many tools can re-scan immediately to ensure the code doesn’t return.
- Data Retention: Modern professional tools can often clear codes without completely wiping other adaptive memory settings.
This method is part of a thorough diagnostic and repair process, ensuring the computer registers the fix and begins monitoring the system properly again.
Battery Disconnect Method (Use with Caution)
A more “manual” approach to clearing the check engine light involves disconnecting your car’s battery. This effectively performs a “hard reset” on your vehicle’s computer, erasing all stored codes, including the CEL. While it sounds simple, it comes with a few caveats. Disconnecting the battery can reset other electronic systems in your car, such as your radio presets, navigation system memory, and even the engine’s idle learn procedures. Some newer vehicles might require a specific re-learning process for various systems after a battery disconnect.
- Simplicity: Doesn’t require special tools.
- Potential Side Effects: May lose radio codes, seat memory, or trigger anti-theft systems.
- Temporary Fix: If the underlying issue isn’t resolved, the light will inevitably return.
Always consult your vehicle’s owner’s manual before attempting this method to understand any specific warnings or post-disconnection procedures for your model.
Post-Clearing Expectations and Next Steps
Clearing your check engine light isn’t the finish line; it’s a new starting point. What happens next, and how your car behaves, tells you a lot about whether the issue was truly resolved or if it’s merely hiding.
Monitoring for Recurrence
After you clear the check engine light, especially if you’ve done so after a repair, the most important step is to monitor your vehicle. Drive your car as you normally would, but pay close attention to its performance. Does it feel smoother? Is the problem you noticed gone? The engine’s computer needs to go through a series of “drive cycles” to re-evaluate all its systems and confirm everything is operating correctly. This can take anywhere from a few miles to several days of varied driving conditions.
- Listen and Feel: Pay attention to any unusual noises, smells, or changes in driving feel.
- Readiness Monitors: OBD-II scanners can show “readiness monitor” status. These are tests the computer runs to confirm emissions systems are working. They typically show “incomplete” after a reset and need to complete before some inspections.
- Record Observations: Keep a mental (or actual) note of how the car performs immediately after the reset.
If the light stays off and your car runs normally, congratulations! You likely addressed the issue successfully.
When the Light Comes Back On
It’s a common scenario: you clear the light, breathe a sigh of relief, and then it reappears. Don’t despair, but do take action. If the check engine light comes back on, it’s a strong indicator that the underlying problem was not fully resolved, or that a new issue has arisen. In this case, it’s crucial to go back to square one: re-scan for codes. The new code might be the same, suggesting the repair wasn’t effective, or it could be a different code pointing to a related or new problem.
When the light persists after clearing, it’s a clear signal that professional help is likely needed. While DIY diagnostics can get you started, some issues require specialized tools, in-depth knowledge, and experienced hands to properly identify and fix. Ignoring a persistent check engine light can lead to more significant, and more expensive, damage down the road.
Conclusion
Navigating a check engine light can feel daunting, but with the right approach, it’s a manageable part of vehicle ownership. Remember, the light is a messenger, not the problem itself. Prioritize accurate diagnosis before attempting any resets. Whether you opt for a professional scan tool or the cautious battery disconnect method, always follow up by carefully monitoring your vehicle’s performance. A persistent light is your car’s way of asking for professional attention. By understanding these steps and warnings, you can make informed decisions, ensuring your vehicle remains reliable and safe on the road. Take control of your car’s health and drive with confidence!
❓ Frequently Asked Questions
Why is diagnosing the problem before clearing crucial?
Clearing the light without knowing the cause can mask a serious issue, potentially leading to further damage, costly repairs, or even safety risks. It’s essential to retrieve the diagnostic trouble codes (DTCs) first to understand the problem.
When should I absolutely NOT clear the check engine light?
Do not clear the light if it’s flashing or if you notice significant performance issues like misfires, loss of power, or strange noises. A flashing light often indicates a severe problem that could damage the catalytic converter.
What are the risks of ignoring a check engine light?
Ignoring the light can lead to decreased fuel efficiency, increased emissions, engine damage, or even a breakdown. Minor issues can escalate into major, expensive repairs if left unaddressed for too long.
Does clearing the light fix the underlying problem?
No, clearing the light only turns off the indicator; it does not resolve the mechanical or electrical issue causing it. The light will likely return if the root cause isn’t fixed.
How does an OBD2 scanner help clear the light?
An OBD2 scanner connects to your car’s diagnostic port, reads the error codes, and often has an option to ‘erase codes’ or ‘clear DTCs.’ This tells the car’s computer to turn off the light.
What happens to my car’s ‘readiness monitors’ after clearing codes?
Clearing codes resets your car’s readiness monitors to an ‘incomplete’ state. These monitors need to run through specific drive cycles to become ‘ready’ again, which is often required for emissions testing.