Autofit All Excel Columns: Quick Ways to Expand Widths
Last Updated on September 1, 2026 by Ryan
The most efficient way to expand all columns in Excel is to select the entire sheet and double-click between any two column headers. This action instantly adjusts every column to perfectly fit its widest content, saving significant time and improving readability. You can also achieve this via the Home tab’s Format options.

Prime for Young Adults — 6 Months Free
Students and 18–24s get six months of Prime free, then half price.
Start 6 Months Free🎯 Key Takeaways
Recommended Best Deal Products


- Select all, double-click a header boundary to autofit.
- Use Home tab> Format> Autofit Column Width option.
- Autofit applies to all visible data in selected columns.
- Ensure no merged cells interfere with autofit accuracy.
- Regularly autofit for better data presentation and clarity.
To instantly adjust the width of all columns in your Excel spreadsheet to perfectly fit their content, you have a lightning-fast method at your disposal. Simply select your entire worksheet – either by pressing Ctrl + A (or Cmd + A on Mac) or by clicking the top-left corner triangle – and then double-click between any two column letters in the header row. This single action will dynamically resize every column to its optimal width.
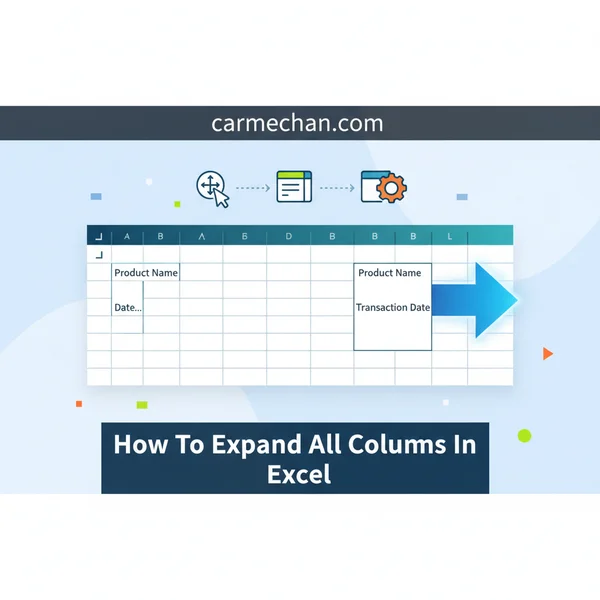
This quick trick is incredibly practical and fundamentally changes how you interact with large or frequently updated datasets. No longer will you struggle with truncated text, hidden numbers, or excessively wide columns that waste screen space. Mastering this automatic autofit ensures your data is consistently presented with clarity and professionalism, saving you significant time and frustration.
Understanding Excel’s Autofit Column Width Function
Excel’s autofit feature is your best friend for clean, readable data presentation. It intelligently analyzes the content within each cell of a column – be it text, numbers, dates, or formulas – and then automatically adjusts that column’s width to precisely accommodate its widest entry. This powerful, built-in function eliminates the guesswork of manual resizing, ensuring every piece of information is fully visible without any wasted space.
The Go-To Method: Select All and Double-Click
This is by far the quickest and most intuitive way to expand all columns in your Excel sheet. It leverages a simple, universal mouse gesture after you’ve selected your entire data range. Here’s how to master this essential technique to perfectly fit all your column widths:
- Select Your Entire Worksheet: You have two primary, efficient options here:
- Press Ctrl + A (Cmd + A on Mac). If you have data in your sheet, pressing this once selects your current data region. Pressing it a second time (or once in an empty sheet) selects the entire grid.
- Click the Select All button. This is the small gray triangle situated at the intersection of the row numbers and column letters, in the very top-left corner of your worksheet. Clicking it once highlights the entire sheet.
- Double-Click Between Any Two Column Headers: After your entire worksheet is selected, move your mouse cursor to the boundary line between any two column letters in the header row (for example, position it precisely between the “A” and “B” column headers, or “C” and “D”). Your cursor will change into a distinctive double-headed arrow icon. When you see this icon, double-click.
Instantly, every single column in your selected worksheet will snap to the perfect width, fitting its longest content. This includes lengthy text strings, large numbers, and even dates. It’s a universal adjustment applied across the entire sheet, ensuring uniformity and exceptional clarity.
Ribbon-Based Alternative: Accessing Autofit Through the Menu
While the double-click method is lightning fast and widely preferred, Excel also provides an option through the ribbon menu. Some users prefer this method for menu-driven navigation or in workflows where a mouse double-click might not always register reliably.
Follow these steps for the ribbon method:
- Select Your Entire Worksheet: Just like with the previous method, begin by selecting all cells using Ctrl + A or by clicking the Select All button in the top-left corner of your sheet.
- Navigate to the Home Tab: Ensure you are on the Home tab of the Excel ribbon at the top of your window.
- Find the Format Dropdown: In the Cells group (this group is typically located towards the right side of the Home tab), click on the Format dropdown menu.
- Choose Autofit Column Width: From the list of options that appear in the dropdown, select Autofit Column Width.
This action will yield the exact same result as the double-click method, adjusting all columns to fit their content perfectly. It’s a robust and reliable alternative, ensuring you always have a way to quickly optimize your column widths.

Audible — Listen Free for 30 Days
One free credit a month and thousands of titles included.
Listen Free for 30 DaysThe Ultimate Excel Column Expansion Walkthrough
Recommended Best Deal Products


Welcome to your essential guide for mastering column width adjustments in Microsoft Excel! This walkthrough will demystify the process of expanding columns, ensuring all your valuable data is fully visible without frustrating truncation. Whether you’re dealing with a single overflowing cell, a selection of critical columns, or an entire sprawling worksheet, this guide provides practical, step-by-step instructions. Properly formatted columns enhance readability, improve data presentation, and make your spreadsheets far more user-friendly, saving you significant time and potential errors in the long run.
Step 1: Understanding Excel Column Behavior and Data Visibility
What you need: An open Microsoft Excel workbook containing some data, preferably with text that extends beyond the default column width.
Instructions: It’s crucial to understand why columns appear to “cut off” data. Excel columns have a default width. When content in a cell is wider than its column, Excel displays only what fits. For text, it usually overflows into adjacent empty cells; if the adjacent cell is also populated, the text appears truncated. For numbers, Excel often displays “######” to indicate insufficient width. Recognizing this behavior helps you identify when an expansion is needed.
Pro Tip: Text truncation hides crucial information. Always visually inspect your spreadsheet for “######” in numeric cells or partially visible text strings, as these are primary indicators that column expansion is required for full data integrity and comprehension.
Step 2: The Quick Auto-Fit for a Single Column
What you need: An active Excel worksheet with at least one column requiring width adjustment.
Instructions: This is the fastest method for a single column. Move your mouse cursor to the column header area (e.g., between ‘A’ and ‘B’, or ‘B’ and ‘C’). The cursor will change into a double-headed arrow. Once you see this arrow, simply double-click the boundary line. Excel will automatically adjust that specific column’s width to perfectly fit the longest entry within that column, whether it’s text, numbers, or a formula result, providing an instant, precise fit.
Pro Tip: Ensure you double-click directly on the dividing line between two column letters in the header. Clicking too far left or right might accidentally select a column or trigger a manual drag operation instead.
Step 3: Manual Adjustment for Precise Column Width Control
What you need: An Excel worksheet where you need to set a column to a very specific, non-auto-fitted width.
Instructions: For situations where auto-fit is too narrow or too wide, you can manually drag the column boundary. Position your mouse cursor in the column header between the two column letters (e.g., between ‘C’ and ‘D’) until it transforms into the double-headed arrow. Click and hold the left mouse button, then drag the boundary line left or right. As you drag, Excel will display the current width in “pixels” and “characters” in a tooltip. Release the mouse button when you reach your desired width, allowing for exact aesthetic adjustments.
Audible Premium Plus — Annual Membership
12 audiobook credits up front, plus the full Audible catalogue.
See Annual PlansPro Tip: While dragging, hold down the Alt key (Windows) or Option key (Mac) to snap to grid lines or other precise increments, which can be useful for alignment with other elements on your sheet.
Step 4: Expanding a Selection of Specific Columns Simultaneously
What you need: An Excel worksheet with multiple non-adjacent or adjacent columns that all need their widths adjusted to fit their content.
Instructions: To apply auto-fit to several columns at once, first select the columns you wish to adjust. You can do this by clicking the first column header and dragging across adjacent columns, or by holding down the Ctrl key (Windows) or Cmd key (Mac) and clicking individual non-adjacent column headers. Once all desired columns are selected, move your cursor to any boundary line between any two of the selected column headers. When the double-headed arrow appears, double-click. All selected columns will then auto-fit to their respective longest entries.
Pro Tip: This method is incredibly efficient when you only need to adjust a specific range of data rather than the entire sheet. Always ensure all intended columns are highlighted before performing the double-click action.
Step 5: The “Select All” Trick: Auto-Fit the Entire Worksheet
What you need: A densely populated Excel worksheet where you want every single column to automatically adjust its width to its content.
Instructions: This is the ultimate time-saver for entire sheets. Locate the “Select All” button, which is the small triangular button situated in the top-left corner of your worksheet, at the intersection of the row ‘1’ header and the column ‘A’ header. Click this button once; your entire worksheet will become highlighted. With the whole sheet selected, move your cursor to any column boundary line in the header area (e.g., between A and B, or C and D). When the double-headed arrow appears, double-click it. Every single column on the active sheet will instantly auto-fit to its maximum content width.
Pro Tip: Be mindful that this method affects all columns, including those that might not contain data but could have formatting applied. If you have extremely wide content in one obscure cell, it could dramatically expand an otherwise narrow column.
Step 6: Utilizing the Ribbon: Format Menu Auto-Fit Column Width
What you need: An Excel worksheet and a preference for using menu commands over direct mouse actions.
Instructions: Excel’s Ribbon provides an alternative path for auto-fitting. First, select the columns you want to adjust (either a single column, a range of columns, or the entire sheet using the “Select All” button). Navigate to the Home tab on the Excel Ribbon. In the Cells group, click on the Format dropdown menu. From the options, select AutoFit Column Width. Excel will then adjust the width of all currently selected columns to fit their content perfectly. This method is useful if you find the double-click action challenging or prefer a menu-driven approach.
Pro Tip: This menu option can also be accessed by right-clicking on selected column headers. In the context menu that appears, hover over “Column Width…” or directly select “AutoFit Column Width” depending on your Excel version and selected options.
Step 7: Troubleshooting and Best Practices for Column Expansion
What you need: An Excel worksheet where column expansion might not be behaving as expected, or for general optimization.
Instructions: Sometimes auto-fit doesn’t seem to work, or it produces unexpected results. A common culprit is merged cells; if you have cells merged across columns, auto-fit might not function correctly for those specific columns. Unmerge them, adjust, then re-merge if necessary. Another issue can be ‘Wrap Text’ formatting; if text is wrapped within a cell, auto-fit will prioritize the wrapped height over expanding the width. If you need wide data to appear on one line, ensure ‘Wrap Text’ is turned off. Also, large amounts of hidden data or objects can sometimes interfere. Always check for these elements if column expansion isn’t yielding the desired visual outcome.
Pro Tip: For cells containing long text that must be fully visible on one line, ensure ‘Wrap Text’ is disabled. If you want text to stay within a narrow column and flow onto multiple lines, then ‘Wrap Text’ should be enabled, and you’ll typically be adjusting row height instead of column width.
✅ Final Checklist
- All critical data is fully visible in its respective column.
- No “######” symbols appear in any numeric cells.
- The overall aesthetic of the worksheet is clean and readable.
- Unintended column expansions due to hidden elements have been addressed.
- Merged cells or “Wrap Text” settings are correctly configured relative to column width needs.
Important Notes:
- These methods are generally safe for your data. Expanding column width only changes how data is displayed, not the data itself. Always save your workbook before and after significant formatting changes as a best practice.
- If you encounter persistent issues with column formatting, especially in complex workbooks with macros or data connections, seeking help from an experienced Excel user or your organization’s IT support is advisable. They can help diagnose underlying sheet protection, macro interference, or data validation issues.
- The estimated time to perform these actions is typically very quick, ranging from 5 seconds for a single column to 2-3 minutes for reviewing and adjusting an entire complex workbook. There is no direct cost associated with learning or performing these Excel functions, assuming you already have access to Microsoft Excel.
Benefits of Automated Column Expansion in Data Management
These quick autofit methods are more than just a convenience; they are fundamental for effective data presentation and analysis in Excel. They directly impact how you and others interact with your spreadsheets, enhancing readability and boosting efficiency.

Enhancing Readability and Professionalism
One of the most immediate benefits of autofitting columns is the drastic improvement in data readability. Gone are the frustrating visual cues like ####### appearing in number or date fields, or crucial text being cut off and appearing as “Product Descriptio…” Autofitting instantly resolves these issues, making your data fully visible and understandable at a glance.
Imagine a financial report where account names are truncated, or product IDs appear incomplete. Autofitting instantly presents a clean, professional document that builds trust and clarity. Legible data also significantly reduces the chances of misinterpretation or errors when reviewing reports, sharing dashboards, or presenting information to colleagues and clients. It projects a polished, competent image for your work.
Saving Time and Reducing Manual Effort
The time-saving aspect of automated column expansion cannot be overstated. Instead of meticulously dragging each column boundary one by one – a task that can take minutes or even hours for large datasets with dozens of columns – autofit accomplishes this in mere seconds. This efficiency is invaluable, especially when you’re working with data that frequently changes or is imported from external sources.
When you regularly import data or update reports, column widths often get scrambled. Manually adjusting them every time is a significant time sink. Autofit provides a consistent, one-click (or two-click) solution, ensuring your spreadsheet always looks tidy without demanding tedious manual adjustments. This consistency also extends across different worksheets or workbooks, maintaining a uniform and professional appearance effortlessly.
Advanced Considerations for Column Sizing and Display
Recommended Best Deal Products


While autofitting columns might seem straightforward, a few advanced scenarios and settings can influence how your widths behave or appear. Understanding these nuances helps you maintain pixel-perfect presentation.
Handling Merged Cells and Text Wrapping
Merged cells are notorious for complicating column autofit. When cells are merged, Excel considers the entire merged block as one entity. If you try to autofit a column that’s part of a merged cell, Excel often struggles to determine the optimal width, sometimes leading to columns that are still too wide or too narrow. Similarly, text wrapping, while excellent for readability, changes how Excel treats content within a cell. Autofit primarily adjusts width based on the longest line of text before wrapping. If text is heavily wrapped, autofit might not make the row tall enough to display all content clearly, requiring manual row height adjustments.
- Tip for Merged Cells: If possible, temporarily unmerge cells before autofitting the individual columns, then re-merge if necessary. This allows autofit to calculate widths for the actual content in each column.
- Tip for Text Wrapping: Remember that autofit handles width, not necessarily height. For text-wrapped cells, you might need to manually adjust the row height to ensure all content is visible after autofitting column widths.
Impact of Zoom Levels and Print Settings
How columns look on your screen can sometimes be deceptive, especially with varying zoom levels. While a column might appear perfectly sized at 100% zoom, zooming out can make the text seem cramped, or zooming in might show excessive white space. It’s crucial to remember that autofit calculates width based on the actual character dimensions, not your current screen zoom. Printing is another area where column widths can change. Excel’s print settings, like “Fit Sheet on One Page” or scaling options, can dynamically compress or expand columns to fit the paper, overriding your carefully autofitted widths for the printed output.
- Zoom Level Insight: Always perform your final autofit and visual check at 100% zoom to get an accurate representation of the column widths.
- Print Preview is Your Friend: Before printing, always use Print Preview. This shows you exactly how your columns will appear on paper, accounting for any scaling or fitting options. You might need to adjust print scaling or page breaks rather than column widths themselves.
Troubleshooting Common Autofit Challenges
Even with the best intentions, autofitting columns doesn’t always go as planned. Here’s how to tackle some common issues that can leave you scratching your head.
Invisible Characters and Hidden Content
One of the most frequent culprits for unexpectedly wide columns is invisible content. This could be extra spaces at the end of text entries, non-breaking spaces (ALT+0160), or even formatting marks. Excel’s autofit feature is diligent; it will account for every character, visible or not. Another issue arises from hidden columns or rows containing very long text. Even if a column is hidden, its content can sometimes influence the autofit calculation for other columns, especially if you’re selecting the entire worksheet before autofitting.
- Spotting Extra Spaces: Use the LEN() function in an adjacent column to check the true length of your text, and compare it to what you visibly see. A discrepancy often points to extra spaces. You can also use “Find & Replace” to find and remove multiple spaces or specific non-printing characters.
- Check for Hidden Data: Unhide all rows and columns (select the entire sheet, then right-click a row/column header and choose “Unhide”) to ensure no rogue, long text entries are impacting your autofit calculations from unseen areas.
Autofit Not Working or Producing Unexpected Results
Sometimes, autofit simply refuses to cooperate, or the results are far from what you expected. This can stem from a few core reasons. Worksheet protection is a common cause; if a sheet or specific range is protected, you might be prevented from making structural changes like column width adjustments. Filters can also mislead autofit; if you have a filter applied, Excel might only consider the visible data, leading to widths that are too narrow once the filter is removed.
- Verify Sheet Protection: Go to the “Review” tab and check if “Unprotect Sheet” is available. If the sheet is protected, you’ll need to unprotect it (if you have the password) before autofitting.
- Consider Filters: If you’re encountering issues, try clearing all filters before performing an autofit. This ensures that Excel takes into account all data, not just what’s currently visible, giving you a more comprehensive width adjustment.
- Last Resort: Manual Adjustments: If all else fails, a quick double-click between column headers will usually do the trick for individual columns. For a whole range, select them and manually drag one to your desired width.
Wrapping Up: Mastering Your Column Widths
Managing column widths in Excel is a fundamental skill that dramatically improves the readability and professionalism of your spreadsheets. From the quick double-click to more advanced multi-column selections, you now have a robust toolkit for efficiently expanding your columns to fit their content perfectly. We’ve explored how autofit works, discussed advanced considerations like merged cells and print settings, and equipped you with troubleshooting tips for common challenges like invisible characters or unexpected results.
By understanding these techniques and potential pitfalls, you’re better prepared to ensure your data is always presented clearly and precisely. Don’t let untidy columns detract from your hard work. Take control of your spreadsheet presentation, experiment with these methods, and enjoy the satisfaction of perfectly formatted data!
❓ Frequently Asked Questions
What’s the fastest way to expand all columns to fit content in an entire Excel worksheet?
The quickest method is to click the ‘Select All’ button, which is the triangle in the top-left corner where row numbers and column letters meet. After selecting the entire sheet, double-click the boundary line between any two column letters in the header row, and all columns will instantly autofit.
How can I autofit columns using the Excel ribbon for a whole sheet?
First, select the entire worksheet by clicking the ‘Select All’ button. Then, navigate to the ‘Home’ tab on the ribbon. In the ‘Cells’ group, click the ‘Format’ dropdown, and from the options, choose ‘Autofit Column Width’. This will adjust all selected columns automatically.
Why is it important to autofit columns for data presentation and readability?
Autofitting columns is crucial for ensuring that all data within your cells is fully visible and not cut off, significantly improving the readability and professional appearance of your spreadsheets. It eliminates the need for manual, subjective resizing, saving time and promoting consistency across your data.
Are there specific scenarios where autofit column width might not perform as expected?
Yes, autofit might not behave as anticipated with merged cells, as it struggles to determine the ‘widest’ content across a merged range. Similarly, cells containing very long text strings without text wrapping or hidden characters can also lead to unexpected or overly wide adjustments.
Can I prevent Excel from automatically resizing columns when I open a file?
Excel does not automatically autofit columns upon opening a file unless specific VBA code has been embedded within the workbook to trigger this action. Any autofit actions you perform are saved with the workbook, maintaining the column widths until you manually change them again.
What’s the main difference between manually dragging column boundaries and using the autofit feature?
Manually dragging column boundaries allows you to set a fixed, arbitrary width for a column based on your visual preference. In contrast, the autofit feature dynamically calculates and applies the precise width required to display the longest text or number within that column, ensuring optimal data visibility without unnecessary space.