Honda CRV Warning Light Reset: Understanding & Solutions
Last Updated on September 1, 2026 by Ryan
📋 Table of Contents
- 🎯 Key Takeaways
- Understanding Common Honda CRV Warning Lights and Their Meanings
- Your Complete DIY Guide to Honda CRV Warning Light Resets
- Factors Influencing Warning Light Persistence After Reset
- Expert Tips for Diagnosing and Addressing CRV Dashboard Alerts
- When to Seek Professional Help for Persistent Warning Lights
- Conclusion
- 💬 Quick Questions & Answers
- ❓ Frequently Asked Questions
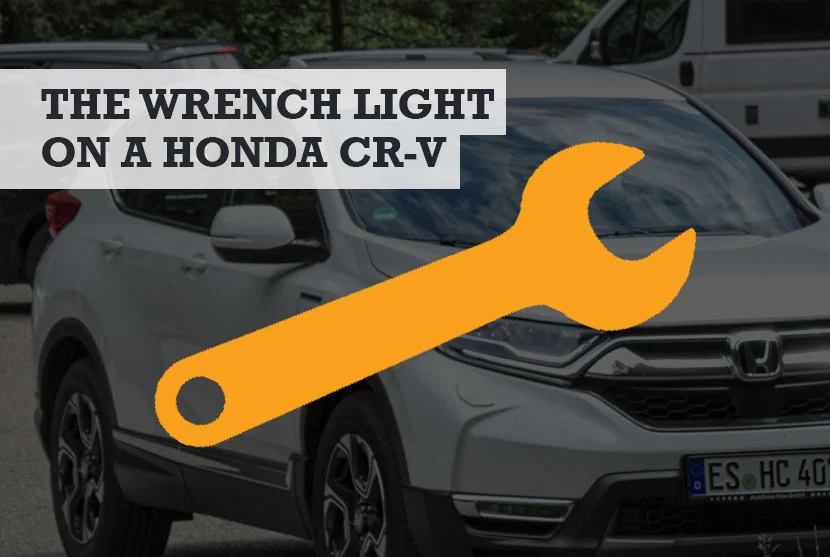
Resetting a Honda CRV warning light often requires understanding the underlying issue rather than just clearing the light itself. Many dashboard lights indicate maintenance needs or minor glitches that can be resolved with specific procedures, while others signal more serious problems requiring professional attention. It’s crucial to identify the light’s meaning before attempting any reset.

Prime for Young Adults — 6 Months Free
Students and 18–24s get six months of Prime free, then half price.
Start 6 Months Free🎯 Key Takeaways
Recommended Best Deal Products


- Takeaway 1:Identify warning light meaning first.
- Takeaway 2:Many resets are simple maintenance tasks.
- Takeaway 3:A proper scan diagnoses complex issues.
- Takeaway 4:Battery resets can clear minor glitches.
- Takeaway 5:Proactive maintenance prevents most warnings.
Has that unexpected amber glow ever sent a little shiver down your spine? You’re cruising along in your Honda CRV, and suddenly a symbol illuminates your dashboard. Warning lights are your vehicle’s essential communication system, acting as early indicators of potential issues that range from minor inconveniences to serious safety concerns. Understanding what these lights mean is the first step towards maintaining your CRV’s health and ensuring your peace of mind.
This post will help you decipher those mysterious illuminated icons. We’ll explore common warning lights and explain why they appear. We’ll also dive into why a warning light might stubbornly persist, even after you think you’ve addressed the problem. Knowing these details empowers you to respond effectively, keeping your CRV running smoothly and safely on the road.
Understanding Common Honda CRV Warning Lights and Their Meanings
Your Honda CRV’s dashboard is a sophisticated information hub. Each warning light serves a specific purpose, alerting you to various system statuses or malfunctions. Recognizing these symbols and understanding their basic implications is crucial for making informed decisions. It helps you decide whether to pull over immediately or if it’s safe to drive to a service center.
The Malfunction Indicator Lamp (MIL) – Check Engine Light
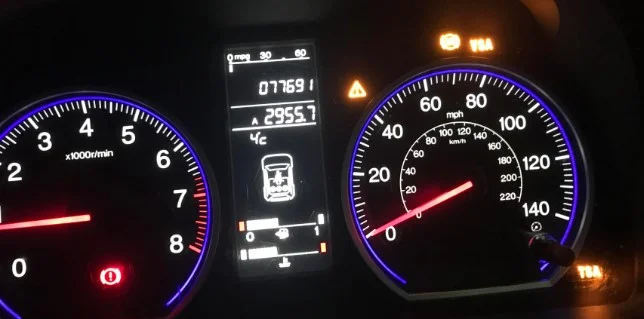
Perhaps the most famous, or infamous, warning light is the Malfunction Indicator Lamp (MIL), commonly known as the Check Engine Light. When this light illuminates, it signals that your CRV’s onboard diagnostic (OBD-II) system has detected a problem within the engine or emissions system. It’s a general warning, not a specific fault indicator. Many issues can trigger it.
- Loose Gas Cap: Often, the simplest culprit is a gas cap that isn’t sealed correctly, allowing fuel vapor to escape.
- Oxygen Sensor Fault: This sensor measures unburned oxygen in your exhaust, critical for fuel efficiency and emissions. A faulty one can cause your light to come on.
- Catalytic Converter Issues: A failing catalytic converter, which reduces harmful emissions, will almost certainly trigger the MIL.
- Spark Plug or Ignition Coil Problems: Misfires can lead to unburned fuel entering the exhaust system, detected by the sensors.
A steady Check Engine Light usually indicates a non-critical issue that needs attention soon. However, a flashing Check Engine Light signifies a severe misfire. This condition can damage your catalytic converter. You should reduce power and seek immediate service if it flashes.
Brake System and Anti-lock Braking System (ABS) Warning Lights
Brake system lights are paramount to your safety. They alert you to potential issues with your vehicle’s ability to stop. Ignoring these lights can lead to dangerous situations. Your CRV has distinct indicators for different brake-related problems.
- Brake System Light (Exclamation Mark in a Circle): This light often indicates a low brake fluid level or an engaged parking brake. If your parking brake is off and the light is on, it suggests a more serious issue like a hydraulic system fault. You should check your brake fluid reservoir immediately.
- ABS Warning Light: This light signals a problem with your Anti-lock Braking System. The ABS prevents your wheels from locking up during hard braking, allowing you to steer. If this light is on, your standard brakes will still work, but the ABS functionality will be disabled. This means you might experience wheel lock-up under emergency braking conditions.
- VSA (Vehicle Stability Assist) Warning Light: The VSA system works closely with the ABS. If this light illuminates, it means your CRV’s stability control system is malfunctioning. This system helps prevent skids and maintains traction. A deactivated VSA means your vehicle may be more prone to losing control in slippery conditions.
Any brake-related warning light demands your immediate attention. Your CRV’s braking performance is essential for safe driving. Always prioritize getting these systems inspected by a professional without delay.
Your Complete DIY Guide to Honda CRV Warning Light Resets
Recommended Best Deal Products


Encountering a warning light on your Honda CRV dashboard can be a cause for concern, but not all lights signal an immediate catastrophe. Often, after routine maintenance or a minor fix, a simple reset is all that’s needed to clear the illuminated indicator. This comprehensive guide will walk you through the precise, step-by-step procedures to reset the most common warning lights on your Honda CRV, empowering you to handle these situations yourself. Following these instructions carefully is crucial for both your safety and the longevity of your vehicle’s electronic systems.

Audible — Listen Free for 30 Days
One free credit a month and thousands of titles included.
Listen Free for 30 DaysStep 1: Identify the Warning Light and Its Meaning
What you need: Your Honda CRV Owner’s Manual, keen observation skills.
Instructions: Before attempting any reset, it’s vital to understand which specific warning light is illuminated and what it signifies. Different lights indicate different issues. Consult your CRV’s owner’s manual (typically found in the glove compartment or accessible online via Honda’s official website) and locate the section detailing dashboard warning indicators. Cross-reference the symbol on your dash with the descriptions in the manual to identify the light’s purpose. This step is crucial for determining if a simple reset is appropriate or if professional attention is truly needed for an underlying mechanical issue.
Pro Tip: Never assume a warning light is minor. While some are informational, others (like the oil pressure or battery light) demand immediate attention. Always diagnose before attempting to clear, as clearing a critical light without addressing the problem can lead to further, more expensive damage.
Step 2: Resetting the Maintenance Minder (Oil Life/Service Due)
What you need: Your Honda CRV’s ignition key, access to the driver’s seat.
Instructions: This light typically indicates your engine oil life is low or a scheduled service is due. First, ensure you have completed the necessary maintenance, such as an oil change. Turn the ignition to the “ON” position (do not start the engine). Press the “SEL/RESET” button (usually located on the instrument cluster or steering wheel) repeatedly until the oil life percentage is displayed. Once displayed, press and hold the “SEL/RESET” button for approximately 10 seconds. The oil life display will begin to blink. Release the button, then press and hold it again for another 5 seconds until the display resets to “100%.” Turn the ignition off, then start the engine to confirm the light is gone.
Pro Tip: Always perform the actual oil change and filter replacement before resetting the maintenance minder. Resetting it without changing the oil will cause the car’s system to believe new oil is in place, leading to potentially harmful extended oil change intervals based on false data.
Step 3: Resetting the Tire Pressure Monitoring System (TPMS) Light
What you need: Tire pressure gauge, air compressor (if any tires need inflation), Honda CRV TPMS reset button (location varies by year).
Instructions: A persistent TPMS light usually means one or more tires are underinflated or there’s a system malfunction. Begin by checking and adjusting all four tires to the recommended PSI specified on the driver’s side door jamb sticker, plus the spare tire if applicable. Drive your CRV for at least 10-15 minutes at speeds above 30 mph to allow the system to recalibrate. If the light remains on, locate your TPMS reset button. On many CRV models (2007-2016), it’s a small black button under the dash to the left of the steering wheel. For newer models (2017+), the reset procedure is often done via the infotainment screen in the “Vehicle Settings” or “TPMS Calibration” menu. With the engine off, ignition to ON, press and hold the TPMS button (or select “Calibrate” on the screen) until the TPMS indicator blinks twice. Drive again for 10-20 minutes.
Pro Tip: Always check and adjust tire pressure when tires are cold (before driving) for the most accurate readings. Significant temperature drops can cause the TPMS light to come on, even if there’s no leak. Ensuring all tires are at the correct pressure before attempting a reset is paramount.
Audible Premium Plus — Annual Membership
12 audiobook credits up front, plus the full Audible catalogue.
See Annual PlansStep 4: Clearing the Check Engine Light (CEL) via Battery Disconnect (Temporary)
What you need: 10mm or 12mm wrench, safety glasses, work gloves.
Instructions: While not a permanent fix for underlying issues, disconnecting the battery can sometimes clear a Check Engine Light (CEL) for transient or minor issues (e.g., loose gas cap). Park your CRV on a level surface and engage the parking brake. Turn off the engine and remove the key. Locate your vehicle’s battery. Using your wrench, loosen the nut on the negative (-) battery terminal and carefully remove the cable from the terminal. Allow the battery to remain disconnected for at least 5-10 minutes to ensure the vehicle’s computer (ECU) capacitors fully discharge. Reconnect the negative terminal cable securely, ensuring it’s tight. Start the vehicle to see if the CEL has cleared. Remember, if the underlying problem persists, the light will return.
Pro Tip: Always disconnect the negative (-) terminal first and reconnect it last. This minimizes the risk of short-circuiting your vehicle’s electrical system. Be aware that disconnecting the battery will reset your radio presets, clock, and potentially some learned engine parameters, which may require a short driving cycle for the car to re-learn.
Step 5: Clearing the Check Engine Light (CEL) with an OBD-II Scanner (Recommended Method)
What you need: An OBD-II (On-Board Diagnostics II) scanner (available at auto parts stores or online), car keys.
Instructions: This is the most effective and recommended method for addressing a Check Engine Light. First, identify the underlying issue by reading the diagnostic trouble codes (DTCs) with the scanner. Locate your CRV’s OBD-II port, which is typically found under the dashboard on the driver’s side. Plug the scanner into the port. Turn the ignition to the “ON” position (engine off). Follow the scanner’s on-screen instructions to first “Read Codes.” Note down all codes displayed. Once you have documented the codes, navigate to the “Erase Codes,” “Clear Codes,” or “Reset ECU” function on the scanner. Confirm the action when prompted. The CEL should turn off. Remove the scanner and start your engine to verify.
Pro Tip: Always read and record the trouble codes before clearing them. This information is invaluable for diagnosing the root cause of the problem. Clearing codes without knowing why they appeared is like turning off an alarm without checking for fire; the problem is still there and will likely return.
Step 6: Re-calibrating Systems After Battery Disconnect or ECU Reset
What you need: Your Honda CRV, a clear road for a short drive, patience.
Instructions: After disconnecting the battery or using an OBD-II scanner to clear codes, your CRV’s onboard computer (ECU) may lose some of its learned settings. This can affect idle quality, transmission shift points, and other electronic features. To recalibrate, you’ll need to perform a “drive cycle.” Simply drive your CRV normally for about 15-30 minutes, including some city and highway driving. The ECU will gradually re-learn optimal parameters. You may also need to reset your radio presets, clock, and potentially re-initialize power windows (by fully opening and closing each window, holding the switch at the fully open/closed position for a few seconds).
Pro Tip: If your CRV has Vehicle Stability Assist (VSA) or ABS warning lights briefly come on after a battery reset, don’t panic immediately. Often, these systems will self-calibrate after driving a short distance (e.g., above 12 mph for a few minutes). However, if they persist, professional diagnosis is warranted.
✅ Final Checklist
- The specific warning light is no longer illuminated on the dashboard.
- All tires are properly inflated to the recommended PSI.
- Engine oil life is displaying 100% (if Maintenance Minder was reset).
- Radio presets and clock are reset to your preferences.
- The vehicle drives normally without any new issues or recurring warning lights.
Important Notes:
- Safety Considerations: Always ensure the vehicle is parked safely on level ground with the parking brake engaged before working on it. Wear appropriate personal protective equipment like gloves and safety glasses, especially when working with the battery.
- When to Seek Professional Help: If a warning light persists after attempting the appropriate reset procedure, or if you notice any unusual driving symptoms (e.g., loss of power, strange noises, overheating), it’s crucial to seek professional diagnosis from a certified Honda technician. Some lights, such as SRS (Airbag) or ABS, often indicate serious issues that require specialized tools and expertise to address safely and correctly.
- Estimated Time and Cost Range: Most of these reset procedures take approximately 5-20 minutes to complete. The cost is typically free if you own the necessary basic tools or an OBD-II scanner. If you need to purchase an OBD-II scanner, they can range from $20 for basic models to $100+ for more advanced units.
Factors Influencing Warning Light Persistence After Reset
You might be tempted to simply reset a warning light, hoping it disappears for good. While a reset can temporarily clear the code and extinguish the light, it doesn’t always solve the underlying problem. Sometimes, the light quickly reappears, which can be frustrating. Understanding why this happens is key to addressing your CRV’s issues effectively.
Underlying Mechanical Issues and Faulty Components
The most common reason a warning light comes back is that the root cause of the problem still exists. Resetting the light merely clears the diagnostic trouble code (DTC) from the vehicle’s computer. It doesn’t magically repair a broken part or fix a sensor that isn’t working correctly. Your CRV’s sophisticated systems will quickly re-detect the fault once it starts running again.
- Persistent Fault: If an oxygen sensor is truly defective, clearing the code will only work until the engine runs another diagnostic cycle. The computer will identify the same error, and the light will come back on.
- Physical Damage: A minor problem, like a loose vacuum hose causing a small leak, won’t disappear with a reset. The leak continues, and the sensor readings will still be out of specification.
- Fluid Levels: If a brake warning light is on due to low fluid, resetting it doesn’t add fluid. The light will reappear the moment the system registers insufficient pressure or volume again.
Think of resetting a warning light like turning off an alarm without addressing the fire. The alarm stops, but the danger remains. True resolution involves diagnosing and repairing the specific component or system causing the fault. Attempting multiple resets without fixing the problem can sometimes mask a worsening condition, potentially leading to more extensive and costly repairs later.
System Self-Checks and Diagnostic Cycles
Modern Honda CRVs feature complex onboard diagnostic systems that constantly monitor various vehicle parameters. After a warning light reset, these systems don’t immediately assume everything is fine. Instead, they enter a readiness state, performing a series of self-checks and “drive cycles” to confirm all systems are functioning correctly. If any issues are detected during these tests, the warning light will reappear.
- Required Drive Cycles: For the emissions system, for example, your CRV’s computer needs to see specific driving conditions. This often involves a mix of highway driving, city driving, and engine starts and stops. Only after completing these cycles without detecting a fault will the system confirm readiness.
- Intermittent Faults: Some problems are intermittent, meaning they only occur under certain conditions, like specific temperatures or engine loads. A reset might temporarily clear the light, but if those conditions are met again and the fault recurs, the light will return.
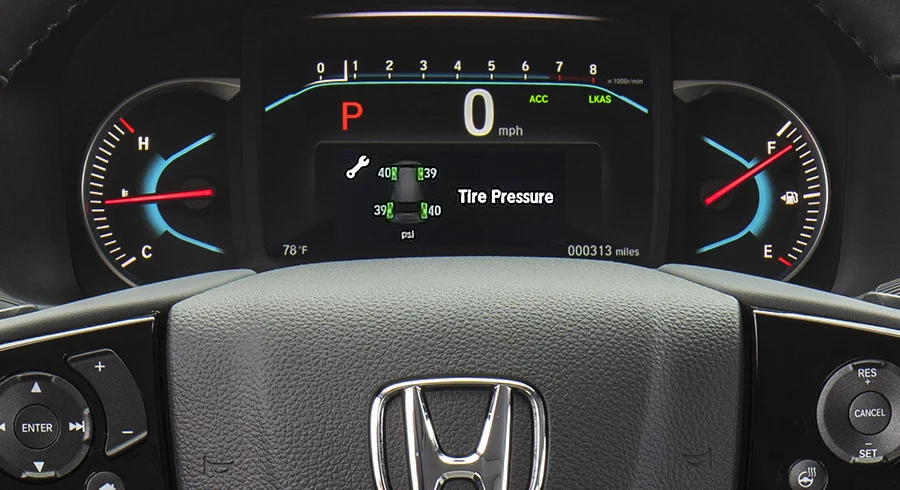
- Component-Specific Recalibration: For certain systems, like the Tire Pressure Monitoring System (TPMS) after a tire rotation or replacement, a simple reset isn’t enough. The system often needs to be driven for a period or even manually recalibrated to learn the new sensor positions or tire pressures.
Understanding these diagnostic cycles is important. If you reset a light and it comes back after some driving, it’s a strong indicator that an underlying problem requires professional diagnosis. The car’s computer is telling you it’s still finding an issue, even after your attempt to clear it.
Expert Tips for Diagnosing and Addressing CRV Dashboard Alerts
Recommended Best Deal Products


While the initial appearance of a warning light can be concerning, many issues can be understood and even addressed with a little know-how. The key is to approach the situation systematically, prioritizing safety and accurate diagnosis.
Start with the Basics: Visual Inspection and Owner’s Manual
Before jumping to conclusions, a quick visual check can sometimes reveal the culprit. For instance, a “Tire Pressure Monitoring System” (TPMS) light might be triggered by a visibly flat tire, or a “Check Engine Light” (CEL) could relate to a loose gas cap. Your Honda CRV’s owner’s manual is an invaluable resource here. It provides detailed explanations for each warning light, including its meaning, potential causes, and recommended actions. Always consult it first.
- Loose Gas Cap: A common and easily overlooked reason for a Check Engine Light. Ensure it’s tightened until it clicks.
- Fluid Levels: Low oil, coolant, or brake fluid can trigger specific warnings. A quick check under the hood can confirm.
- Lights and Wipers: Some warnings relate to exterior lights or wiper fluid levels; a visual check can confirm if bulbs are out or fluid is low.
Leveraging Technology: OBD-II Scanners
For more complex issues, an On-Board Diagnostics II (OBD-II) scanner can be a game-changer. These devices connect to a port usually found under your CRV’s dashboard and retrieve “trouble codes” from your vehicle’s computer. Each code corresponds to a specific fault, helping pinpoint the problem area. You can purchase these scanners relatively inexpensively, or many auto parts stores offer free diagnostic scans.
- Deciphering Codes: Once you have a code (e.g., P0420 for catalytic converter inefficiency), you can research its specific meaning online.
- Not a Fix, but a Clue: Remember, an OBD-II scanner tells you what the computer thinks is wrong, not necessarily the ultimate solution. It’s a diagnostic tool, not a repair tool.
- Intermittent vs. Persistent: Pay attention if the light is intermittent or constant, as this can offer further clues to the severity and nature of the issue.
When to Seek Professional Help for Persistent Warning Lights
While some warning lights can be self-diagnosed or even temporarily addressed at home, others signal issues that demand immediate professional attention. Ignoring critical warnings can lead to more severe damage, compromise your safety, or result in costly repairs down the line.
Identifying Critical vs. Non-Critical Lights
It’s crucial to differentiate between lights that indicate a minor inconvenience and those that point to a serious mechanical failure. Generally, red warning lights (like the oil pressure, battery, or brake system light) signify a critical issue requiring immediate action – often pulling over safely and shutting off the engine. Yellow or orange lights (like the Check Engine or TPMS light) typically indicate a less urgent but still important issue that should be investigated soon.
- Red Lights: Always prioritize. These often mean a system failure that could impact safety or cause irreversible engine damage.
- Flashing Lights: A flashing Check Engine Light, for example, often indicates a severe engine misfire that could be damaging your catalytic converter – this requires immediate attention.
- Multiple Lights: If several warning lights illuminate simultaneously, it could indicate a more complex electrical or system-wide problem.
The Value of Certified Honda Technicians
When in doubt, or when dealing with persistent or critical warning lights, consulting a certified Honda technician is always the wisest course of action. These professionals have specialized training, access to proprietary diagnostic tools, and in-depth knowledge of CRV-specific systems. They can accurately diagnose complex issues, perform necessary repairs using genuine Honda parts, and ensure your vehicle is returned to optimal operating condition.
- Advanced Diagnostics: Beyond basic OBD-II, Honda dealerships have sophisticated diagnostic equipment that can delve deeper into complex electronic systems.
- Expertise: They understand the nuances of Honda engineering and common CRV issues.
- Peace of Mind: Knowing your CRV is in expert hands provides confidence that the problem will be resolved correctly and safely.
Conclusion
Understanding the warning lights on your Honda CRV’s dashboard is more than just about “resetting” them; it’s about listening to what your vehicle is trying to tell you. From the initial flicker of a light to a persistent glow, each alert is a signal demanding attention. By familiarizing yourself with your owner’s manual, performing basic checks, and knowing when to leverage diagnostic tools or professional expertise, you can ensure your CRV remains a reliable and safe companion on the road.
Don’t ignore these vital messages. Take the time to understand them, act promptly and appropriately, and consult with a trusted professional when needed. Your CRV will thank you for it, providing many more miles of trouble-free driving.
💬 Quick Questions & Answers
Can I reset all CRV warning lights myself?
No, only certain maintenance-related lights can be reset manually; others require professional tools or repairs.
What’s the easiest way to reset a maintenance light?
For some lights, turning the ignition on/off or using the vehicle’s menu system can perform a reset.
Will resetting a warning light fix the problem?
Resetting only clears the indicator; it doesn’t fix the underlying issue that triggered the light.
How do I know which warning light is on?
Consult your Honda CRV owner’s manual for specific warning light definitions and recommended actions.
Is it safe to drive with a warning light on?
It depends on the light; some are minor reminders, while others indicate serious safety concerns requiring immediate attention.
❓ Frequently Asked Questions
What’s the difference between a warning light and an indicator light in my CRV?
Warning lights typically signal a problem or malfunction requiring attention, often appearing in red or amber. Indicator lights, like turn signals or high beams, simply show that a particular system or feature is currently active.
Why does my CRV’s maintenance required light keep coming back after an oil change?
The maintenance light is a timer-based reminder that needs to be manually reset after an oil change. If it recurs, the reset procedure wasn’t performed correctly, or there might be another outstanding service interval due, even if the oil was changed.
Can using an OBD-II scanner help with warning light resets?
Yes, an OBD-II scanner can read diagnostic trouble codes (DTCs) that trigger the check engine light and similar warnings. While it can clear these codes, the underlying problem must be fixed or the light will inevitably return once the fault is detected again.
Is it possible to accidentally damage my CRV’s electrical system when trying to reset a light?
Improperly disconnecting the battery or attempting to short-circuit wires can indeed cause damage to your vehicle’s electrical system or sensitive components. Always follow safe procedures outlined in your manual or seek professional assistance to avoid such issues.
My CRV’s VSA warning light came on. What does that mean for a reset?
The Vehicle Stability Assist (VSA) light indicates an issue with the traction control system or related components. While sometimes a simple ignition cycle can clear it, it often points to sensor problems, low brake fluid, or a more serious fault requiring specialized diagnostic tools and professional repair.
When should I absolutely avoid attempting a DIY reset for a CRV warning light?
If the warning light is red, flashing, accompanied by noticeable performance issues (like engine sputtering or braking problems), smoke, or unusual noises, avoid DIY resets. These usually indicate critical problems that need immediate professional inspection for your safety and to prevent further vehicle damage.