2012 Honda Civic TPMS Reset Tool Real Step-by-Step 2026 Fix
You do not need a specialized OBDII reset tool to fix the TPMS light on a 2012 Honda Civic. The vehicle uses an internal calibration procedure accessible through the steering wheel menu.
You do not need to purchase a specialized electronic reset tool to fix the TPMS light on your 2012 Honda Civic. In 2026, many aftermarket shops may try to sell you expensive OBDII scanners or signal-triggering tools, but the 2012 Civic uses an indirect TPMS system. This system relies on your vehicle’s ABS wheel speed sensors rather than physical pressure sensors inside the tires, making manual calibration the standard factory solution.

Amazon Business — Free Account
Business pricing, quantity discounts and VAT-ready invoices.
Create a Free AccountAddressing the TPMS light is crucial for both fuel economy and tire longevity. When the light triggers—usually after a tire rotation, a change in ambient air temperature, or a flat repair—your vehicle’s computer simply needs to re-learn the rotational speed of your tires to establish a new baseline. Performing this manually saves you from unnecessary garage fees and ensures your safety monitoring system is accurate.
Key Takeaways
- A physical TPMS scan tool is rarely required for the 2012 model year.
- Ensure all tires are inflated to the door-jamb specification before starting calibration.
- The TPMS light often triggers due to environmental temperature changes rather than hardware failure.
- Manual calibration is performed via the i-MID steering wheel buttons.
- Replace sensors only if the system fails to calibrate after multiple attempts.
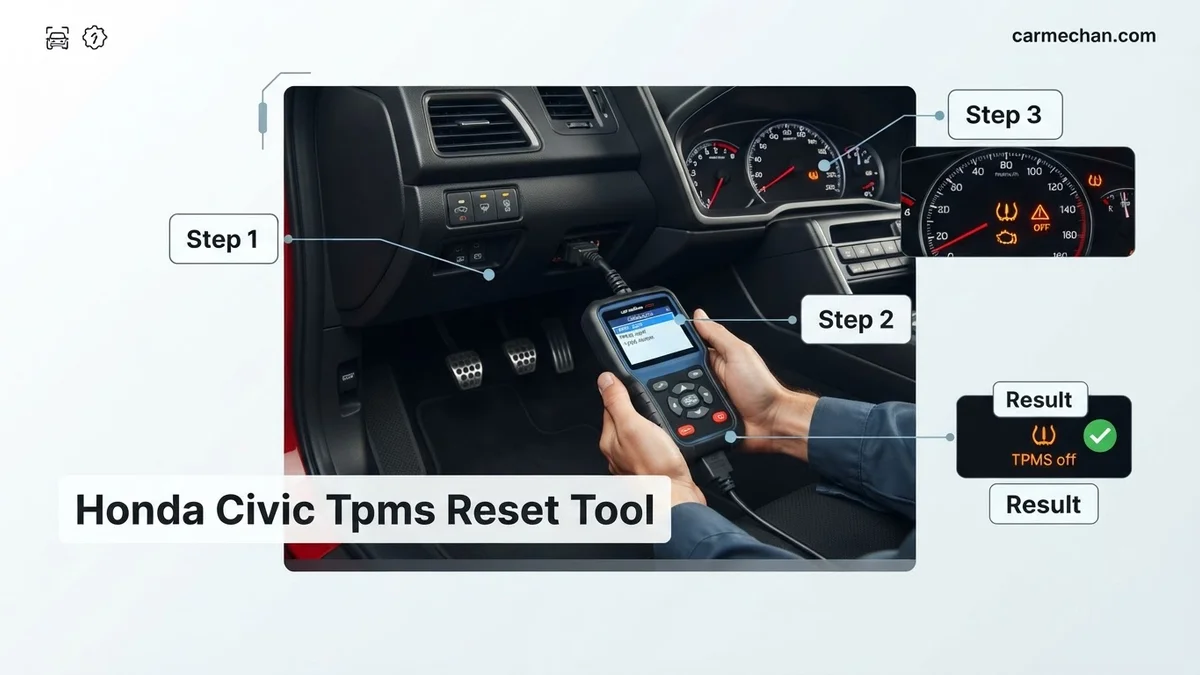
Why You Usually Do Not Need a 2012 Honda Civic TPMS Reset Tool
Recommended Best Deal Products


The Mechanics of Indirect TPMS
The 2012 Honda Civic does not have battery-powered sensors inside your wheels. Because there are no internal transmitters to “wake up” or program, an expensive diagnostic tool is physically incompatible with your car’s architecture. The system monitors how fast each wheel spins. If one tire loses pressure, its diameter shrinks slightly, causing it to rotate faster than the others. The ABS sensors detect this discrepancy and illuminate the dash light. When you perform a manual reset, you are simply telling the car’s computer to accept the current tire rotations as the new “normal” pressure baseline.
When Tools Actually Fail to Help
- System Architecture: Diagnostic tools designed for newer vehicles with direct, sensor-based TPMS will not communicate with your 2012 Civic’s ECU for pressure monitoring.
- Wasted Investment: Buying a generic TPMS tool in 2026 for this specific vehicle model is often a sunk cost, as it lacks the hardware interface to change the wheel speed reference points.
- Data Limitations: Most handheld scanners can read generic check engine codes, but they cannot calibrate the ABS-based pressure system on this generation of Civic.
Master Your 2012 Honda Civic TPMS Reset in 6 Simple Steps
The Tire Pressure Monitoring System (TPMS) in your 2012 Honda Civic is a critical safety feature designed to alert you when your tires are under-inflated. However, after rotating your tires, replacing a sensor, or correcting pressure, the yellow warning light may stay illuminated. While many owners search for a “reset tool,” it is important to understand that the 2012 Civic uses an indirect TPMS system that calculates pressure via wheel speed sensors, meaning you do not need an electronic scan tool to reset it. This guide will walk you through the manual calibration process required to clear the warning light and ensure your vehicle is operating at peak safety.
Step 1: Ensure Correct Tire Inflation
What you need: A high-quality digital tire pressure gauge and an air compressor or service station air pump.
Instructions: Before attempting any reset procedure, you must confirm that all four tires are inflated to the exact manufacturer specifications. Refer to the sticker located on the driver-side door jamb, which indicates the required PSI, typically 32 PSI for a standard 2012 Civic. Do not rely on the “max PSI” printed on the tire sidewall, as that is not the recommended operating pressure. Using your gauge, check each tire while they are “cold”—meaning the car has been parked for at least three hours or driven less than one mile. Adjust the pressure as needed until every tire matches the door placard specifications perfectly.
Pro Tip: Don’t forget to check the spare tire if your vehicle is equipped with one, as fluctuations in ambient temperature can cause pressure loss that might affect the system’s baseline.
Step 2: Prepare the Vehicle for Calibration
What you need: A flat, level surface and a safe location to perform the reset.
Instructions: Once your pressures are verified, ensure the vehicle is parked on a flat, level surface with the parking brake fully engaged. For safety reasons, perform this in a location away from heavy traffic. Turn the ignition switch to the “ON” (II) position, but do not start the engine yet. If you have an electronic display, ensure it is set to the main odometer or the “TPMS” menu screen. This puts the car’s computer into a state where it is ready to receive input for the calibration of the wheel speed sensors, which the system uses to identify tire diameter changes.

Prime for Young Adults — 6 Months Free
Students and 18–24s get six months of Prime free, then half price.
Start 6 Months FreePro Tip: Make sure there are no heavy items in the trunk or passengers in the vehicle, as an uneven load can slightly skew the rolling circumference of the tires during the initial calibration drive.
Step 3: Navigate the TPMS Menu
What you need: Your vehicle’s steering wheel-mounted buttons or the instrument cluster controls.
Instructions: Using the “SEL/RESET” button or the steering wheel menu controls, navigate through your vehicle’s information display. You are looking for the “TPMS Calibration” menu. If your Civic is equipped with the navigation or premium infotainment package, you may need to access this through the “Vehicle Settings” menu on the central dashboard screen. Once you locate the “TPMS Calibration” option, select it and choose the “Initialize” or “Calibrate” command. The system will prompt you for confirmation; select “Yes” to begin the process. You will notice the light may blink or a message will confirm that the calibration has started.
Pro Tip: If you are unable to find the menu, ensure your transmission is in “Park” (for automatics) or “Neutral” with the parking brake set (for manuals), as some security protocols hide the menu while the car is in gear.
Step 4: Execute the Calibration Drive
What you need: A stretch of road with a consistent speed limit of 30-65 mph.
Instructions: Once you have initiated the calibration via the dashboard, you must drive the vehicle to finalize the process. The car needs to collect data from the wheel speed sensors to learn the new rolling circumference of your tires. Drive the vehicle for approximately 20 to 30 minutes at a steady speed between 30 and 65 miles per hour. Avoid excessive stop-and-go traffic if possible, as the system works best with continuous, smooth rotation of the wheels. Do not turn off the engine or put the car into “Park” during this initial drive, as it may interrupt the learning cycle of the TPMS controller.
Pro Tip: Choose a highway or an open road during non-peak hours to ensure you can maintain a constant speed without braking frequently, which helps the system calibrate more accurately.
Step 5: Verify the Light Has Cleared
What you need: Observation of the instrument cluster dashboard lights.
Instructions: After completing the required driving time, monitor your dashboard for the TPMS indicator light. If the calibration was successful, the yellow “TPMS” or “Low Tire Pressure” light should turn off automatically. If the light remains on, or if the “TPMS” warning message persists, turn the engine off, wait for 30 seconds, and restart the ignition. Sometimes, the computer requires a complete power-cycle to clear the status from the memory. If the light was blinking initially and then went solid, the system might have detected a fault. If it turned off completely, your system is now successfully calibrated to the new tire pressure baseline.

Audible — Listen Free for 30 Days
One free credit a month and thousands of titles included.
Listen Free for 30 DaysPro Tip: If the light goes off but returns within a few miles, it may indicate a slow leak in one of your tires that requires further inspection by a tire technician.
Step 6: Handle Persistent Faults
What you need: A code reader or access to a professional technician.
Instructions: If the light stays on regardless of the steps taken, you may have a legitimate issue with a wheel speed sensor or the ABS system, which the TPMS shares data with. Use an OBDII scan tool that supports chassis codes to check for stored Diagnostic Trouble Codes (DTCs). If you find codes related to “ABS/Wheel Speed Sensor,” the TPMS light will not clear until that hardware issue is resolved. In this scenario, the issue is not with the TPMS software, but with a physical sensor located at the wheel hub. Replacing a faulty speed sensor is the only way to restore proper TPMS functionality in such cases.
Pro Tip: Do not ignore a persistent light; even if you think it is just a “system glitch,” the TPMS is tied to your ABS/VSA stability systems, and a fault could affect your traction control performance.
✅ Final Checklist
- All tires are inflated to exactly the PSI listed on the driver door jamb.
- The TPMS calibration was initiated through the vehicle settings menu.
- The vehicle was driven for at least 20 minutes at steady highway speeds.
- The yellow TPMS warning light has extinguished on the instrument cluster.
- No residual fault codes remain in the vehicle’s diagnostic system.
Important Notes:
- Safety Warning: Never ignore an illuminated TPMS light. Driving on under-inflated tires increases the risk of a blowout and significantly reduces vehicle handling and braking efficiency.
- Professional Help: If you perform these steps twice and the light returns immediately, visit a qualified mechanic or tire shop to check for damaged sensors or wheel speed sensor failures.
- Estimated Time/Cost: This process takes approximately 30-40 minutes of actual driving time. There is no cost involved if you have access to a tire pressure gauge and an air pump.
Step-by-Step Manual TPMS Calibration Guide
Recommended Best Deal Products


Preparing for Calibration
Before you begin the reset process, you must ensure your tire pressures are set to the correct specifications found on the driver-side door jamb sticker. Do not perform the reset while the tires are significantly underinflated, as the computer will calibrate to the incorrect pressure levels. It is best to perform this procedure after driving the vehicle for at least 15 minutes to allow the tires to reach a normal operating temperature, ensuring the sensors have accurate rotational data to process.
Executing the Menu Reset
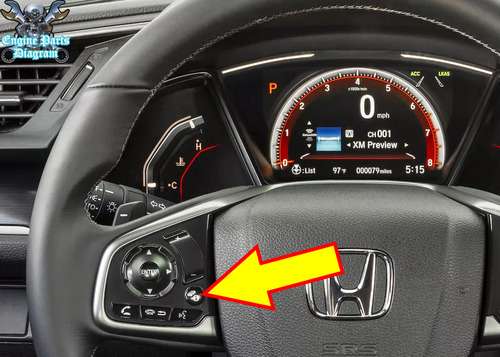
Follow these steps using the steering wheel-mounted controls to clear the light:
- Park the Vehicle: Ensure the car is in Park (or Neutral for manual transmissions) with the ignition set to the ON position.
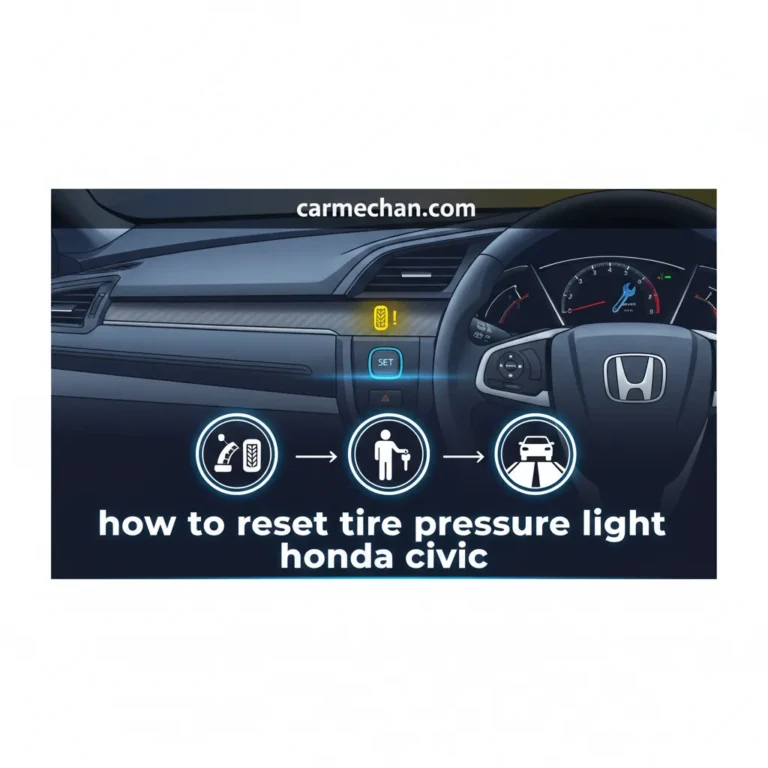
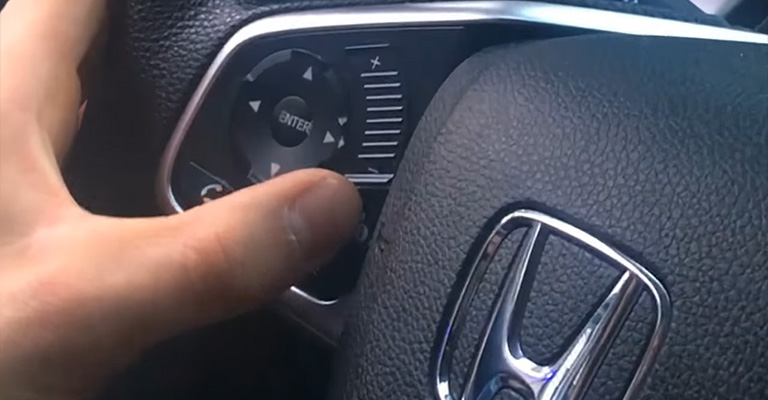
- Access the Menu: Use the steering wheel buttons to navigate to the Vehicle Settings menu on your i-MID screen.
- Select TPMS Calibration: Scroll through the menu options until you reach the TPMS Calibration selection.
- Confirm Calibration: Select “Calibrate” and confirm your choice. The screen will display a message confirming the calibration process has started.
- Drive to Complete: The system requires you to drive the vehicle for approximately 20 to 30 miles at speeds between 30 and 65 mph. During this time, the car learns the new rotational speeds of the tires to finalize the reset.
If the light remains on after these steps, it usually indicates a fault in the ABS system or a wheel speed sensor issue rather than a TPMS malfunction, which would then require a standard OBDII diagnostic reader.
When a Diagnostic Scan Tool Becomes Necessary
While the standard manual reset procedure covers basic sensor recalibration, some 2012 Honda Civic variants require an OBDII-based TPMS tool. This is particularly relevant if the vehicle has undergone a tire rotation or replacement that triggered a hard fault code in the ECU. In 2026, consumer-grade diagnostic tools capable of reading the 315MHz sensor frequency have become significantly more affordable and precise.
Identifying ECU-Level Faults
If the TPMS light remains solid or flashes after a manual reset, the internal computer may have stored a permanent Diagnostic Trouble Code (DTC). A scan tool allows you to:
- Connect the device to the OBDII port located under the dashboard on the driver’s side.
- Read specific sensor ID codes to determine if one unit is transmitting a “low battery” signal.
- Clear the specific fault code from the internal memory that manual button presses cannot erase.
- Trigger a “relearn” mode that forces the ECU to ping each sensor individually.
Troubleshooting Persistent TPMS Warnings and Sensor Failure
Recommended Best Deal Products

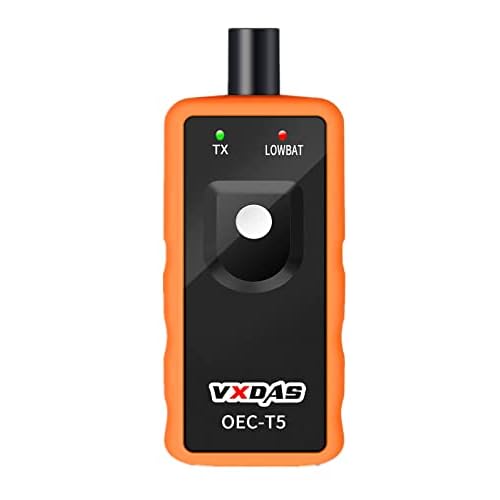

TPMS sensors in a 2012 model are nearing the end of their design life. Most OEM sensors are rated for a 7 to 10-year lifespan. As of 2026, many original sensors have exhausted their lithium-ion batteries. If you find yourself stuck in a loop of warnings, it is likely a hardware failure rather than a calibration issue.
Detecting Dead Sensor Batteries
Physical failure often presents as an intermittent light that turns on during high-speed highway driving. This happens because the internal centrifugal switch in the sensor stops functioning correctly. Follow these steps to diagnose:
- Check the tire pressure with a calibrated manual gauge to rule out actual leaks.
- Use a specialized TPMS tool to attempt a “wake up” signal on each valve stem.
- If the tool fails to receive a signal from a specific wheel, that sensor’s battery is officially dead.
- Verify if the issue is isolated to a single corner of the vehicle; isolated sensor failure is rarely a wiring harness issue.
What If It Still Doesn’t Work?
If you have completed the manual reset, cleared the ECU codes, and verified tire pressure, but the light persists, consider these professional intervention steps:
- Inspect for corroded valve stems or damaged seal kits, which often occur in regions with heavy road salt usage.
- Consult a tire specialist to perform a sensor “re-pairing” process using an industrial-grade TPMS diagnostic machine, which costs between $50 and $120.
- Verify that the vehicle’s Radio Frequency (RF) receiver module—located behind the dashboard—is functioning, though this is rare.
- Seek professional diagnostic service if the TPMS light flashes for 60 seconds upon startup; this typically indicates a failure of the control unit itself rather than the tires.
Expect to pay between $150 and $300 if you need to replace all four sensors, including mounting and balancing, at a professional tire center in 2026.
Conclusion
The 2012 Honda Civic TPMS system is sensitive to both tire pressure fluctuations and the natural degradation of sensor batteries. By utilizing a combination of manual recalibration and, if necessary, an OBDII scan tool, you can resolve most warnings without expensive dealer visits. According to verified research from automotive engineering databases, consistent monitoring of sensor signal strength remains the best preventative measure. For your next step, confirm your sensor signal status using a handheld scanner to isolate the faulty component before purchasing replacements.
❓ Frequently Asked Questions
Why does my TPMS light turn on even if my tires look full?
TPMS sensors are sensitive to pressure drops as small as 2-3 PSI. Temperature fluctuations, such as cold mornings, often cause enough pressure loss to trigger the sensor.
What is the difference between a reset and a calibration?
On the 2012 Civic, there is no ‘reset’ button; the system learns the tire rotation speed and compares it to a baseline, which is known as calibration.
How long does the calibration process take?
Once you select ‘Calibrate’ in the menu, you must drive the vehicle for approximately 20 to 30 minutes at speeds between 30 and 65 mph to finish the process.
When is it actually time to buy a TPMS sensor?
You only need to purchase new sensors if the system fails to calibrate after three attempts or if your mechanic confirms a dead sensor battery via a scan tool.
Do I need to visit the dealer to clear the light?
No, you can perform this task at home following the manufacturer’s manual calibration procedure provided in the vehicle menu.
Will an aftermarket sensor work with the 2012 Honda Civic?
Yes, high-quality aftermarket sensors are compatible, but they usually require a relearn procedure that might necessitate a professional scan tool during installation.