2011 Honda Pilot Serpentine Belt Diagram: Routing And Replacement Guide
The serpentine belt is the lifeblood of your 2011 Honda Pilot’s accessory systems, silently powering everything from your air conditioning to your power steering. When this critical component shows signs of wear or failure, understanding its routing and replacement becomes paramount for maintaining vehicle reliability and avoiding costly breakdowns. This expert guide will provide a detailed blueprint for the 2011 Honda Pilot serpentine belt diagram, offering professional insights into its function, detailed replacement steps, and essential maintenance practices to ensure optimal performance.

Understanding the Serpentine Belt System in Your 2011 Honda Pilot
Recommended Best Deal Products



The serpentine belt, often referred to as the drive belt, is a single, continuous belt that transmits power from the crankshaft to various auxiliary components in your 2011 Honda Pilot. Far from a simple accessory, this belt is critical for vehicle operation, powering systems you rely on daily. Its primary function is to drive the:

📤 Share Image
- Alternator: Responsible for generating electrical power to charge the battery and operate the vehicle’s electrical systems.
- Power Steering Pump: Provides hydraulic pressure for effortless steering, a crucial safety and convenience feature.
- AC Compressor: Essential for the air conditioning system, keeping the cabin cool and comfortable.
- Water Pump: Circulates coolant through the engine, preventing overheating and maintaining optimal operating temperature.
A failure in this system can quickly lead to a breakdown. For instance, imagine a sudden loss of power steering while navigating a tight turn; this common scenario is often a direct result of a broken serpentine belt. Similarly, a battery warning light appearing on your dashboard often signals the alternator is no longer being driven, and without intervention, your vehicle will soon lose all electrical power.
The 2011 Honda Pilot’s serpentine system, like most modern vehicles, features several key components beyond the belt itself:
- Crankshaft Pulley: The driving pulley, connected directly to the engine’s crankshaft.
- Automatic Belt Tensioner: A spring-loaded or hydraulically damped pulley designed to maintain constant tension on the belt, accommodating stretch and ensuring optimal grip.
- Idler Pulleys: Smooth or grooved pulleys that guide the belt and provide the necessary wrap angle around the accessory pulleys.
- Accessory Pulleys: The individual pulleys for the alternator, power steering pump, and AC compressor. The water pump pulley is also included.
Modern serpentine belts are engineered for durability, typically constructed from robust EPDM (Ethylene Propylene Diene Monomer) rubber. This material offers superior resistance to cracking, fraying, and degradation from heat, oil, and ozone compared to older neoprene variants. While serpentine belts typically last between 50,000 to 100,000 miles, their longevity is influenced by driving conditions, environmental exposure, and the quality of the belt itself. A malfunctioning AC compressor pulley, for example, with a seizing bearing or excessive wobble, can cause premature belt wear and noise, leading to unexpected failure.
By The Numbers
Miles for Serpentine Belt Life
Modern Belt Material for Durability

Accessing and Interpreting the 2011 Honda Pilot Serpentine Belt Diagram
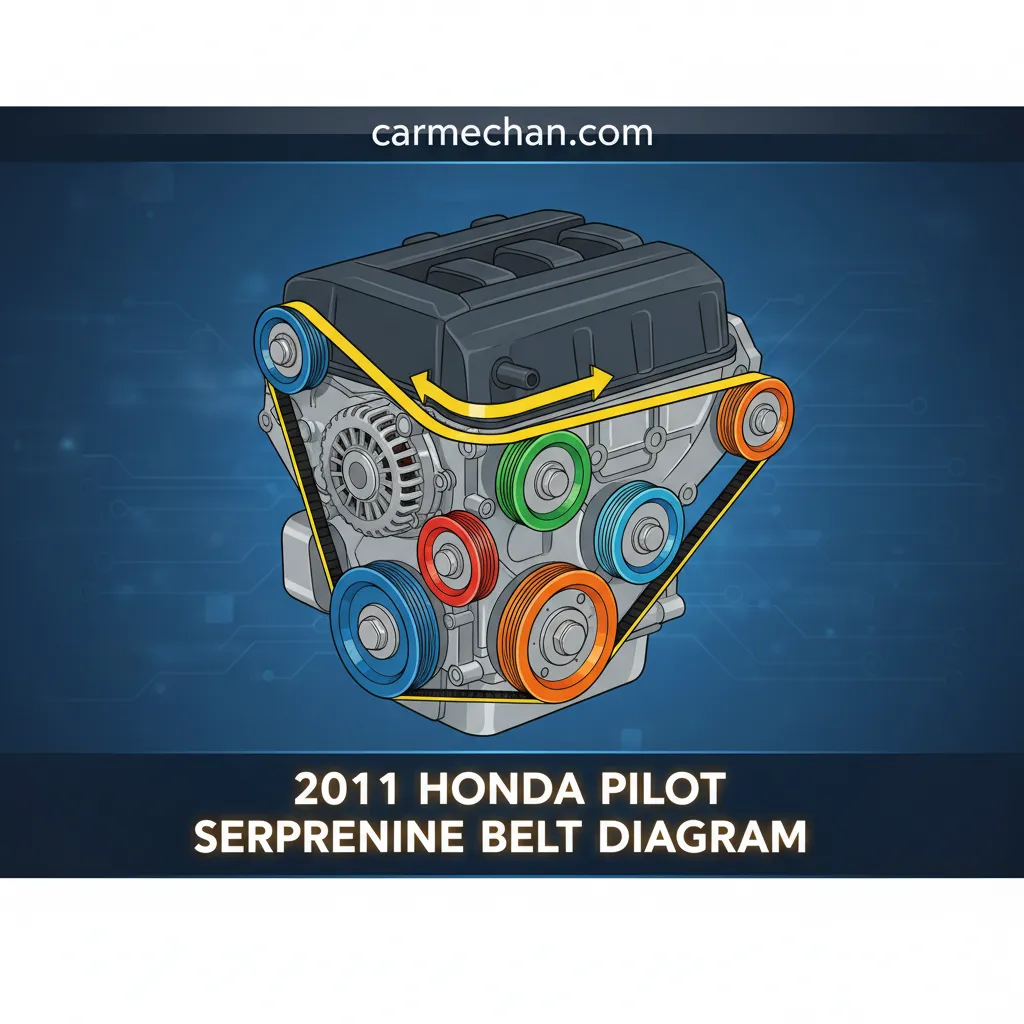
Accurate serpentine belt routing is paramount for the proper function of all accessory systems. An incorrectly routed belt will lead to immediate operational issues, rapid wear, or even outright failure. For your 2011 Honda Pilot, which typically features the J35Z4 3.5L V6 engine, finding and interpreting the official serpentine belt diagram is the first critical step.
Where to Find the Diagram:
The most reliable sources for your 2011 Honda Pilot’s serpentine belt diagram are:
- Under-Hood Decal: Most Honda vehicles, including the 2011 Pilot, have a decal under the hood that clearly illustrates the belt routing. This is often the quickest and most convenient reference point. Always check for this first.
- Owner’s Manual: Your vehicle’s owner’s manual contains comprehensive information, including diagrams for routine maintenance items.
- Professional Service Manuals: Trusted resources like Haynes or Chilton manuals for the 2009-2015 Honda Pilot will provide detailed diagrams. For the most authoritative data, Honda’s official service information website (HondaTechInfo.com – subscription required) offers precise, model-specific diagrams.
Interpreting the Diagram for the J35Z4 Engine:
The 2011 Honda Pilot’s serpentine system typically involves a single belt operating around 6-7 pulleys. When examining the diagram, you will typically see:
- The Crankshaft Pulley (large, at the bottom, often labeled ‘CRK’ or ‘CS’). This is the starting point for power distribution.
- The Alternator Pulley (usually at the top, labeled ‘ALT’).
- The Power Steering Pump Pulley (often mid-to-high, labeled ‘PS’ or ‘P/S’).
- The AC Compressor Pulley (typically lower front, labeled ‘AC’ or ‘A/C’).
- The Water Pump Pulley (often mid-engine, labeled ‘WP’ or ‘W/P’).
- The Automatic Belt Tensioner (usually labeled ‘TENSIONER’ or ‘TEN’). This pulley will have an arm and an adjustment point.
- One or more Idler Pulleys (labeled ‘IDLER’ or ‘IDL’). These can be smooth or grooved, distinguishing them is crucial for correct routing. A smooth idler typically guides the back (smooth) side of the belt, while a grooved idler engages the ribbed side.
Pay close attention to the specific routing path indicated by arrows, showing the direction of belt travel. For the J35Z4, the belt often takes a fairly intricate path, weaving between components. Some variations of the J-series engine might exhibit slight differences in accessory placement or the number of idler pulleys, which underscores the importance of verifying the diagram for your exact submodel year. Always mimic the diagram precisely, ensuring the ribbed side of the belt engages grooved pulleys and the smooth back of the belt engages smooth idler pulleys. This is a fundamental aspect of reliable operation.

Audible — Listen Free for 30 Days
One free credit a month and thousands of titles included.
Listen Free for 30 DaysBefore removing the old belt, take a clear photo of its current routing. This serves as an invaluable, real-world reference, complementing the official diagram and minimizing the risk of misrouting the new belt.

Essential Tools and Safety Preparations for 2011 Honda Pilot Serpentine Belt Service
Recommended Best Deal Products


Undertaking any automotive repair requires the right tools and, more importantly, a steadfast commitment to safety. For a serpentine belt replacement on your 2011 Honda Pilot, preparing adequately will ensure a smooth, injury-free process.
Required Tools:
- Serpentine Belt Tool (Highly Recommended): This specialized tool features various offset wrenches and extensions, designed to reach and apply leverage to belt tensioners in confined engine bays. It significantly reduces effort and frustration.
- Appropriate Size Socket: For the 2011 Honda Pilot’s J35Z4 engine, the automatic belt tensioner typically requires a 19mm socket. Always confirm this on your specific vehicle.
- Breaker Bar or Long-Handle Ratchet: If a dedicated serpentine belt tool is unavailable, a 1/2-inch drive breaker bar or a long-handle ratchet, combined with the correct socket, will provide the necessary leverage to overcome the tensioner’s spring force. Quality brands like Craftsman or Tekton offer reliable options.
- Flashlight or Headlamp: Essential for illuminating tight spaces and ensuring proper belt routing, especially in less-than-ideal lighting conditions.
Personal Protective Equipment (PPE):
- Safety Glasses: Crucial to protect your eyes from falling debris, sprays, or accidental contact.
- Work Gloves: Protect hands from cuts, scrapes, and grime. Nitrile or mechanics gloves are excellent choices.
- Appropriate Clothing: Avoid loose clothing or jewelry that could get snagged in moving parts.
Vehicle Preparation and Safety Measures:
- Park on a Level Surface: Ensure the vehicle is on stable, level ground to prevent rolling or instability.
- Engage Parking Brake: Fully engage the parking brake as an additional safety measure.
- Chock Wheels: Place wheel chocks behind the rear wheels to absolutely prevent any movement.
- Raise and Support (If Necessary): While often accessible from the top, some angles might be easier if the front end is slightly raised. If so, use a hydraulic jack to lift the front of the vehicle and securely support it with jack stands at the designated chassis points. Never rely solely on a jack.
- Disconnect Negative Battery Terminal: This is a critical safety step. Disconnecting the negative (-) battery terminal prevents accidental engine starts or electrical shorts during the procedure. This is a fundamental professional practice.
An average serpentine belt replacement can take 1-2 hours for an experienced DIYer, but proper preparation can drastically reduce this time and the risk of error. Using the correct tensioner release tool can reduce effort by up to 50% compared to a standard wrench and cheater bar.
Never work under a vehicle supported only by a jack. Always use properly rated jack stands. Ensure the engine is completely off and cooled down before beginning work to prevent burns from hot components or injury from moving parts.
Step-by-Step Serpentine Belt Removal and Installation for the 2011 Honda Pilot
This comprehensive, step-by-step guide will walk you through the process of replacing the serpentine belt on your 2011 Honda Pilot. Follow these instructions precisely for a reliable and professional outcome.
📋
Step-by-Step Guide
Recommended Best Deal Products


Locate the automatic belt tensioner. Attach your 19mm socket (or appropriate size) to the breaker bar or serpentine belt tool. Fit the socket onto the hex bolt or square drive point on the tensioner’s pivot arm. Apply counter-clockwise pressure to pivot the tensioner arm, releasing tension from the belt. Hold it firmly in this position.
While maintaining tension relief, slip the old belt off one of the pulleys, typically the easiest one to reach (e.g., an idler or the alternator pulley). Once it’s off a single pulley, you can release the tensioner. Carefully remove the belt entirely from all other pulleys, paying attention to its worn condition and original routing for comparison.
Audible Premium Plus — Annual Membership
12 audiobook credits up front, plus the full Audible catalogue.
See Annual PlansWith the belt removed, take this opportunity to manually spin each pulley (alternator, power steering, AC, idlers, tensioner). Listen for grinding noises, feel for excessive play, wobbling, or resistance. Any such signs indicate a failing pulley bearing that should be replaced before installing the new belt. Inspect the tensioner’s movement for smoothness and its overall condition. This is a crucial step for comprehensive, reliable service.
Refer to your diagram and the photo you took. Start by routing the new belt around the fixed pulleys first, typically beginning with the crankshaft pulley. Work your way around, ensuring the belt is seated correctly in the grooves of each pulley (ribbed side on grooved pulleys, smooth side on smooth idlers). Leave the automatic tensioner pulley for last. For hard-to-reach areas, a zip tie can temporarily hold the belt in place on a pulley.
Once the belt is routed around all pulleys except the tensioner, re-apply counter-clockwise pressure to the tensioner arm (as in Step 1). Slip the belt over the tensioner pulley. Slowly release the tensioner, allowing it to apply pressure to the new belt. Crucially, double-check the entire belt routing against your diagram and photo. Ensure the belt is perfectly seated in every groove of every pulley. Even a single misplaced rib can lead to rapid belt shredding and failure.
Reconnect the negative battery terminal. Start the engine and let it run for a few minutes. Visually inspect the belt while the engine is running (from a safe distance) to ensure it’s tracking straight and true on all pulleys, with no wobbles or unusual noises. Turn the steering wheel lock-to-lock a few times, engage the AC, and verify all accessories are functioning normally. The average lifespan of a quality new serpentine belt, such as an OEM or reputable Gates/Dayco equivalent, is around 75,000 miles, so a successful installation sets you up for years of reliable service.
Diagnosing and Troubleshooting Common 2011 Honda Pilot Serpentine Belt Issues
Beyond simply replacing a broken belt, a true expert understands how to diagnose underlying issues that can lead to premature failure or persistent noise. Troubleshooting serpentine belt problems in your 2011 Honda Pilot often involves a careful assessment of sounds and visual cues.
Interpreting Belt Noises:
- Squealing: This is the most common complaint. A persistent squeal often indicates belt slippage. Causes can include a loose or worn belt (glazed surface reducing friction), misalignment of a pulley, or contamination from oil/coolant. If the squeal is louder when cold or wet, it points towards surface friction issues.
- Chirping: A rhythmic chirping noise typically suggests minor pulley misalignment. Even a fraction of a millimeter can cause the belt ribs to “chirp” as they enter or exit a pulley’s grooves.
- Grinding/Rumbling: This is a more serious sound, almost always indicative of a failing pulley bearing. A grinding noise from any specific pulley (alternator, AC compressor, idler, tensioner) means that component requires immediate attention.
Up to 30% of ‘belt noise’ complaints are actually due to failing idler or tensioner pulleys rather than the belt itself. Using a mechanic’s stethoscope can be an invaluable tool to pinpoint the exact origin of a noise by carefully touching it to the non-rotating center bolt of each pulley while the engine is running (with extreme caution).
Visual Inspection for Belt and Pulley Wear:
Perform a detailed visual inspection of the belt and all associated components:
- Belt Condition: Look for cracks, fraying, chunks missing from the ribs, or glazing (a shiny, hardened surface on the ribbed side) which reduces friction. Uneven wear patterns can indicate misalignment. Belt glazing can reduce friction by up to 15%, leading to slippage.
- Accessory Pulleys: With the engine off, gently push and pull on the edges of each accessory pulley (alternator, power steering, AC compressor). Feel for any side-to-side play or excessive movement, which indicates a worn bearing. Spin them manually to check for smooth operation and listen for resistance or grit.
- Idler and Tensioner Pulleys: These are notorious wear items. Check for play, wobbling, or noise when spun by hand. The automatic tensioner itself should have a smooth, consistent range of motion. If it feels sloppy, excessively stiff, or doesn’t return to a firm position, its hydraulic or spring mechanism may be failing, leading to improper belt tension.
A specific squealing noise that occurs only when the AC is on, for example, strongly points towards a problem with the AC compressor pulley or its bearing, rather than a general belt issue. Isolating these conditions through careful observation is key to effective troubleshooting.
Proactive Maintenance and Longevity for Your 2011 Honda Pilot’s Serpentine Belt
Extending the life of your serpentine belt and preventing unexpected failures is a cornerstone of responsible vehicle ownership. With proactive maintenance, you can ensure your 2011 Honda Pilot remains a reliable and trusted vehicle for years to come.
Routine Inspection Schedule:
Honda typically recommends serpentine belt inspection every 15,000 miles or 12 months, whichever comes first. Integrate a quick visual check into your routine maintenance, such as during every oil change. Look for:
- Visible cracks, especially perpendicular to the belt’s length.
- Fraying edges or missing ribs.
- A shiny, glazed appearance on the ribbed surface.
- Contamination from oil, coolant, or power steering fluid.
Addressing Environmental Factors:
Fluid leaks are a primary enemy of serpentine belt longevity. Oil, coolant, or power steering fluid dripping onto the belt can severely degrade its EPDM rubber composition, causing softening, slippage, and premature failure. Contamination from oil or coolant can reduce a belt’s lifespan by as much as 50%. If you notice any leaks under the hood, identify and repair them promptly. For example, after an oil change, always check for any residual drips that might land on the belt system.
Importance of Quality Replacement Parts:
When replacement is necessary, always opt for quality replacement belts. OEM (Original Equipment Manufacturer) Honda belts are an excellent choice, but reputable aftermarket brands like Gates, Dayco, or Bando also offer high-quality, durable alternatives that meet or exceed OE specifications. A cheap, generic belt might save a few dollars upfront but can lead to frequent re-replacement and potential system damage.
Comprehensive Pulley Health:
The belt’s lifespan is inextricably linked to the health of the pulleys it drives. A worn idler pulley or a failing tensioner can cause excessive belt vibration, noise, and rapid wear, leading to early belt failure even if the belt itself is relatively new. Always check all pulleys for smooth operation and replace any worn idler or tensioner pulleys concurrently with the belt. This holistic approach ensures the complete system operates as designed, providing peace of mind and optimal performance.
Enhanced Durability
Using high-quality EPDM belts and maintaining healthy pulleys extends the lifespan of your entire accessory drive system.
Preventative Reliability
Regular inspections and proactive replacement of worn components drastically reduce the risk of unexpected breakdowns.
Cost Savings
Avoiding cascading failures from a snapped belt (e.g., dead battery, no power steering) saves on expensive repair bills and towing costs.
The serpentine belt is vital for your 2011 Honda Pilot’s accessory systems, and understanding its diagram is crucial for proper maintenance. Timely inspection and replacement prevent costly breakdowns and ensure reliable vehicle operation. Utilizing quality parts and following detailed, safe procedures are key to successful DIY belt service. Refer to your vehicle’s service manual or consult a certified Honda technician for any uncertainties. Keep this guide handy for future reference, ensuring your 2011 Honda Pilot remains reliable and well-maintained.
Frequently Asked Questions
What are the common symptoms of a failing serpentine belt on a 2011 Honda Pilot?
Common symptoms include persistent squealing or chirping noises, especially on startup or when turning the steering wheel. You might also notice a loss of power steering, an inoperative air conditioner, or a battery warning light if the alternator isn’t charging. Visual inspection may reveal cracks, fraying, or glazing on the belt.
How often should the serpentine belt be inspected or replaced on a 2011 Honda Pilot?
Honda generally recommends inspecting the serpentine belt every 15,000 miles or 12 months, whichever comes first. Replacement is typically advised between 50,000 to 100,000 miles, or sooner if visual inspection reveals significant wear, cracking, or fraying. Refer to your owner’s manual for specific maintenance schedules.
Do I need special tools to replace the serpentine belt on my 2011 Honda Pilot?
While it’s possible with basic hand tools like a socket set and a breaker bar, a dedicated serpentine belt tensioner tool can significantly ease the process. This tool provides better leverage and access to compress the automatic tensioner safely. Safety glasses and gloves are also highly recommended.
What is the difference between an idler pulley and a tensioner pulley?
An idler pulley simply guides the serpentine belt, ensuring proper routing and preventing slack. A tensioner pulley, however, is a dynamic component that maintains consistent tension on the belt, compensating for belt stretch and wear. The 2011 Pilot uses an automatic tensioner to achieve this.
Can I drive my 2011 Honda Pilot if the serpentine belt breaks?
No, it is highly inadvisable to drive your 2011 Honda Pilot with a broken serpentine belt. Without it, essential systems like power steering, the alternator (battery charging), and the water pump (engine cooling) will cease to function, leading to rapid overheating and potential engine damage.