Toyota Sienna TPMS Reset Button Location (All Years) & Troubleshooting Guide 2026
Last Updated on September 1, 2026 by Ryan
The Tire Pressure Monitoring System (TPMS) represents one of the most critical safety innovations in modern automotive history. For the Toyota Sienna, a vehicle specifically engineered for family transport, maintaining precise tire inflation is paramount for both passenger safety and fuel efficiency.

Prime for Young Adults — 6 Months Free
Students and 18–24s get six months of Prime free, then half price.
Start 6 Months FreeUnderstanding the intricacies of this system is essential for proper vehicle maintenance. Finding the Toyota Sienna TPMS reset button location is historically one of the most common challenges for owners.
Toyota has continuously evolved the Sienna’s dashboard layout, shifting the reset mechanism from hidden physical switches to complex digital menus. This exhaustive technical report details the exact location of the reset function across every production year.
It further explores the mechanical evolution from indirect ABS-based systems to highly accurate direct radio-frequency sensors. By analyzing common diagnostic trouble codes (DTCs), sensor replacement costs, and calibration procedures, this guide serves as the ultimate resource for automotive professionals and Sienna owners alike.
The Evolution of Tire Pressure Monitoring
Recommended Best Deal Products

The integration of tire pressure monitoring in passenger vehicles was significantly accelerated by federal safety mandates.
Following the implementation of the TREAD Act, automakers were forced to standardize tire safety systems to prevent catastrophic blowouts.
Toyota responded by deploying several generations of TPMS technology across its fleet.
Understanding the underlying technology is vital for accurate diagnostics and successful system resets.
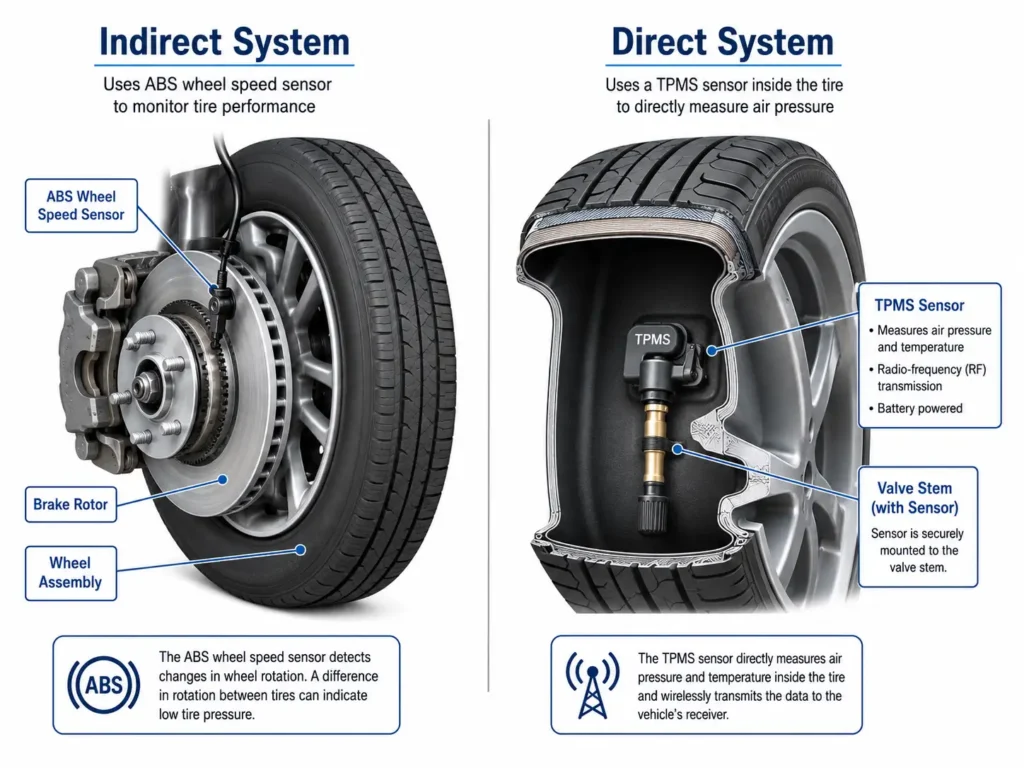
Indirect TPMS Technology (1998–2003)
Early iterations of the Toyota Sienna relied entirely on Indirect TPMS technology.

Audible — Listen Free for 30 Days
One free credit a month and thousands of titles included.
Listen Free for 30 DaysThis system did not feature physical pressure sensors mounted inside the wheel assembly.
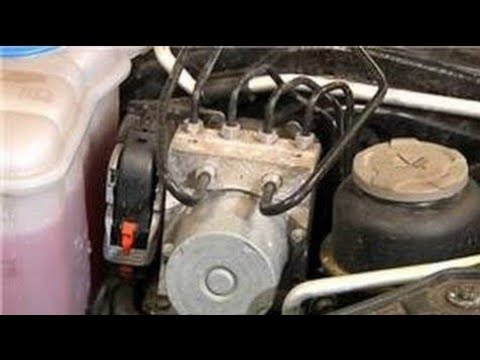
Instead, it leveraged the vehicle’s Anti-lock Braking System (ABS) and wheel speed sensors.
The indirect system operated on a simple principle of rotational physics.
When a tire loses air pressure, its overall rolling diameter decreases slightly.
This reduction in size causes the deflated tire to rotate faster than the fully inflated tires on the same axle.
The engine control unit (ECU) constantly monitors these minute differences in wheel speed.
If the ECU detects a persistent variance in rotational velocity, it triggers the dashboard warning light.
While highly cost-effective, this system could not provide precise PSI readings and often failed to detect pressure drops if all four tires deflated evenly.
Direct TPMS Technology (2004–Present)
To comply with stricter safety regulations, Toyota transitioned the Sienna to Direct TPMS starting in the mid-2000s.
Audible Premium Plus — Annual Membership
12 audiobook credits up front, plus the full Audible catalogue.
See Annual PlansThis modern system utilizes standalone battery-powered sensors mounted directly to the valve stem inside the tire cavity.
These sophisticated modules continuously measure the absolute barometric pressure and internal temperature of the tire.
The data is transmitted wirelessly via radio frequency (RF) to a central receiver module.
In North America, Toyota standardizes this RF transmission at a precise 315 MHz frequency.
Because each sensor features a unique hexadecimal identification code, the ECU can pinpoint exactly which tire is suffering from a pressure loss.
Locating the Toyota Sienna TPMS Reset Button
The exact location and procedure required to reset the tire pressure warning light depend entirely on the vehicle’s production year.
Automakers frequently reorganize interior ergonomics during major model refreshes.
The following sections provide highly specific location data and reset procedures for every generation of the Sienna.
| Sienna Generation | Production Years | System Type | Reset Mechanism Location |
| Fourth Gen | 2021 – 2026 | Direct TPMS | Multi-Information Display (Digital Menu) |
| Third Gen | 2011 – 2020 | Direct TPMS | Physical Button: Lower right knee bolster |
| Second Gen | 2004 – 2010 | Direct TPMS | Physical Button: Under steering column or glovebox |
| First Gen | 1998 – 2003 | Indirect TPMS | Physical Button: Lower driver-side dash panel |
Fourth Generation Sienna (2021–2026): The Digital Interface
The introduction of the fourth-generation Sienna marked a radical departure from previous interior designs.
Built exclusively as a hybrid platform, the interior was digitized, and analog switches were heavily reduced.
Consequently, Toyota completely eliminated the physical TPMS reset button.
All tire pressure monitoring and calibration functions are now housed within the dashboard software.
Navigating the Multi-Information Display (MID)
To reset the tire pressure light on a 2021–2026 Sienna, the driver must interact with the Multi-Information Display.
This digital screen is located directly within the gauge cluster, flanked by the speedometer and hybrid power meter.
Begin the process by parking the vehicle on a level surface and engaging the parking brake.
Turn the ignition to the “ON” position without depressing the brake pedal, ensuring the engine remains off.
Utilize the directional arrow pad located on the left side of the steering wheel to navigate the digital menus.
Scroll sideways until the “Gear” icon is highlighted, which grants access to the vehicle’s core settings.
Executing the Digital Reset Command
Within the settings menu, scroll downward until you locate the “Vehicle Settings” sub-menu.
Press and hold the central “OK” button on the steering wheel pad to enter this section.
Continue scrolling until the “TPWS” (Tire Pressure Warning System) tab is visible.
Select the “Set Pressure” or “Warning System” option depending on your specific trim level.
Press and hold the “OK” button firmly until the yellow TPMS indicator light on the dashboard blinks slowly three times.
Release the button and allow the vehicle to remain in the “ON” state for several minutes to finalize the new pressure baseline.
Third Generation Sienna (2011–2020): The Hidden Bolster Switch
The third-generation Sienna remains one of the most popular minivans on the road today.
However, its TPMS reset button is notoriously difficult to find for uninitiated drivers.
The button is hidden entirely out of the driver’s normal line of sight to prevent accidental engagement.
Pinpointing the Physical Button
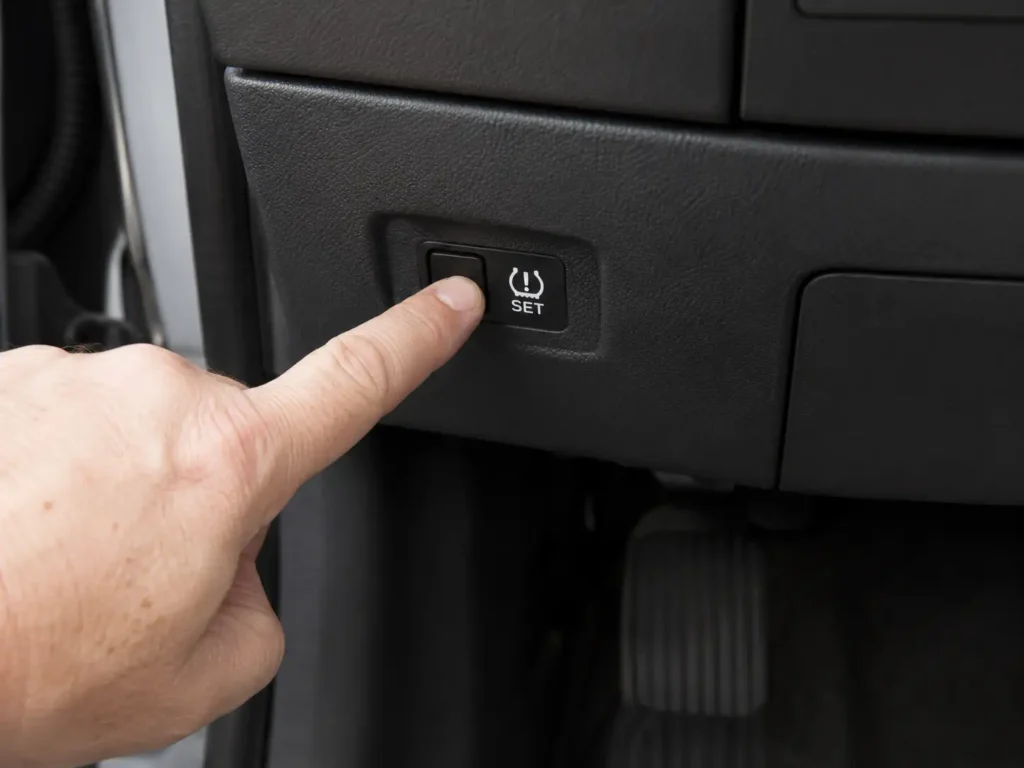
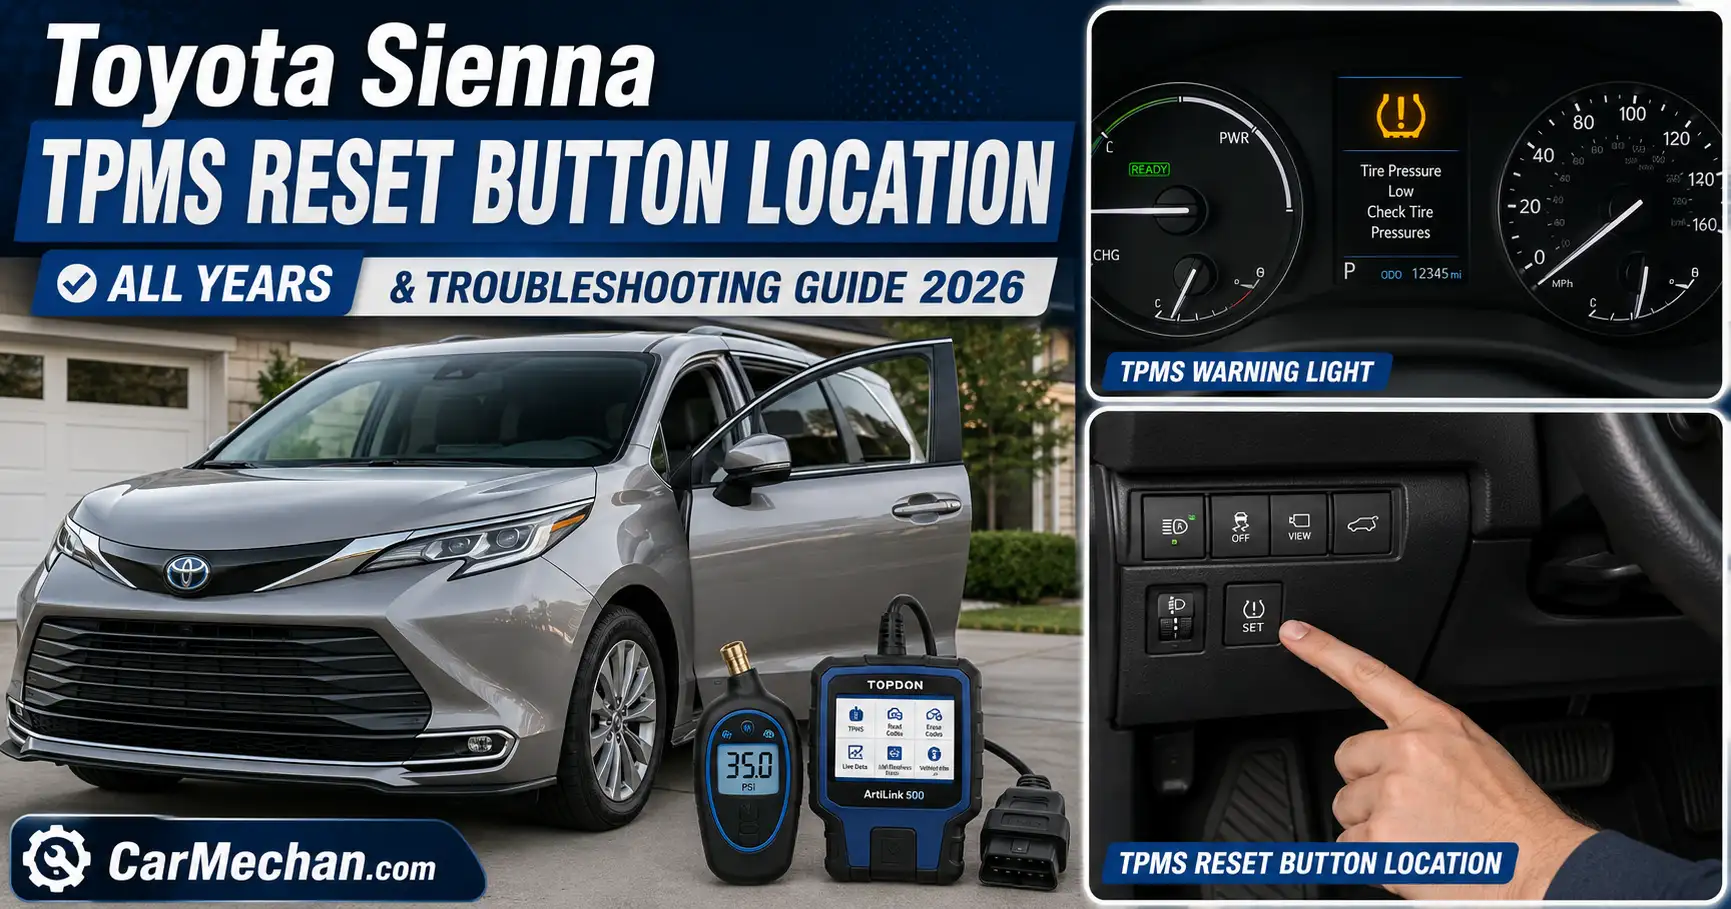
To locate the reset switch on a 2011–2020 model, the driver must inspect the lower instrument panel.
Look beneath the steering column, specifically focusing on the area near the driver’s right knee bolster.
The button is small, black, and recessed slightly into the plastic paneling.
It is clearly marked with the universal TPMS icon—a cross-section of a tire containing an exclamation point.
Adjacent to this icon, the word “SET” is printed in bold white lettering.
If the button is not immediately visible, running a hand along the bottom edge of the plastic trim will usually reveal its location.
The Gen 3 Calibration Sequence
Proper calibration requires precise execution of the reset sequence.
Ensure that all four tires, and potentially the spare, are inflated to the exact cold pressure listed on the driver’s door placard.
Turn the ignition key to the “ON” position, activating the vehicle’s electrical systems.
Press the hidden TPMS “SET” button inward and hold it continuously for approximately three to five seconds.
Observe the instrument cluster; the orange tire pressure warning light should begin to flash slowly.
After three distinct flashes, release the button and leave the vehicle powered on for several minutes to allow the ECU to register the new sensor data.
Second Generation Sienna (2004–2010): Early Direct Systems
The second-generation Sienna bridged the gap between analog and modern digital safety systems.
This era introduced the first widespread use of Direct TPMS RF sensors in the Toyota lineup.
Because the technology was rapidly evolving, the location of the reset button varied slightly based on the specific production year and trim level.
Locating the Variable Reset Switch
For the majority of 2004–2010 Siennas, the reset button is situated on the lower driver-side dashboard.
It is generally positioned below the steering wheel, similar to the subsequent generation.
However, in certain early models or specific configurations, Toyota engineers placed the switch under the passenger-side glovebox.
Technicians often have to inspect both footwells to locate the deeply recessed “SET” switch.
Once found, the reset procedure mimics the Gen 3 protocol: ignition to “ON,” press and hold until three flashes occur.
This sets a new baseline for the ECU based on the current absolute pressure in the tires.
The “Closed Loop” ECU Anomaly
Servicing the Gen 2 Sienna TPMS can present unique diagnostic challenges for mechanics.
When the “SET” button is depressed, the system actively searches only for the specific sensor IDs already stored in the ECU.
If new sensors are installed during a tire change, the ECU will reject them if the button is pushed before a proper relearn procedure is executed.
This traps the vehicle’s computer in a “closed loop,” preventing any new data from being accepted.
To break this loop, technicians must deploy an advanced TPMS diagnostic scan tool equipped with an “Unlock ECU” feature.
Only after the ECU is unlocked can the new 315 MHz sensor IDs be successfully written to the module via the OBD2 port.
First Generation Sienna (1998–2003): ABS-Based Monitoring
The original Toyota Sienna relied on the more primitive Indirect TPMS architecture.
Because the system used ABS tone rings rather than physical pressure transducers, it required frequent manual recalibration.
Any change in tire brand, tread depth, or air pressure could trigger a false warning light.
The Gen 1 Reset Location and Procedure
The reset button for the 1998–2003 Sienna is located on the lower dashboard panel on the driver’s side.
It is typically found just above the parking brake pedal or near the kick panel.
Because the system detects relative wheel speed deviations, the calibration process establishes a new baseline for tire rotation.
To execute the reset, turn the ignition to the “ON” position and locate the button.
Press and hold the switch firmly for several seconds.
Wait for the tire pressure light on the dash to flash three times before releasing the button.
The vehicle must then be driven at varying speeds to allow the ECU to map the rotational speed of the newly inflated tires.
Advanced Alternative Reset Methods
There are instances where the standard button press or digital menu selection fails to clear a stubborn TPMS light.
When the ECU exhibits a software glitch or a sensor falls “asleep,” alternative mechanical resets are required.
Automotive professionals frequently rely on these workarounds to bypass persistent dashboard warnings.
The Highway Speed Wake-Up Call
Direct TPMS sensors feature internal accelerometers designed to conserve battery life.
When the vehicle is parked, the sensors enter a low-power sleep mode.
If the light remains illuminated after setting the tire pressures, the sensors may need centrifugal force to wake up.
Taking the vehicle on a sustained highway drive is highly recommended.
Maintain a consistent speed of 50 mph or greater for approximately 10 to 15 minutes.
This constant rotational force activates the sensors, forcing them to broadcast their current PSI to the receiver module, often clearing the light instantly.
The Extreme Pressure Swing Tactic
Occasionally, a sensor’s internal pressure transducer becomes stuck on a previous low-pressure reading.
To force a physical reboot of the sensor hardware, a dramatic pressure swing is required.
Begin by inflating all four tires (and the spare, if equipped) to 3 PSI above the recommended limit.
Next, depress the valve cores and completely deflate the tires until they are entirely flat.
Finally, use an air compressor to reinflate them exactly to the cold pressure specified on the door jamb.
This massive fluctuation clears the sensor’s temporary memory buffer and forces a fresh data transmission to the ECU.
The Hard Electrical Reboot
If the vehicle’s computer module itself is locked in a fault state, an electrical hard reset is necessary.
Turn the vehicle entirely off and open the hood to access the primary 12-volt battery.
Using a 10mm wrench, carefully disconnect the positive battery cable from the terminal.
Move to the cabin, turn the ignition key to the “ON” position, and press the vehicle’s horn for roughly three seconds.
This action drains any residual electrical power stored in the system’s capacitors, completely wiping the temporary memory.
Reconnect the battery terminal tightly; the TPMS module will perform a cold boot, potentially clearing the erroneous warning light.
Diagnostic Mastery: Analyzing the Warning Light
Accurate TPMS diagnostics begin the moment the ignition is turned on.
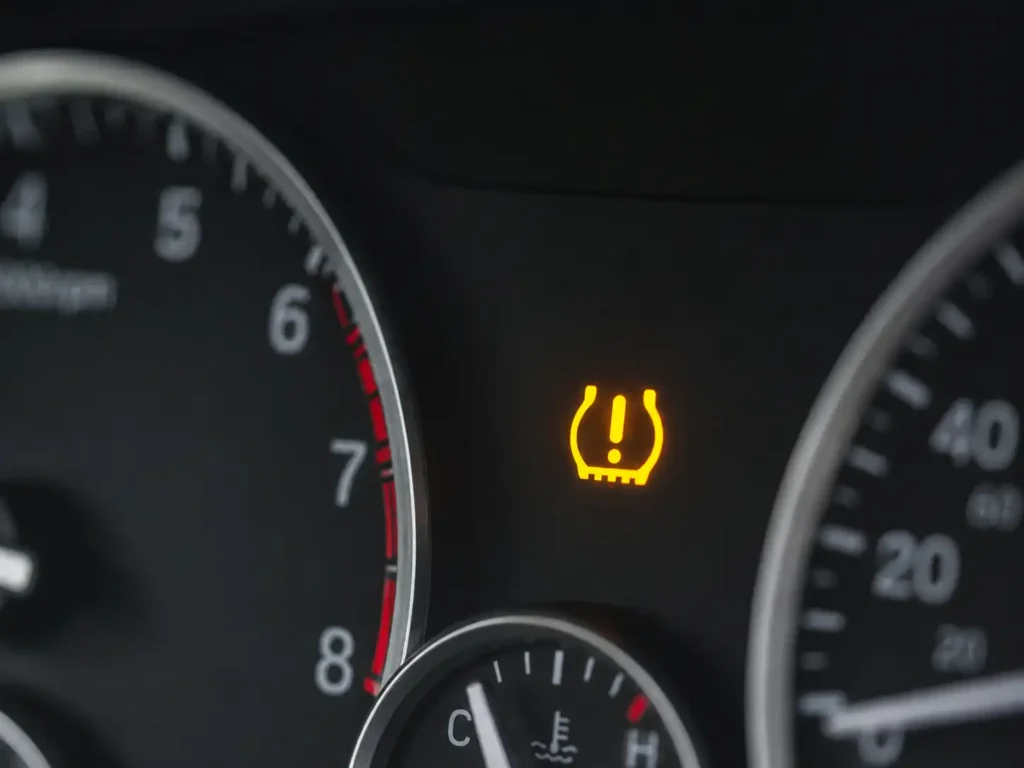
The behavior of the yellow horseshoe-shaped warning light provides immediate clues regarding the system’s health.
Understanding the difference between solid and flashing indicators is crucial for determining the next repair step.
Decoding the Solid Warning Light
A solid, unblinking TPMS light indicates a direct, measurable loss of tire pressure.
The ECU has successfully communicated with all sensors and determined that at least one tire has fallen roughly 25% below the recommended baseline.
This is the most common warning and is easily resolved with a standard air compressor.
Solid lights are frequently triggered during the transition from autumn to winter.
According to Gay-Lussac’s law of pressure and temperature, as ambient temperatures drop, the air inside the tire compresses.
For every 10-degree Fahrenheit drop, a tire will lose approximately 1 PSI.
A severe overnight freeze can easily cause a properly inflated tire to trigger a low-pressure warning by morning.
Decoding the Flashing Warning Light
A flashing TPMS light is indicative of a much more severe hardware or communication failure.
When the vehicle is started, if the light blinks steadily for one to two minutes before turning solid, the ECU has lost contact with a sensor.
The computer is essentially pinging the wheel sensors and receiving no return radio frequency.
In the vast majority of cases, this is caused by a depleted lithium-ion battery inside the sensor.
Because the batteries are permanently sealed within potting resin to protect against moisture and vibration, they cannot be replaced.
Once a battery dies—typically after 7 to 10 years—the entire sensor unit must be discarded and replaced.
The Forgotten Fifth Sensor: The Spare Tire
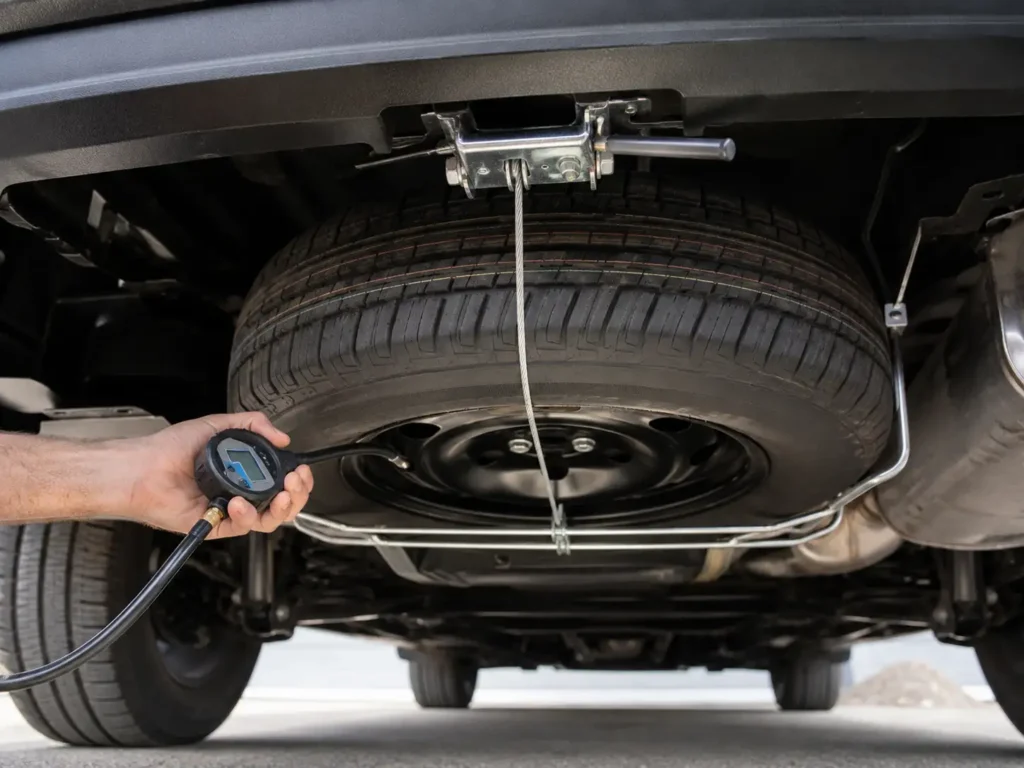
One of the most persistent diagnostic headaches for Toyota Sienna owners involves the spare tire.
Drivers frequently ensure all four ground-contact tires are inflated perfectly, only to find the TPMS light stubbornly remains on.
This occurs because Toyota engineered many Sienna generations with a fully active, fifth TPMS sensor inside the spare tire.
Why the Spare Tire Triggers the Light
The inclusion of a sensor in the spare is a deliberate safety feature designed to ensure emergency readiness.
Because the spare tire is mounted underneath the vehicle chassis on a drop-down cable, it is exposed to harsh elements and rarely inspected.
Over months and years, the spare tire naturally loses air pressure due to permeation through the rubber.
Once the pressure in the hidden spare drops below the ECU’s programmed threshold, the system illuminates the dashboard warning.
To clear this frustrating issue, owners must locate the drop-down nut inside the rear cargo area, lower the tire, and inflate it to 60 PSI (or the specific pressure listed for the temporary spare).
Failing to check this fifth tire is the leading cause of unresolved TPMS lights in older Siennas.
All-Wheel Drive Siennas and Run-Flat Tires
The Toyota Sienna holds a unique position in the automotive market as one of the few minivans offering an All-Wheel Drive (AWD) drivetrain.
However, implementing AWD required routing a driveshaft and rear differential through the undercarriage.
This mechanical layout completely eliminated the physical space required to store a spare tire on third-generation (2011–2020) AWD models.
The Necessity of Run-Flat Technology
To compensate for the lack of a spare, Toyota equipped AWD Siennas with specialized run-flat tires directly from the factory.
Run-flat tires feature heavily reinforced, thick rubber sidewalls.
If the tire suffers a catastrophic puncture, these stiff sidewalls support the entire weight of the minivan, allowing the driver to limp to a repair facility.
Because a punctured run-flat tire does not visually sag or collapse, a highly accurate TPMS system is absolutely mandatory.
Without the dashboard warning light, a driver would have no sensory indication that the tire had lost all its air.
Continuing to drive at highway speeds on a deflated run-flat beyond its 50-mile limit can result in severe wheel damage and loss of vehicle control.
Transitioning to Standard Tires
Despite their safety benefits, run-flat tires are widely criticized for their harsh ride quality, high replacement costs, and short tread life.
Many Sienna owners choose to replace them with standard, non-run-flat tires.
When performing this modification, the original TPMS sensors can simply be transferred to the new tires without reprogramming.
However, owners must formulate a backup plan for emergencies.
Many opt to carry a heavy-duty chemical inflation kit and a portable air compressor.
Others invest in comprehensive aftermarket spare tire solutions, such as those offered by Modern Spare, which provide a narrow alloy wheel and specialized jack that can be stored in the rear cargo area.
TPMS Sensor Replacement and Costs
When a direct TPMS sensor fails due to battery depletion or physical damage, replacement is unavoidable.
Navigating the replacement market requires an understanding of the available parts and their associated labor costs.
Vehicle owners can choose between premium factory parts or highly capable aftermarket alternatives.
OEM vs. Aftermarket Sensor Technology
Original Equipment Manufacturer (OEM) sensors for Toyota are typically manufactured by Pacific Industrial or Denso.
These sensors are renowned for their flawless compatibility and longevity, but they carry a premium price tag.
An OEM sensor purchased directly from a Toyota parts counter generally ranges from $80 to $150 per wheel.
Conversely, the aftermarket is dominated by programmable sensors from brands like Autel (MX-Sensors), Schrader, and VDO.
These universal sensors cost significantly less, often retailing between $25 and $60 each.
Using an RF programming tool, technicians can easily format these blank sensors to mimic the exact protocol required by the Sienna’s ECU.
| Replacement Option | Sensor Hardware Cost (Per Wheel) | Average Labor & Programming | Estimated Total Cost (All 4 Wheels) |
| Toyota Dealership (OEM) | $100 – $150 | $80 – $150 | $720 – $1,200 |
| Independent Repair Shop | $50 – $80 | $40 – $60 | $360 – $560 |
| National Tire Chains (Costco) | $40 – $60 | Often bundled with tire install | $200 – $350 |
| DIY Home Installation | $25 – $40 | $0 | $100 – $160 |
The DIY Replacement Process
For mechanically inclined owners, replacing a TPMS sensor at home is a viable cost-saving option.
The vehicle must be safely lifted, and the tire must be completely deflated by removing the valve core.
Using a manual bead breaker tool, the tire bead is pushed down off the rim rim just enough to expose the interior mounting point of the sensor.
The retaining nut on the valve stem is removed, allowing the old sensor to drop into the tire cavity for extraction.
The new sensor is inserted through the rim hole, and the retaining collar is torqued to specific manufacturer specifications (usually around 4-7 Nm) to prevent air leaks.
Finally, the tire is re-inflated to seat the bead, and the new sensor must be programmed to the vehicle.
ECU Reprogramming and OBD2 Relearns
Installing a new physical sensor does not automatically fix the dashboard warning light.
The vehicle’s computer has no way of knowing that a new sensor has been introduced until its unique hexadecimal ID is manually programmed into the memory.
This process, known as a TPMS relearn, requires specialized electronic hardware and cannot be bypassed.
Utilizing TPMS Scan Tools
To complete a relearn on a Toyota Sienna, a professional-grade TPMS diagnostic tool is required.
Devices like the Autel MaxiTPMS or the ATEQ VT56 are used to scan each wheel sequentially, starting with the front-left and moving clockwise.
The tool utilizes low-frequency radio waves to ping the sensor, capturing its exact ID, battery status, and current PSI.
Once all four (or five) IDs are captured in the tool’s memory, an OBDII cable is connected from the tool to the vehicle’s Data Link Connector (DLC) under the dashboard.
The technician initiates an OBD relearn command, which forces the ECU into write-mode.
The new hexadecimal IDs are flashed directly onto the computer’s motherboard, finalizing the repair and extinguishing the flashing light.
Managing Seasonal Tire Swaps
In regions that experience heavy snowfall, many Sienna owners utilize two distinct sets of wheels: one equipped with summer tires, and one with dedicated winter rubber.
Historically, swapping these wheel sets required a costly trip to the dealership twice a year to reprogram the ECU with the new sensor IDs.
To circumvent this expense, owners can invest in consumer-grade tools like the ATEQ Quickset.
The Quickset device connects to a home computer, allowing the user to store the unique IDs for both the summer and winter wheel sets.
When the seasons change and the tires are swapped, the owner simply plugs the Quickset module into the Sienna’s OBD2 port.
Pressing the “Summer” or “Winter” button on the device instantly overwrites the ECU with the correct pre-saved IDs, completely bypassing dealership labor fees.
The “Main / 2nd” Memory Switch
To further assist with seasonal tire swaps, Toyota engineered certain models with a hidden memory toggle switch.
This switch is usually located deep beneath the passenger side glovebox or near the lower driver’s kick panel.
It allows the vehicle’s ECU to store two entirely separate sets of TPMS sensor IDs simultaneously.
When the “Main” setting is active, the computer reads the summer tire sensors.
When the winter wheels are bolted on, the owner simply flips the switch to the “2nd” position, commanding the ECU to look for the secondary set of stored IDs.
It is vital to ensure that technicians write the correct sensor IDs to the corresponding memory bank during the initial programming phase.
Toyota Sienna vs. Toyota Sienta: Clarifying Market Differences
When researching automotive diagnostics online, global search queries often conflate two distinctly different vehicles: the Toyota Sienna and the Toyota Sienta.
While their nomenclature is separated by a single letter, their engineering, target demographics, and internal technologies are vastly divergent.
Understanding these differences is crucial when purchasing replacement parts or diagnostic tools online.
The Toyota Sienna (USDM)
The Sienna is a large, heavy-duty minivan designed primarily for the North American market.
It competes directly with full-size haulers like the Honda Odyssey and Chrysler Pacifica.
Because it must comply with regulations set forth by the National Highway Traffic Safety Administration (NHTSA), its TPMS architecture is strictly regulated.
All direct TPMS sensors utilized in the North American Sienna broadcast their data exclusively on the 315 MHz radio frequency band.
The Toyota Sienta (JDM/Global)
Conversely, the Toyota Sienta is a subcompact, highly efficient MPV (Multi-Purpose Vehicle) popular in the Japanese Domestic Market (JDM), Southeast Asia, and Bangladesh.
Built on a smaller, more nimble platform, it features unique equipment designed for dense urban environments, such as power sliding doors and compact hybrid powertrains.
Due to differing international telecommunications regulations, the Sienta often utilizes TPMS sensors that broadcast on the 433 MHz frequency band.
Cross-Compatibility Warnings
This frequency variance is a critical failure point for DIY mechanics purchasing parts from international e-commerce platforms.
A 315 MHz sensor intended for a US-market Sienna cannot be programmed into the ECU of an imported 433 MHz Sienta, and vice versa.
The vehicle’s receiver module simply cannot process the incorrect radio wave frequency.
Always verify the required OEM part number and frequency requirements via the vehicle’s VIN before attempting to clone or replace TPMS hardware.
Advanced Sensor Cloning Technology
For those looking to avoid OBD2 reprogramming entirely, sensor cloning has emerged as a highly popular technological workaround.
Rather than writing new IDs to the vehicle’s computer, technicians use blank, programmable aftermarket sensors.
Using a specialized TPMS tool, the exact hexadecimal ID of the original, dying factory sensor is wirelessly read and copied.
This captured ID is then permanently burned onto the new blank sensor.
Because the new sensor broadcasts the exact same digital signature as the old one, the vehicle’s ECU is entirely unaware that a hardware change occurred.
This method requires absolutely no interaction with the vehicle’s OBD2 port and is the preferred solution for replacing a single damaged wheel or building a dedicated set of winter tires.
In-Depth Answers to Critical Reader Questions
What does it mean if my tire pressure is fine, but the light is still on?
If you have verified with a manual gauge that all four tires are inflated to the exact cold pressure listed on the door jamb, the issue lies elsewhere. First, check the pressure of the spare tire, as its internal sensor is frequently the culprit. If the spare is properly inflated, the system requires a manual reset. You must press the physical reset button (or utilize the MID menu on 2021+ models) to set the new baseline, followed by a sustained drive at 50 mph to finalize the calibration.
Can a standard OBD2 code reader diagnose my TPMS issues?
Generally, no. Standard OBD2 code readers are mandated by law to read and clear emissions-related engine codes (Check Engine Lights). Tire pressure monitoring, ABS, and airbag systems utilize proprietary, vendor-specific diagnostic protocols. To read TPMS-specific Diagnostic Trouble Codes (DTCs), you must use an advanced bidirectional scan tool (such as those from Snap-On or Autel) capable of accessing Toyota’s proprietary body control modules.
How much does tire pressure change in cold weather?
Tire pressure is highly susceptible to ambient temperature fluctuations. Due to the physics of gas compression, the air inside your tires becomes denser as it cools. As a general rule of thumb, tire pressure will drop by roughly 1 PSI for every 10-degree Fahrenheit decrease in ambient temperature. This is why TPMS lights are most frequently triggered on the first freezing morning of autumn, despite the tire having no physical puncture.
Is it illegal to disable the TPMS system?
In the United States, under the TREAD Act, it is a federal violation for any commercial automotive repair facility to intentionally disable or bypass a functioning TPMS system. While an individual owner technically can modify their own vehicle, doing so is highly discouraged. Disabling the TPMS warning light usually requires complex wiring modifications or ECU tuning, and it fundamentally compromises the safety systems designed to prevent high-speed blowouts.
Why do dealerships charge so much for TPMS replacement?
Dealership pricing reflects several compounded factors. First, they exclusively utilize OEM sensors, which carry higher manufacturing and markup costs than aftermarket alternatives. Second, they charge a flat-rate diagnostic fee to verify the failure, followed by standard hourly labor rates for the physical installation. Finally, they bill for the specialized time required to interface with the ECU and perform the OBD2 relearn procedure. Utilizing independent shops or ATEQ TPMS Solutions can drastically reduce these overhead costs.