2010 Honda Civic Fuse Box Diagram: Locations, Interpretation, And Troubleshooting
The electrical system of your 2010 Honda Civic is a meticulously engineered network, safeguarded by a series of critical components: fuses. Without a precise understanding of your vehicle’s fuse box diagram, diagnosing even common electrical malfunctions can prove challenging, potentially leading to unnecessary repair costs or prolonged vehicle downtime. This expert guide provides a professional, authoritative breakdown of your 2010 Honda Civic’s fuse box locations, how to interpret its detailed diagram, and reliable, step-by-step procedures for effective troubleshooting and safe fuse replacement, ensuring the continued integrity of your vehicle’s electrical system.

Understanding Your 2010 Honda Civic’s Electrical System and Fuse Boxes
Recommended Best Deal Products


📤 Share Image
The intricate electrical system of your 2010 Honda Civic is a marvel of modern automotive engineering, with each component relying on a steady, regulated flow of current. At the heart of this protection system are fuses, specifically designed as sacrificial devices to safeguard sensitive components and intricate wiring against the detrimental effects of electrical overloads. When an overcurrent condition occurs—be it from a short circuit, component failure, or voltage spike—the fuse’s internal filament melts, breaking the circuit and preventing potentially extensive and expensive damage downstream.
Honda meticulously segments the Civic’s electrical architecture into distinct circuits. Each circuit, from the simple courtesy light to complex engine management systems, is protected by a fuse precisely rated for its operational current draw. This segmentation ensures that an electrical fault in one area does not cascade throughout the entire vehicle. For instance, common circuits like the power windows, the audio head unit, the headlights, and the sophisticated Engine Control Unit (ECU) each possess their dedicated fuses, guaranteeing isolated protection.
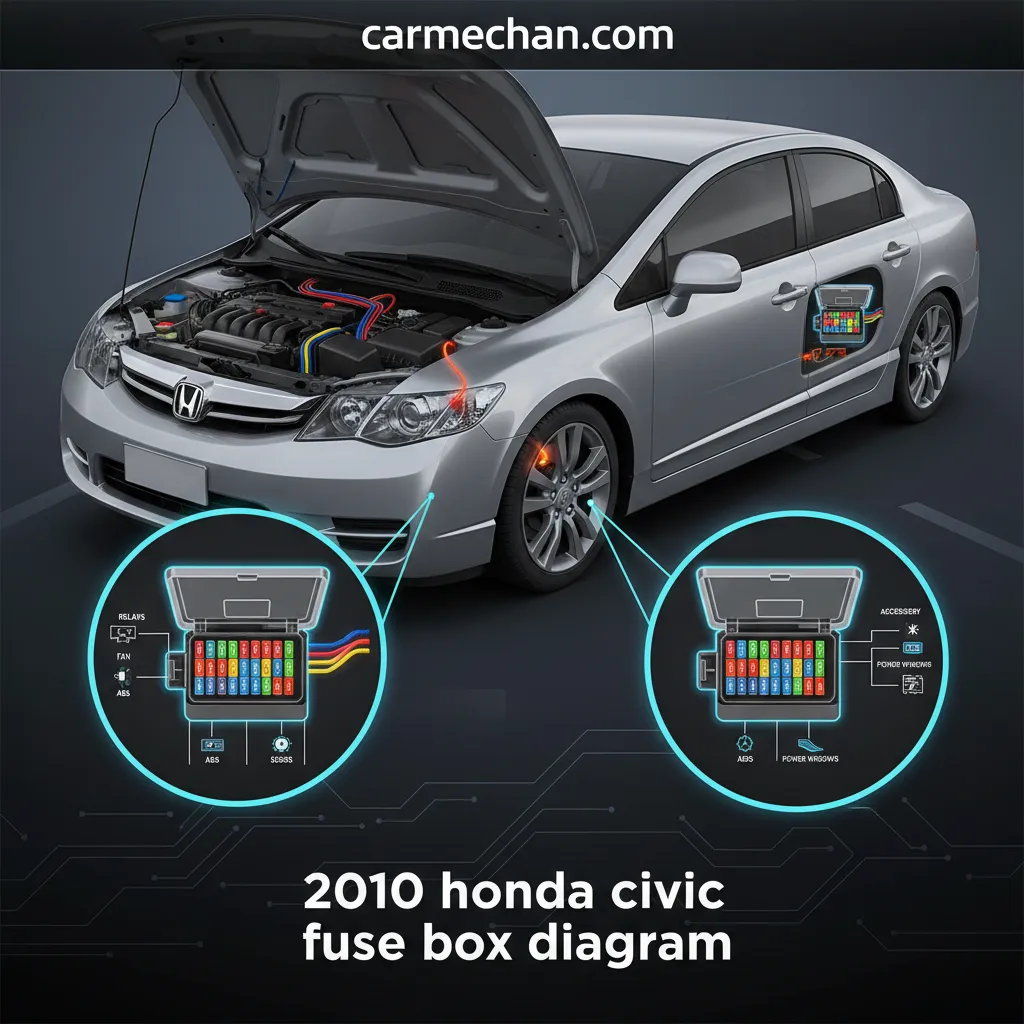
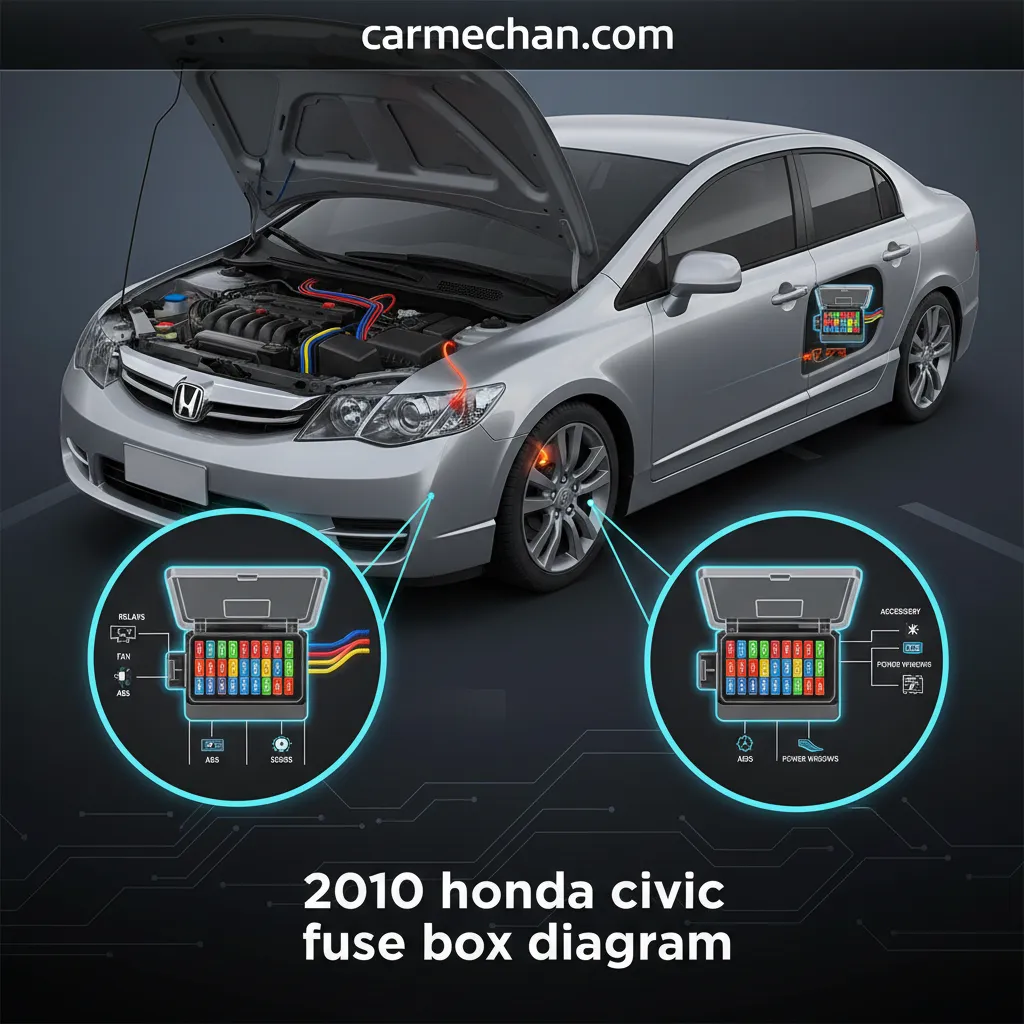
To accommodate the varying current demands across the vehicle, the 2010 Honda Civic integrates two primary fuse box locations: the under-hood (engine compartment) fuse box and the interior (driver’s side dash) fuse box. The under-hood fuse box typically houses fuses and relays for high-current circuits crucial to engine operation, such starting, cooling fans, and the anti-lock braking system (ABS). In contrast, the interior fuse box manages lower-current accessories and convenience features, such as the radio, power outlets, interior lights, and various sensors.
Maintaining the integrity of this fuse system is paramount for reliable vehicle operation. A well-maintained and correctly fused electrical system adheres to the highest quality and trusted manufacturing standards, ensuring that all components function as intended without risk of electrical compromise. The 2010 Honda Civic typically utilizes a combination of blade-type fuses (Mini, ATO, Maxi) ranging from 5A to 80A. Critical, high-amperage circuits, such as those powering the starter motor or the ABS pump, are often protected by larger cartridge fuses or fusible links, designed for sustained high current loads.
Damage Prevention
Fuses act as critical fail-safes, preventing costly damage to wiring harnesses and sensitive electronic control modules from electrical overloads.
System Reliability
A well-maintained fuse system ensures consistent and reliable operation of all vehicle electrical components, from essential engine functions to cabin accessories.
Simplified Diagnosis
Understanding fuse box diagrams allows for rapid and precise identification of electrical faults, streamlining troubleshooting and reducing diagnostic time.

Locating the Fuse Boxes in Your 2010 Honda Civic
Accessing the fuse boxes in your 2010 Honda Civic is a fundamental step in any electrical troubleshooting process. Honda has thoughtfully positioned these critical enclosures for relatively easy access, though their exact location and access method differ between the interior and under-hood units.

Audible — Listen Free for 30 Days
One free credit a month and thousands of titles included.
Listen Free for 30 DaysInterior Fuse Box Location
The interior fuse box on a 2010 Honda Civic is commonly located on the driver’s side dashboard, specifically to the left of the steering column. To access it, you will typically need to remove a small plastic panel or cover. This panel is often integrated seamlessly into the dash design. Look for a small recess or a subtle outline that indicates a removable section. Sometimes, a gentle pull or the use of a trim removal tool will unclip it. On the reverse side of this cover, or molded into the inside of the fuse box lid itself, you will often find a diagrammatic illustration indicating fuse positions and their corresponding circuits, along with the “Fuse” label as a clear visual cue.
Under-Hood Fuse Box Location
The under-hood fuse box is situated within the engine compartment, designed to handle the higher electrical loads associated with powertrain components. In the 2010 Honda Civic, this essential box is usually a prominent black plastic housing marked ‘FUSE’ or ‘RELAY’, often located on the passenger side of the engine bay, typically near the battery or adjacent to the fender well. To access it, you will release a series of clips or latches on the cover. These mechanisms are designed for secure closure but allow for straightforward manual release. Once opened, the underside of the lid commonly presents a comprehensive diagram of the fuses and relays housed within.
It is crucial to recognize that the specific malfunctioning component dictates which fuse box requires inspection. For example, a non-functional radio or power window points directly to the interior fuse box, whereas issues with headlights or the engine’s cooling fan necessitate examination of the under-hood fuse box. Understanding this distinction is a hallmark of expert electrical troubleshooting.

Interpreting the 2010 Honda Civic Fuse Box Diagram
Recommended Best Deal Products


Successfully diagnosing an electrical issue hinges on your ability to accurately interpret the fuse box diagrams. These diagrams, often found on the underside of the fuse box cover or within your vehicle’s owner’s manual, are not merely random arrays of numbers and symbols; they are a logical representation of your Civic’s electrical network.
Decoding Symbols and Abbreviations
Honda diagrams employ a standardized set of symbols and abbreviations. For instance, you will commonly encounter:
- ‘ACC’ for Accessories (often refers to accessory power outlets or infotainment).
- ‘DRL’ for Daytime Running Lights.
- ‘WIPER’ for the windshield wiper system.
- ‘RADIO’ for the audio system.
- ‘TAIL LIGHTS’ for the rear illumination.
- ‘HORN’ for the vehicle’s horn circuit.
Each symbol or abbreviation corresponds to a specific electrical component or circuit. Numerical codes typically identify the fuse’s position within the fuse box, aiding in precise location.
Matching Amperage Ratings and Color Codes
Equally critical is understanding the fuse’s amperage rating, denoted by a number followed by ‘A’ (e.g., 10A, 15A, 20A). This rating indicates the maximum current the fuse can safely carry before blowing. Honda, like many manufacturers, utilizes a standardized color-coding system for blade fuses, offering an immediate visual cue for their rating:
- Yellow typically denotes a 20A fuse.
- Blue indicates a 15A fuse.
- Red signifies a 10A fuse.
- Brown is for a 7.5A fuse.
Always match the amperage rating on the diagram to the physical fuse’s color code and stamped rating. Deviating from the specified amperage can lead to severe electrical damage, as a lower-rated fuse will blow prematurely, and a higher-rated fuse risks wiring damage or fire due to inadequate protection.
Your 2010 Honda Civic’s owner’s manual is the definitive, professional, and most reliable source for the fuse box diagrams specific to your vehicle’s trim level and manufacturing variations. Always refer to it first for a complete guide, especially when dealing with complex circuits or unique options.
Audible Premium Plus — Annual Membership
12 audiobook credits up front, plus the full Audible catalogue.
See Annual PlansTracing Components to Fuses
To effectively troubleshoot, you must be able to trace a malfunctioning electrical component back to its corresponding fuse on the diagram. For example, if your car horn stops working, you would consult the diagram, locate the symbol or abbreviation for ‘HORN’, and identify its associated fuse number and amperage rating (e.g., Fuse No. 16, 10A). The owner’s manual for the 2010 Honda Civic typically dedicates several pages to detailed fuse box layouts and circuit descriptions, providing an expert and comprehensive resource.
Common Electrical Issues and Troubleshooting with Fuses
Diagnosing electrical malfunctions in your 2010 Honda Civic often begins with a systematic inspection of the fuses. Many common electrical issues are, in fact, symptoms of a blown fuse, making this a frequent and often straightforward fix for the professional technician or astute DIYer.
Symptoms of a Blown Fuse
The most telling symptom of a blown fuse is the complete failure of a specific electrical component or group of components within a single circuit. Examples include:
- No power to the radio or infotainment system.
- Headlights or tail lights not illuminating (often one side, or an entire circuit).
- Power windows unresponsive.
- A non-functional accessory power outlet (cigarette lighter).
- Blinking turn signals failing to operate.
If multiple unrelated components fail simultaneously, it may indicate a larger electrical issue, potentially involving a main fuse, a fusible link, or a ground fault affecting an entire branch of the system, which typically warrants a professional assessment.
Methodical Troubleshooting Approach
Follow this methodical approach to diagnose a suspected blown fuse:
- Confirm Component Failure: Verify that the component in question is indeed not working. For example, test an accessory power outlet with a known working device.
- Identify Corresponding Fuse: Consult your 2010 Honda Civic’s owner’s manual or the fuse box diagram to locate the specific fuse protecting the malfunctioning component. Note its location (interior or under-hood), fuse number, and amperage rating.
- Visual Inspection: Carefully remove the suspected fuse using the fuse puller (usually found within the fuse box cover) or small needle-nose pliers. Hold the fuse up to a light source. For clear blade fuses, a broken or burnt wire filament inside the plastic casing unequivocally identifies a blown fuse.
- Use a Fuse Tester (Recommended): For definitive confirmation, especially with opaque fuses or when visual inspection is ambiguous, use a reliable fuse tester or a digital multimeter set to continuity mode. A good fuse will show continuity; a blown fuse will not.
Beyond the Blown Fuse
While replacing a blown fuse often resolves the immediate issue, it is crucial to remember that a blown fuse is frequently a symptom, not the root problem. If a fuse repeatedly blows, it strongly indicates an underlying electrical fault, such as:
- A persistent short circuit in the wiring.
- A malfunctioning component drawing excessive current.
- Corrosion in electrical connections.
In these scenarios, simply replacing the fuse without addressing the underlying cause will lead to continuous fuse failures and could potentially cause more significant damage. Such persistent issues require a professional diagnostic assessment by a qualified automotive electrician to prevent further complications and ensure your vehicle’s long-term reliability. According to automotive service data, blown fuses account for approximately 15-20% of minor electrical complaints reported in vehicles, making them a common yet often straightforward fix. However, a professional digital multimeter set to continuity mode can reliably test a fuse’s integrity in seconds, confirming if a replacement is indeed required.
By The Numbers
Minor Electrical Issues Due to Blown Fuses
Time to Test a Fuse with a Multimeter
✅ Pros of DIY Fuse Replacement
- Immediate restoration of functionality for simple faults.
- Cost-effective for straightforward repairs.
- Empowers owners with basic maintenance skills.
❌ Cons of DIY for Recurring Issues
- Risks masking a deeper, more serious electrical problem.
- Potential for greater damage if incorrect fuse types are used repeatedly.
- Requires specialized diagnostic tools and expertise for root cause analysis.
Step-by-Step Guide to Replacing a Blown Fuse in Your Civic
Recommended Best Deal Products


Replacing a blown fuse is a routine maintenance task that most 2010 Honda Civic owners can perform with confidence, provided they follow the correct procedures. This complete guide ensures safety and proper functionality.
📋
Step-by-Step Fuse Replacement
Before touching any electrical components, turn off your vehicle’s ignition and remove the key to ensure no power is flowing through the circuits. For high-amperage fuses in the under-hood box, or if you feel any uncertainty, it is a best practice to disconnect the negative battery terminal (black cable) as an added safety measure. This prevents accidental short circuits or electrical shocks during fuse extraction or insertion.
Locate the fuse puller – a small plastic tool often clipped to the inside of the fuse box cover or within the under-hood fuse box. Using this tool, grasp the suspected blown fuse firmly and pull it straight out. If a fuse puller is unavailable, small, insulated needle-nose pliers can be used, taking extreme care not to bend the fuse terminals or damage adjacent fuses. For example, replacing a 15A blue blade fuse for the ‘WIPER’ circuit involves using the puller to remove the identified fuse from its slot.
This is the most critical step. You MUST replace the blown fuse with a new fuse of the exact same amperage rating (e.g., 15A for 15A, not 20A) and the exact same physical type (e.g., Mini, ATO, Maxi blade fuse). Using a fuse with a higher amperage rating than specified can lead to serious electrical damage, including overheating of wires and potential wiring fires, as the circuit will not be adequately protected against overcurrent. Always refer to a trusted OEM fuse supplier for replacement parts to ensure quality and compatibility, maintaining your Civic’s professional electrical standards.
Align the new fuse with the empty slot and press it firmly into place until it is fully seated. Reconnect the negative battery terminal if it was disconnected. Turn the ignition on and verify that the previously malfunctioning component (e.g., wipers, radio) is now working correctly. Ensure that the new fuse remains securely in its position for long-term reliability.
Once you’ve confirmed the electrical component is operational, securely replace the fuse box cover and any interior panels that were removed. Ensure all clips and latches are engaged to maintain proper sealing against dust and moisture, which is vital for the longevity and quality of your electrical system. This completes the comprehensive fuse replacement process.
Never, under any circumstances, substitute a fuse with tin foil, wire, or a fuse of a higher amperage rating. This bypasses the circuit’s intended protection, creating an extreme risk of serious electrical damage, component failure, and potentially vehicle fires. Always use the specified OEM-equivalent fuse for safety and system integrity.
Effectively locating both interior and under-hood fuse boxes in your 2010 Honda Civic and accurately interpreting their diagrams are foundational skills. This expert, trusted guide has provided you with the knowledge to perform reliable troubleshooting for common electrical issues and safely replace blown fuses. By always using the correct fuse types and ratings, you prioritize vehicle safety and the long-term health of its electrical system. Empower yourself with this complete knowledge to maintain your 2010 Honda Civic’s electrical system with confidence and ensure its long-term operational reliability.
Frequently Asked Questions
What is the primary purpose of a fuse in my 2010 Honda Civic’s electrical system?
A fuse in your 2010 Honda Civic serves as a critical safety device designed to protect electrical components and wiring from excessive current (overloads). When a circuit draws too much current, the fuse’s internal filament melts, breaking the circuit and preventing damage to more expensive components like the stereo, ECU, or wiring harness. This ensures the reliable operation and longevity of your vehicle’s electrical system.
Can I use a higher amperage fuse if I don’t have the exact specified one for my Civic?
No, it is critically important to only use a replacement fuse with the exact amperage rating specified by Honda for your 2010 Civic. Installing a fuse with a higher amperage rating removes the intended overcurrent protection, potentially leading to wiring overheating, electrical component damage, or even fire. Always refer to your owner’s manual or the fuse box diagram for the correct rating to ensure safety and prevent costly repairs.
How can I tell if a fuse is blown without physically removing it from the fuse box?
While physical removal and visual inspection (checking for a broken filament) are the most common methods, some fuses have a small transparent window allowing a visual check. For a more definitive and professional assessment without removal, a digital multimeter set to continuity mode can be used to test the fuse’s integrity while still in its slot, or a dedicated fuse tester can quickly indicate if a fuse is blown.
Where can I find the official and most reliable 2010 Honda Civic fuse diagram?
The most official and reliable source for your 2010 Honda Civic’s fuse diagram is your vehicle’s owner’s manual. Honda provides comprehensive diagrams for both the interior and under-hood fuse boxes, detailing each fuse’s location, amperage rating, and the circuit it protects. If your manual is lost, a digital version can often be found on the official Honda website or obtained from a trusted dealership.
What essential tools do I need to safely replace a blown fuse in my 2010 Honda Civic?
To safely and efficiently replace a blown fuse in your 2010 Honda Civic, you will primarily need a plastic fuse puller (often included in the fuse box cover or under-hood fuse box), or small needle-nose pliers. Additionally, having a set of assorted spare fuses of various amperage ratings is highly recommended. For advanced troubleshooting, a continuity tester or digital multimeter can be a valuable professional tool.