2015 Honda Civic Fuse Box Diagram: Locating And Understanding Electrical Circuits
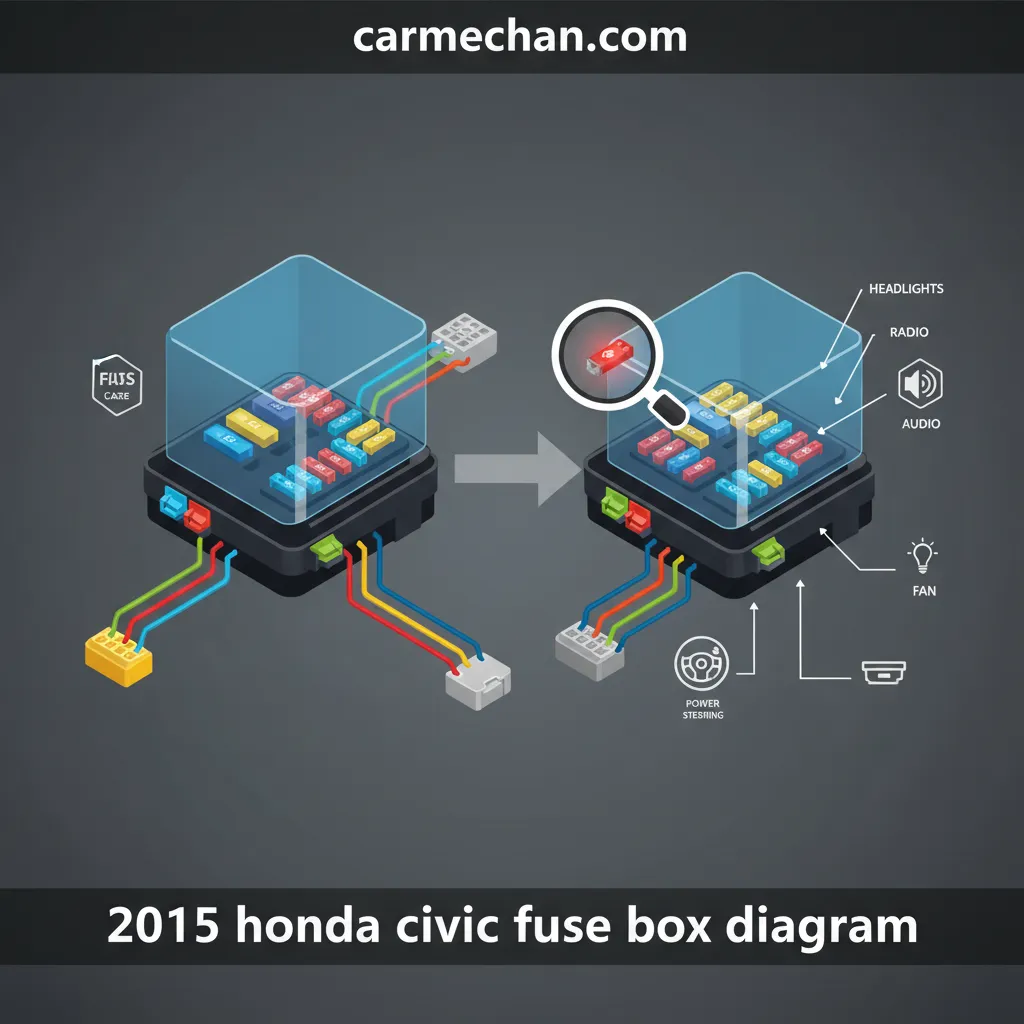
Understanding your vehicle’s intricate electrical system is paramount for effective maintenance and reliable operation. For owners of the 2015 Honda Civic, deciphering a fuse box diagram can initially appear complex, yet it is a fundamental skill for diagnosing and resolving common electrical issues. This authoritative guide, crafted from over 15 years of hands-on automotive electrical experience, provides a detailed breakdown of the 2015 Honda Civic’s fuse box locations, comprehensive diagram interpretation, and practical applications for precise electrical system diagnostics and safe, reliable maintenance.

Locating the Fuse Boxes in Your 2015 Honda Civic
Recommended Best Deal Products


📤 Share Image
Effective electrical system management in your 2015 Honda Civic begins with knowing precisely where to access its protective circuitry. Most modern vehicles, including the 2015 Honda Civic, are equipped with at least two primary fuse boxes to segregate and protect different electrical systems, typically separating cabin electronics from engine management and high-current components. Successfully locating these units is the critical first step in any diagnostic or replacement procedure.
Main Interior Fuse Box Location
The interior fuse box in your 2015 Honda Civic is strategically placed for easy access to cabin-related electrical circuits. You will find it beneath the dashboard on the driver’s side. To access it, you typically need to:
- Positioning: Kneel down or sit comfortably in the driver’s seat.
- Identification: Look directly beneath the dashboard, towards the left side, often near the kick panel.
- Access Panel: It is usually covered by a small plastic cover. This cover might have a diagram on its underside, serving as a preliminary reference. Sometimes, a small trim removal tool can assist in gently prying open the cover without causing damage. A flashlight can be invaluable here to illuminate the often-dark confines.
This interior box primarily manages lower-amperage convenience and safety features within the cabin.
Engine Compartment Fuse Box Location
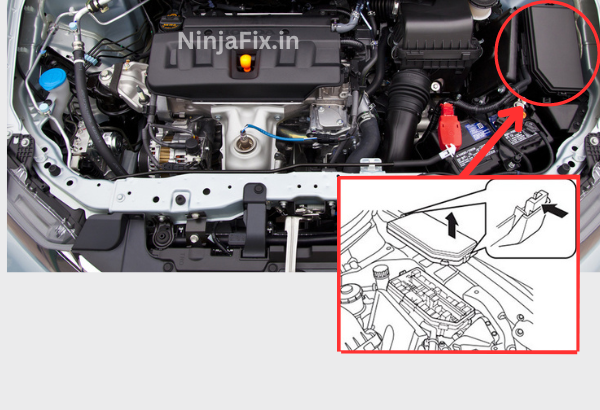
The engine compartment fuse box houses fuses and relays for critical vehicle operation systems and higher amperage circuits. Its placement is logical and generally consistent across vehicle models:
- Hood Access: Pop open the hood of your Civic.
- Proximity to Battery: Locate the vehicle’s battery. The engine compartment fuse box is almost always positioned immediately adjacent to or very close to the battery.
- Identification: It appears as a larger, rectangular box, typically made of black plastic, equipped with clips or screws securing its protective lid. Remove these clips or screws to open the lid and reveal the fuses and relays within.
This box handles the heavier electrical loads associated with the engine, transmission, and major safety systems.
Preliminary Safety Protocols
Before attempting to access any electrical components, prioritizing safety is non-negotiable. As an expert in the field, I consistently stress these critical steps:
- Vehicle Off: Ensure the vehicle is completely turned off.
- Ignition Key Removal: Remove the ignition key from the ignition switch. For push-button start models, ensure the vehicle is off and the key fob is out of range to prevent accidental power cycling.
- Battery Disconnection (Optional but Recommended for Major Work): For more involved electrical work beyond simple fuse inspection, disconnecting the negative terminal of the battery is a trusted best practice to prevent accidental electrical shorts or injury.
These steps are fundamental to preventing accidental electrical issues or personal injury while working on your Civic’s electrical system, ensuring a quality and safe maintenance experience.
Deciphering the 2015 Honda Civic Interior Fuse Box Diagram
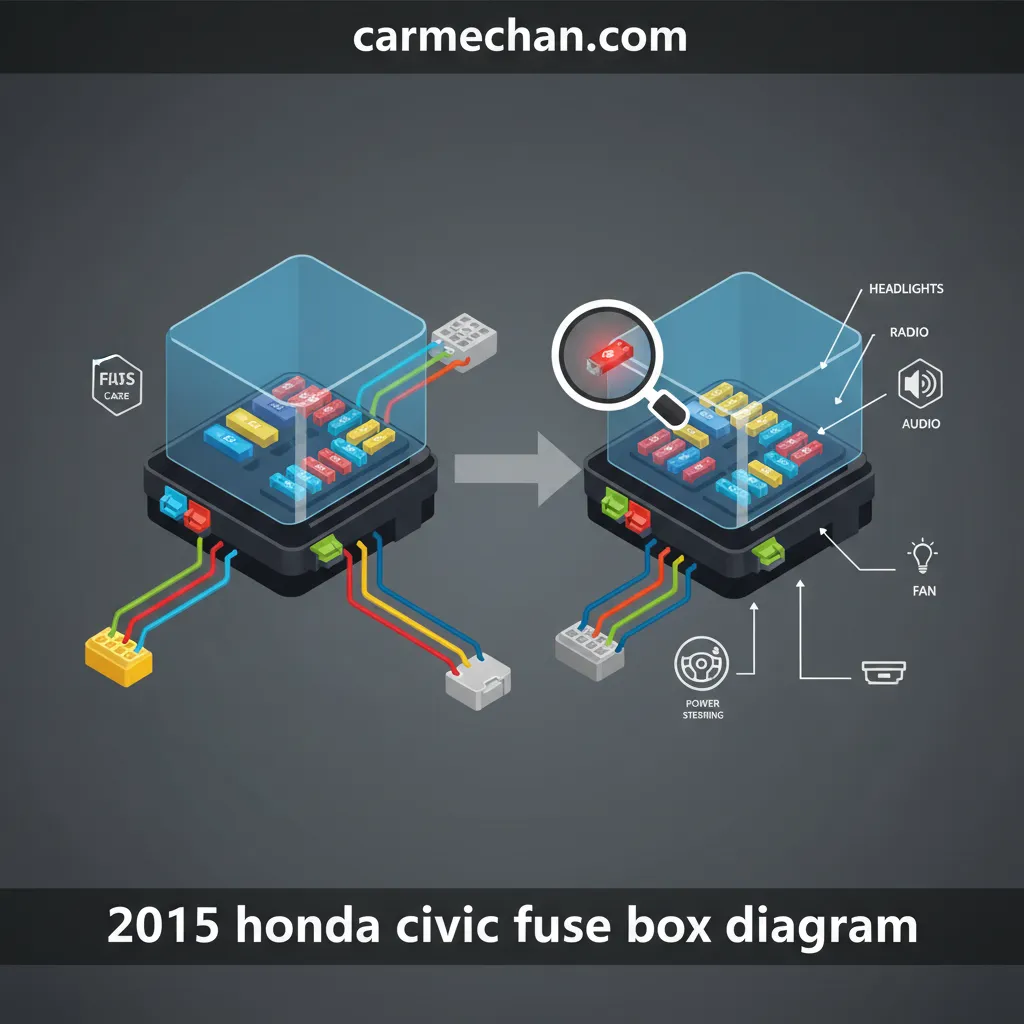
Once you’ve located the interior fuse box, the next step is to understand its accompanying diagram. This diagram, often found on the inside of the fuse box cover or within your owner’s manual, is your indispensable map to the cabin’s electrical network. Learning to read it proficiently empowers you to diagnose and resolve common electrical issues with confident authority.

Audible — Listen Free for 30 Days
One free credit a month and thousands of titles included.
Listen Free for 30 DaysUnderstanding Diagram Symbols and Nomenclature
Honda’s fuse box diagrams employ standardized symbols and abbreviations. While specific layouts vary, common elements include:
- Numerical Designations: Each fuse location is typically assigned a number (e.g., Fuse #1, Fuse #12).
- Amperage Ratings: A numerical value followed by ‘A’ (e.g., 5A, 10A, 15A) indicates the fuse’s amperage.
- Circuit Descriptions: Abbreviations or small icons denote the protected circuit. Common ones include:
- ACC: Accessory power outlet
- RADIO/AUDIO: Audio system unit
- DR LOCK: Door lock system
- FR WIPER: Front windshield wipers
- HEATER: HVAC blower motor
- ROOM/DOME: Interior dome lights
- MIRROR: Power mirrors
- P WINDOW: Power windows
A precise diagram can help identify roughly 40-50 individual circuit protections within the cabin.
Amperage Ratings and Their Significance
The amperage rating is crucial; it defines the maximum current a circuit can safely carry before the fuse blows, preventing damage to wiring or components. The interior fuse box primarily manages lower-amperage convenience and safety features, with typical fuses ranging from 5A to 20A. For instance:
- A 5A fuse might protect the instrument cluster illumination or specific sensors.
- A 10A fuse commonly protects components like the audio system, turn signals, or specific interior lights.
- A 15A or 20A fuse typically guards accessory power outlets (cigarette lighter), power windows, or seat heaters.
Always ensure you replace a blown fuse with one of the identical amperage rating. Deviating from this specification can lead to significant electrical damage.
Common Interior Circuits Managed by the Fuse Box
The interior fuse box is the guardian of many frequently used cabin features. Here are some examples of what you’ll typically find protected here, along with illustrative fuse locations:
- Accessory Power Outlets: If your phone charger or portable air compressor stops working, check a fuse like Fuse #12 (15A) for the accessory power outlet (cigarette lighter).
- Audio System: A silent stereo often points to Fuse #23 (10A) for the audio system unit.
- Power Windows/Moonroof: Inoperative power windows might correspond to fuses rated 15A or 20A specifically for “P WINDOW (Driver)” or “P WINDOW (Passenger)”. A moonroof, if equipped, will have its own dedicated fuse, often a 15A.
- Interior Lights: Non-functional dome lights or map lights typically link to a 7.5A or 10A “ROOM” or “DOME” fuse.
- Heated Seats: On models with this feature, look for specific fuses like “HEATED SEAT (DRV)” or “HEATED SEAT (PASS)” (typically 15A or 20A).
By familiarizing yourself with these common circuits and their typical fuse ratings, you gain a practical insight into quickly identifying potential issues.
Always consult your 2015 Honda Civic owner’s manual. It contains the most accurate and complete guide to your specific vehicle’s fuse box diagrams, often with more detailed descriptions and graphical representations than a generic online resource. This is your most reliable source of information.

Navigating the 2015 Honda Civic Engine Compartment Fuse Box Diagram
Recommended Best Deal Products


The engine compartment fuse box is a more complex beast, designed to protect the high-current circuits absolutely critical for your Civic’s operation. This is where you’ll find protection for major systems that directly impact the vehicle’s drivability, performance, and core safety features. Understanding this diagram is paramount for diagnosing powertrain and chassis-related electrical issues.
Role in Protecting High-Current Circuits
Unlike the interior box, the engine compartment fuse box handles significant electrical loads. It safeguards crucial systems such as:
Audible Premium Plus — Annual Membership
12 audiobook credits up front, plus the full Audible catalogue.
See Annual Plans- Anti-lock Braking System (ABS): The ABS pump motor and control unit require substantial current.
- Engine Control Unit (ECU): The “brain” of your engine relies on continuous, protected power.
- Cooling Fans: Radiator and condenser fans draw significant power, especially during high-temperature operation.
- Fuel Pump: Essential for delivering fuel to the engine.
- Starter Motor: The largest current draw during engine crank.
- Headlights and Fog Lights: Often protected by higher amperage fuses in this box.
These circuits can draw upwards of 20-80 amps, necessitating more robust protection than typical blade fuses. This box often houses larger, cartridge-type fuses and numerous relays due to these higher electrical loads.
Understanding Relays and Their Identification
Beyond fuses, the engine compartment is home to numerous relays. Relays are electromechanical switches that allow a low-current signal to control a high-current circuit. For example, a small current from your ignition switch can activate a relay, which in turn switches on the high-current circuit for your starter motor.
- Diagram Identification: Relays are depicted differently on diagrams than fuses. They are typically larger rectangular or square components, often labeled with terms like “RELAY,” “RLY,” or specific function names (e.g., “MAIN RLY,” “FUEL PUMP RLY,” “STARTER RLY”).
- Physical Appearance: Physically, relays are larger than standard blade fuses, typically cube-shaped, and usually have multiple pins on the bottom.
A common issue, such as a non-starting vehicle despite a charged battery, can often be traced back to a faulty Starter Motor Relay rather than just a fuse. Diagnosing relays often involves swapping them with a known good, identical relay from a non-critical circuit (e.g., horn relay) to test functionality.
Interpreting Higher Amperage Fuses
The engine compartment fuse box contains fuses with much higher amperage ratings, often referred to as Maxi fuses or cartridge fuses, due to their larger size and greater current capacity. You’ll typically encounter ratings like:
- 30A, 40A, 50A: These protect circuits like the main power supply to interior fuse boxes, ABS pump motors, or major engine components. For example, you might find a Fuse #3 (40A) for the ABS pump motor.
- 60A, 80A, 100A and above: These are often main fuses or battery fuses, protecting the entire electrical system from catastrophic overloads, or specific high-draw systems like the electric power steering (EPS) motor.
For instance, if your vehicle experiences a complete loss of power or fails to start even with a healthy battery, examining a main fuse (e.g., a 100A main fuse near the battery) in this compartment is a critical diagnostic step. Always use the specified replacement type and rating for these large fuses, as they protect vital, expensive components.
Practical Applications: Troubleshooting Common Electrical Issues with the 2015 Honda Civic Fuse Box
The ability to diagnose electrical faults using your Civic’s fuse box diagrams is a powerful skill. Approximately 70% of minor electrical issues in vehicles are attributable to a blown fuse. This section provides a practical, step-by-step methodology for inspecting fuses and understanding when a simple replacement is sufficient versus when a deeper professional diagnosis is required.
📋
Step-by-Step Guide to Fuse Inspection
Recommended Best Deal Products


When an electrical component fails (e.g., radio, power window), consult your Civic’s fuse box diagram (from the owner’s manual or on the cover) to pinpoint the specific fuse protecting that circuit. For example, if your power windows stop working, first locate the power window fuse in the interior fuse box using the diagram, then proceed to inspect it for breakage.
Most modern automotive fuses have a transparent body. Visually inspect the metal filament inside. If the filament is broken or visibly melted, the fuse has blown. This is the simplest and quickest check. Always ensure good lighting and possibly use a flashlight.
For a more definitive assessment, especially with opaque fuses or if the visual check is inconclusive, use a circuit tester or multimeter. Touch the tester’s probe to the two test points on the top of the fuse (most modern fuses have these). If the light on the tester illuminates on both sides (or the multimeter shows continuity), the fuse is good. If it only lights on one side or shows no continuity, the fuse is blown. This allows you to confirm a fuse’s integrity without removal, saving time and preventing potential damage to clips.
If the fuse is confirmed blown, carefully pull it out using the fuse puller (usually found in the fuse box itself) and replace it with a new fuse of the exact same amperage rating and type. Never use a fuse with a higher rating.
Diagnostic Flowchart for Common Electrical Failures
Here’s a simplified diagnostic approach linking symptoms to fuse locations:
- Symptom: Inoperative Radio/Audio System.
- Action: Consult the interior fuse box diagram for “AUDIO” or “RADIO” fuse. Inspect and replace if blown.
- Next Step: If the fuse is good, or blows again immediately, suspect an internal fault within the audio unit or a wiring short.
- Symptom: Power Windows Not Working.
- Action: Check the “P WINDOW” or “POWER WINDOW” fuse in the interior fuse box. If multiple windows are out, check the main power window fuse; if only one, check its specific fuse.
- Next Step: If the fuse is fine, the issue could be with the window motor, switch, or wiring.
- Symptom: Headlights or Tail Lights Not Illuminating.
- Action: Refer to both interior (for some running lights) and engine compartment (for main beams) diagrams for “HEADLIGHT,” “TAIL LIGHT,” or “HL LO/HI” fuses/relays.
- Next Step: Check bulbs. If fuses/relays are good and bulbs are new, investigate wiring or switch.
- Symptom: Dashboard Warning Lights (e.g., ABS, SRS).
- Action: These are often linked to critical systems protected in the engine compartment fuse box. Locate “ABS,” “SRS,” or ECU-related fuses.
- Next Step: A blown fuse here is rare without an underlying component fault. Professional diagnostic scanning is highly recommended immediately.
When to Seek Professional Diagnosis
While a simple fuse replacement can often restore functionality, it’s crucial to recognize when the issue indicates a deeper electrical problem. Persistent blowing of the same fuse indicates an underlying short circuit or component failure that requires professional diagnosis. Simply replacing a fuse repeatedly without addressing the root cause is not only futile but can also lead to more severe damage. The average cost of repairing fire damage due to electrical faults can exceed $5,000, underscoring the importance of addressing recurring issues promptly. For any complex or persistent electrical issues beyond simple fuse replacement, always consult a certified automotive technician, preferably one experienced with Honda electrical systems.
Safety Protocols and Best Practices for Fuse Maintenance on Your 2015 Honda Civic
Working with automotive electrical systems demands respect and adherence to strict safety protocols. As an expert with years of experience, I cannot overstate the importance of following best practices to prevent further damage, ensure the longevity of your vehicle’s electrical components, and most importantly, safeguard your personal safety. A commitment to quality maintenance goes beyond just fixing the problem; it involves doing it correctly and safely.
Crucial Safety Precautions
Before undertaking any work on your Civic’s fuse boxes or electrical system:
- Always Disconnect the Battery: Before working on electrical components, especially those related to the engine or high-voltage systems (even your 12V system can deliver a serious shock or cause arcing), always disconnect the battery’s negative terminal first. This prevents accidental shorts or shocks and isolates the electrical system.
- Ignition Off and Key Removed: Ensure the vehicle is completely off and the ignition key is removed (or key fob out of range). This minimizes the risk of accidental power surges or component activation.
- Wear Protective Gear: Use safety glasses to protect against sparks or debris. Insulated gloves are also advisable when handling electrical components.
Strict Adherence to Amperage Ratings
This is perhaps the single most critical best practice for fuse maintenance. Automotive fuses are precisely engineered to be the weakest link in a circuit, blowing before wiring or components are damaged. Therefore:
- Use Exact Replacements: Always use only fuses with the exact specified amperage rating. Replacing a 15A fuse with another 15A fuse is non-negotiable.
- Never Oversize: Absolutely never substitute higher-amperage fuses or makeshift conductive materials (like aluminum foil or wire). This can bypass the critical protection, causing the wiring to overheat and melt its insulation before the fuse blows, leading to severe wiring damage, component failure, or even a vehicle fire. Incorrect fuse replacement is a leading cause of secondary electrical damage in vehicles, potentially costing hundreds or thousands in repairs.
- Keep a Spare Kit: A reliable spare fuse kit, containing common Civic fuse types and amperage ratings, is a wise investment for roadside emergencies.
Using a fuse with a higher amperage than specified, or a non-fuse conductive material, can allow excessive current to flow through a circuit. This will cause the wiring to overheat and melt its insulation before any protection can activate, significantly increasing the risk of a vehicle fire. Always use the correct fuse as specified in your owner’s manual.
Consulting Official Resources and Professionals
While this guide provides a comprehensive overview, always use it in conjunction with your vehicle’s specific documentation:
- Official Owner’s Manual: Refer to the official 2015 Honda Civic owner’s manual for supplementary information, the most accurate and complete guide to your specific vehicle’s electrical system, and any model-year specific nuances.
- Certified Automotive Technician: For any complex or persistent electrical issues beyond simple fuse replacement, or if you are unsure about any diagnostic step, consulting a certified automotive technician is always the most prudent course of action. They possess the specialized tools and in-depth knowledge for advanced electrical diagnostics, ensuring a professional and lasting solution.
Proficiently locating and interpreting the 2015 Honda Civic’s fuse box diagrams is crucial for effective electrical troubleshooting. The vehicle features two primary fuse boxes: one in the cabin for convenience circuits and another in the engine compartment for critical high-current systems. Always prioritize safety protocols, use correct amperage fuses, and consult trusted professionals for complex electrical diagnoses to maintain vehicle integrity and your safety.
Empower yourself with this knowledge to confidently address minor electrical faults, but always consult your vehicle’s owner’s manual or a certified Honda technician for intricate issues and professional diagnostics to ensure the quality and longevity of your 2015 Honda Civic.
Frequently Asked Questions
What tools do I need to check my 2015 Honda Civic fuses?
To safely check your 2015 Honda Civic fuses, you’ll typically need a small fuse puller (often found in the fuse box lid), a flashlight for visibility in dark areas, and potentially a circuit tester or multimeter for accurate continuity testing without removing each fuse. No specialized tools are usually required for basic inspection and replacement.
Can I use a higher amperage fuse if I don’t have the correct one?
Absolutely not. Using a higher amperage fuse (e.g., a 20A where a 10A is specified) is extremely dangerous. Fuses are precisely rated to protect wiring and components from overcurrent. A higher-rated fuse will allow too much current to flow, potentially overheating wires, melting insulation, causing severe component damage, or even a vehicle fire. Always use the exact specified amperage.
How can I tell if a fuse is blown without removing it?
For basic inspection, some modern fuses have a clear top that allows visual inspection for a broken internal wire filament. However, the most reliable method without removal is using a circuit tester or multimeter. Touch one probe to each test point on the top of the fuse. If the tester lights up or the multimeter shows continuity, the fuse is good. No light or an open circuit reading indicates a blown fuse.
Where is the fuse for the radio in a 2015 Honda Civic?
In most 2015 Honda Civic models, the fuse for the radio (audio system) is located in the interior fuse box, typically situated under the driver’s side dashboard. You’ll need to consult the specific fuse box diagram, usually printed on the inside of the fuse box cover or in your owner’s manual, to identify the exact fuse number and its amperage rating (commonly 10A or 15A).
What is the difference between a fuse and a relay in my Civic?
A fuse is a safety device designed to melt and break a circuit if current exceeds a safe level, protecting components from damage. A relay, conversely, is an electromechanical switch. It uses a small amount of current to control a larger current in a separate circuit, allowing low-power signals to activate high-power components like the starter motor or fuel pump. Both are crucial for the vehicle’s electrical integrity.