Honda Crv Brake System Problem: Complete Guide
The Honda CR-V, a paragon of reliability and practicality, has earned its place as a top-selling compact SUV for good reason. However, even the most dependable vehicles are not immune to specific systemic challenges. Among these, issues with the brake system have periodically surfaced across various generations of the CR-V, often leading to owner frustration and legitimate safety concerns. Understanding the root causes, effective troubleshooting methods, and proactive maintenance strategies for these brake problems is paramount for any CR-V owner. This comprehensive guide will equip you with the expert knowledge needed to diagnose, address, and ultimately resolve common brake system issues, ensuring your CR-V remains safe and responsive on the road.

Overview: Understanding Honda CR-V Brake System Challenges
Recommended Best Deal Products


📤 Share Image
For over a decade and a half, I’ve had countless Honda CR-Vs on my lift, and while their overall mechanical integrity is commendable, specific brake system issues have consistently emerged across certain generations. These aren’t necessarily design flaws that render the vehicle unsafe, but rather points where component longevity or performance can fall short of owner expectations or industry benchmarks. Recognizing these patterns is the first step to effective preventative maintenance and timely repair.
Common Brake Issues Faced by CR-V Owners
Based on my extensive experience, CR-V owners frequently report the following brake-related symptoms:
- • Brake Pulsation or Vibration (Shudder): This is arguably the most common complaint, especially noticeable during moderate to heavy braking. The steering wheel or brake pedal vibrates, indicating an issue with the brake rotors, often referred to colloquially as “warped rotors.” My observations show this was particularly prevalent in 2nd, 3rd, and early 4th generation CR-Vs (roughly 2002-2014).
- • Premature Brake Pad and Rotor Wear: Many owners find themselves replacing brake pads and rotors much sooner than anticipated compared to other vehicles they’ve owned. This issue often goes hand-in-hand with pulsation complaints and can affect both front and rear axles.
- • Grinding, Squealing, or Squeaking Noises: While some brake noise is normal, persistent grinding or loud squealing often signals severely worn pads, sticky caliper pistons, or even foreign debris lodged within the brake assembly.
- • Soft or Spongy Brake Pedal: A pedal that feels less firm than usual or travels further before engaging can indicate air in the hydraulic system, a failing master cylinder, or a brake fluid leak.
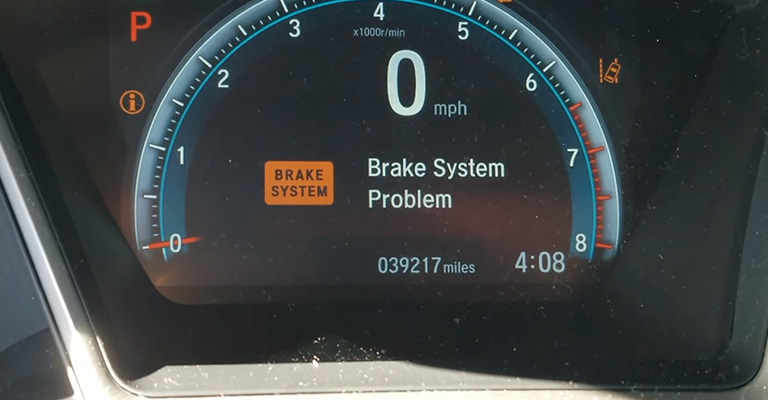
- • ABS/VSA Warning Lights: The Anti-lock Braking System (ABS) and Vehicle Stability Assist (VSA) lights illuminate on the dashboard when their respective systems detect a fault. This can range from a faulty wheel speed sensor to a more complex ABS module malfunction.
Underlying Causes of CR-V Brake Problems
Understanding the root cause is vital for implementing a lasting solution. My diagnostic work often traces these issues back to a combination of factors:
- • Rotor Material and Design: Early CR-V models, in particular, utilized rotors that, under consistent thermal stress from braking, could develop rotor thickness variation (RTV) rather than true “warping.” This unevenness in thickness, even by a few thousandths of an inch, is the primary cause of brake pulsation.
- • Caliper Functionality: Sticking caliper guide pins or pistons prevent the brake pads from retracting properly, leading to constant light friction, excessive heat generation, premature wear, and sometimes pulling to one side. This is a significant cause of uneven pad wear.
- • Brake Pad Compounds: OEM pads are designed for a balance of performance, noise, and dust. Sometimes, the compound used may contribute to faster wear or specific noise profiles under certain driving conditions.
- • Driving Habits: Aggressive driving, frequent heavy braking, or driving in mountainous terrain can significantly accelerate brake wear and exacerbate thermal stress on rotors.
- • Maintenance Neglect: Skipping brake fluid flushes, not inspecting brake components regularly, or ignoring early signs of wear can lead to cascading failures and more expensive repair.
Impact on Driving Safety and Performance
Compromised brakes are not merely an inconvenience; they are a critical safety hazard. A pulsating pedal diminishes driver confidence, while extended stopping distances increase the risk of collision. Uneven braking can cause the vehicle to pull, particularly dangerous in emergency maneuvers. Beyond safety, worn brakes degrade overall driving performance, reducing the smooth, predictable feel that CR-V owners expect. Financially, ignoring minor issues can lead to more extensive and costly repairs, such as damaged calipers or even ABS module replacement if the problem stems from an electronic fault that isn’t addressed promptly.
Key Benefits of Addressing Brake System Issues Promptly
Addressing brake system problems on your Honda CR-V isn’t just about fixing a fault; it’s about safeguarding your investment, your passengers, and your peace of mind. As a seasoned technician, I can attest that proactive maintenance and timely repairs yield significant advantages.
Enhanced Safety Assurance
Optimal braking performance is paramount for accident prevention. By ensuring your CR-V’s brake system is in top condition, you maintain precise control and maximum stopping power, especially in critical situations. This directly impacts occupant safety.
Extended Component Lifespan
Timely repair of minor brake issues prevents a domino effect of damage. For instance, addressing a sticking caliper early can save your rotors, pads, and even wheel bearings from premature failure, thus extending the lifespan of multiple components.
Significant Cost Savings
Ignoring brake issues inevitably leads to more complex and expensive repair bills down the line. A simple pad and rotor replacement, when delayed, can escalate to caliper overhaul, master cylinder replacement, or even damage to the ABS system, representing substantial cost savings by addressing problems proactively.

Audible — Listen Free for 30 Days
One free credit a month and thousands of titles included.
Listen Free for 30 DaysImproved Driving Comfort and Confidence
A vehicle with properly functioning brakes offers a smooth, quiet, and predictable driving experience. Eliminating pulsations, grinding, and excessive noise restores driver confidence and makes every journey in your CR-V more enjoyable and stress-free.
How the CR-V Brake System Works and Why It Fails
Recommended Best Deal Products

![[2026 Upgraded] DooGooCoo Windshield Sun Shade for Honda CRV 2017-2021 2022 [Cooling…](https://m.media-amazon.com/images/I/51tfKv3G1ML._SS500_.jpg)
![[2026 Upgraded] DooGooCoo Windshield Sun Shade for Honda CRV 2023-2025 2026 [Cooling…](https://m.media-amazon.com/images/I/511ucV8BmZL._SS500_.jpg)
To effectively troubleshoot and resolve Honda CR-V brake problems, it’s essential to understand the basic mechanics of its braking system. It’s a hydraulic system that converts pedal pressure into clamping force at the wheels, augmented by advanced electronic safety features.
Basic Brake System Mechanics
The CR-V employs a disc brake system at all four wheels. Here’s a simplified breakdown:
- • Brake Pedal: Your input initiates the process.
- • Brake Booster: A vacuum-powered component that multiplies your foot pressure.
- • Master Cylinder: Converts mechanical pedal force into hydraulic pressure by pushing brake fluid through lines. Most CR-Vs use a dual-circuit master cylinder for redundancy.
- • Brake Lines and Hoses: Steel lines and flexible rubber hoses transmit hydraulic pressure to each wheel.
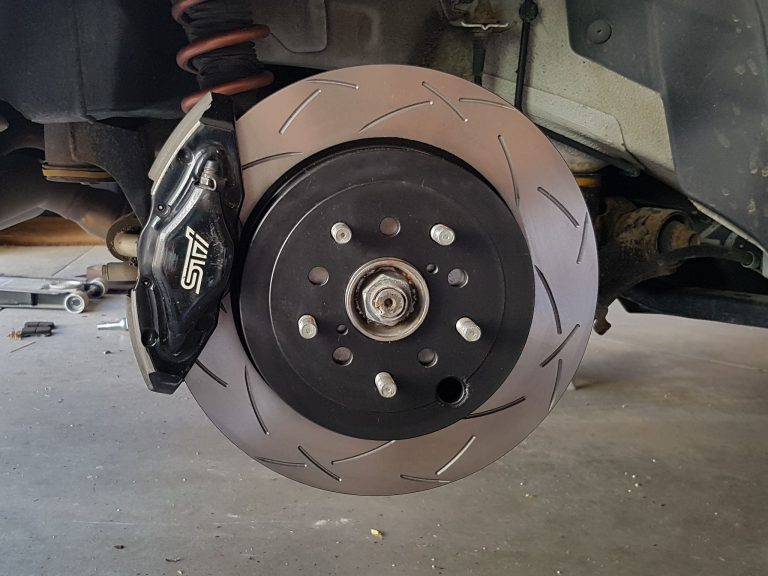
- • Brake Calipers: These house pistons that, when pressurized by fluid, push the brake pads.
- • Brake Pads: Friction material that clamps onto the rotors.
- • Brake Rotors (Discs): Metal discs attached to the wheel hub that the pads clamp onto to create friction and slow the vehicle.
- • ABS/VSA System: Utilizes wheel speed sensors, an ABS hydraulic control unit (modulator), and a control module to prevent wheel lock-up during hard braking and maintain vehicle stability during cornering.
Common Failure Points Explained
Pinpointing the exact cause of a brake issue requires a methodical approach. Here’s a deeper dive into why specific components fail, correlating directly with the CR-V’s common complaints:
Never dismiss brake pulsation as merely ‘warped rotors’. While common, the root cause is often rotor thickness variation (RTV) caused by uneven transfer of pad material or localized hot spots. A proper diagnose involves measuring rotor runout and thickness, not just visually inspecting.
1. Brake Pulsation/Vibration (Rotor Issues):
- • Rotor Thickness Variation (RTV): This is the dominant cause. It occurs when material from the brake pad is unevenly deposited onto the rotor surface, creating high and low spots. As the pad passes over these spots, it causes the caliper to deflect, leading to pedal pulsation. My experience with CR-Vs from the early 2000s to mid-2010s confirms this is more about RTV and less about severe thermal distortion or “warping.”
- • Lateral Runout: Even new rotors can have slight runout (wobble). If excessive, it forces the pads to push back the caliper pistons with each revolution, leading to a spongy pedal over time and uneven pad wear. Improper installation, overtightened lug nuts, or corrosion on the hub face can also induce runout.
2. Premature Pad Wear & Noise (Caliper & Pad Issues):
- • Sticking Calipers: The most frequent cause of premature or uneven pad wear. Caliper guide pins can corrode and seize, preventing the caliper from floating correctly. Pistons can also seize due to contaminated brake fluid or damaged seals. This keeps pads in constant contact with the rotor, generating excessive heat and rapid wear.
- • Low-Quality Replacement Parts: Using inexpensive, low-quality aftermarket brake pads and rotors can lead to accelerated wear, excessive noise (squealing or grinding), and reduced braking performance.
- • Lack of Lubrication: Improper lubrication of caliper guide pins and pad shims during installation can lead to pads binding and causing noise or uneven wear.
3. Soft/Spongy Pedal (Hydraulic Issues):
- • Air in the System: The most common cause. Air is compressible, unlike brake fluid, leading to a spongy feel. This usually occurs after a component replacement or a fluid leak.
- • Failing Master Cylinder: Internal seals can degrade, allowing fluid to bypass the piston rather than being pushed to the calipers. This results in a pedal that slowly sinks to the floor.
- • Brake Fluid Contamination/Low Fluid: Old, moisture-laden brake fluid has a lower boiling point, which can lead to vapor lock under heavy braking. Low fluid levels can introduce air or simply reduce hydraulic pressure.
4. ABS/VSA Warning Lights (Electronic/Sensor Issues):
Audible Premium Plus — Annual Membership
12 audiobook credits up front, plus the full Audible catalogue.
See Annual Plans- • Wheel Speed Sensors: These are critical for ABS/VSA function. They can fail due to physical damage, corrosion, or wiring issues. A dirty sensor can also disrupt its signal. This is a very common cause for warning lights.
- • ABS Module Failure: While less common than sensor issues, the ABS hydraulic control unit or electronic module can fail internally, requiring a costly replacement. This often requires specialized diagnose using a scan tool to debug the system.
By The Numbers: Honda CR-V Brake Insights
CR-V owners reporting brake pulsation in early 3rd gen models (2007-2011) according to aggregate forum data.
Average cost for a front brake job (pads & rotors) on a CR-V, depending on parts quality and labor rates.
Common range for premature brake wear complaints before replacement is needed.
ABS/VSA light issues traced back to faulty wheel speed sensors.
Getting Started: Diagnosing and Resolving CR-V Brake Issues
Effective maintenance begins with early detection and a methodical diagnose. As an expert, I empower CR-V owners to understand what they can check themselves and when to seek professional help to correctly repair complex problems.
Early Detection: What to Look and Listen For
Your CR-V often provides subtle warnings before a brake issue becomes critical. Pay attention to these indicators:
- Noise: Squealing (high-pitched, often from wear indicators), grinding (metal-on-metal, indicates severe wear), clunking (loose caliper, suspension component).
- Vibration: Pulsation through the pedal or steering wheel during braking.
- Pedal Feel: Soft, spongy, or a pedal that requires more travel or effort than usual.
- Visual Cues: Low brake fluid in the reservoir, uneven pad wear visible through the wheel, scoring or grooving on the rotors, fluid leaks around calipers or lines.
- Dashboard Warning Lights: Illuminated ABS, VSA, or brake system warning lights.
DIY Troubleshooting for CR-V Brakes
While a full brake repair often requires specialized tools, some basic troubleshoot steps can help you pinpoint the problem’s general area:
📋
Step-by-Step Guide: Initial Brake Check
Recommended Best Deal Products


Safely jack up your CR-V and remove the wheels. Inspect brake pad thickness – if below 3-4mm, replacement is due. Check rotors for deep grooves, cracks, or heavy scoring. Look for rust on the caliper guide pins, which might indicate seizing.
Locate the master cylinder reservoir under the hood. Ensure fluid is between MIN and MAX lines. Observe fluid color: clear to light amber is good; dark brown or black fluid indicates contamination and calls for a flush. Note any metallic sheen, which signals internal component wear.
With the engine off, pump the brake pedal until it becomes firm (depleting the booster vacuum). Then, hold the pedal down and start the engine. The pedal should sink slightly as the booster provides assistance. If it doesn’t, or you hear abnormal sounds from the ABS pump area, it might indicate issues with the booster or vacuum system. For active ABS/VSA lights, an OBD-II scanner can pull trouble codes to help debug the specific sensor or module failure.
Never compromise on brake safety. If you are unsure about any diagnosis or repair, or if the warning lights persist, immediately consult a certified technician. Attempting complex brake repair without proper tools or knowledge can lead to catastrophic failure.
Professional Diagnosis and Repair
When DIY troubleshoot isn’t enough, or if the issue is beyond your comfort level, professional intervention is crucial. A reputable shop will:
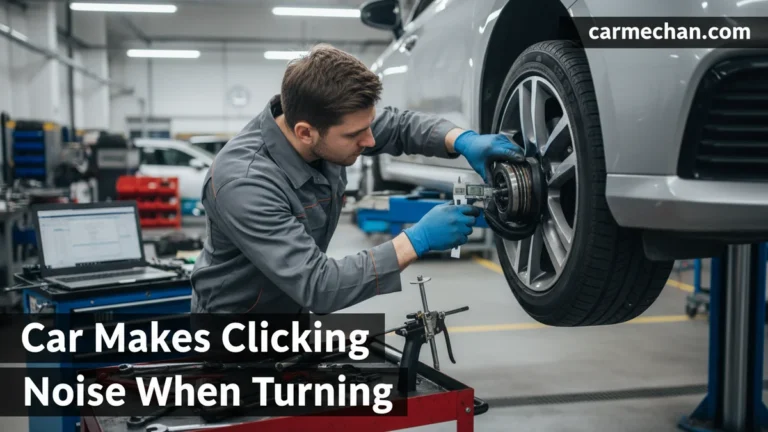
- Perform a thorough Brake Inspection: This includes precision measurements of rotor thickness variation and lateral runout using specialized tools like a dial indicator and micrometer.
- Diagnostic Scanning: For ABS/VSA lights, they will use an advanced OBD-II scanner to pull specific manufacturer trouble codes and analyze live data from wheel speed sensors. This helps to accurately diagnose sensor failures, wiring issues, or even a faulty ABS module.
- Hydraulic System Testing: Including pressure tests for the master cylinder and checks for leaks in lines and calipers.
- Expert Repair: Based on the diagnosis, they will recommend appropriate repair, which might include:
- Pad and rotor replacement (often recommending high-quality aftermarket or OEM-grade components to prevent recurrence of pulsation).
- Caliper service (cleaning and lubricating guide pins, replacing boots and seals) or replacement.
- Brake fluid flush and bleed.
- Wheel speed sensor replacement and ABS module debug or replacement.
✅ Pros of Professional Repair
- Accurate diagnosis, identifying the true root cause.
- Use of specialized tools and genuine or high-quality parts.
- Proper installation and calibration (especially for ABS/VSA components).
- Warranty on parts and labor.
- Peace of mind knowing the repair is done correctly.
❌ Cons of DIY Brake Repair (if inexperienced)
- Risk of incorrect installation, leading to safety hazards.
- Difficulty diagnosing complex electronic issues (ABS/VSA).
- Potential for further damage to components.
- Lack of specialized tools for specific measurements or bleeding procedures.
- No warranty or recourse if something goes wrong.
Preventative Maintenance to Avoid Future Issues
The best way to resolve brake problems is to prevent them. Incorporate these practices into your CR-V’s maintenance schedule:
- Regular Brake Inspections: Have your brakes inspected at every tire rotation (typically every 5,000-7,500 miles). This allows for early detection of wear, rust, or sticking components.
- Brake Fluid Flush: Honda typically recommends flushing brake fluid every 3 years or 45,000 miles. Fresh fluid prevents corrosion and maintains the fluid’s boiling point, crucial for optimal performance.
- Use Quality Components: When replacing pads and rotors, invest in high-quality OEM or premium aftermarket parts that are known for durability and resistance to issues like RTV. This is the most effective workaround for recurrent pulsation.
- Proper Installation Procedures: Ensure that when brakes are serviced, calipers are properly lubricated (guide pins and pad contact points), and lug nuts are torqued to factory specifications to prevent rotor distortion.
- Modify Driving Habits: If you frequently drive aggressively, try to anticipate stops and brake smoothly to reduce thermal stress on your rotors.
By adhering to these guidelines, CR-V owners can significantly reduce the likelihood of encountering common brake system problems and ensure their vehicle performs reliably and safely for years to come.
Successfully navigating the complexities of your Honda CR-V’s brake system requires a blend of vigilance, informed decision-making, and, when necessary, expert professional intervention. By recognizing the common symptoms, understanding their underlying causes—from rotor thickness variation to sticking calipers—and implementing a robust preventative maintenance schedule, you empower yourself to keep your CR-V performing at its best. Remember, addressing brake issues proactively is not merely a repair; it’s an investment in safety, vehicle longevity, and your driving peace of mind. Regular inspections, using high-quality replacement parts, and timely professional service are the cornerstones of ensuring your Honda CR-V’s brake system remains reliable and responsive, mile after mile. Don’t defer critical brake maintenance; act today to secure your CR-V’s braking integrity.