Toyota 4Runner Steering Angle Sensor Reset: Key Insights
Last Updated on September 1, 2026 by Ryan
📋 Table of Contents
- 🎯 Key Takeaways
- Understanding the Role of the Steering Angle Sensor in Toyota VSC Systems
- Master the Toyota 4Runner Steering Angle Sensor Reset in 8 Simple Steps
- Common Symptoms of a Miscalibrated Toyota 4Runner Sensor
- Cost Analysis: Professional vs. Independent Tool Calibration Options
- Long-Term Benefits of Maintaining Proper Sensor Alignment
- Conclusion
- 💬 Quick Questions & Answers
- ❓ Frequently Asked Questions
Resetting the steering angle sensor is a critical step after alignment or suspension repairs to maintain your 4Runner’s Vehicle Stability Control (VSC) system integrity. Failure to recalibrate can lead to incorrect sensor readings and unexpected braking interventions while driving.
🎯 Key Takeaways
Recommended Best Deal Products

- Takeaway 1:Calibrate after every wheel alignment to ensure VSC accuracy.
- Takeaway 2:Disconnecting the battery often triggers the need for recalibration.
- Takeaway 3:Zero-point calibration prevents phantom braking and dash warning lights.
- Takeaway 4:Use an OBD-II scanner for precise electronic sensor synchronization.
- Takeaway 5:Verify steering wheel centering before starting any electronic calibration.
Have you ever noticed your Toyota 4Runner acting strangely after a simple battery swap or a wheel alignment? You might see a flashing light on your dashboard that refuses to go away. This often points to the steering angle sensor, a tiny but vital part of your vehicle’s brain. If this sensor loses its calibration, your SUV might feel “confused” about which way the wheels are actually pointing. It is a common issue for many 4Runner owners, but understanding it is the first step to a fix.

Prime for Young Adults — 6 Months Free
Students and 18–24s get six months of Prime free, then half price.
Start 6 Months FreeYour 4Runner is built for adventure, but that adventure requires precise safety systems to keep you on the road. The steering angle sensor serves as the primary eyes for these systems. When it works correctly, you never notice it. When it fails or gets out of sync, your driving experience can quickly become frustrating or even unsafe. In this guide, we will explore why this sensor matters so much and how you can tell if yours needs a quick reset to get back to peak performance.
Understanding the Role of the Steering Angle Sensor in Toyota VSC Systems
The steering angle sensor (SAS) is a critical part of your Toyota’s Vehicle Stability Control (VSC) system. Think of it as a compass for your car’s computer. It tells the computer exactly how far you have turned the steering wheel and how fast you are turning it. This data allows the vehicle to know your intended path. If you are turning a sharp corner, the sensor reports that angle to the main computer. This helps the car decide if it needs to intervene to prevent a slide or a rollover.

For a rugged vehicle like the 4Runner, this sensor is even more important. Since these SUVs have a higher center of gravity, staying balanced during a turn is essential. The sensor works in tandem with wheel speed sensors and yaw rate sensors. Together, they create a safety net that keeps your 4Runner planted on the pavement or the trail. Without accurate data from the steering wheel, the VSC system simply cannot do its job properly. It might think you are skidding when you are actually driving straight.
The Vital Link to Traction Control
Your 4Runner also relies on this sensor for its traction control and anti-lock braking systems. When the computer knows your steering angle, it can manage power to each wheel more effectively. For example, if you are climbing a rocky hill and turning the wheels, the sensor helps the truck distribute torque to the tires with the most grip. A miscalibrated sensor breaks this communication chain. It may cause the traction control to kick in at the wrong time, making it harder to drive on loose dirt or snow.
- Data Precision: The sensor tracks movements down to a fraction of a degree.
- Safety Interlocks: It works directly with the braking system to prevent fishtailing.
- System Synergy: It communicates constantly with the Engine Control Module (ECM).
Master the Toyota 4Runner Steering Angle Sensor Reset in 8 Simple Steps
Recommended Best Deal Products


If you have recently performed an alignment, replaced a steering component, or disconnected your battery for an extended period, you might find your Toyota 4Runner’s VSC (Vehicle Stability Control) and TRAC (Traction Control) lights illuminated on the dashboard. This occurs because the steering angle sensor has lost its “Zero Point” calibration. Without this calibration, the vehicle’s computer doesn’t know which direction the wheels are pointed, which can lead to intrusive braking or a total loss of electronic stability aids. This comprehensive guide provides the exact procedure to reset your sensor and perform a Zero Point Calibration, ensuring your 4Runner handles safely and correctly on both the pavement and the trail.
Step 1: Vehicle Alignment and Leveling
What you need: A flat, level surface and a tire pressure gauge.
Instructions: Before you even touch the electronics, you must ensure the mechanical state of the vehicle is perfect. Park your 4Runner on a surface that is as level as possible; a tilted driveway will result in an inaccurate calibration. Check your tire pressures and ensure they are equal across the axles (typically 32-35 PSI). Start the engine and center the steering wheel perfectly. A good way to verify this is to drive forward and backward a few feet to ensure the vehicle tracks in a perfectly straight line without you having to apply correction to the wheel. Once centered, shut off the engine but leave the key in the ignition.
Pro Tip: Use a piece of painter’s tape across the steering wheel hub and the steering column. Once you have the wheel perfectly centered, cut the tape. This provides a visual reference to ensure the wheel doesn’t move during the calibration process.

Audible — Listen Free for 30 Days
One free credit a month and thousands of titles included.
Listen Free for 30 DaysStep 2: Performing a Soft Reset via Battery Disconnect
What you need: A 10mm wrench or socket set.
Instructions: Sometimes the computer simply needs to clear its short-term memory before it will accept a new calibration. Use your 10mm wrench to disconnect the negative (black) battery terminal. Leave it disconnected for at least 10 to 15 minutes. This allows the capacitors in the ECU (Engine Control Unit) and the Skid Control ECU to fully discharge. While waiting, ensure that your wheels are still pointed straight ahead. After the time has elapsed, reconnect the terminal and tighten it securely. Note that this may reset your clock, radio presets, and your automatic window settings, which will need to be re-initialized later.
Pro Tip: After reconnecting the battery, turn the key to the ‘ON’ position (without starting) and wait 30 seconds before starting the engine to allow the throttle body and sensors to sync.
Step 3: Connecting the Diagnostic Interface
What you need: An OBD-II Scan Tool (preferably with Toyota Techstream software or a high-end bidirectional scanner like an Autel or Launch).
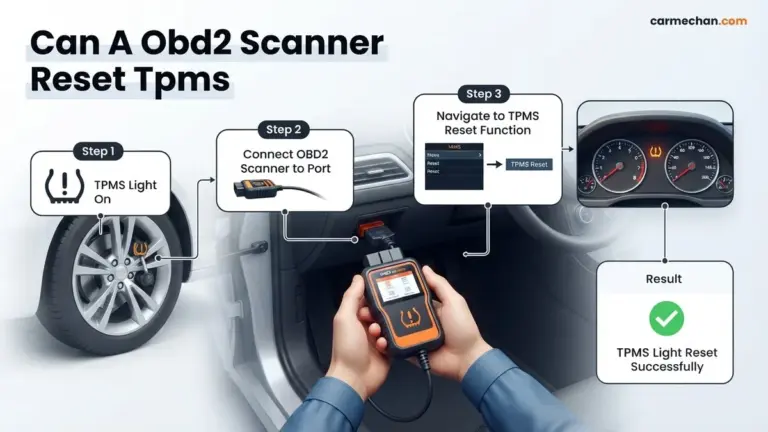
Instructions: Locate the OBD-II port under the driver’s side dashboard, typically near the hood release latch. Plug in your diagnostic tool and turn the ignition to the ‘ON’ position (two clicks, engine off). Navigate the menu on your scanner to select “Chassis” and then “ABS/VSC/TRAC.” It is vital that you use a tool capable of communicating with the ABS module specifically; a basic $20 code reader that only checks the “Check Engine” light will not be able to perform a Zero Point Calibration. Once connected, the tool will pull the current live data from the steering angle sensor.
Pro Tip: If you are using Techstream, ensure your laptop is plugged into a power source. A sudden loss of power during a calibration can cause the ECU to “brick” or require a much more intensive recovery process.
Step 4: Clearing Existing DTCs (Diagnostic Trouble Codes)
What you need: Your OBD-II Diagnostic Tool.
Instructions: Before the system allows a reset, you must clear any stored fault codes. Even if the VSC light is currently off, there may be “History” codes stored in the Skid Control ECU. Look for codes such as C1210 (Zero Point Calibration of Steering Angle Sensor Undone) or C1336 (Zero Point Calibration of Acceleration Sensor Undone). Use the “Clear Codes” or “Erase” function on your scanner. After clearing, turn the ignition ‘OFF’ for ten seconds, then back to ‘ON’. Check the codes again; if the C1210 or C1336 codes reappear immediately, that is normal—it simply means the system is now ready for the calibration procedure.
Pro Tip: If codes like C1231 (Steering Angle Sensor Circuit Malfunction) appear and won’t clear, you likely have a hardware failure (broken clock spring or sensor), and a reset will not work until the part is replaced.
Audible Premium Plus — Annual Membership
12 audiobook credits up front, plus the full Audible catalogue.
See Annual PlansStep 5: Initiating the Zero Point Calibration
What you need: Your OBD-II Diagnostic Tool and a steady hand.
Instructions: Within your scanner’s ABS/VSC menu, look for “Utility” or “Work Support.” Select the function labeled “Zero Point Calibration” or “Test Mode.” Follow the on-screen prompts carefully. The scanner will usually ask you to confirm that the vehicle is on level ground and the steering wheel is centered. Once you hit ‘Next’ or ‘Enter,’ the VSC and ABS lights on your dashboard will begin to blink rapidly. This indicates the ECU is recording the current position of the steering angle sensor and the yaw rate/acceleration sensors as the “Zero” or “Center” point. Do not touch the steering wheel, brake pedal, or shift lever during this 10-20 second window.
Pro Tip: If the lights do not blink, the calibration didn’t start. This is often because the vehicle is not in ‘Park’ (for automatics) or the parking brake is not engaged. Ensure all safety switches are met.
Step 6: The Manual “Paperclip” Method (Alternative)
What you need: A small paperclip or a short piece of jumper wire.
Instructions: If you do not have a high-end scanner, you can use the “SST” (Special Service Tool) method. Locate the OBD-II port. Using a paperclip, you will need to jump Terminal 4 (CG) and Terminal 12 (Ts). Looking at the wide end of the port, Terminal 4 is the fourth from the left on the top row; Terminal 12 is the fourth from the right on the bottom row. With the wire in place, turn the ignition ‘ON’. The VSC/TRAC lights will blink. To clear the zero point, quickly plug and unplug the jumper wire from Terminal 12 four or more times within 8 seconds. Then, turn the ignition off, re-insert the jumper, turn the ignition on, and wait for the lights to blink in a steady pattern to confirm the new zero point is set.
Pro Tip: Be extremely careful not to jump the wrong terminals. Jumping the wrong pins can blow the ECU fuse or damage the data link connector. Count the pins twice before inserting the wire.
Step 7: Verification and Road Testing
What you need: An open road with minimal traffic.
Instructions: Once the scanner or paperclip method indicates success, turn the vehicle off and remove all tools. Start the engine. The VSC and TRAC lights should now be off. Drive the vehicle at a speed above 30 mph for several minutes. During this drive, perform several 90-degree turns and ensure the vehicle feels stable. If the calibration was unsuccessful, the VSC light will usually flash or “beep” when you enter a turn, indicating the computer thinks the car is sliding because the sensor data doesn’t match the wheel speed data. If the lights stay off after a 10-minute drive including both straightaways and turns, the reset is complete.
Pro Tip: During the first few miles, avoid aggressive maneuvers. The ECU is still “learning” the fine nuances of the sensor inputs. Smooth, steady steering inputs help the system calibrate its sensitivity parameters more accurately.
Step 8: Final System Scan
What you need: Your OBD-II Diagnostic Tool.
Instructions: After your road test, park the vehicle and perform one final scan of the ABS/VSC system. You are looking for a “No Codes Present” message. Sometimes a road test will trigger a “pending” code if the sensor is slightly off-center. If you see “Zero Point Calibration Incomplete,” you may need to repeat the process, paying closer attention to the levelness of the ground in Step 1. If the scanner shows 0.0 degrees (or very close to it, within +/- 1.5 degrees) when the steering wheel is visually centered, your 4Runner is officially ready for the road or the trail.
Pro Tip: Record the final degree reading from your scanner. If you notice the car pulling or the lights coming back on in the future, comparing the new reading to this “perfect” reading can help you diagnose if a suspension component has bent or worn out.
✅ Final Checklist
- Verify that the steering wheel is physically straight when the vehicle travels in a straight line.
- Ensure the VSC, TRAC, and ABS warning lights are no longer illuminated on the instrument cluster.
- Confirm that the OBD-II scanner shows a “0” degree steering angle when the wheels are centered.
- Check that automatic features like “Auto-Up” windows are still functioning (re-initialize if necessary).
- Perform a low-speed turn to ensure the VSC system does not prematurely engage or beep.
Important Notes:
- Safety Warning: A miscalibrated steering angle sensor can cause the vehicle to apply brakes unexpectedly. Always test your calibration in a safe, low-traffic area.
- When to Seek Help: If you cannot get the lights to turn off after three attempts, or if you have codes related to “Internal ECU Failure,” consult a professional technician or a Toyota specialist.
- Estimated Time: 30 to 45 minutes.
- Cost Range: $0 (Paperclip method) to $150 (Professional shop labor or purchase of a mid-range scanner).
Common Symptoms of a Miscalibrated Toyota 4Runner Sensor
How do you know if your steering angle sensor is throwing a tantrum? The most obvious sign is a “Christmas tree” of lights on your dashboard. You will likely see the VSC OFF light, the TRAC light, or even the Check Engine light. These lights act as a warning that the computer has disabled your stability systems because it no longer trusts the data it is receiving. In many cases, these lights appear immediately after you disconnect the battery or get a front-end alignment at a shop.
Beyond the lights, you might notice strange physical sensations while driving. Some owners report a “phantom braking” feeling. This happens when the vehicle incorrectly thinks you are losing control during a gentle turn. The computer might pulse the brakes on one side of the car to “correct” a skid that isn’t actually happening. This can be startling and makes the steering feel heavy or jerky. It is your 4Runner’s way of telling you that its internal map of the steering wheel position is wrong.
Recognizing the Warning Signs
It is important to pay attention to when these symptoms occur. If they only happen during turns, the sensor is likely just slightly out of alignment. If the lights stay on all the time, the sensor may have lost its “zero point” entirely. This is very common after installing a lift kit or changing suspension components. Since the physical geometry of the truck has changed, the sensor needs to be taught what “straight ahead” looks like in the new setup.
- VSC/TRAC Lights: These are the most common indicators of a sensor error.
- Erratic Braking: Feeling the brakes grab suddenly during normal turns.
- Loose Steering Feel: A lack of response or a “vague” feeling in the steering wheel.
- Cruise Control Failure: Many 4Runners will disable cruise control if the SAS is not calibrated.
Cost Analysis: Professional vs. Independent Tool Calibration Options
Recommended Best Deal Products


When your Toyota 4Runner requires a steering angle sensor reset, the first question is usually: “What is this going to cost me?” Depending on your mechanical comfort level and the tools you already own, the price tag can vary significantly. You essentially have two paths: paying for a one-time service or investing in hardware that allows you to handle it yourself whenever the need arises.
Dealership and Certified Mechanic Service Fees
Taking your 4Runner to a Toyota dealership is the most straightforward route, but it is rarely the cheapest. Most dealerships charge a flat diagnostic or “labor hour” fee for a Zero Point Calibration. On average, you can expect to pay between $120 and $200 for this professional service. While independent shops might offer a slightly lower rate, they must possess a high-end bidirectional scan tool to communicate effectively with Toyota’s proprietary systems. The benefit here is peace of mind, as professionals can also check for underlying suspension issues that might be causing the sensor to drift.
Investing in Personal Bidirectional Scan Tools
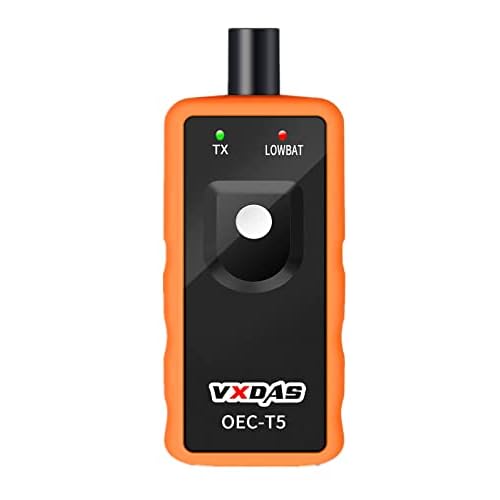
For the dedicated 4Runner enthusiast who frequently modifies their suspension or hits the trails, buying an independent tool is often the smarter financial move. A standard $20 code reader won’t cut it; you need a tool capable of bidirectional control.
- Mid-Range Scanners ($150–$300): Brands like Foxwell or Autel offer handheld units that can specifically perform Toyota Zero Point Calibrations.
- Software-Based Solutions ($30–$100): Some owners use “Techstream” (Toyota’s factory software) on a laptop with a specialized VCI cable. While more technical to set up, it provides dealership-level access for a fraction of the cost.
- Long-Term Savings: If you plan on lifting your truck or replacing steering components in the future, the tool pays for itself after just two uses.
Long-Term Benefits of Maintaining Proper Sensor Alignment
Keeping your steering angle sensor calibrated isn’t just about clearing a nagging light on your dashboard. For a vehicle as robust as the 4Runner, this sensor acts as the “eyes” for your stability control system. When the sensor is aligned correctly, the vehicle’s onboard computer has an accurate understanding of your intended path versus the actual direction of the wheels.
Optimizing Vehicle Stability Control (VSC) and A-TRAC
The 4Runner is famous for its off-road prowess, but systems like VSC and A-TRAC rely heavily on precise steering data. If your sensor is even a few degrees off, the VSC system might intervene prematurely during a highway curve, applying the brakes to individual wheels because it “thinks” the vehicle is skidding. Proper calibration ensures these safety systems remain dormant when you don’t need them and razor-sharp when you do. This prevents unexpected “beeping” alarms and jerky braking movements that can be jarring during daily commutes.
Preserving Tire Life and Mechanical Integrity
While the sensor itself doesn’t change the physical alignment of your tires, a miscalibrated sensor often hides a poor physical alignment. By ensuring the sensor is reset after every alignment, you guarantee that the electronic and mechanical systems are in perfect harmony.
- Reduced Component Stress: Prevents the power steering pump and electronic actuators from overworking to “correct” a perceived steering offset.
- Improved Fuel Efficiency: A vehicle that isn’t fighting its own stability control software rolls more efficiently.
- Consistent Handling: Ensures that the steering feel remains centered and predictable, which is vital for high-clearance SUVs that are already prone to body roll.
Conclusion
Resetting the steering angle sensor on your Toyota 4Runner is a vital maintenance step that bridges the gap between mechanical repairs and electronic safety. Whether you choose to visit a professional or invest in your own diagnostic equipment, ensuring your Zero Point Calibration is accurate will keep your VSC system functioning correctly and your driving experience smooth. Ignoring a misaligned sensor can lead to intrusive safety interventions and unnecessary wear on your vehicle’s components.
Next Steps: First, verify if your VSC light is triggered by a recent alignment or battery disconnect. If it is, decide whether a one-time dealership visit or a long-term tool investment fits your budget. Keep your 4Runner trail-ready and safe by making sensor calibration a standard part of your maintenance routine!
💬 Quick Questions & Answers
Why is the VSC light on after an alignment?
It usually indicates that the steering angle sensor’s zero point needs to be recalibrated to match the new alignment.
Can I reset the sensor without specialized tools?
While manual methods exist for older models, using an OBD-II scan tool is the most reliable method for modern 4Runners.
Does a dead battery affect the steering sensor?
Yes, a complete loss of power can cause the sensor to lose its stored zero-point position calibration.
Will the sensor eventually reset itself while driving?
No, the Toyota 4Runner system requires a specific calibration trigger to define the center point accurately.
Is it safe to drive with an uncalibrated sensor?
It is not recommended, as the VSC system may activate unexpectedly or disable safety features entirely.
❓ Frequently Asked Questions
What exactly does the steering angle sensor do in a Toyota 4Runner?
The sensor tracks the steering wheel’s position and rate of turn to help the VSC system determine the driver’s intended path. It compares this data with actual vehicle movement to prevent skidding or loss of control during turns.
Why did my ABS light come on alongside the VSC light?
These systems are interconnected; if the steering angle sensor data is invalid, the ABS and Traction Control modules cannot function correctly. Resetting the sensor often clears both lights if there is no hardware damage.
Are there specific 4Runner generations that require this reset more often?
While all 4th and 5th Gen 4Runners require it, 4th Gen models are notoriously sensitive to battery swaps and suspension lifts. Any modification to the vehicle’s ride height necessitates a new zero-point calibration.
What is the difference between a zero-point calibration and a sensor reset?
They are essentially the same process; ‘zero-point calibration’ is the technical Toyota term for teaching the computer which sensor voltage corresponds to the steering wheel being dead center.
Can a misaligned steering wheel cause sensor errors?
Yes, if the steering wheel is physically off-center while the wheels are straight, the sensor will report a turn that isn’t happening. The physical alignment must be corrected before the electronic reset is performed.
How much does a dealership charge for this service?
Most Toyota dealerships charge between $100 and $150 for a standalone zero-point calibration. However, it is often included if you are paying for a full four-wheel alignment at the same location.