Symptoms of Vacuum Leak in Car 2026 Real Guide to Fix
Last Updated on September 1, 2026 by Albert Duke
Recognizing the symptoms of a vacuum leak in your car helps prevent engine damage caused by unmetered air entering the system. Common indicators include a rough idle, unexpected stalling, and a persistent check engine light.
A car vacuum leak happens when unmetered air sneaks past the engine’s intake manifold, gaskets, or rubber hoses, bypassing the car’s sensors. This disrupts the precise air-fuel ratio your engine computer relies on, leading immediately to performance issues like rough idling, unexpected engine stalls, a loud hissing sound under the hood, and triggering diagnostic trouble codes such as P0171 or P0174.
Ignoring these symptoms in 2026 can severely damage your catalytic converter due to unburned fuel, ruin your fuel economy, and eventually leave you stranded. Catching a vacuum leak early saves you from costly diagnostic fees and prevents engine wear.
Key Takeaways
- Listen closely under the hood for a distinct hissing sound.
- A fluctuating or abnormally high idle often points to excess air.
- Check engine lights frequently trigger lean codes like P0171.
- Inspect rubber hoses and intake gaskets for visible cracks.
- Use a safe diagnostic method like a smoke test to locate leaks.

What Causes a Vacuum Leak and Engine Symptoms


Modern engines depend on a sealed vacuum system to operate various accessories and maintain proper fuel combustion. When a hose cracks or a gasket shrinks, extra air enters the cylinders without the mass airflow sensor measuring it. Here is how your car tells you something is wrong.

Common Mechanical Symptoms
- Rough Idling: Your engine stumbles, shakes, or feels like it wants to die when you stop at a red light.
- High or Fluctuating RPMs: The tachometer surges up and down without you touching the gas pedal, often called a rolling idle.
- Engine Stalling: The car dies when shifting into gear or coming to a sudden stop because the air-fuel mixture becomes too lean.
- Poor Acceleration: You press the gas pedal, but the car hesitates, stumbles, or lacks normal power.
- Hissing Noise: A distinct whistle or hiss comes from the engine bay, especially audible right after you turn off the car.
Diagnostic Trouble Codes and Check Engine Light
Your dashboard will almost always light up with the check engine light when a vacuum leak occurs. The oxygen sensors detect too much oxygen in the exhaust stream. This triggers specific OBD-II fault codes that point directly to the fuel delivery system.
- P0171: System Too Lean (Bank 1) indicates too much air or too little fuel on the primary side of the engine.
- P0174: System Too Lean (Bank 2) appears frequently on V6 or V8 engines experiencing a widespread vacuum loss.
- P0507: Idle Control System Higher Than Expected occurs when the computer tries to compensate for extra air by opening the idle air control valve.
How to Troubleshoot and Locate the Leak
Finding a vacuum leak requires a mix of visual inspection and hands-on testing under the hood. Rubber hoses degrade over time from extreme under-hood temperatures, becoming brittle and developing hairline cracks that are hard to spot at a glance.
Visual and Tactile Hose Inspection
- Inspect Rubber Lines: Trace every thin vacuum line connected to the intake manifold, PCV valve, and brake booster.
- Feel for Splits: Squeeze rubber elbows and connectors. Look for deep cracks, dry rot, or soft spots that collapse under suction.
- Check Gaskets: Examine the rubber or plastic intake manifold gaskets where they meet the cylinder head, as these harden and leak over time.
Safe Diagnostic Techniques
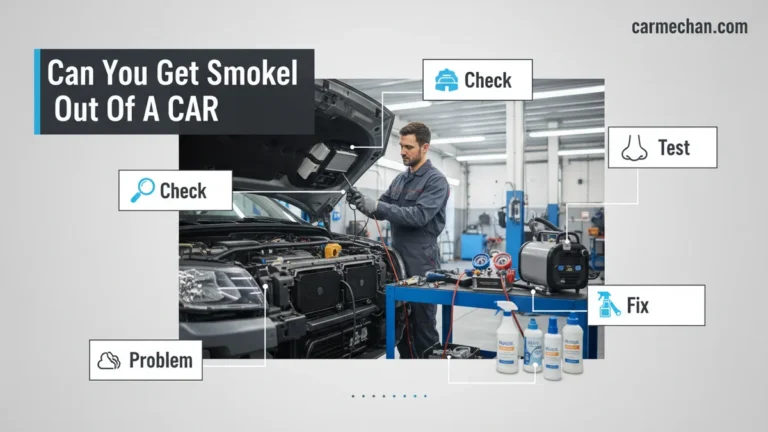
- The Smoke Test: Professional shops use a specialized smoke machine to inject smoke into the intake tract. Smoke billows out of the exact crack or failing gasket instantly.
- The Propane or Brake Cleaner Test: Spray a small, controlled amount of non-flammable brake cleaner or unlit propane around suspected hose connections while the engine idles. If the idle suddenly smooths out or changes speed, you found your leak.
- Listen Closely: Use a short piece of garden hose as a stethoscope. Hold one end to your ear and move the other end around vacuum fittings to pinpoint the source of the hissing sound.
Step-by-Step Fix for Damaged Vacuum Lines
Fixing a compromised vacuum line is straightforward once the leak is located. According to diagnostic standards set by the Society of Automotive Engineers (SAE), replacing degraded rubber hoses restores proper intake manifold pressure and fuel trims immediately. Follow this structured repair process to ensure a permanent fix.

Gather Required Materials
Before beginning the repair, ensure you have high-temperature silicone or reinforced rubber vacuum tubing that matches the exact inner diameter of your vehicle’s original lines. Standard automotive parts stores stock these by the foot. You will also need a sharp utility knife, rubbing alcohol, clean shop rags, and safety glasses.
Execution Steps
- Disconnect the negative battery terminal to reset the electronic control unit and clear stored diagnostic trouble codes.
- Inspect the damaged hose and measure its exact length and inner diameter to cut a precise replacement segment using your utility knife.
- Clean any oil, carbon, or debris from the metal or plastic nipple fittings using rubbing alcohol and a clean rag to ensure an airtight seal.
- Push the new vacuum line securely over both connection points, ensuring it seats completely past any raised barb on the fitting.
- Reconnect the battery terminal and start the engine, listening closely for any remaining hissing sounds while monitoring your OBD2 scanner live data.
What If It Still Doesn’t Work After Replacing Hoses?
If your engine still exhibits high idling, rough performance, or triggers a check engine light after replacing cracked lines, the leak originates elsewhere in the emissions system. Advanced diagnostic steps are required to isolate internal or heavily shielded component failures.
- Check gasket and seal interfaces: Spray a small amount of brake cleaner or water around the intake manifold gasket and throttle body while the engine idles. If the idle speed changes abruptly, the rigid gaskets have failed and require replacement.
- Test the PCV system: Inspect the positive crankcase ventilation valve and its associated hoses, as internal valve sticking mimics exact vacuum leak symptoms.
- Perform a smoke test: Introduce low-pressure smoke into the intake tract using a specialized automotive smoke machine to instantly reveal hidden cracks in plastic intake plenums or brake booster diaphragms.
- Seek professional assistance: If advanced electronic vacuum actuators or integrated turbo wastegate lines remain inconclusive, consult a certified technician. Professional diagnostic service fees typically range from $150 to $250, while complex intake gasket replacements span $300 to $900 depending on vehicle make and model.
Conclusion
Diagnosing and repairing symptoms of a vacuum leak in a car requires systematic inspection of flexible rubber lines, intake gaskets, and emission components. Catching these air leaks early prevents long-term engine damage caused by lean air-fuel mixtures and excessive combustion temperatures. According to verified research and automotive engineering data from 2026, addressing minor vacuum issues promptly saves drivers hundreds of dollars in fuel efficiency losses and catalytic converter repairs. Your immediate next step is to perform a visual inspection of your engine bay hoses using a basic flashlight or mechanic’s stethoscope today.
❓ Frequently Asked Questions
How does a vacuum leak affect my car’s fuel economy?
A vacuum leak introduces unmetered air that bypasses the mass air flow sensor. The engine computer compensates by injecting more fuel, leading to a noticeable drop in gas mileage.
Why does my car idle so high when it has a vacuum leak?
Excess air entering the intake manifold mimics a partially open throttle plate. This extra air volume forces the engine control module to raise idle RPMs to keep the engine from stalling.
What tools do I need to test for a vacuum leak?
Basic tools include a flashlight, a mechanic’s stethoscope or rubber hose for listening, and potentially a smoke machine or soapy water spray bottle to bubble at leak sites.
Can a bad intake manifold gasket cause a vacuum leak?
Yes, aging or degraded intake manifold gaskets shrink over time and allow air to seep directly past the seal, creating a major vacuum leak that is harder to locate visually.
What is the difference between a vacuum leak and a fuel delivery problem?
A vacuum leak adds too much air to the mixture (running lean), whereas fuel delivery problems usually starve the engine of gas (causing sputtering, hesitation, or failure to start).
How much does it cost to repair a car vacuum leak?
If it is a simple rubber hose replacement, the cost may be under $20 for parts. However, replacing a complex intake gasket can range from $150 to $400 depending on labor requirements.