How To Use Jumper Cables On A Car How to Use Jumper 2026
Last Updated on September 1, 2026 by Ryan
To safely and effectively jump-start a car, first prepare both vehicles and essential safety gear, then connect the red cable to the positive terminals and the black cable to the donor car’s negative terminal and the dead car’s unpainted metal surface, start the donor car, wait, and finally disconnect in reverse order.
This comprehensive guide ensures your car restarts while prioritizing personal safety and vehicle integrity, even if you are a complete novice.
Knowing how to use jumper cables on a car is an essential skill every driver should possess, ensuring you can tackle a dead battery with confidence. A drained car battery can strike at the most inconvenient times, leaving you stranded and frustrated. This guide will provide clear, safe steps to jump-start your vehicle, whether you are helping a friend or your own car needs a boost.
We will cover everything from initial setup to safely disconnecting the cables. Understanding the roles of the ‘donor’ car (with a healthy battery) and the ‘dead’ car (with the drained battery) is crucial for a successful outcome. Our aim is to empower you with the knowledge to get back on the road quickly and safely.
Quick Summary: To safely and effectively jump-start a car, first prepare both vehicles and essential safety gear, then connect the red cable to the positive terminals and the black cable to the donor car’s negative terminal and the dead car’s unpainted metal surface, start the
donor car, wait, and finally disconnect in reverse order. This comprehensive guide ensures your car restarts while prioritizing personal safety and vehicle integrity, even if you are a complete novice.
Key Takeaways
- Always prioritize safety with eye protection and ventilation.
- Connect red to positive, black to donor negative and metal.
- Allow donor car to run for a few minutes before starting.
- Disconnect cables in reverse order after successful start.
- Drive immediately to recharge battery; get it tested.
Key Takeaways


- Always prioritize safety with eye protection and ventilation.
- Connect red to positive, black to donor negative and metal.
- Allow donor car to run for a few minutes before starting.
- Disconnect cables in reverse order after successful start.
- Drive immediately to recharge battery; get it tested.
How to Prepare Both Vehicles for a Jump Start


Proper preparation is the critical first step before you even think about connecting jumper cables. Taking a moment to organize your tools and position the vehicles correctly minimizes risks and streamlines the entire process.


Gather Crucial Equipment
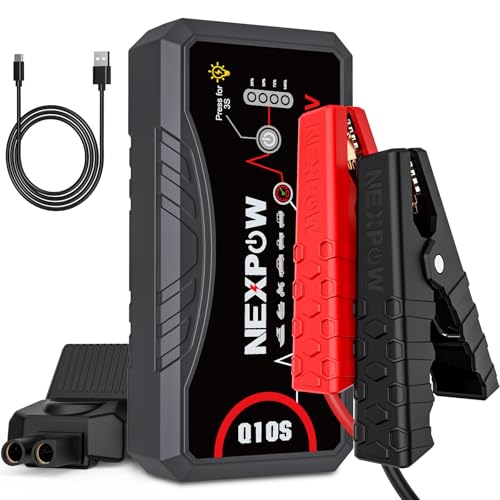
First, collect all necessary items. You will need a reliable set of jumper cables. Quality cables are typically thick with strong clamps, ensuring good conductivity. We also recommend heavy-duty work gloves for protection against heat or grime. Safety glasses are absolutely essential to shield your eyes from potential battery acid splashes or sparks.
Additionally, a flashlight can be invaluable if you are working in low light conditions.
Position Cars Closely
Next, position the donor car so its battery is within reach of the dead car’s battery. This usually means parking the cars nose-to-nose or side-by-side, but without touching. Ensure there is enough space to comfortably work between the vehicles. Both cars should be turned off with their parking brakes engaged to prevent any accidental movement.
Inspect Battery Terminals
Visually inspect both vehicle batteries. Look for any signs of damage, cracks, or excessive corrosion on the terminals. A swollen or leaking battery is a clear indicator of severe internal damage; attempting to jump-start such a battery is extremely dangerous and should be avoided. Clean any light corrosion using a wire brush if safe to do so.
Ensure battery caps are securely in place.
Turn Off Car Electronics
Before connecting any cables, turn off all accessories in both vehicles. This includes headlights, interior lights, radio, air conditioning, and any other electrical components. This precaution prevents power surges that could damage sensitive electronics when the cables are connected. A completely de-energized system makes for a safer connection.
With your vehicles prepared, our next crucial step involves understanding and implementing vital safety precautions to protect yourself and your car.
5 Essential Safety Precautions for Jumper Cable Use


Before handling any electrical components, prioritizing safety when using jumper cables is paramount. Neglecting these precautions can lead to serious injury or damage to your vehicle.
Wear Eye Protection
Always wear safety glasses or goggles. Batteries produce hydrogen gas, which can ignite and cause an explosion. Moreover, battery acid is corrosive and can cause severe chemical burns if it comes into contact with your eyes or skin. Protecting your vision should be your top priority during this process.
Ensure Adequate Ventilation
Work in a well-ventilated area. If you are in a garage, open the garage door to allow fresh air to circulate. This dissipates any hydrogen gas that might be released from the battery during the jump-starting process. Hydrogen gas is highly flammable, making proper ventilation critical for preventing explosions.
Avoid Metal Contact
Exercise extreme caution to prevent the jumper cable clamps from touching any other metal parts of the car, especially when connected to a battery terminal. A short circuit can cause severe sparks, leading to potential burns, battery damage, or even an explosion. We must also ensure the clamps themselves do not touch each other once connected to a battery.
Check Cable Condition
Before use, thoroughly inspect your jumper cables. Look for any frayed wires, cracked insulation, or loose clamps. Damaged cables can lead to poor conductivity, overheating, and a heightened risk of electric shock or fire. Using well-maintained cables ensures a safer and more effective jump start.
Read Vehicle Manuals
Always consult both vehicle owner’s manuals for specific instructions or warnings related to jump-starting. Some modern vehicles, particularly hybrids, have unique battery locations or specific jump-starting procedures that differ from conventional cars. Following manufacturer guidelines protects your vehicle’s complex electrical systems from damage. Our internal guide on hybrid car maintenance can offer more specialized advice.
Now that we have covered the essential safety guidelines, let us proceed to the step-by-step process of connecting the jumper cables correctly.
How to Connect Jumper Cables in 6 Simple Steps
Connecting jumper cables correctly is a precise process that, when followed, ensures a successful and safe jump start. Each step is critical for both your safety and the longevity of your vehicle’s electrical system.
Identify Positive Negative
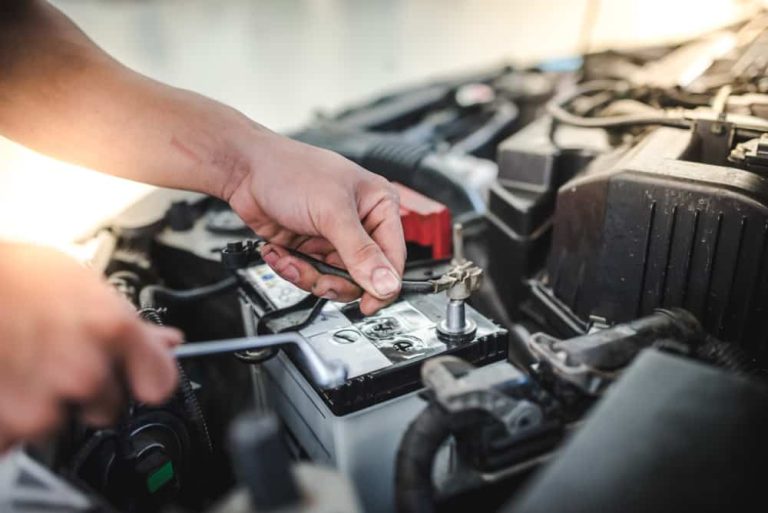
Begin by locating the positive (+) and negative (-) terminals on both the dead car’s battery and the donor car’s battery. The positive terminal is usually larger and marked with a plus sign, often covered by a red cap. The negative terminal has a minus sign, typically covered by a black cap or left exposed.
Familiarizing yourself with these ensures proper connection later.
Attach First Red Cable
Take one of the red (positive) jumper cable clamps. Securely attach it to the positive (+) terminal of the dead car’s battery. Ensure the clamp has a firm, direct grip on the metal terminal. This is the first connection, establishing the positive circuit for the dead battery.
Connect Second Red Cable
Now, take the other end of the red jumper cable. Attach its clamp to the positive (+) terminal of the donor car’s battery. Again, confirm a secure connection. At this point, the positive circuit between both batteries is complete. Be careful not to let the other, still unconnected black clamps touch anything metal.
Attach First Black Cable
Take one of the black (negative) jumper cable clamps. Connect it firmly to the negative (-) terminal of the donor car’s battery. This completes the donor car’s side of the negative circuit, preparing it to supply power. Always ensure a tight grip to avoid sparking.
Connect Second Black Cable
This is a critical safety step. Attach the remaining black (negative) clamp to an unpainted metal surface on the engine block or chassis of the dead car. Choose a sturdy, clean metal part away from the battery and moving engine components. Do not connect this clamp directly to the dead battery’s negative terminal, as this can cause a spark near the potentially gassing battery.
For more specific grounding points, consult your vehicle’s manual.
Start Donor Engine
Once all four clamps are securely connected, start the engine of the donor car. Let it run for at least 5 to 10 minutes to allow the dead battery to receive a preliminary charge. During this time, you might gently rev the donor car’s engine to a slightly higher RPM to increase charging current.
We recommend reviewing our article on understanding car battery charging for deeper insights.
What happens if, despite our best efforts, the dead car still refuses to spring to life? Let’s explore common troubleshooting steps.
What to Do If Your Car Won’t Start After a Jump
Even with proper connection, a car may occasionally refuse to start, indicating a need for troubleshooting. A non-starting car after a jump can be frustrating, but often there’s a simple explanation or a clear next step.
Troubleshoot Basic Issues
If the car doesn’t start, wait a few more minutes with the donor car running. The dead battery might need a longer charge, especially if it was completely depleted. Check all cable connections again, ensuring they are firm and making good contact. Loose connections are a frequent cause of failed jump starts.
Ensure the ground connection on the dead car is to a clean, unpainted metal surface, not just a painted bolt.
Check Battery Connections
Ensure the battery terminals themselves are clean and tight. Corrosion can hinder electrical flow, preventing a successful jump. If the battery cables leading to the terminals are loose, gently tighten them with a wrench, but avoid over-tightening. Sometimes, simply wiggling the connections can re-establish contact if they have vibrated loose.
Our blog post on DIY car battery maintenance covers this in more detail.
Seek Expert Assistance
If the car still won’t start after repeated attempts, the issue might be more complex than a simple dead battery. Problems could include a faulty starter motor, a damaged alternator, or a severely degraded battery that cannot hold a charge. In such cases, it is best to call for roadside assistance or a professional mechanic.
They have specialized tools to diagnose the exact problem without risking further damage.
Consider Battery Replacement
A car battery typically lasts between three and five years, though this can vary by climate and driving habits. If your battery is older than this, it might be time for a replacement. Signs of a failing battery include dimming lights, slow cranking, or the inability to hold a charge.
A jump start is a temporary fix; a new battery will resolve recurring starting issues.
Assuming your car has successfully started, the final crucial steps involve safely disconnecting the cables and taking action to prevent future battery issues.
How to Safely Disconnect Jumper Cables in 4 Clear Stages
Once your car’s engine purrs back to life, safely disconnecting the jumper cables is just as important as connecting them. Following a precise sequence prevents sparks and protects both vehicles’ electrical systems.
Shut Off Donor Car
First, turn off the engine of the donor car. While the newly started car may still be running, the donor car’s engine is no longer needed to supply power. This minimizes the risk of electrical surges or damage to either vehicle’s components during disconnection. Ensure all accessories in both cars are still off.
Remove Black Clamp
Carefully remove the black (negative) clamp from the unpainted metal surface on the dead car. Lift it straight off to avoid dragging it across other metal parts. Set it aside, ensuring it doesn’t accidentally touch anything conductive. This breaks the negative circuit from the previously dead car’s side.
Detach Red Clamps
Next, remove the black (negative) clamp from the negative terminal of the donor car’s battery. Then, remove the red (positive) clamp from the positive terminal of the donor car’s battery. Finally, remove the red (positive) clamp from the positive terminal of the now-started car. Always remove clamps cleanly and avoid letting them touch each other or the vehicle body.
Drive Your Vehicle
After successfully disconnecting the cables, allow your car to run for at least 20 to 30 minutes, or drive it for a similar duration. This allows the alternator to fully recharge the battery. Short drives immediately after a jump start are often insufficient for a complete charge, potentially leading to another dead battery.
We strongly recommend visiting an automotive service center soon to have your battery and charging system tested to diagnose the root cause of the drain and prevent future issues. Our post on preventing car battery drain offers helpful strategies.
Conclusion
Mastering how to use jumper cables on a car is an indispensable skill for any driver, offering peace of mind and self-reliance in unexpected situations. We have provided a detailed, step-by-step guide focusing on safety, preparation, correct connection, and proper disconnection. By adhering to these guidelines, you can safely and effectively jump-start a dead car battery, minimizing risks to yourself and your vehicle.
Remember that a successful jump-start is often a temporary solution, especially for an older battery. After getting your car running, prioritize having your battery and charging system inspected by a professional to address any underlying issues. Stay safe and prepared on the road ahead.
Frequently Asked Questions About Jump Starting Cars
How Long Should I Let a Car Run After a Jump Start?
You should let your car run for at least 20 to 30 minutes after a jump start. This allows the alternator enough time to adequately recharge the battery. Driving it for this period also helps ensure the battery regains a sufficient charge to start the car again independently.
Can Using Jumper Cables Damage My Car?
Improper use of jumper cables can indeed damage your car’s electrical system, including sensitive electronics, the battery, or the alternator. Always follow the correct connection sequence and safety precautions to prevent sparks or reverse polarity, which are common causes of damage.
What If My Jumper Cables Spark When Connecting?
Minor sparks are normal when connecting the final negative clamp to the dead car’s ground. However, excessive sparking, or sparks occurring at other connection points, indicates a problem. Disconnect immediately, recheck your connections, and ensure the clamps are not touching other metal surfaces or each other.
Can I Jump-start a Completely Dead Battery?
Yes, you can jump-start a completely dead battery, but it may take longer for the donor car to provide enough charge. If the battery is severely degraded or damaged, it might not hold a charge, and the jump start will only be temporary, requiring a battery replacement.
When Should I Call for Professional Help Instead of Jump Starting?
You should call for professional help if your battery is leaking or swollen, if you hear clicking but the engine won’t turn over after multiple attempts, or if you suspect issues beyond a dead battery like a faulty starter or alternator. It is also wise to call if you are unsure about the process.