How Does a Torque Wrench Work? Unpacking the Mechanics
A torque wrench works by precisely measuring and limiting rotational force. The most common click-type models use a spring-loaded cam and pivot system to audibly indicate when the set torque is reached. Other types, like beam and digital, rely on physical deflection or electronic sensors to ensure accurate fastening.
🎯 Key Takeaways


- Click wrenches use a spring-cam mechanism for audible indication.
- Beam torque wrenches measure deflection for visual readings.
- Digital models employ strain gauges for electronic precision.
- Internal mechanisms enable precise rotational force control.
- Calibration is crucial for sustained torque wrench accuracy.
A torque wrench precisely measures and limits the rotational force you apply to a fastener, preventing both over-tightening that damages components and under-tightening that leads to failures. It accomplishes this through ingenious internal mechanical or electronic systems that either indicate the force being applied or, in the most common type, physically release or “click” once a preset force is reached. Understanding these internal workings helps you appreciate the critical role this tool plays in safety and performance across countless applications, from assembling engines to mounting wheels.
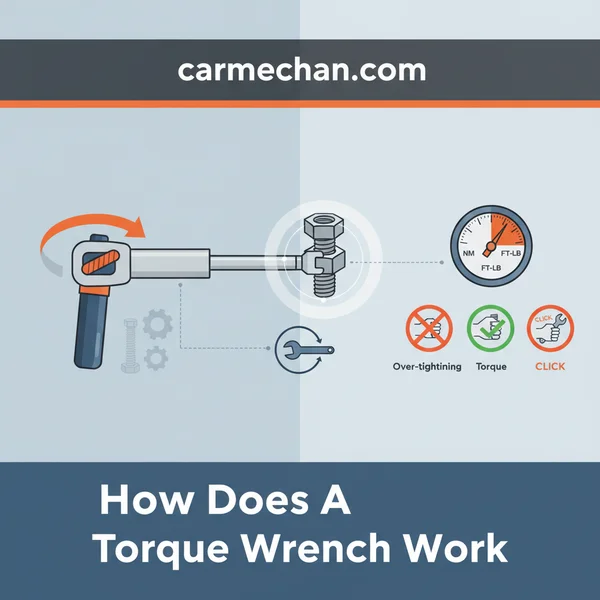
The core of a torque wrench’s function lies in its ability to consistently apply a specific amount of rotational force, ensuring that critical connections are neither too loose nor too tight. Without this precision, you risk anything from stripped threads and warped parts to catastrophic structural failures, making the mechanics inside your torque wrench essential for reliable work.
The Core Concept: What is Torque and Why it Matters


Before diving into the tools themselves, it’s crucial to grasp what torque is. Simply put, torque is the twisting force that causes rotation. Imagine using a wrench: the longer the wrench handle, the easier it is to turn a stubborn bolt. This illustrates the two main components of torque: force and distance.

Understanding Torque Measurement
- Force Application: The pushing or pulling force you exert.
- Lever Arm: The distance from the center of rotation (the bolt) to where the force is applied (your hand on the wrench handle).
Torque is calculated as Force multiplied by Distance. The common units you’ll see are foot-pounds (ft-lbs) in the imperial system, and Newton-meters (Nm) in the metric system. For instance, 50 ft-lbs means applying 50 pounds of force at the end of a one-foot lever arm, or 25 pounds at the end of a two-foot arm.
Why Precise Torque is Critical
Applying the correct torque is not just about tightness; it’s about tension. When you tighten a bolt, you’re actually stretching it slightly, creating clamping force that holds components together. If you:
- Under-tighten: The clamping force is insufficient, leading to vibration, loosening over time, and potential component separation.
- Over-tighten: You stretch the bolt beyond its elastic limit, permanently deforming or even breaking it. This can also strip threads, crack components, or cause fasteners to fail prematurely under stress.
Manufacturers specify torque values to ensure optimal clamping force, maintaining structural integrity and preventing costly damage or dangerous failures.
Everything You Need to Know About How a Torque Wrench Works


Understanding the inner workings of a torque wrench isn’t just for mechanics; it’s for anyone who values precision and safety in their projects. This comprehensive guide will peel back the layers, explaining the fundamental principles and intricate mechanisms that allow a torque wrench to deliver accurate fastening. By understanding how these clever tools function, you’ll gain a deeper appreciation for their role in preventing over-tightening, under-tightening, and ultimately, component failure, ensuring the longevity and reliability of everything from engine bolts to bicycle components. Let’s delve into the science behind the click!
Step 1: The Fundamental Need for Controlled Torque
What you need: A basic understanding of torque (rotational force) and its importance in mechanical assemblies.
Instructions: Before dissecting the wrench itself, it’s crucial to grasp why such a specialized tool is indispensable. Torque is the twisting force that causes rotation, typically measured in Newton-meters (Nm) or foot-pounds (ft-lb). Every bolt, nut, or fastener has a specific torque specification provided by the manufacturer. Applying too much torque can stretch or break the fastener, damage the material being joined, or strip threads. Conversely, too little torque can lead to loose connections, vibrations causing fasteners to back out, or compromised structural integrity. A torque wrench’s primary function is to apply precisely this specified amount of rotational force, ensuring both safety and optimal performance of the assembly.
Pro Tip: Always consult service manuals or manufacturer specifications for the correct torque values. Guessing can lead to expensive damage or dangerous failures down the line.
Step 2: Inside the Click-Type Torque Wrench: Key Components
What you need: Conceptual visualization of mechanical components: handle, main shaft, drive head, internal spring, cam mechanism, detent, and adjustment collar.
Instructions: The most common type, the click-type torque wrench, is a marvel of mechanical engineering. Its core consists of a robust main shaft connected to the drive head, where sockets attach. Encased within the handle and shaft is a calibrated internal spring. This spring is crucial, as its compression directly relates to the torque setting. A cam mechanism or pivot point, along with a detent (a small locking mechanism, often a ball bearing), interacts with this spring. When the wrench is adjusted, the spring’s tension is set. As force is applied, the main shaft begins to deflect slightly, and the internal components are designed to “give way” at a predetermined point, signaling the desired torque has been reached. The robust steel construction ensures accuracy and durability under repeated use.
Pro Tip: Visualizing the internal spring and cam as a precision scale is helpful. The spring resists compression until the set “weight” (torque) is achieved, triggering the release.
Step 3: The Role of the Internal Spring and Adjustment Collar
What you need: Understanding of spring mechanics (Hooke’s Law) and how mechanical advantage is adjusted.
Instructions: At the heart of a click-type wrench’s accuracy lies its internal spring, which is pre-tensioned to a specific resistance. The adjustment collar (often found at the base of the handle) allows the user to compress or decompress this spring. As you rotate the collar to increase the torque setting (e.g., from 50 Nm to 100 Nm), an internal screw mechanism tightens, further compressing the spring. This increased compression means that more force will be required to overcome the spring’s resistance and activate the click mechanism. Conversely, decompressing the spring by lowering the setting reduces the required force. This mechanical adjustment directly translates the user’s desired torque value into a physical tension within the wrench’s internal system, ready for application.
Pro Tip: Always return a click-type torque wrench to its lowest (but not zero, unless specified by manufacturer) setting after use. This relieves tension on the internal spring, prolonging its calibration accuracy and lifespan.
Step 4: Applying Force: The Lever and Drive Mechanism
What you need: Knowledge of the lever principle and how force applied at a distance creates torque.
Instructions: When you grip the handle of a torque wrench and begin to tighten a fastener, you’re applying force, which is then transmitted through the wrench’s body. The length of the wrench acts as a lever arm. Your applied force, multiplied by the effective length of the lever arm (from your hand to the fastener), generates torque. Internally, this rotational force is transferred from the drive head, through the main shaft, to the cam mechanism. As the fastener tightens, resistance increases, and this resistance exerts counter-pressure within the wrench. The entire system is designed to precisely measure this applied torque against the pre-set spring tension, ensuring that the force delivered to the fastener matches the desired specification.
Pro Tip: Always pull, don’t push, a torque wrench for better control and consistent force application. Avoid gripping the wrench by the head or shaft, as this can interfere with the lever arm calculation and distort readings.
Step 5: The “Click”: Reaching the Pre-set Tension
What you need: Understanding of mechanical release mechanisms and auditory/tactile feedback.
Instructions: This is the defining moment for a click-type torque wrench. As you apply force to tighten the fastener, the internal cam mechanism, which is held in place by the spring’s tension via a detent (often a ball bearing or roller), starts to experience increasing pressure. When the applied torque reaches the exact value set on the adjustment collar, the pressure overcomes the spring’s resistance. At this precise point, the cam “slips” past the detent, causing a momentary release and a distinct audible “click” and a slight tactile jolt through the handle. This click is the wrench signaling that the target torque has been achieved. Once the click occurs, stop immediately to avoid over-tightening. The mechanism then automatically resets, ready for the next application.
Pro Tip: Familiarize yourself with the feel and sound of your specific wrench’s click. In noisy environments, rely on the tactile feedback as much as the auditory click.
Step 6: Understanding Calibration and Accuracy
What you need: Awareness of the factors affecting precision in mechanical tools over time.
Instructions: A torque wrench’s accuracy is paramount. Each wrench is calibrated during manufacturing to ensure it delivers torque within a specified tolerance (e.g., ±3-4%). However, internal components, particularly the spring, can experience wear and fatigue over time due to repeated use, impacts, or improper storage (like leaving the spring compressed). This wear directly affects the spring’s tension and, consequently, the wrench’s ability to accurately register torque. Reputable manufacturers recommend periodic re-calibration, typically every 12 months or after 5,000 cycles, whichever comes first. During calibration, specialized equipment measures the wrench’s output against known standards and adjusts the internal mechanism to bring it back within its specified accuracy range, ensuring reliable performance.
Pro Tip: Treat your torque wrench with care. Dropping it, using it as a breaker bar, or exposing it to extreme temperatures can all compromise its delicate internal calibration and accuracy.
Step 7: Beam Torque Wrenches: A Different Principle
What you need: Understanding of deflection and direct measurement.
Instructions: Unlike the internal spring and cam mechanism of a click-type wrench, a beam-type torque wrench operates on a much simpler, purely mechanical principle: deflection. It consists of a long, flexible main beam and a smaller indicator beam. The drive head is attached to one end of the main beam, while the handle is at the other. When torque is applied to tighten a fastener, the main beam flexes or bends proportionally to the applied force. The indicator beam, which is fixed only at the head end and floats freely over a scale, remains straight. As the main beam deflects, the indicator beam points to the corresponding torque value on the scale. This direct visual reading means there are no internal springs or clicks; accuracy relies on the consistent deflection of the main beam and the user’s ability to read the scale accurately.
Pro Tip: Beam wrenches are generally considered highly durable and less prone to going out of calibration than click-types because they lack complex internal mechanisms. However, they require careful visual alignment for accurate readings.
Step 8: Digital Torque Wrenches: Electronic Precision
What you need: Basic understanding of electronic sensors and digital displays.
Instructions: Digital torque wrenches represent the pinnacle of modern torque measurement technology. Instead of relying on mechanical springs or beam deflection, these wrenches incorporate sophisticated electronic strain gauges (transducers) within their shaft. As torque is applied, the strain gauge measures the minute deformation (strain) of the wrench’s shaft. This mechanical strain is then converted into an electrical signal, which is processed by internal electronics and displayed as a precise torque reading on a digital screen. Many digital wrenches also offer audible beeps, vibratory alerts, or LED indicators when the target torque is reached, sometimes even providing data logging capabilities. Their accuracy is often superior, and they can typically measure in multiple units (Nm, ft-lb, in-lb, kg-cm) with ease.
Pro Tip: Keep digital torque wrenches away from strong magnetic fields or extreme temperatures, as these can interfere with their electronic components and affect accuracy. Always ensure batteries are fresh for reliable operation.
✅ Final Checklist
- Understood the core purpose of a torque wrench in ensuring precise fastening.
- Grasped the internal mechanical workings of a click-type torque wrench, including the spring, cam, and detent.
- Learned how the adjustment collar translates desired torque into internal spring tension.
- Identified the mechanism of the “click” and its significance as a signal.
- Understood the principles behind beam and digital torque wrenches for comparison.
Important Notes:
- Safety First: Always wear appropriate personal protective equipment (PPE), such as safety glasses, when working with tools. Ensure the fastener and workpiece are securely held before applying torque.
- Professional Help: If you suspect your torque wrench is inaccurate, or if a critical fastener requires extremely precise or specialized torquing, consider having your wrench professionally calibrated or seeking assistance from a certified mechanic or technician.
- Estimated Time and Cost Range: Understanding how a torque wrench works requires a few hours of dedicated reading and conceptualization. The cost for professional calibration services typically ranges from $50-$150, depending on the wrench type and service provider, and is recommended annually for frequently used tools.
Unveiling the Click: How a Click-Type Torque Wrench Works Internally
The click-type torque wrench is arguably the most common and widely used precision tightening tool, renowned for its simplicity and clear indication. Its genius lies in a purely mechanical system that, once a desired torque is reached, physically releases, producing an unmistakable “click” and slight give in the handle, signaling you to stop applying force.
The Inner Mechanics: Spring, Cam, Pivot, and Detent
At the heart of a click-type wrench is a sophisticated arrangement of internal components designed to trip at a precise rotational force. Let’s break down the key players:
- Adjustment Spring: This is the primary component that you interact with when setting a torque value. A threaded shaft, often connected to the handle, compresses or decompresses a strong internal spring. Increasing the torque setting compresses the spring further, requiring more force to activate the release mechanism.
- Cam Mechanism: Attached to the drive head (where your socket connects) is a cam. As you apply rotational force, this cam begins to rotate.
- Detent Roller or Ball: Positioned against the cam is a roller or ball, held in place by the pressure of the adjustment spring. This detent creates resistance against the cam’s rotation.
- Pivot/Lever Arm: The detent is typically part of a pivoting lever arm. When the force on the cam becomes sufficient to overcome the spring’s resistance, the cam pushes past the detent, causing the lever arm to pivot sharply.
The “Click” Explained
The magic happens as you tighten a fastener:
- Applying Force: As you rotate the wrench, torque is transferred from the handle through the body to the drive head and into the fastener.
- Building Pressure: Inside, the cam mechanism starts to rotate, pushing against the detent roller or ball. This movement compresses the adjustment spring further, building tension.
- Reaching Set Torque: When the rotational force (torque) applied to the fastener reaches the value you preset on the wrench, the cam’s geometry, combined with the extreme pressure from the spring, causes a sudden event. The cam crests past the detent roller.
- The Release: The detent roller “snaps” past the cam’s peak, causing the internal lever arm to quickly pivot. This rapid internal movement generates the distinct audible “click” and a slight haptic feedback or “give” in the handle.
- Signal to Stop: This sudden release of tension and the audible/tactile signal tells you instantly that the desired torque has been achieved. The mechanism essentially unloads the stress, preventing you from applying any more force above the set limit.
This ingenious mechanical system ensures consistent and repeatable torque application without any electronic components, relying purely on the physics of springs, levers, and cams.
Beyond the Click: Exploring Beam and Digital Torque Wrench Mechanisms
While the click-type wrench often comes to mind first, torque wrenches come in various forms, each with unique mechanics. Understanding these alternatives helps you choose the best tool for specific tasks and appreciate the ingenuity behind their design.
The Simplicity of the Beam Torque Wrench
The beam torque wrench is arguably the most straightforward and oldest design. Its mechanism relies on pure physics, offering robust reliability without complex moving parts.
- How it Works: It consists of a long, flexible beam, typically steel, with a drive head at one end and a handle at the other. As force is applied to the handle, the beam deflects or bends. A separate, static indicator beam or pointer remains stationary relative to the handle, while the main beam moves.
- Reading Torque: A calibrated scale is printed along the main beam, and the pointer indicates the applied torque directly against this scale as the beam flexes. You simply read the value where the pointer aligns with the scale.
- Practical Tip: Beam wrenches are excellent for educational purposes and situations where a visual confirmation of applied torque is preferred. They are also incredibly durable and rarely go out of calibration due to their simple design.
The Precision of Digital Torque Wrenches
At the cutting edge of torque technology, digital torque wrenches combine mechanical strength with electronic intelligence to deliver highly precise readings and advanced features.
- How it Works: The core of a digital torque wrench is a highly sensitive strain gauge (or multiple gauges) integrated into the wrench’s internal structure. When torque is applied, the strain gauge subtly deforms, converting this mechanical stress into an electrical signal.
- Electronic Conversion: This electrical signal is then sent to a microprocessor within the wrench. The microprocessor processes the signal, converting it into a precise torque value, which is then displayed on an LCD screen.
- Advanced Features: Many digital wrenches offer features like multiple units of measurement (Nm, ft-lbs, in-lbs), peak hold, tracking mode, data storage, and audible/visual alarms to indicate when the target torque is reached or exceeded.
- Practical Tip: Digital wrenches are often favored for their superior accuracy, ease of reading, and ability to handle complex fastening specifications. Think of them as the smart device of the torque wrench world, providing not just a measurement but often analytical data too.
Maintaining Precision: Calibration and Factors Affecting Torque Wrench Accuracy
Regardless of their internal mechanism, all torque wrenches are precision instruments. Their ability to apply exact forces makes them invaluable, but this precision isn’t static. Understanding calibration and factors that influence accuracy is key to ensuring your tools perform reliably.
Why Regular Calibration is Crucial
Calibration is the process of comparing a torque wrench’s readings against a known, accurate standard to verify its precision and adjust it if necessary. It’s not just a recommendation; it’s a critical maintenance step for any professional using these tools.
- Ensuring Accuracy: Over time, the internal components of any torque wrench can wear, springs can fatigue, or electronic sensors can drift. Regular calibration ensures that the torque value displayed or “clicked” by your wrench truly corresponds to the force being applied.
- Preventing Fastener Failure: An uncalibrated wrench can lead to fasteners being over-tightened (potentially causing thread stripping or component damage) or under-tightened (leading to loose connections and potential failure). Both scenarios can have serious safety and operational consequences.
- Recommended Frequency: Most manufacturers recommend annual calibration, or more frequently if the wrench is used heavily, has been dropped, or produces questionable results. For critical applications, adherence to industry standards for calibration intervals is a must.
Common Factors Influencing Accuracy
Beyond natural wear, several external factors can compromise a torque wrench’s accuracy and performance. Being aware of these helps you protect your investment and maintain reliable operation.
- Drops and Impacts: A single drop onto a hard surface can misalign internal components, damage the delicate spring mechanism in click wrenches, or disrupt the strain gauges in digital versions. Always handle your torque wrench with care.
- Over-Torquing: Applying torque significantly beyond the wrench’s maximum capacity can permanently deform or damage its internal mechanisms, leading to inaccurate readings even within its rated range.
- Improper Storage: For click-type wrenches, storing them with the setting left at maximum can keep the internal spring under constant compression, leading to “spring fatigue” over time and reducing its long-term accuracy. Always back off the setting to the lowest value (but not below its minimum range) for storage.
- Environmental Conditions: Extreme temperatures or high humidity can affect the performance of some digital torque wrenches’ electronics or strain gauges. Always operate and store your wrench within its specified environmental limits.
- Dirty or Damaged Drive Heads: Debris or wear in the square drive can lead to an improper fit with sockets, influencing the feel and potentially the actual torque transmission.
Conclusion
From the satisfying “click” of a mechanical wrench to the precise digital readout of its electronic counterpart, understanding how a torque wrench works demystifies this essential tool. We’ve explored the ingenious internal mechanics that translate applied force into measurable torque, highlighting the differences between click, beam, and digital models. The common thread among them, however, is the paramount importance of precision. Recognizing the necessity of regular calibration and being mindful of factors that can compromise accuracy ensures that your torque wrench remains a reliable partner in every project.
Armed with this knowledge, you’re not just using a tool; you’re leveraging a sophisticated instrument. So, go forth with confidence, select the right torque wrench for your task, and remember that proper care and attention to calibration will safeguard both your work and your investment.
❓ Frequently Asked Questions
Explain the internal components and operation of a click-type torque wrench.
A click-type torque wrench contains a primary spring, a pivot point, and a cam mechanism. When torque is applied, the main lever bends, compressing the spring until the cam overcomes the resistance, causing it to ‘click’ or ‘break’ over the pivot point, indicating the set torque has been met.
What are the fundamental differences in how beam and digital torque wrenches operate?
Beam torque wrenches operate mechanically by measuring the physical deflection of a beam against a calibrated scale. Digital torque wrenches, however, use electronic strain gauges to detect force, converting it into an electrical signal for a precise numerical display and often offering audible alerts.
How does temperature or misuse affect a torque wrench’s accuracy?
Extreme temperature fluctuations can affect the properties of internal materials like springs, altering their tension and leading to inaccurate readings. Misuse, such as dropping the wrench or using it beyond its capacity, can permanently damage internal mechanisms and compromise calibration.
Can a torque wrench lose its calibration over time, and why?
Yes, a torque wrench can lose calibration due to normal wear and tear on internal components like springs and cams, material fatigue, or improper storage and handling. Regular use and age naturally degrade its precision, making periodic recalibration essential.
What role does the internal spring play in a click-type torque wrench?
The internal spring in a click-type torque wrench provides the adjustable resistance that determines the specific torque setting. Adjusting the handle compresses or releases this spring, changing the force required for the cam mechanism to ‘break over’ and produce the click.
How do electronic torque wrenches display their readings and what additional features do they offer?
Electronic torque wrenches display real-time torque readings on an LCD screen, often with peak hold and track modes. They typically include audible beeps or visual LED indicators to alert the user when the target torque is reached, and some can store data or connect to computers for analysis.