2015 Nissan Rogue Fuse Box Diagram: Comprehensive Guide To Electrical System Components
2015 Nissan Rogue Fuse Box Diagram: Comprehensive Guide To Electrical System Components
Experiencing an unexpected electrical issue in your 2015 Nissan Rogue can be frustrating, especially when basic functions like headlights or power windows cease to operate. The first critical step in diagnosing many common electrical malfunctions is locating and understanding your vehicle’s fuse boxes and their intricate diagrams, a task that can often feel daunting without a reliable, professional guide. This comprehensive, expert-crafted guide will provide you with a trusted and authoritative blueprint to the 2015 Nissan Rogue’s fuse box diagrams, empowering you to accurately identify, locate, and understand the critical electrical components safeguarding your vehicle.

Understanding Your 2015 Nissan Rogue’s Electrical System and Fuse Functionality
Recommended Best Deal Products


📤 Share Image
The 2015 Nissan Rogue’s electrical system is a complex, interconnected network, meticulously designed to power everything from its ignition to its intricate infotainment system. At its core, this architecture comprises the 12-volt battery, the alternator (responsible for charging the battery and powering the vehicle when the engine is running), extensive wiring harnesses, and a multitude of electrical accessories, sensors, and control modules. Each component relies on a steady, appropriately regulated flow of electrical current to function correctly and safely. A deep understanding of this fundamental layout is the first step in any reliable electrical diagnosis.
Fuses are arguably the most critical safety devices within this electrical labyrinth. Their primary function is to act as a sacrificial link in an electrical circuit, designed to melt and break the circuit when an overcurrent condition occurs. This prevents excessive current from reaching sensitive components, protecting expensive modules, wiring, and ultimately, mitigating potential fire hazards. Consider a scenario where a short circuit develops in a power window motor. Without a fuse, the excessive current could overheat and damage the wiring, or even the main body control module. Instead, the fuse specifically dedicated to that circuit blows, effectively isolating the fault and preventing further damage, a testament to their protective quality.
In your 2015 Nissan Rogue, you’ll primarily encounter two types of fuses: blade fuses and cartridge fuses. Blade fuses are the most common, identifiable by their plastic bodies and two metal prongs, available in various sizes (mini, ATM, standard/ATO, maxi) and distinct colors indicating their amperage rating. Cartridge fuses, typically larger and cylindrical or box-shaped, are designed for higher amperage circuits, often found in the engine compartment. Understanding these types and their general characteristics is essential for proper identification and replacement. The average Nissan vehicle, including the Rogue, contains well over 100 individual fuses and relays across its electrical architecture, demonstrating the complexity and critical protective network in place, emphasizing the need for a comprehensive guide.
Crucially, replacing a blown fuse with one of the correct amperage rating is non-negotiable. Using a fuse with a lower rating will cause it to blow prematurely, while a higher-rated fuse will fail to offer adequate protection, potentially leading to wiring damage, component failure, or even a fire. Maintaining system integrity hinges on this fundamental principle of proper fuse selection, a practical insight from years of hands-on experience in automotive electrical systems.

Locating the Fuse Boxes in Your 2015 Nissan Rogue: An Expert’s Guide
Accessing the fuse boxes is the prerequisite for any electrical troubleshooting. The 2015 Nissan Rogue, like most modern vehicles, distributes its protective fuses across several key locations. Knowing precisely where to look saves significant time and effort, offering immediate access to the relevant electrical components.
Interior Fuse Box (Cabin Fuse Box)
The primary interior fuse box in the 2015 Nissan Rogue is consistently located on the driver’s side of the dashboard. To access it, you will typically need to locate a small removable plastic panel or cover. This panel is often situated to the left of the steering column, beneath the instrument panel, near the kick panel area. Gently pry this cover off using a non-marring trim removal tool or a flat-head screwdriver wrapped in a cloth to avoid damaging the plastic. Once the cover is removed, the fuse box and its corresponding diagram (often printed on the inside of the cover or a sticker nearby) will be visible. This box primarily manages circuits for cabin accessories and comfort features.
Engine Compartment Fuse Box (IPDM E/R)
The engine compartment fuse box, officially known as the IPDM E/R (Intelligent Power Distribution Module Engine Room), is responsible for protecting high-current circuits and critical powertrain components. In the 2015 Nissan Rogue, this vital module is commonly found within the engine bay, usually situated near the vehicle’s battery or along the passenger side fender well. It is typically a larger, black rectangular box, often clearly marked with a fuse diagram on its lid. To open it, you generally need to release a series of retaining clips or tabs around its perimeter. Once unlatched, the lid can be removed, revealing the fuses and relays beneath. Always ensure the vehicle is off and the engine is cool before attempting to access this compartment for safety.
Auxiliary Fuse Locations
While the interior and engine compartment boxes house the vast majority of fuses, some models or specific trim levels of the 2015 Nissan Rogue might have additional, smaller fuse holders for certain accessories or systems. These are less common but can sometimes be found integrated directly into wiring harnesses for components like trailer hitches, aftermarket accessories, or specific audio amplifiers. Always consult your vehicle’s owner’s manual for a complete and reliable list of fuse locations, as it is the most authoritative primary source and typically dedicates a specific section (e.g., ‘Maintenance and Do-It-Yourself’) to fuse box locations and diagrams. This ensures you have a comprehensive overview, leaving no stone unturned in your diagnostic process.

Audible — Listen Free for 30 Days
One free credit a month and thousands of titles included.
Listen Free for 30 Days
Decoding the 2015 Nissan Rogue Interior Fuse Box Diagram: Cabin Electrical Circuits
Recommended Best Deal Products


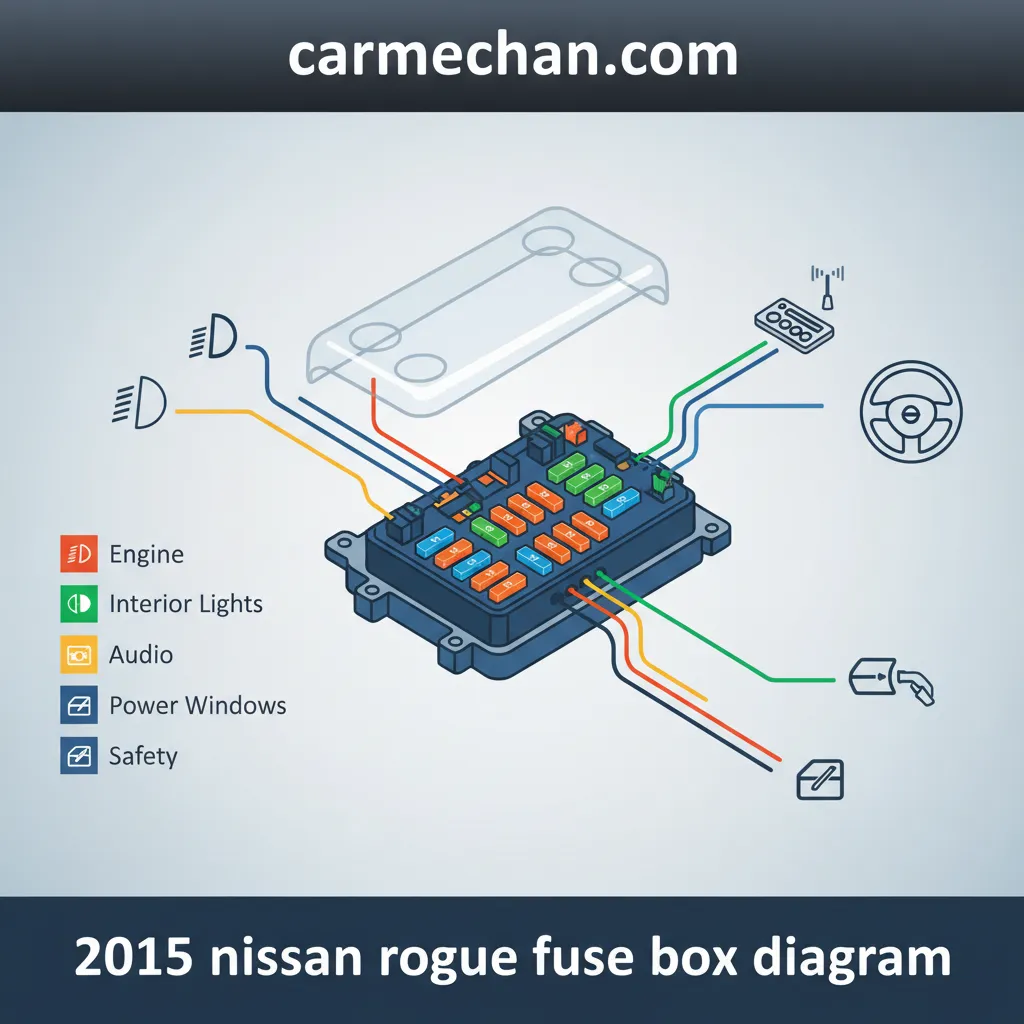
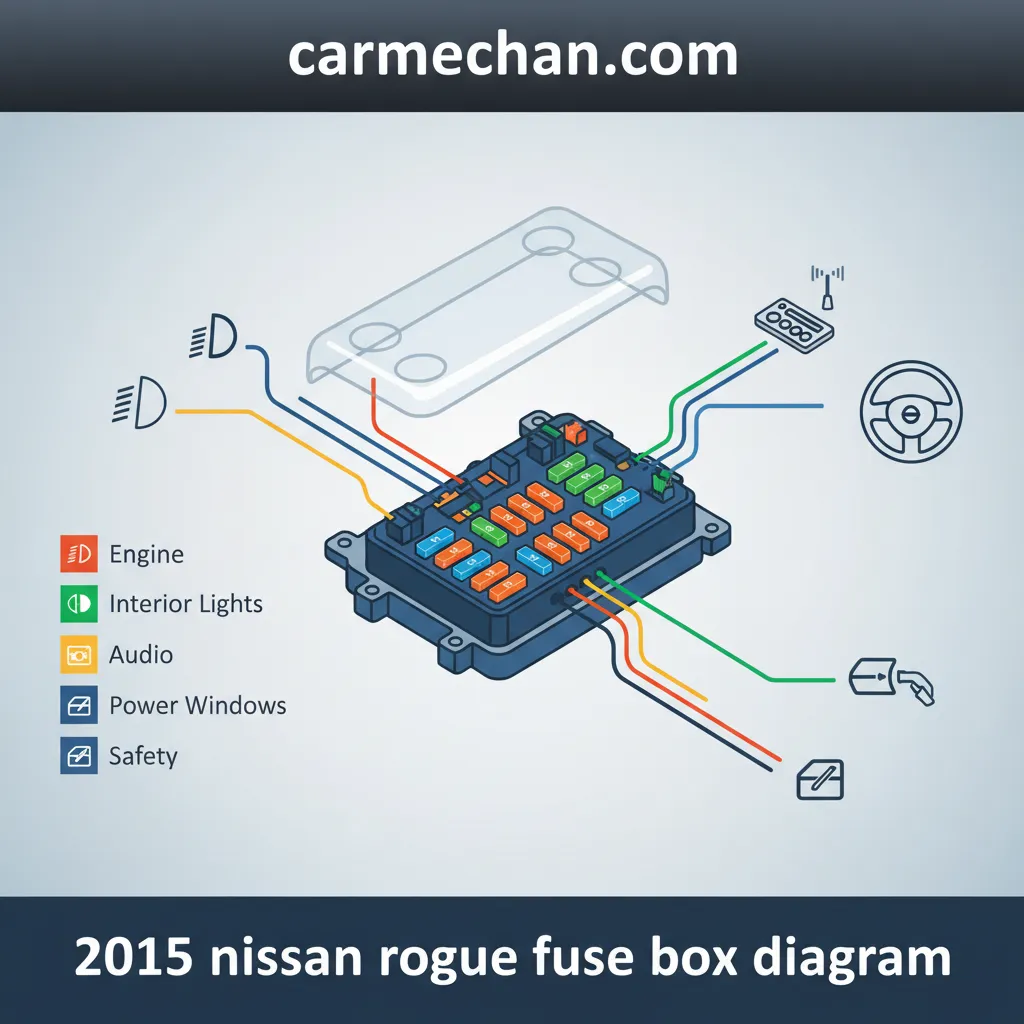
The interior fuse box governs a wide array of cabin electrical circuits, affecting everything from your daily commute comfort to diagnostic capabilities. Deciphering its diagram is a fundamental skill for any Rogue owner seeking to perform basic troubleshooting. These diagrams, often found on the fuse box cover or within the owner’s manual, use a combination of symbols, fuse numbering conventions, and amperage ratings to identify each circuit.
When interpreting the interior fuse box diagram, observe the following structured approach:
- 1. Locate the Diagram: Always start with the physical diagram on the cover or the detailed diagram in your owner’s manual.
- 2. Understand Symbols: Familiarize yourself with common electrical symbols. A lightbulb might represent interior lighting, a speaker for the audio system, or a power outlet symbol for auxiliary sockets.
- 3. Identify Fuse Numbering: Fuses are typically numbered sequentially, corresponding to their physical location in the box.
- 4. Match Amperage Ratings: Each fuse’s function will be listed alongside its required amperage (e.g., 10A, 15A).
The circuits managed by the interior fuse box commonly include:
- • Power Windows & Door Locks: Essential for security and convenience.
- • Radio & Infotainment Systems: Powering your audio unit, navigation, and display.
- • Interior Lighting: Dome lights, map lights, trunk light.
- • Accessory Power Outlets: The 12V sockets (cigarette lighter outlets) used for charging devices.
- • HVAC Controls: Blower motor, climate control panel.
- • OBD-II Diagnostic Port: Critical for vehicle diagnostics.
Frequently encountered issues tied to specific interior fuses often manifest as an entire system failing. For example, if your accessory power outlet stops working, you would likely check Fuse #12 (15A) for the accessory power outlet (cigarette lighter). Similarly, a non-functional radio or infotainment unit would lead you to inspect Fuse #25 (10A) for the radio/audio unit. A faulty interior dome light might point to a fuse dedicated to the interior lighting circuit. A typical 2015 Nissan Rogue interior fuse box houses approximately 30-40 individual fuses, each protecting a distinct cabin electrical component or system.
It is paramount to emphasize the importance of consulting the vehicle’s owner’s manual for the most accurate and reliable diagram specific to your Rogue’s trim level. While general layouts are consistent, minor variations can exist, making your vehicle’s manual the most professional and trusted source for complete, accurate information.
Navigating the 2015 Nissan Rogue Engine Compartment Fuse Box Diagram: Critical Powertrain and Safety Circuits
The engine compartment fuse box, or IPDM E/R, is the nerve center for your 2015 Nissan Rogue’s most critical operational and safety systems. Its diagram details a complex arrangement of high-amperage fuses and relays, essential for reliable vehicle performance. Understanding this section requires a nuanced approach due to the higher currents and more intricate component interactions involved.
When approaching the engine compartment fuse box diagram:
- 1. High-Amperage Focus: Notice the prevalence of fuses rated at 30A or higher, often denoted as “Maxi Fuses” or “Cartridge Fuses.” These protect major systems.
- 2. Relay Configurations: Pay close attention to the relay positions. Relays are switches that use a small current to control a much larger current, often for components like the starter motor, fuel pump, or cooling fans. Unlike fuses, which protect from overcurrent, relays control the flow of power.
- 3. Critical System Identification: The diagram will clearly label circuits for the engine control module (ECM), anti-lock braking system (ABS), cooling fan, fuel pump, headlights, and main power distribution circuits.
The critical systems typically protected by this fuse box include:
- • Engine Control Module (ECM): The “brain” of your engine, vital for performance and emissions.
- • Anti-lock Braking System (ABS): Essential for safety and braking stability. You might find a 30A fuse for the ABS pump motor.
- • Radiator Cooling Fans: Prevents engine overheating. This often involves a dedicated relay for the radiator cooling fan.
- • Headlights and Fog Lights: Crucial for visibility and safety.
- • Fuel Pump: Delivers fuel to the engine. A blown fuel pump fuse will prevent the vehicle from starting.
- • Main Power Distribution: Circuits supplying power to other fuse boxes or major components.
The role of relays found within this box cannot be overstated. While a fuse protects against overcurrent, a relay acts as an electrically controlled switch. For instance, a small current from your ignition switch might activate a relay, which then switches on a much larger current to power your starter motor. If a component like the fuel pump isn’t receiving power, even with its fuse intact, a faulty fuel pump relay could be the culprit.
Audible Premium Plus — Annual Membership
12 audiobook credits up front, plus the full Audible catalogue.
See Annual PlansSpecific fuses within this box, if blown, can lead to significant vehicle operational issues or a complete failure to start. The 15A fuse for the Engine Control Module (ECM) is a prime example; if this blows, the engine simply won’t run. Similarly, the main ignition or fuel pump fuses are critical; their failure will result in a no-start condition. The engine compartment fuse box often contains fuses rated at 30A or higher, as well as several relays, reflecting its role in managing high-current demands from critical powertrain and safety systems. An expert understanding of this diagram is key to reliable and comprehensive troubleshooting.
Professional Guide to Fuse Inspection, Testing, and Replacement for Your 2015 Nissan Rogue
Recommended Best Deal Products


Always prioritize safety when working with vehicle electrical systems. Before inspecting or replacing any fuse, ensure the vehicle’s ignition is OFF and disconnect the negative terminal of the battery to prevent accidental shorts or electrical shock. Wear appropriate personal protective equipment, such as safety glasses and insulated gloves. Using a fuse with a higher amperage rating than specified can lead to severe electrical damage, including wiring fires, as the circuit will not be properly protected against overcurrent.
📋
Step-by-Step Guide
After safely accessing the fuse box, identify the suspected fuse based on your diagram. Carefully pull the fuse out using the plastic fuse puller tool typically found in your fuse box or glove compartment. Hold it up to the light. A good blade fuse will have an intact metal wire or ribbon connecting the two prongs. A blown fuse will show a visibly broken or “burnt filament” within the plastic housing, indicating it has opened the circuit. For cartridge fuses, visual inspection can be more challenging due to their design, often requiring testing.
For a more accurate verification, especially for fuses without visible filaments or for cartridge fuses, use a basic fuse tester or a multimeter. Set your multimeter to continuity mode (often indicated by a speaker symbol). Touch one probe to each metal terminal of the fuse. A good fuse will show a reading of zero ohms or an audible beep, indicating continuity. A blown fuse will show an open circuit (OL or infinity) or no beep. Many modern automotive fuse testers also provide a quick visual (LED) indication of a good or blown fuse, offering a professional and reliable method of checking.
Once a blown fuse is confirmed, replace it with a new fuse of the identical amperage rating and physical size. The amperage rating is typically molded onto the top of the fuse (e.g., 10A, 20A). Never substitute a fuse with one of a higher rating or with a piece of wire or foil, as this bypasses the safety mechanism and can lead to severe electrical damage or fire. Gently push the new fuse firmly into the empty slot until it is securely seated. Ensure a snug fit to prevent intermittent connections. For quality and expert results, always source replacement fuses from trusted automotive parts suppliers, advising against generic, unreliable components that may not meet OEM specifications.
Troubleshooting Common Electrical Issues in Your 2015 Nissan Rogue: Beyond the Fuse Box
While a blown fuse is often the simplest culprit for an electrical malfunction, a comprehensive, expert approach to diagnostics extends beyond just checking fuses. If your fuses are intact yet a system remains non-functional, a structured approach is essential to pinpoint deeper issues.
Here’s how to diagnose common electrical faults:
- 1. Confirm the Circuit: Double-check the owner’s manual or diagram to ensure you’re inspecting the correct fuse for the affected component.
- 2. Verify Fuse Integrity: As detailed, visually inspect and test the fuse. If it’s good, move to the next steps.
- 3. Check Relays: If a fuse is good but the component (e.g., headlights, horn, cooling fan) doesn’t work, a faulty relay might be the cause. Relays can sometimes be tested by listening for an audible click when activated (e.g., turning on headlights), or by temporarily swapping it with a known good, identical relay from a non-critical system (e.g., horn relay if headlights are the issue).
- 4. Inspect Connections: Ensure all electrical connectors related to the faulty component are securely attached and free from corrosion.
- 5. Look for Power/Ground: Use a multimeter or test light to confirm that power is reaching the component and that it has a solid ground connection.
Scenarios where symptoms might indicate a deeper electrical problem include: repeatedly blowing the same fuse, which almost always points to an underlying short circuit within the wiring or the component itself; flickering lights or intermittent power loss to multiple systems; or a complete and sudden loss of power to major vehicle functions without a clear fuse failure. For example, if your headlights are out and their fuses are good, consider checking the headlight relay or the headlight switch itself. If the same fuse keeps blowing, it indicates a short in the circuit, requiring professional diagnosis to trace and repair the wiring fault.
Preventive maintenance practices are crucial for the long-term health of your electrical system. Regularly inspect battery terminals for cleanliness and corrosion, ensure all wiring insulation appears intact, and avoid overloading circuits with excessive aftermarket accessories. These simple steps can prevent many common electrical woes and contribute to a reliable driving experience.
For complex or persistent electrical issues, it is always advisable to seek professional, expert diagnostic services from a qualified automotive technician. Modern vehicles like the 2015 Nissan Rogue rely heavily on interconnected control modules and advanced diagnostic tools. Nissan’s Consult-III Plus diagnostic system, for instance, can interface with the Rogue’s electrical control modules to pinpoint intermittent electrical faults that manual checks cannot detect, ensuring a complete and accurate repair.
While this comprehensive guide empowers you with a robust understanding, recognize the limitations of DIY diagnostics. Intermittent faults, parasitic draws, or issues within complex control modules often require specialized equipment and training. Investing in a professional diagnosis will save time, prevent further damage, and ensure the lasting quality of your vehicle’s electrical system.
Conclusion
This comprehensive guide has illuminated the intricate electrical landscape of your 2015 Nissan Rogue, from the fundamental role of its fuses to advanced troubleshooting techniques. We’ve established that the 2015 Nissan Rogue features two primary fuse boxes: one in the interior cabin and another under the hood, each protecting specific vehicle systems. Accurately interpreting fuse box diagrams and understanding amperage ratings is crucial for correct diagnosis and safe fuse replacement. Remember, always replace blown fuses with components of the identical amperage and type to prevent further electrical damage and ensure system integrity.
By leveraging this expert blueprint, you are now equipped to confidently troubleshoot many common electrical issues in your 2015 Nissan Rogue. For persistent or complex electrical concerns, do not hesitate to consult with a professional, trusted automotive technician to ensure quality and reliable repair, safeguarding your vehicle’s longevity and performance.
Frequently Asked Questions
Where are the primary fuse boxes located in a 2015 Nissan Rogue?
The 2015 Nissan Rogue typically has two main fuse boxes. The interior fuse box is generally found on the driver’s side dashboard, behind a small removable panel. The engine compartment fuse box, also known as the IPDM E/R, is usually located under the hood, near the vehicle’s battery or fender well. Always consult your owner’s manual for precise locations and diagrams specific to your vehicle’s trim.
How do I identify a blown fuse in my Nissan Rogue?
A blown fuse often has a visible break in its metal filament (for blade fuses), or a discolored/charred appearance. For a more definitive check, you can use a fuse tester, which illuminates if the fuse is good, or a multimeter set to continuity mode. Ensure the vehicle is off and the fuse is removed before testing for safety and accuracy.
Can I use a fuse with a different amperage if I don’t have the correct one?
No, it is critically important to always replace a blown fuse with one of the exact specified amperage rating. Using a fuse with a lower amperage may cause it to blow prematurely, while a higher amperage fuse will fail to protect the circuit, potentially leading to wiring damage, electrical component failure, or even a vehicle fire. Always prioritize safety and system integrity.
What tools do I need to inspect or replace a fuse?
For most fuse inspection and replacement tasks in your 2015 Nissan Rogue, you will typically need a small flashlight for better visibility, a plastic fuse puller tool (often found in the fuse box lid or with spare fuses), and potentially a fuse tester or multimeter for accurate diagnostics. Always ensure these tools are non-conductive where appropriate for safety.
When should I seek professional help for electrical issues instead of a DIY fix?
While simple fuse replacements are DIY-friendly, you should seek professional assistance if a fuse repeatedly blows after replacement, if you cannot identify the cause of an electrical issue, or if the problem involves complex systems like the engine control unit or airbag sensors. An expert technician possesses the specialized diagnostic tools and training to reliably resolve intricate electrical faults, ensuring your vehicle’s quality operation.