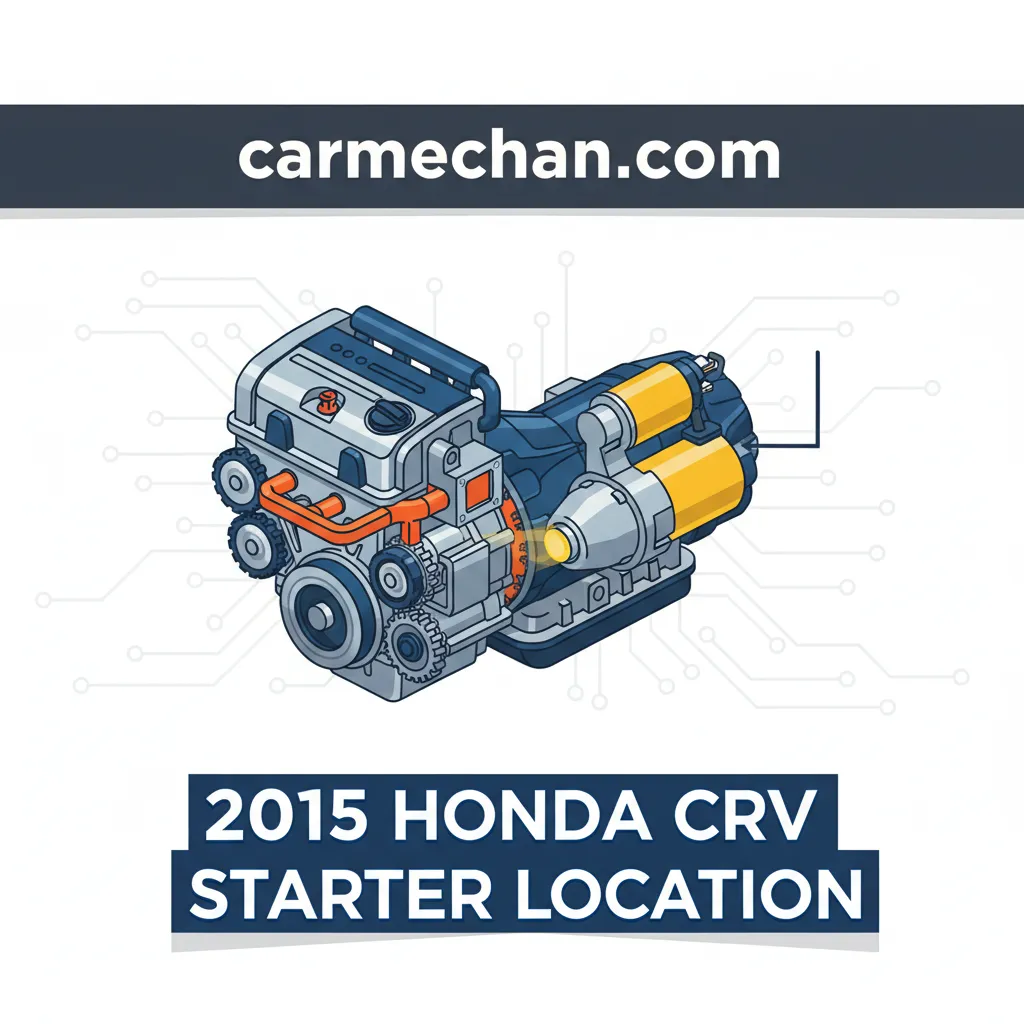
2015 Honda Cr-V Starter Location: A Detailed Guide For Technicians And Owners
The reliable operation of your 2015 Honda CR-V hinges on a functional starting system, yet pinpointing a critical component like the starter motor can be a challenge. Automotive professionals and DIY enthusiasts often struggle with the precise location, access procedures, and diagnostic steps for the 2015 CR-V’s starter, leading to inefficiencies or incorrect repairs. This comprehensive guide will meticulously detail the exact 2015 Honda CR-V starter location, outline preparatory safety measures, provide a step-by-step removal and installation process, and offer expert insights into post-repair verification and local support.

Understanding the 2015 Honda CR-V Starting System Architecture
Recommended Best Deal Products



📤 Share Image
The intricate dance of components that brings your 2015 Honda CR-V to life begins with the starting system. At its heart lies the starter motor, an electromechanical device engineered to crank the engine, initiating combustion. The 2015 CR-V primarily utilizes the K24W direct-injection 2.4-liter DOHC i-VTEC engine, a robust powertrain known for its reliability. The starter motor interacts directly with the engine’s flywheel (via the ring gear) through a bendix gear, converting electrical energy from the battery into sufficient mechanical rotation to overcome the engine’s compression and internal friction. This critical process is carefully timed and managed by the vehicle’s electrical control unit.
Recognizing a failing starter is often the first step in addressing a starting issue. Common symptoms include a distinct single ‘click’ on ignition without the engine turning over, indicating the solenoid engages but the motor doesn’t spin. Other signs include slow, sluggish cranking, where the engine struggles to rotate, or a complete no-crank, no-start scenario where the engine doesn’t turn over at all, even with a charged battery. For instance, a vehicle presenting with an intermittent starting issue, where the starter engages only after multiple attempts, frequently points to failing internal contacts or worn brushes within the starter motor.
The starter motor operates within a vital electrical circuit. It receives its primary power directly from the 12V vehicle battery via a heavy-gauge cable (B+ terminal). The battery must be in optimal condition; a fully charged 12V battery typically registers 12.6V, crucial for optimal starter performance. The starter solenoid, often integrated into the starter motor assembly, acts as an electromagnetic switch. It performs two key functions: engaging the bendix gear with the flywheel and connecting high current from the battery to the starter motor windings. This solenoid is activated by a smaller signal wire from the ignition switch, which momentarily energizes the solenoid when the key is turned to the ‘start’ position. Understanding these interactions is fundamental to diagnosing issues, differentiating between a healthy 12V system and a low-voltage scenario affecting starter engagement, which can present similar symptoms to a faulty starter.
By The Numbers
Miles (Starter Lifespan)
Fully Charged Battery
Pinpointing the Exact 2015 Honda CR-V Starter Motor Location
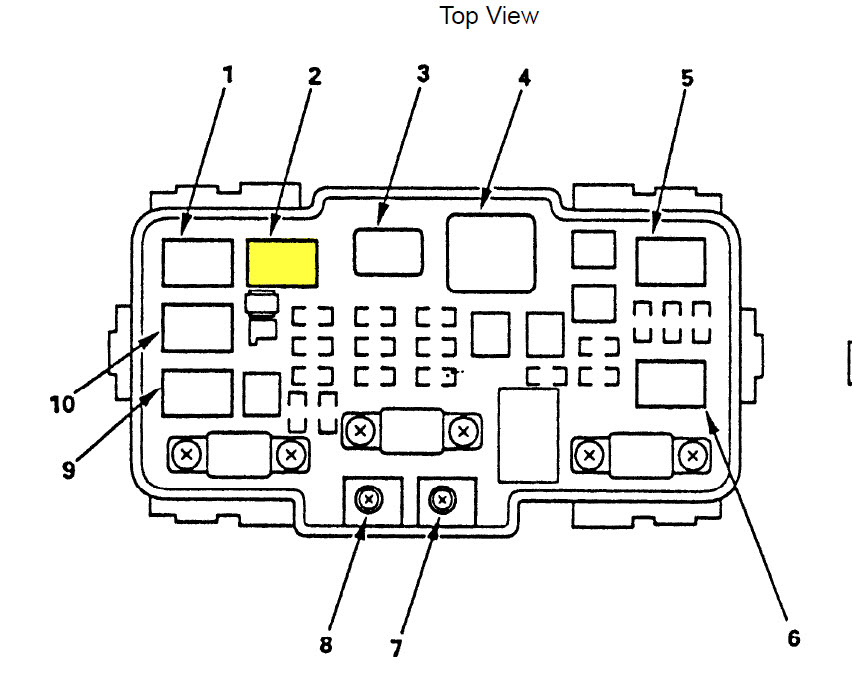
For the 2015 Honda CR-V equipped with the K24W engine, the starter motor’s physical location is quite specific and consistent. It is situated on the passenger side of the engine block, nestled directly where the engine meets the transmission. More precisely, it is mounted to the transmission bell housing, engaging the engine’s flywheel. This strategic placement allows for efficient power transfer to crank the engine.
Identifying this location requires a keen eye and knowledge of surrounding components. When viewing the engine bay from the front of the vehicle, the starter will be tucked low and towards the rear of the engine, adjacent to the firewall, on the right-hand side (passenger side). Key visual landmarks include the large intake manifold which sits above and slightly forward, and the battery tray and battery itself, which are immediately to the front of the starter’s general area. You may also observe various transmission fluid lines or cooling hoses in the vicinity. For example, accessing the starter from above often necessitates the partial removal of the air intake system, including the air box and ducting, to achieve an unobstructed view and working space.
The most effective angle of approach for initial visual inspection and subsequent access can vary depending on the technician’s preference and available tools. From above, after removing the battery and its tray along with the air intake system, a clear line of sight to the top mounting bolt and electrical connections becomes accessible. From below, with the vehicle safely elevated on a lift or jack stands, the lower mounting bolt and the main body of the starter are more readily visible. Often, a combination of both approaches is necessary to effectively disconnect all fasteners and electrical connections. The 22-pound curb weight difference between FWD (approx. 3,400 lbs) and AWD (approx. 3,600 lbs) models does not impact the starter’s specific location, only the overall vehicle weight when lifting.
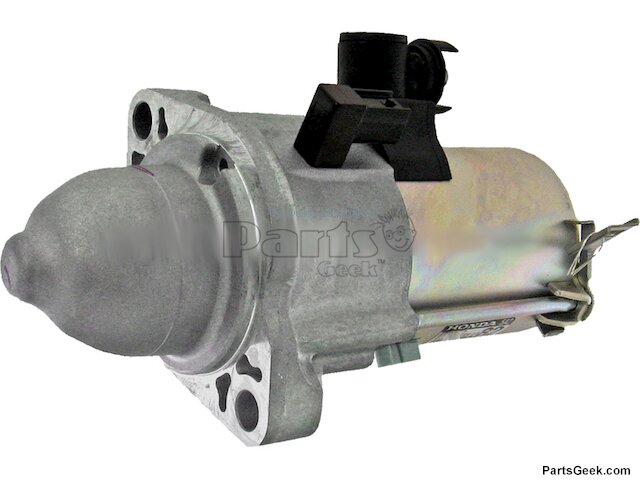
For absolute precision, always consult a Honda factory service manual. These manuals provide detailed exploded views and schematics that unequivocally confirm the starter’s exact orientation, mounting points, and the precise routing of its electrical harness. Reference to a specific diagram from a Honda factory service manual illustrating the starter’s orientation relative to the transmission casing will eliminate any guesswork regarding its precise location. The 2015 CR-V starter typically weighs between 5-7 lbs, making its physical handling manageable. The main power cable (B+) connection typically uses a 12mm nut, while the signal wire uses an 8mm nut, distinguishing the two critical electrical connections for proper identification and removal.
Preparatory Safety Procedures and Component Removal for Starter Access
Recommended Best Deal Products

Before commencing any work on the 2015 Honda CR-V’s starting system, paramount importance must be placed on safety. Electrical systems, especially those connected to the battery and high-current components like the starter, pose significant risks if not handled correctly. The very first and most critical safety measure is to disconnect the negative battery terminal first, followed by the positive terminal. This sequence prevents accidental electrical shorts, which can cause severe injury, damage to the vehicle’s electrical system, or even ignite a battery fire. Battery terminal torque specifications typically range from 10-14 ft-lbs, but over-tightening can damage the battery posts.

Audible — Listen Free for 30 Days
One free credit a month and thousands of titles included.
Listen Free for 30 DaysAlways ensure the vehicle is parked on a level surface, the parking brake is engaged, and the wheels are chocked before lifting. Never work under a vehicle supported only by a jack. Utilize robust jack stands or a certified professional lift for comprehensive safety.
Once the battery is safely disconnected, the next step involves safely lifting and securing the vehicle. Whether using robust jack stands or a professional automotive lift, ensure the vehicle is stable and adequately supported throughout the repair process. A typical automotive lift has a weight capacity of 9,000-12,000 lbs, far exceeding the 2015 CR-V’s curb weight (approx. 3,400-3,600 lbs), providing a secure platform. Always wear appropriate Personal Protective Equipment (PPE), including gloves and eye protection, as a standard pre-service preparation.
Accessing the starter motor requires the systematic removal of several obstructing components. This process typically includes:
- Battery Removal: Disconnect terminals (negative first, then positive) and remove the hold-down clamp. Carefully lift out the battery.
- Battery Tray Removal: Unbolt and remove the plastic or metal battery tray situated beneath the battery.
- Air Intake Ducting Removal: This involves disconnecting hoses, unclipping fasteners, and unbolting the air box and associated ducting that leads to the throttle body. A scenario might involve using specialized hose clamp pliers for removing difficult-to-reach or stubborn air intake clamps.
- Throttle Body (Potentially): In some cases, or for greater access, disconnecting and moving the throttle body may be beneficial, though often not strictly necessary. If removed, be mindful of gasket integrity and electrical connections.
Proper handling and storage of all removed components and fasteners are crucial. Use labeled bags or compartmentalized trays to organize bolts, nuts, and clips, preventing loss or confusion during reassembly. This meticulous approach ensures that every component is accounted for and correctly reinstalled, maintaining the vehicle’s integrity.
Photograph the engine bay at various stages of disassembly. These visual aids can be invaluable during reassembly, helping you remember the exact routing of wires, hoses, and component placement, especially in a confined engine space.
Enhanced Safety
Prevents electrical shorts, injury, and component damage by following proper disconnection protocols.
Optimized Access
Systematic removal of components creates ample working space, streamlining the repair process.
Component Preservation
Careful handling and storage prevent loss or damage to critical parts and fasteners, ensuring a smooth reassembly.
Step-by-Step Procedure: 2015 CR-V Starter Removal and Installation
Executing the starter motor replacement on a 2015 Honda CR-V requires precision and adherence to established technical procedures. With the preliminary safety measures complete and obstructing components removed, you can now proceed with the core task. Always ensure you have a replacement starter motor readily `available`, ideally an OEM or high-quality remanufactured unit, before beginning removal.
Audible Premium Plus — Annual Membership
12 audiobook credits up front, plus the full Audible catalogue.
See Annual Plans
📋
Step-by-Step Guide
Locate the starter motor. Carefully disconnect the main battery cable (B+ terminal) by loosening the 12mm nut. Then, disconnect the solenoid signal wire by loosening the 8mm nut. Ensure these wires are tucked away from any metal surfaces to prevent accidental grounding. For corroded starter bolts or nuts, applying a penetrating lubricant and allowing it to soak can be highly beneficial.
Identify the starter mounting bolts. Typically, there are two or three bolts securing the starter to the transmission bell housing. These often require a 14mm or 17mm socket. Depending on their `location` and accessibility, you may need various extensions, swivel sockets, or a universal joint to reach them effectively. Carefully loosen and remove all mounting bolts. Keep these bolts organized, as they are often of different lengths.
Once unbolted, gently wiggle the old starter motor to free it from its seating. Carefully maneuver it out of its confined `location`, taking extreme care to avoid damaging `nearby` wiring harnesses, hoses, or sensors. Once removed, inspect the mounting surface on the transmission bell housing for any debris or corrosion and clean it thoroughly to ensure proper seating of the new unit.
Position the new starter motor into its mounting `location`, carefully aligning it with the bolt holes. Insert and hand-tighten the mounting bolts. Then, tighten them to the factory specification of 33 ft-lbs. It’s often best to torque these bolts in a sequence (e.g., top then bottom, or alternating if multiple) for even seating. Reattach the electrical connections: the main power cable (B+ terminal) with its 12mm nut to 8 ft-lbs, and the solenoid signal wire with its 8mm nut to 3 ft-lbs. Incorrect torque can lead to premature failure or electrical issues.
Reinstall all previously removed components in reverse order: air intake ducting, battery tray, and finally, the battery itself. Ensure all clamps, fasteners, and electrical connectors are securely refitted. Double-check all connections, especially those related to the starter, to ensure they are tight and properly seated before attempting to start the vehicle. For a reputable brand, consider Denso or Bosch starter motors, which are often `available` as OEM or high-quality aftermarket options for the 2015 CR-V.
Post-Installation Verification and Professional Diagnostic Services for Your CR-V (Local Community Support)
After diligently completing the starter motor replacement, the final phase involves comprehensive post-installation verification. This ensures that the new starter functions correctly and that no new issues have been introduced. Begin by reconnecting the battery terminals, always attaching the positive terminal first, then the negative. Conduct an initial startup test. Turn the ignition key and listen carefully for the distinctive sound of the engine cranking and starting. Pay attention to any unusual noises, delayed engagement, or grinding sounds, which could indicate improper installation or a deeper issue.
Troubleshooting common post-replacement issues is essential. If the starter still doesn’t engage, perform a quick check of the main power cable and signal wire connections at the starter itself. Confirm the battery terminals are tight and clean. A “no crank, no start” situation after replacement could point to a battery that is actually dead or failing, requiring a battery load test or an alternator check to verify the entire charging system is healthy. A healthy charging system should produce 13.8V-14.7V at the battery while the engine is running. Sometimes, a persistent electrical problem might indicate a deeper underlying fault within the wiring harness, ignition switch, or even a blown fuse or relay, which the starter replacement alone cannot resolve.
If starting issues persist despite a correct installation, it is prudent to seek professional automotive diagnostic services. Specialized shops offer advanced diagnostic tools and the expertise `available` to accurately pinpoint complex electrical or mechanical faults. A typical diagnostic fee for electrical systems ranges from $80-$150, a worthwhile investment to avoid costly misdiagnoses or further damage. These professionals are experienced in `serving` the `community` with intricate Honda electrical system diagnostics, often identifying issues that are not immediately `accessible` to the average DIY enthusiast.
Locating reputable repair facilities `nearby` that specialize in Honda vehicles is crucial. Look for shops with ASE-certified technicians and positive customer reviews within your `community`. A `trusted local` mechanic will provide an accurate assessment, transparent pricing, and quality repairs. Many such centers are committed to `serving` their local clientele, ensuring that your 2015 Honda CR-V remains reliable and safe for years to come. Don’t hesitate to inquire about their experience with specific Honda models to ensure you’re getting specialized care.
✅ DIY Benefits
- Cost savings on labor.
- Personal satisfaction of repair.
- Immediate attention to the issue.
❌ Professional Service Benefits
- Advanced diagnostic capabilities.
- Expertise for complex issues.
- Warranty on parts and labor.
- Access to specialized tools.
The 2015 Honda CR-V starter is precisely located on the passenger side, mounted to the transmission bell housing. Safe and effective access requires proper battery disconnection, vehicle elevation, and the systematic removal of obstructing components. Following detailed electrical and mechanical procedures, including correct torque specifications, is crucial for successful starter replacement and optimal vehicle function. Post-installation verification and considering local professional services ensure comprehensive repair and long-term reliability. Utilize this expert blueprint to confidently approach the 2015 Honda CR-V starter service, ensuring precision and safety in every step, or consult a local certified technician for professional assistance.
Frequently Asked Questions
What are the primary symptoms of a failing starter motor in a 2015 Honda CR-V?
Primary symptoms include a single ‘click’ noise when turning the ignition without the engine cranking, slow or sluggish engine cranking, or complete silence and no engine turnover at all. Sometimes, the headlights may dim significantly when attempting to start, indicating a high current draw that the starter can’t manage effectively.
Is replacing the 2015 CR-V starter motor a feasible DIY project, or should I seek professional help?
While technically possible for an experienced DIY enthusiast with proper tools and safety equipment, replacing the 2015 CR-V starter is considered moderately challenging due to its confined location and the need for vehicle elevation. For those less experienced, professional assistance is highly recommended to ensure safety and proper installation, preventing further vehicle damage.
What specialized tools are required for accessing and replacing the 2015 Honda CR-V starter?
Beyond standard mechanics’ tools like socket sets, wrenches, and a torque wrench, you’ll need specialized equipment such as a reliable hydraulic jack and sturdy jack stands. Extensions and swivel sockets are often necessary for reaching confined bolts, and a battery terminal puller can be useful. Safety glasses and gloves are also essential PPE.
How long does a typical 2015 Honda CR-V starter replacement take at a service center?
For a trained technician at a professional service center, a 2015 Honda CR-V starter replacement typically takes between 1.5 to 3 hours, depending on the mechanic’s experience and any unforeseen complications like rusted bolts. This time frame includes diagnostic checks, component removal, replacement, and post-installation testing.
My new starter isn’t working after installation; what should I check first?
First, verify all battery connections are clean and secure, including both terminals and the main starter cable. Then, ensure the small solenoid signal wire is correctly attached. Check for proper battery voltage. If problems persist, consider checking the battery’s charge, examining the starter relay, or testing for continuity in the starter circuit with a multimeter. A professional diagnostic is recommended if basic checks fail.