2014 Nissan Altima Fuse Box Diagram: Locating, Understanding, And Troubleshooting Electrical Systems
Understanding the intricate electrical network of your 2014 Nissan Altima is paramount for maintaining its operational integrity and ensuring your safety on the road. When an electrical component fails, from a simple radio to a critical sensor, the immediate assumption is often a complex issue requiring professional intervention. However, frequently, the culprit is a small, inexpensive fuse, yet knowing which fuse and where to find it can be a significant challenge without proper guidance. This comprehensive guide provides an authoritative roadmap to the 2014 Nissan Altima’s fuse box diagrams, empowering you to accurately locate, understand, and troubleshoot common electrical issues with confidence, offering reliable and expert insights.

The Critical Role of Fuses in Your 2014 Nissan Altima’s Electrical Integrity
Recommended Best Deal Products


📤 Share Image
In any modern vehicle, particularly the sophisticated 2014 Nissan Altima, fuses serve as the silent guardians of the electrical system. Their primary function is unequivocally a safety device, meticulously designed to protect electrical circuits from the detrimental effects of overcurrent. When an electrical surge or short circuit occurs, the fuse, containing a thin metallic filament, is engineered to melt and break the circuit before excessive current can cause irreversible damage to expensive components or, more critically, ignite a fire. This precise, rapid interruption is fundamental to vehicle safety and longevity.
The 2014 Nissan Altima’s electrical system is a complex network, integrating a sophisticated body control module (BCM), numerous sensors, and actuators that manage everything from engine performance to creature comforts. This intricate architecture relies on a meticulously fused network for optimal and reliable operation. Each circuit, from the low-amperage cabin lights to the high-amperage starter motor, is precisely rated and protected by a fuse tailored to its specific current requirements. For instance, the Altima operates on a standard 12-volt DC system, with fuses ranging from 5A for minor accessories up to 80A for major power distribution circuits, ensuring quick interruption to prevent sustained overcurrent.
The consequences of a blown fuse can range from a minor inconvenience to a critical system failure. Imagine a scenario where a power window suddenly becomes non-functional—often, this localized failure points directly to a blown fuse. However, a blown fuse in a more critical circuit, such as those governing the Anti-lock Braking System (ABS), engine control module (ECM), or supplemental restraint system (SRS), could compromise vehicle safety and operational integrity. Accurate diagnosis is paramount; haphazardly replacing fuses without understanding the underlying cause or using incorrect amperage fuses can lead to recurring issues or more severe damage. Therefore, referring to the vehicle-specific fuse box diagram is not merely a suggestion but a necessity for ensuring quality electrical maintenance and precise identification, a practice trusted by expert technicians.

Pinpointing the Fuse Box Locations in the 2014 Nissan Altima
Locating the fuse boxes in your 2014 Nissan Altima is the foundational step for any electrical troubleshooting. Nissan engineers typically distribute these critical components strategically to manage different aspects of the vehicle’s electrical load. Most 2014 Nissan Altima models are equipped with two primary fuse boxes, designed to segregate high-current circuits from lower-current accessory functions, providing a more robust and reliable electrical architecture.
📋
Step-by-Step Guide: Locating Your Altima’s Fuse Boxes
Recommended Best Deal Products


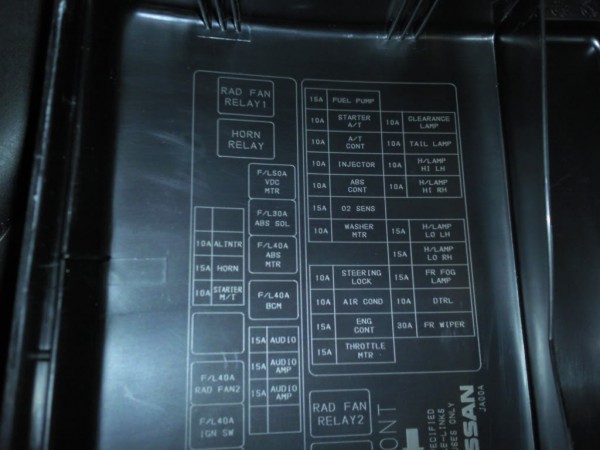
This box, often referred to as the IPDM E/R (Intelligent Power Distribution Module Engine Room), is typically situated on the driver’s side of the engine bay, usually near the battery or adjacent to the fender. Look for a large, black plastic box with a clearly labeled lid and securing clips. To access it, you’ll need to press in or pull up on the clips and then lift the lid. This box primarily handles high-current components such as the engine control unit, headlights, cooling fan, and Anti-lock Braking System (ABS).
The cabin fuse box is usually located on the driver’s side dashboard, behind a removable panel or cover, often near the lower kick panel. To access it, you may need a small flat-head screwdriver or a trim removal tool to gently pry open the plastic cover. Once opened, the fuse panel and its associated diagram (often a sticker on the back of the cover) will be visible. This box manages lower-current accessories and interior systems like the radio, power windows, interior lights, heated seats, and horn.

Audible — Listen Free for 30 Days
One free credit a month and thousands of titles included.
Listen Free for 30 DaysWhile these general locations apply to most 2014 Nissan Altima models, the owner’s manual remains the definitive and most reliable source for exact fuse box locations and access procedures specific to your vehicle’s trim level and configuration. It provides a complete guide, often with detailed diagrams, ensuring you have trusted information at your fingertips.
Occasionally, auxiliary fuse locations might exist for specific factory or aftermarket accessories, such as trailer wiring harnesses or specialized audio equipment. However, these are generally not primary service points for general vehicle electrical maintenance. Always refer to your vehicle’s specific documentation to avoid confusion and ensure a precise understanding of your Altima’s electrical layout.
Deciphering the 2014 Nissan Altima Fuse Box Diagrams and Legend
Once you’ve located the fuse boxes, the next critical step in expert electrical troubleshooting is to accurately interpret the fuse box diagrams. These diagrams, typically found on the inside of the fuse box cover, within the owner’s manual, or a dedicated service manual, are a roadmap to your Altima’s electrical circuits. A professional approach to maintenance hinges on understanding these schematics.
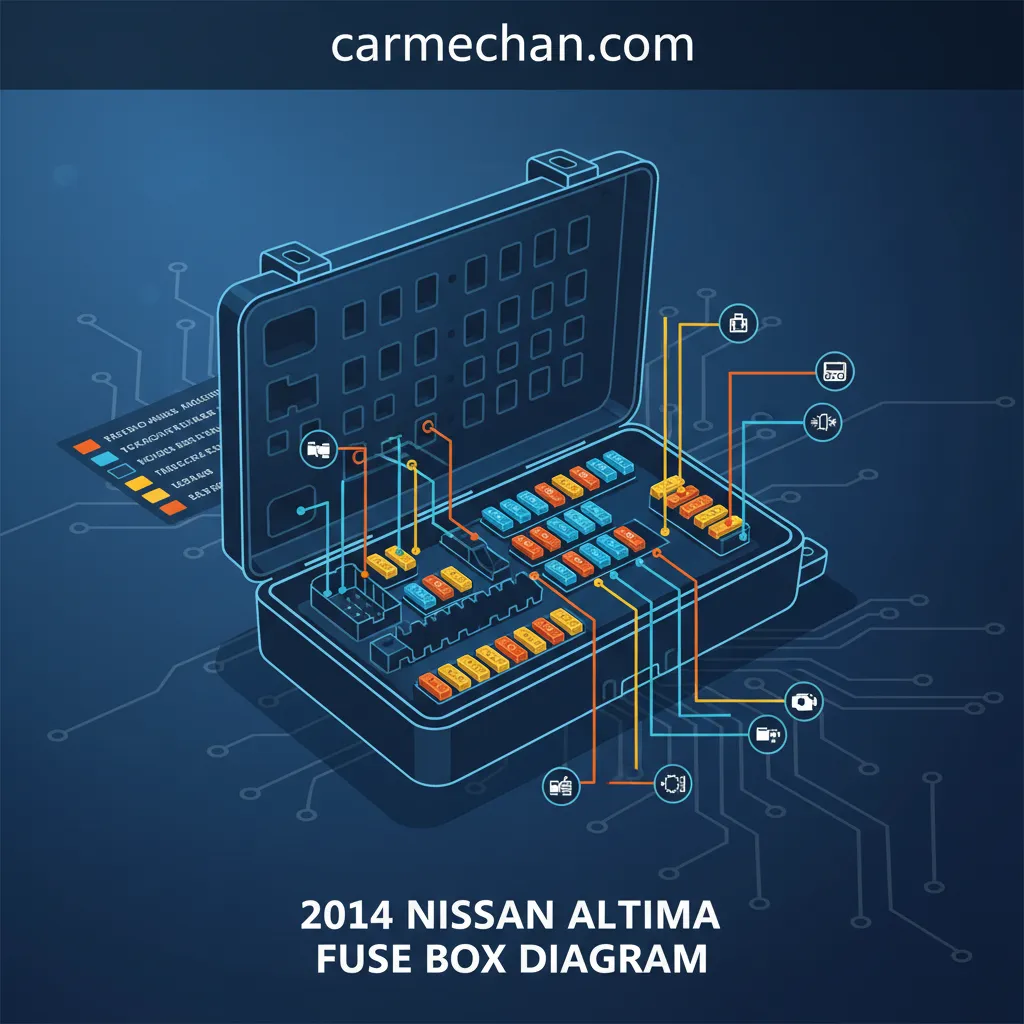
Nissan fuse box diagrams employ a standardized layout and iconography. You’ll observe a grid-like representation mirroring the physical fuse box, with each square or rectangle denoting a specific fuse slot. Adjacent to these slots, you’ll find symbols or abbreviated text representing the electrical components or circuits they protect. For example, a symbol resembling a headlight will clearly indicate the fuse for the vehicle’s headlights, while “RADIO” or “PWR OUTLET” directly identifies circuits for the audio system or power sockets. Each fuse is also assigned a specific number (e.g., F12, F23) to facilitate cross-referencing with the accompanying legend.
Crucially, the diagram will specify the amperage rating for each fuse, typically denoted by “A” (e.g., 10A, 15A, 20A). Using the correct amperage is not merely a recommendation; it is absolutely vital. Installing a fuse with a lower rating will cause it to blow prematurely, while a higher-rated fuse can fail to protect the circuit, potentially leading to overheating wires, component damage, or even an electrical fire. The 2014 Altima predominantly uses standard ATO/ATC blade fuses, though mini and maxi blade fuses are also employed for specific applications, particularly for higher current demands in the engine bay.
Automotive fuses also follow a common color-coding system, which is a helpful visual aid for quick identification. For instance:
- Tan/Orange: 5 Amps
- Red: 10 Amps
- Blue: 15 Amps
- Yellow: 20 Amps
- Green: 30 Amps
This color-coding allows for swift verification against the diagram. When tackling an issue, such as a non-functioning power outlet, you would locate the ‘PWR OUTLET’ fuse on the diagram (e.g., F20, 15A, Blue). Then, cross-reference this information with the physical fuse box, identifying the exact blue 15A fuse in position F20. Remember that engine compartment and cabin fuse boxes often have distinct diagrams and legends, necessitating a careful review of the relevant diagram for the specific fuse box you are inspecting. An average Altima fuse box diagram might list over 50 individual fuses, underscoring the need for a complete and trusted guide to navigate it effectively.
Always verify the diagram number with the corresponding fuse number on the physical fuse box. Some diagrams may be generic, so visual confirmation of the amperage and color of the existing fuse is an extra layer of reliability before replacement.
Audible Premium Plus — Annual Membership
12 audiobook credits up front, plus the full Audible catalogue.
See Annual PlansDiagnosing Common Electrical Issues with Your 2014 Altima Fuses
Recommended Best Deal Products


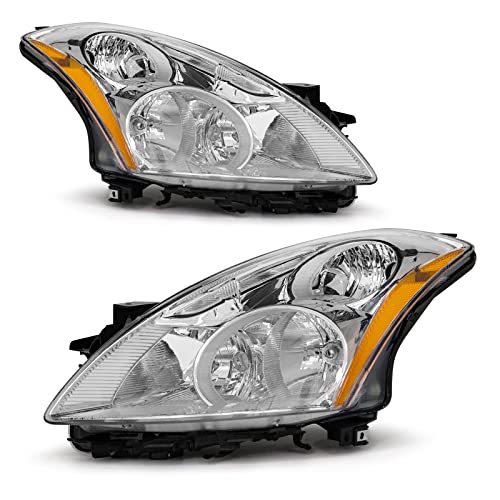
Effectively diagnosing electrical issues in your 2014 Nissan Altima often begins with identifying and inspecting fuses. While the average lifespan of a vehicle fuse is designed to exceed the vehicle’s operational life, they blow under specific fault conditions like a short circuit, which can draw hundreds of amps instantaneously. Here’s a practical, step-by-step approach to troubleshooting common fuse-related problems, empowering you to perform basic diagnoses with confidence.
📋
Step-by-Step Guide: Fuse Diagnosis
Start by noting the specific component that has ceased functioning. For instance, if your headlights are not working, this points to the headlight circuit. Next, consult your owner’s manual or the fuse box lid diagram to identify which fuse box (engine bay or cabin) contains the fuse(s) for that component. For headlights, you’d likely look in the engine compartment fuse box.
Using the diagram for precise fuse identification, carefully remove the suspected fuse. Many fuse boxes contain a small fuse puller tool on the inside of the lid, which makes this process safer and easier. Hold the fuse up to the light. A good fuse will have an unbroken metal wire or strip connecting the two terminals. A blown fuse will show a visibly broken or melted filament. This is often the quickest way to identify the fault.
For a reliable verification, especially when visual inspection is inconclusive (some fuses don’t show clear breaks), use a multimeter set to continuity mode or a dedicated fuse tester. Touch the probes to the metal contacts on top of the fuse. A good fuse will show continuity (a beep or a reading of zero ohms), while a blown fuse will show an open circuit (no beep or an ‘OL’ reading). This provides a professional and accurate method for verifying fuse integrity.
If you replace a blown fuse, and the new fuse blows immediately, this is a strong indicator of a deeper short circuit within the component or its wiring. This scenario requires expert diagnostic attention beyond a simple fuse replacement. Persistent issues like flickering lights, complete system failure for a connected component, or even an inexplicable burning smell are all symptoms that warrant careful investigation.
Understanding these diagnostic steps ensures a quality approach to identifying electrical faults, differentiating simple fuse issues from more complex underlying problems that require professional tools and expertise.
Best Practices for Fuse Replacement and Electrical System Maintenance
Replacing a blown fuse is often a straightforward task, but adhering to best practices is paramount to ensure the ongoing reliability and safety of your 2014 Nissan Altima’s electrical system. This isn’t just about getting the component working again; it’s about preventing further damage and maintaining the integrity of the entire network, ensuring a quality and trusted repair.
Step-by-Step Safe Fuse Replacement:
- Ensure Vehicle is Off: Always begin with the ignition in the “OFF” position and, ideally, the key removed to prevent accidental power surges or component activation.
- Identify Correct Amperage: Crucially, using the fuse box diagram, confirm the exact amperage rating for the fuse you are replacing. Never guess.
- Use a Fuse Puller: Carefully remove the blown fuse using the plastic fuse puller tool provided in many fuse boxes, or a pair of needle-nose pliers if a puller isn’t available. Avoid using metal tools that could short circuits.
- Insert New Fuse: Take a new fuse of the exact specified amperage and type (e.g., mini, regular, maxi blade fuse). Align it with the empty slot and gently push it straight down until it is fully seated and secure. A properly replaced fuse will sit flush.
Replacing a 10A fuse with a 20A fuse in a circuit designed for 10A is extremely dangerous. It allows up to twice the designed current to flow, potentially overheating and melting wires, damaging expensive electronic modules (like the ECU or BCM), or causing an electrical fire. Conversely, a lower-rated fuse will blow prematurely, creating unnecessary hassle.
When sourcing replacement fuses, always recommend reputable automotive parts suppliers. OEM (Original Equipment Manufacturer) fuses are typically tested to stringent standards, guaranteeing reliable performance and proper current interruption characteristics. Avoid generic, unbranded fuses, as their quality can be inconsistent, potentially compromising circuit protection.
General Electrical System Maintenance Advice:
Battery Terminal Checks
Regularly inspect your battery terminals for signs of corrosion (a white or greenish powdery substance). Corroded terminals hinder current flow, leading to charging issues and electrical inconsistencies. Clean them with a wire brush and a baking soda solution.
Grounding Connections
Ensure all grounding connections throughout the engine bay and chassis are clean and secure. Poor grounds are a common cause of intermittent electrical problems and component malfunctions.
Aftermarket Modifications
Avoid aftermarket electrical modifications (e.g., stereo upgrades, auxiliary lighting) without professional consultation. Improper wiring or excessive loads can strain the electrical system and lead to fuse failures or more serious damage.
Routine Fuse Box Inspections
Perform routine visual inspections of your fuse boxes for signs of moisture, corrosion, or burnt plastic, which can degrade electrical connections and lead to intermittent issues. Ensure covers are securely fastened to prevent environmental ingress.
Following these professional maintenance guidelines will significantly contribute to the longevity and trouble-free operation of your Altima’s electrical system, reinforcing the quality and reliability Nissan intended.
Safety Protocols and Knowing When to Engage Professional Assistance for Your Altima
While understanding your 2014 Nissan Altima’s fuse box diagrams and performing basic fuse replacement can save time and money, working with vehicle electrical systems demands strict adherence to safety protocols. More complex issues also necessitate the intervention of expert, trusted automotive technicians.
Fundamental Safety Precautions:
- Disconnect Battery: Before undertaking any extensive electrical work beyond simple fuse replacement, always disconnect the negative battery terminal. This eliminates the risk of accidental short circuits or electrical shock.
- Personal Protective Equipment (PPE): Wear appropriate PPE, including safety glasses to protect against sparks or flying debris, and electrical-rated gloves if working with live circuits (though this should generally be avoided by DIYers).
- Avoid Contact with Live Circuits: Never probe live electrical circuits without proper training and equipment. The 12-volt system can still deliver a significant current, causing burns or damaging sensitive components.
- Use Insulated Tools: If working near battery terminals or other high-current areas, ensure your tools are insulated to prevent accidental shorting.
The risks associated with improper electrical work are substantial. Beyond personal injury from electrical shock, there’s a significant danger of damaging sensitive electronic control units (ECUs), such as the Engine Control Module (ECM) or Body Control Module (BCM). Modern vehicle electrical systems are intricate, and incorrect voltage or current can render these modules inoperable, costing thousands of dollars to replace. Furthermore, improper repairs can lead to vehicle fires, posing a grave safety hazard. This reinforces the need for professional handling of complex electrical diagnostics.
When to Seek Professional, Expert Intervention:
✅ Scenarios for Professional Help
- Recurring Blown Fuses: If a fuse repeatedly blows even after replacement, it signals an underlying short circuit or component failure (e.g., a pinched wire, a faulty motor). This requires an expert diagnostic approach.
- Symptoms of Short or Open Circuit: Indicators like melted wires, burning smells, or erratic electrical behavior suggest more than a simple fuse issue.
- Critical Safety Systems: Problems affecting airbags, ABS, traction control, or steering require immediate professional attention due to their direct impact on vehicle safety.
- Complex Diagnostic Trouble Codes (DTCs): Modern Altima models generate specific codes for electrical faults that require specialized scan tools and expert interpretation.
- Intermittent Electrical Issues: Problems that come and go are notoriously difficult to diagnose without advanced equipment like oscilloscopes and experienced technicians.
❌ Risks of DIY in Complex Cases
- Component Damage: Incorrect testing or repair can damage sensitive ECUs, leading to costly replacements.
- Escalated Problems: Misdiagnosis can lead to further electrical issues, turning a minor problem into a major repair.
- Safety Hazards: Risk of electrical shock or vehicle fire due to improper wiring or overload.
- Invalidated Warranties: Attempting complex repairs yourself might void certain vehicle warranties.
For situations beyond basic fuse replacement, always seek out trusted automotive technicians with specialized diagnostic equipment and deep expertise in Nissan electrical systems. These professionals possess advanced scan tools, multimeters, and oscilloscopes, allowing them to pinpoint faults with precision. While electrical system diagnosis can typically range from $100-$200 per hour at a professional shop, this investment is minimal compared to the potential costs and safety risks of improper DIY attempts. An expert provides a complete guide to quality, lasting repairs, ensuring your Altima’s continued performance and your peace of mind.
By The Numbers
Fuses in a typical Altima
Cost of BCM replacement
Max fuse rating for major circuits
Standard DC system voltage
Properly locating and understanding your 2014 Nissan Altima’s fuse box diagrams is crucial for effective electrical maintenance, serving as a reliable and complete guide to your vehicle’s intricate systems. Accurate diagnosis of blown fuses, coupled with the exclusive use of correct amperage replacements, prevents further system damage, ensures operational safety, and maintains the overall quality of your Altima’s electrical health. While basic fuse replacement is a manageable DIY task, persistent electrical issues, recurring fuse failures, or problems affecting critical safety systems warrant immediate professional, expert attention. Refer to your 2014 Nissan Altima’s owner’s manual for model-specific diagrams, and for any recurring or complex electrical concerns, consult a trusted automotive professional to ensure your vehicle’s continued quality performance and long-term reliability.
Frequently Asked Questions
Where are the primary fuse boxes located in a 2014 Nissan Altima?
The 2014 Nissan Altima typically has two main fuse box locations. One is in the engine compartment, usually near the battery or fender, covered by a black plastic lid. The second is in the passenger cabin, often situated behind a small access panel on the driver’s side dashboard or lower kick panel. Consult your owner’s manual for precise diagrams.
How can I tell if a fuse is blown in my 2014 Altima?
You can visually inspect a fuse by carefully removing it with a fuse puller (often found in the fuse box cover). A blown fuse will typically have a visible break in the metal wire connecting the two prongs. For a more reliable check, use a multimeter set to continuity mode; a blown fuse will show no continuity, while a good one will.
What type of fuses does the 2014 Nissan Altima commonly use?
The 2014 Nissan Altima primarily uses ATO/ATC blade-type fuses, which are flat and come in various sizes (mini, regular, maxi) and amperage ratings. These fuses are color-coded according to their amperage, making visual identification easier. Always ensure replacement fuses match the original’s amperage and physical dimensions exactly for reliable operation.
Can I use a higher amperage fuse if the correct one keeps blowing?
Absolutely not. Using a fuse with a higher amperage rating than specified is a serious safety risk. Fuses are designed to protect the circuit by blowing when overloaded. A higher-rated fuse will allow excessive current to flow, potentially overheating wiring, damaging expensive electrical components, or causing a vehicle fire. Always use the exact specified amperage.
What electrical issues might indicate a faulty fuse in my 2014 Altima?
Common indicators of a faulty fuse include a specific electrical component or system suddenly ceasing to function (e.g., radio, power windows, headlights, turn signals). If multiple unrelated components fail simultaneously, it might point to a larger electrical issue or a main fuse. Always consult the fuse box diagram to match symptoms to specific circuits.