The serpentine belt, often overlooked, is a critical component ensuring your 2008 Honda CR-V operates efficiently. This single, continuous belt powers an array of essential engine accessories, from the alternator keeping your battery charged to the power steering pump making turns effortless. Without a clear understanding of its routing and function, owners face significant challenges in diagnostics and maintenance, potentially leading to unexpected breakdowns or costly, avoidable repairs. This article provides a detailed, authoritative guide to the 2008 Honda CR-V serpentine belt diagram, empowering you with the knowledge to identify, understand, and address issues confidently, ensuring your vehicle remains a reliable and trusted companion on the road.
Mastering the 2008 Honda CR-V serpentine belt diagram is fundamental for proactive maintenance, swift diagnostics, and ensuring the uninterrupted operation of critical engine accessories. Accurate routing is paramount for preventing system failures.
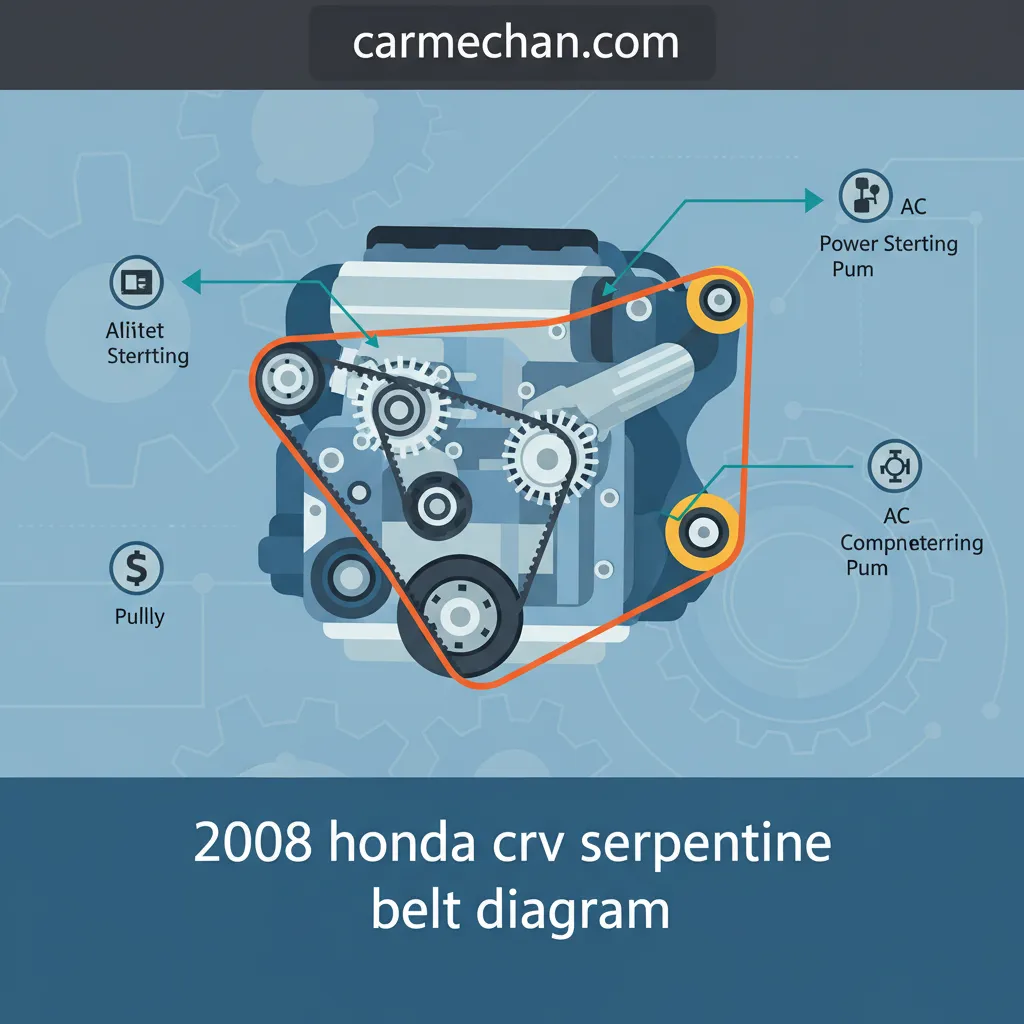
2008 honda crv serpentine belt diagram
Understanding the Vital Role of the 2008 Honda CR-V Serpentine Belt
2008 Honda Crv Serpentine Belt Diagram: Technical Routing And Maintenance
The serpentine belt, a component often taken for granted until it fails, is the linchpin of your 2008 Honda CR-V’s accessory drive system. It is a single, continuous belt meticulously engineered to transmit power from the engine’s crankshaft to multiple peripheral devices. Its primary function is to ensure these critical accessories operate seamlessly, contributing directly to the vehicle’s overall performance and safety.
In a 2008 Honda CR-V, specifically equipped with the robust K24-series engine, the serpentine belt is responsible for driving several key components. These typically include the alternator, which generates electrical power to charge the battery and run the vehicle’s electrical systems; the power steering pump, essential for hydraulic power assist that makes steering effortless; and the air conditioning compressor, which circulates refrigerant to keep the cabin cool. While some engines route the water pump via the serpentine belt, Honda’s K24 engine usually features an internal, timing chain-driven water pump, meaning the serpentine belt specifically focuses on the external accessories mentioned. This streamlined design underscores the belt’s multifaceted responsibility.
The consequences of belt failure are immediate and severe. Imagine driving and suddenly experiencing a complete loss of power steering assist, making the steering wheel incredibly heavy and difficult to turn. Simultaneously, your battery light illuminates as the alternator ceases to charge, leading inevitably to a dead battery and vehicle shutdown. This scenario is not theoretical; a snapped or severely worn serpentine belt invariably leads to operational paralysis, often requiring immediate roadside assistance and potentially costly towing. A comprehensive understanding of its health and routing is paramount.
Modern serpentine belts are testament to advanced materials science. Typically constructed from Ethylene Propylene Diene Monomer (EPDM) rubber, these belts are designed for exceptional durability, flexibility, and resistance to wear, heat, and ozone. This specialized construction allows them to endure the constant flexing, high temperatures, and diverse loads inherent in engine operation. This quality engineering ensures a long service life under normal conditions. Modern serpentine belts are engineered to last between 50,000 to 100,000 miles, though factors like persistent exposure to extreme temperatures, fluid contamination, and aggressive driving can significantly reduce this lifespan. Proactive attention is a hallmark of professional vehicle maintenance.
2008 honda crv serpentine belt diagram
Locating the Serpentine Belt and Key Pulleys on Your 2008 Honda CR-V Engine
Before you can accurately interpret a 2008 Honda CR-V serpentine belt diagram, you must first be able to physically locate the belt and its associated pulleys within your vehicle’s engine bay. This initial visual inspection is a fundamental step in any comprehensive maintenance routine. Standing in front of your 2008 CR-V, the serpentine belt system is typically found on the passenger side of the engine, visible and accessible, running vertically along the engine block.
Identifying major pulleys correctly is crucial. Start by locating the crankshaft pulley, which is the largest pulley situated at the lowest point of the engine, directly connected to the engine’s crankshaft. This pulley powers all other accessories. From there, your eye should trace the belt’s path to:
The alternator pulley, typically positioned higher up, often towards the top-front of the engine, distinguished by its electrical wiring harness.
The power steering pump pulley, usually located towards the upper portion of the engine bay, near the front, connected to the power steering fluid reservoir.
The AC compressor pulley, generally found lower down, towards the front or bottom of the engine, identifiable by the refrigerant lines connected to the compressor unit.
Idler pulleys, which are smooth, unpowered pulleys designed solely to guide the belt and provide the correct wrap angle around other components.
The 2008 CR-V’s K24-series engine utilizes a single serpentine belt for all external accessories, a streamlined design that simplifies physical tracing and diagram interpretation compared to older multi-belt configurations.
A critical component to identify is the automatic belt tensioner mechanism. This device maintains the correct tension on the serpentine belt throughout its life, compensating for slight belt stretch and variations in load. The tensioner typically consists of a spring-loaded arm and a pulley. You’ll usually find it positioned strategically along the belt’s path, often with a square drive opening designed for a wrench or breaker bar, which is used to relieve tension for belt removal or installation. Its robust design is vital for ensuring reliable operation of the accessory drive system.
After locating these components, perform a visual inspection for belt condition. With the engine off and cool, use a strong flashlight to meticulously examine the entire length of the belt, paying close attention to both the ribbed and smooth sides. Look for:
Cracks: Especially transverse cracks across the ribbed surface.
Fraying or shredding: Along the edges of the belt.
Glazing: A shiny, hardened appearance on the ribbed or smooth surfaces, indicating loss of grip.
Missing chunks or ribs: This is a clear sign of impending failure.
The 2008 CR-V (K24Z1 or K24A1 engine) often presents a relatively accessible belt path, making this visual quality check less cumbersome. This proactive inspection forms the basis of expert vehicle maintenance, allowing anticipation of potential issues.
Decoding the 2008 Honda CR-V Serpentine Belt Routing Diagram
Understanding the 2008 Honda CR-V serpentine belt diagram is an absolute necessity for inspection, maintenance, or replacement. Incorrect routing is a prevalent error, often leading to immediate belt squealing, premature wear, or complete system failure. Having the correct, vehicle-specific diagram at hand is crucial. The most reliablesources of the diagram are typically found on a sticker affixed under the hood, usually near the radiator support or on the underside of the hood itself. Failing that, the owner’s manual or a dedicated service manual will provide the official diagram. Various online resources also offer these diagrams, but always cross-reference to ensure accuracy for your specific 2008 CR-V model (K24 engine variant).
When examining the diagram, you’ll notice key diagram symbols and conventions designed to clearly illustrate the belt’s path. Look for:
Arrows: These indicate the direction of the belt’s rotation, crucial for confirming correct routing.
Labels: Components are typically labeled with abbreviations such as ALT (Alternator), AC (Air Conditioning compressor), PS (Power Steering pump), and CRANK (Crankshaft pulley).
Pulley types: The diagram often differentiates between grooved pulleys (where the ribbed side of the belt makes contact) and smooth idler pulleys (where the smooth, backside of the belt makes contact). This distinction is vital for proper belt alignment and function.
A complete understanding of these symbols ensures you’re not just looking at lines, but interpreting a functional guide.
📋
Step-by-Step Guide: Tracing the Serpentine Belt Path
1
Locate the Starting Point
Always begin your trace from the crankshaft pulley (CRANK). This is the engine’s main drive pulley and serves as the primary power source for the belt system. Visualize the belt exiting this pulley and observe its immediate trajectory.
2
Follow the Path Sequentially
Methodically follow the belt as it wraps around each accessory pulley and idler pulley. For the 2008 Honda CR-V K24 engine, a common routing sequence is: ‘Starting from the bottom (crankshaft), the belt typically travels up to the power steering pump, across to an idler pulley, down to the AC compressor, then up to the alternator, and finally across the tensioner before returning to the crankshaft.’ Pay close attention to whether the belt contacts a pulley on its ribbed or smooth side.
The tensioner pulley’s depiction in the diagram is critical. It shows where the tensioner applies its force to maintain belt tautness. Ensure your tracing matches the diagram’s depiction of the tensioner’s role in the belt’s overall path. Incorrect routing, especially around the tensioner, will lead to improper tension, causing noise or slippage.
By meticulously following these steps, you can confidently decode the serpentine belt routing for your 2008 Honda CR-V. I cannot overstate that incorrect belt routing is a common error during DIY replacement, often leading to immediate belt squealing, premature failure due to improper tension, or even severe system damage due to the belt contacting incorrect surfaces. Always take the time to compare your physical routing with the diagram, ensuring a professional and accurate setup. This meticulous approach builds trusted automotive service.
Identifying Common Serpentine Belt Malfunctions and Maintenance on a 2008 CR-V
Proactive identification of serpentine belt malfunctions is key to preventing unexpected breakdowns in your 2008 Honda CR-V. As an expert, I’ve seen countless vehicles sidelined by easily avertible issues. Recognizing the symptoms of a worn or failing belt is the first line of defense.
Audible Cues: The most common symptom is noise. A loud squealing upon startup, especially in cold or damp conditions, often points to a loose or glazed belt. A persistent chirping or ticking noise might indicate a misaligned pulley, a failing idler bearing, or even contamination. A deep grinding sound usually suggests a severely worn bearing in an accessory or idler pulley, which can quickly lead to belt shredding.
Visual Indicators: As discussed earlier, a visual inspection is paramount. Look for deep cracks across the belt’s ribs, fraying along the edges, missing chunks of rubber, or a shiny, glazed appearance. These are all definitive signs of material degradation and a diminished ability to grip pulleys effectively.
Operational Issues: Beyond noise and visual cues, a failing belt can manifest as dimming headlights at idle (due to the alternator slipping), harder than usual steering (if the power steering pump is struggling), or an AC system that blows warm air intermittently. These symptoms indicate inconsistent power delivery to the accessories.
Establishing regular inspection procedures is vital for extending belt life and ensuring reliable operation. I recommend a thorough visual check of the serpentine belt and its associated pulleys every 10,000 to 15,000 miles or at least once a year. While the 2008 CR-V features an automatic tensioner, it’s still prudent to observe its movement for any signs of excessive vibration or sluggish response, which could indicate a failing tensioner unit. Also, check for proper pulley alignment by ensuring all pulleys are spinning on a single plane without wobble. Any noticeable misalignment can quickly lead to accelerated belt wear.
💡
Pro Tip
When inspecting, use a piece of chalk to draw a line across the ribbed surface of the belt. If the line appears broken or uneven after a short period of engine operation, it can indicate belt slippage, even if not audibly squealing, pointing towards glazing or improper tension.
Several factors contribute to causes of premature belt wear. The most common culprits include:
Misaligned pulleys: Even a slight misalignment (e.g., a fraction of an inch) can cause the belt to ride improperly, leading to edge wear, noise, and reduced lifespan. This often stems from improper installation or a worn component bearing.
Fluid contamination: Oil, power steering fluid, or coolant leaks dripping onto the belt can severely degrade the EPDM rubber, causing it to soften, swell, and lose its friction properties. This is a critical issue that must be addressed promptly.
Excessive accessory load: While less common for the serpentine belt itself, a failing accessory (e.g., a seizing AC compressor) can place undue stress on the belt and the tensioner.
Prolonged exposure to extreme temperatures: Consistent cycling between very hot and very cold conditions can accelerate the rubber’s hardening and cracking process.
Addressing specific issues often requires careful diagnosis. For example, a constant chirping noise might indicate a misaligned pulley or a failing idler bearing, requiring closer inspection of each rotating component. A loud squeal on startup that quickly disappears usually signals a slightly glazed or marginally loose belt, while a constant squeal points to a more significant issue, potentially a failing tensioner or a severely glazed belt. It’s important to remember that, according to industry data, 20-30% of drive belt-related issues are due to tensioner failure rather than the belt itself, underscoring the importance of inspecting the entire system, not just the belt. A comprehensive diagnostic approach ensures the root cause is identified and remedied, rather than merely treating symptoms.
⚠️
Important Warning
Never ignore persistent noises from your serpentine belt system. These are not merely annoyances; they are critical indicators of underlying issues that can lead to catastrophic system failure and significant repair costs if left unaddressed.
Basic Considerations for 2008 Honda CR-V Serpentine Belt Service and Replacement
When it comes to the serpentine belt on your 2008 Honda CR-V, understanding when to consider replacement is as important as knowing how it works. Beyond the 50,000 to 100,000-mile interval, prioritize visual inspection findings. If you observe deep cracks that penetrate multiple ribs, significant fraying, material loss, or chunks missing from the belt, immediate replacement is warranted regardless of mileage. Furthermore, the age of the belt plays a crucial role; even if a belt hasn’t reached its mileage limit, the rubber can degrade over time. A good rule of thumb is to consider replacement every 5-7 years, as material integrity can compromise its quality and reliable performance.
For those considering a DIY approach, possessing the essential tools and safety precautions is non-negotiable. At a minimum, you’ll need:
An appropriate-sized wrench or breaker bar (typically 14mm or 19mm, but verify with your service manual) to rotate the automatic tensioner.
Your 2008 Honda CR-V serpentine belt diagram for accurate routing.
Proper lighting, such as a strong flashlight or work light.
Critical safety measures include ensuring the engine is completely off and cool before attempting any work. Always wear appropriate eye protection and gloves. If jacking up the vehicle is necessary for better access (which is often recommended for the CRV’s lower crankshaft pulley), always use sturdy jack stands on a level surface; never rely solely on a jack. Safety should always be your top priority, especially when working in the engine bay.
The overview of the replacement process is relatively straightforward, though precise execution is key:
Relieve tension: Using your wrench or breaker bar, rotate the automatic tensioner pulley arm to relieve tension on the belt.
Remove old belt: Carefully slide the old belt off the pulleys, starting with an easy-to-reach pulley.
Route new belt: Following the 2008 Honda CR-V serpentine belt diagram precisely, route the new belt around all pulleys, leaving the tensioner pulley for last. This is where the diagram’s accuracy is most critical.
Release tensioner: Once the belt is correctly seated on all other pulleys, rotate the tensioner arm again to create slack, slip the belt over the tensioner pulley, and then slowly release the tensioner to apply proper tension.
Check alignment: Double-check that the belt is perfectly seated in all pulley grooves and that no edges are hanging off.
Start the engine briefly and listen for any abnormal noises. Re-inspect after a short drive.
Deciding between DIY vs. professional service often comes down to comfort level and experience. If you are unfamiliar with engine bay work, encounter seized or rusted components, or are simply unsure about correctly interpreting the diagram or achieving proper tension, professional assistance is highly advisable. A certified technician has the expert knowledge, specialized tools, and diagnostic capabilities to ensure the job is done correctly. While a DIY replacement can save on labor costs, an incorrectly installed belt can lead to more significant, expensive damage. For a complete and accurate replacement, a professional hand offers peace of mind.
Finally, choosing the right replacement belt is paramount. Always emphasize selecting a belt specifically designed for the 2008 Honda CR-V. Using an OEM part number (e.g., Honda’s OEM part number for the 2008 CR-V is typically 31110-RMA-E01 or similar, though always verify with your VIN) ensures optimal fit, material quality, and durability. Reputable aftermarket brands like Gates or Continental also offer high-quality options that meet or exceed OEM specifications. Studies show that non-OEM or low-quality aftermarket belts can reduce lifespan by up to 30%, leading to earlier replacement and potential system damage. Invest in trusted components for your CR-V’s reliable operation.
✅ Enhanced Durability
High-quality belts resist wear, heat, and cracks for a longer service life.
The serpentine belt is undeniably a small but mighty component, absolutely essential for operating multiple critical engine accessories in your 2008 Honda CR-V. From power steering to battery charging and climate control, its uninterrupted function is paramount for both convenience and safety. Accurate understanding of the 2008 CR-V’s specific belt routing diagram is paramount for proper maintenance, correct replacement, and effective diagnostics, preventing common and often costly errors. Through regular inspection, prompt attention to wear symptoms, and adherence to recommended service intervals, you can actively prevent major operational failures, extend your vehicle’s longevity, and ensure its continued reliable performance. For specific guidance tailored to your vehicle’s condition, or if you encounter any uncertainty, always consult your vehicle’s service manual or a certified professional technician. Prioritize safety during any belt inspection or service to protect both yourself and your investment.
Frequently Asked Questions
How often should I inspect the serpentine belt on my 2008 Honda CR-V?
It is professionally recommended to inspect the serpentine belt every 15,000 miles or annually, whichever comes first. Look for visible cracks, fraying, glazing, or any signs of wear. Honda’s service schedule typically suggests a more thorough inspection at specific mileage intervals, often around 30,000 to 45,000 miles, with replacement usually between 50,000 and 100,000 miles, depending on condition and environment.
What are the common symptoms of a failing serpentine belt on a 2008 CR-V?
Common symptoms include audible squealing or chirping noises, especially on startup or when turning the steering wheel. Visually, you might notice cracks, fraying, or a ‘glazed’ appearance. Operational issues can also arise, such as dimming headlights (alternator failure), stiff steering (power steering loss), or an illuminated battery light on the dashboard, indicating a charging system problem.
Can I drive my 2008 Honda CR-V with a broken serpentine belt?
No, it is highly inadvisable to drive your 2008 Honda CR-V with a broken serpentine belt. Doing so will immediately result in the loss of critical functions like power steering, battery charging (leading to eventual vehicle shutdown), and potentially engine cooling (if the water pump is belt-driven). Driving without these functions can cause significant damage to other engine components and create dangerous driving conditions.
Where can I find the official serpentine belt diagram for my 2008 Honda CR-V?
The official serpentine belt diagram for your 2008 Honda CR-V can typically be found on a sticker located under the hood, usually near the front of the engine bay. If it’s missing or illegible, refer to your vehicle’s owner’s manual or the factory service manual. Reliable online resources for automotive diagrams, often specific to your CR-V’s engine code (e.g., K24Z1), are also excellent options.
Is it difficult to replace the serpentine belt on a 2008 Honda CR-V myself?
Replacing the serpentine belt on a 2008 Honda CR-V is a moderately challenging DIY task. It requires specific tools, understanding of the tensioner mechanism, and precise adherence to the routing diagram. While many mechanically inclined individuals can perform it, incorrect routing or tensioning can lead to immediate belt failure or damage to accessories. If unsure, professional installation is a reliable and recommended option to ensure quality.
Rayan is the founder, author, and editor of CarMechan.com, a leading automotive resource dedicated to providing accurate, up-to-date, and comprehensive information on vehicle maintenance, repairs, and performance enhancements. As a professional automotive technician, Rayan brings a wealth of knowledge and expertise to the table.
In addition to his automotive expertise, Rayan is an adept writer and editor who has published more than 500 articles on various automotive topics. His dedication to providing useful, reliable, and trustworthy content has earned him the respect of car owners and enthusiasts worldwide.
Last Updated on September 1, 2026 by Ryan 📋 In This Guide How to Find the 2017 Nissan Armada Oil Filter Location Why We Chose to Document This Oil Change Process How to Replace 2017 Armada Engine Oil in 7 Steps What Are the Cost Savings of DIY Oil Maintenance 3 Common Mistakes With Nissan…
Last Updated on September 1, 2026 by Ryan 📋 In This Guide Diagnostic Scope vs Component Limits for Heater Testing Who Needs Cold Cabin Diagnostic Instructions for Passenger Vehicles How to Troubleshoot Defective Car Heating Systems in 7 Steps When to Shut Down Overheating Engines With Heater Failures 5 Most Common DIY Mistakes Fixing Cold…
📌 Quick Summary If your cruise control disengages, it is almost always triggered by a safety fail-safe intended to protect the vehicle. The system detects a fault in critical sensor data, such as speed input or brake status, and kills power to prevent unintended acceleration. Recommended Best Deal Products HUSUKU Steering Wheel Mounted Cruise Control…
Last Updated on September 1, 2026 by Ryan 📋 Table of Contents 🎯 Key Takeaways Understanding the 2019 Nissan Sentra TPMS System Master Your 2019 Nissan Sentra TPMS Reset in 7 Simple Steps The Importance of the TPMS Reset Button 💬 Quick Questions & Answers ❓ Frequently Asked Questions 📌 Quick Summary Recommended Best Deal…
Last Updated on September 1, 2026 by Albert Duke Quick Summary Recommended Best Deal Products 200W Super Fast Car Charger, Adapter with 2×100W USB C to C… 4.7/5 · 129 reviews Check Price GiveBest Space Heater, Portable Space Heaters for Indoor Use | Desk Heater… 4.4/5 · 81.7K reviews Check Price SEEKONE 1800W Heat Gun…






![[2026 Upgraded] DooGooCoo Windshield Sun Shade for Honda CRV 2017-2021 2022 [Cooling…](https://m.media-amazon.com/images/I/51tfKv3G1ML._SS500_.jpg)