How to Heat a Garage: Top Methods, Costs & Safety Tips
Last Updated on September 1, 2026 by Ryan
Heating your garage effectively requires understanding the diverse options available and matching them to your specific needs. Consider your garage size, insulation, power access, and desired temperature to select the most efficient and safe heating solution. This guide breaks down popular methods, costs, and key considerations for a comfortable workspace.
🎯 Key Takeaways


- Evaluate garage insulation and size first.
- Choose heaters based on fuel, power, and ventilation.
- Prioritize safety with proper ventilation and installation.
- Compare upfront costs with long-term energy efficiency.
- Maximize heat retention with weatherstripping and sealing.
Choosing the right heating system for your garage involves balancing initial costs, ongoing energy expenses, installation complexity, and your specific use case. From quick portable solutions to permanent, high-efficiency systems, each option has distinct advantages and considerations regarding operation, suitability, and safety. The best method for you hinges directly on your garage’s characteristics and your personal requirements.

Understanding these variables is crucial for making an informed decision that ensures comfort without breaking the bank or compromising safety. Whether you need a slight chill taken off for occasional tasks or a consistently warm workspace, delving into the nuances of each heating method and evaluating your garage’s unique setup will guide you to the ideal choice.
Understanding Popular Garage Heating Methods


Heating a garage isn’t a one-size-fits-all endeavor. The primary heating methods range widely in power, efficiency, and installation requirements. Getting to grips with how each system operates, its typical initial cost, and its main pros and cons will clarify your options.

Electric Heaters: Portable, Wall-Mounted & Infrared
- Portable Electric Heaters:
- Operation: Plug-and-play convenience. They use resistance coils or ceramic elements to generate heat and often include a fan to circulate warm air.
- Suitability: Best for small garages, targeted spot heating, or infrequent, short-term use. They require no installation beyond an electrical outlet.
- Initial Cost:
Typically the lowest, ranging from $30-$200.
- Benefits: Highly portable, no venting required, immediate heat.
- Drawbacks: Can be inefficient for larger or poorly insulated spaces, high running costs for continuous use, potential trip hazards, safety concerns if left unattended. Most operate on standard 120V circuits.
- Wall-Mounted Electric Unit Heaters:
- Operation: Permanent fixtures mounted on walls or ceilings, usually hardwired into your electrical system (often requiring 240V). They powerfully blow heated air into the space.
- Suitability: Good for medium to large garages, providing more consistent heat than portable units. Best for moderately insulated spaces.
- Initial Cost:
Mid-range, from $200-$1,000, plus potential electrician costs for wiring.
- Benefits: Free up floor space, more durable, generally safer than portables, efficient for their power output.
- Drawbacks: Higher installation cost, still expensive to run continuously due to electricity rates, can be slow to heat very large or uninsulated areas.
- Electric Infrared Heaters:
- Operation: Emits radiant heat that warms objects and people directly, rather than the air. Similar to how the sun feels.
- Suitability: Excellent for zone heating, drafty garages, or spaces with high ceilings where heating all the air is impractical. Can be portable or wall-mounted.
- Initial Cost:
Varies widely, $100-$500 depending on size and power.
- Benefits: Highly efficient for targeted heating, immediate warmth, unaffected by drafts, quiet operation.
- Drawbacks: Does not heat the ambient air, so cold spots may persist if you move away from the direct radiant path; higher running costs if trying to heat an entire large space.
Propane/Natural Gas Heaters: Forced Air & Radiant
- Forced Air Gas Heaters (Garage Furnaces):
- Operation: These units burn propane or natural gas to heat a heat exchanger, then a fan blows warm air through ductwork or directly into the space. They require venting for combustion byproducts.
- Suitability: Ideal for larger garages or those needing rapid, powerful heating. Excellent for frequent use and maintaining a consistent temperature.
- Initial Cost:
Higher, typically $500-$2,000, plus installation for gas lines and venting.
- Benefits: Very powerful, heats quickly and efficiently, lower running costs than electric for continuous use (depending on fuel prices).
- Drawbacks: Requires access to natural gas or storage for propane tanks, professional installation for gas lines and venting is crucial for safety, can be noisy, consumes oxygen (if unvented).
- Radiant Tube Gas Heaters:
- Operation: Gas is burned inside a tube, heating the tube itself, which then emits infrared radiant heat downwards onto objects and surfaces. Also requires venting.
- Suitability: Great for very large garages, high ceilings, or drafty environments where conventional forced air would be inefficient. Heats objects directly.
- Initial Cost:
Highest initial cost among gas heaters, $1,000-$3,000+, plus installation.
- Benefits: Extremely efficient for large spaces, very quiet, comfortable radiant heat, not affected by drafts, frees up floor space.
- Drawbacks: Significant initial investment and professional installation required; does not warm the ambient air directly; less effective for small, cluttered spaces.
Ductless Mini-Splits (Heat Pumps)
- Operation: A two-part system with an outdoor compressor/condenser and an indoor air-handling unit. It moves heat, rather than generating it, making it highly efficient for both heating and cooling.
- Suitability: Perfect for well-insulated garages used frequently, offering year-round comfort with both heating and air conditioning.
- Initial Cost:
Significant, $1,500-$4,000+, plus professional installation.
- Benefits: Extremely energy-efficient, provides both heating and cooling, quiet operation, precise temperature control, no combustion byproducts.
- Drawbacks: High upfront cost, requires professional installation, performance can decrease in extreme cold, best in insulated spaces.
Wood-Burning Stoves
- Operation: Burns wood to generate heat, which radiates from the stove and out through a chimney system.
- Suitability: Best for those with access to affordable wood, seeking rustic ambiance, and willing to manage fuel and ash. Requires substantial clearance and a dedicated chimney.
- Initial Cost:
$500-$2,500 for the stove, plus significant costs for chimney, hearth, and professional installation (can be $1,000-$4,000+ total).
- Benefits: Very low running costs if wood is free or cheap, provides intense, comfortable heat, independent of electrical grid (though some have fans).
- Drawbacks: Requires constant feeding, messy (ash, wood storage), fire safety is paramount, needs proper ventilation/chimney, not suitable for all areas due to emissions regulations.
Radiant Floor Heating
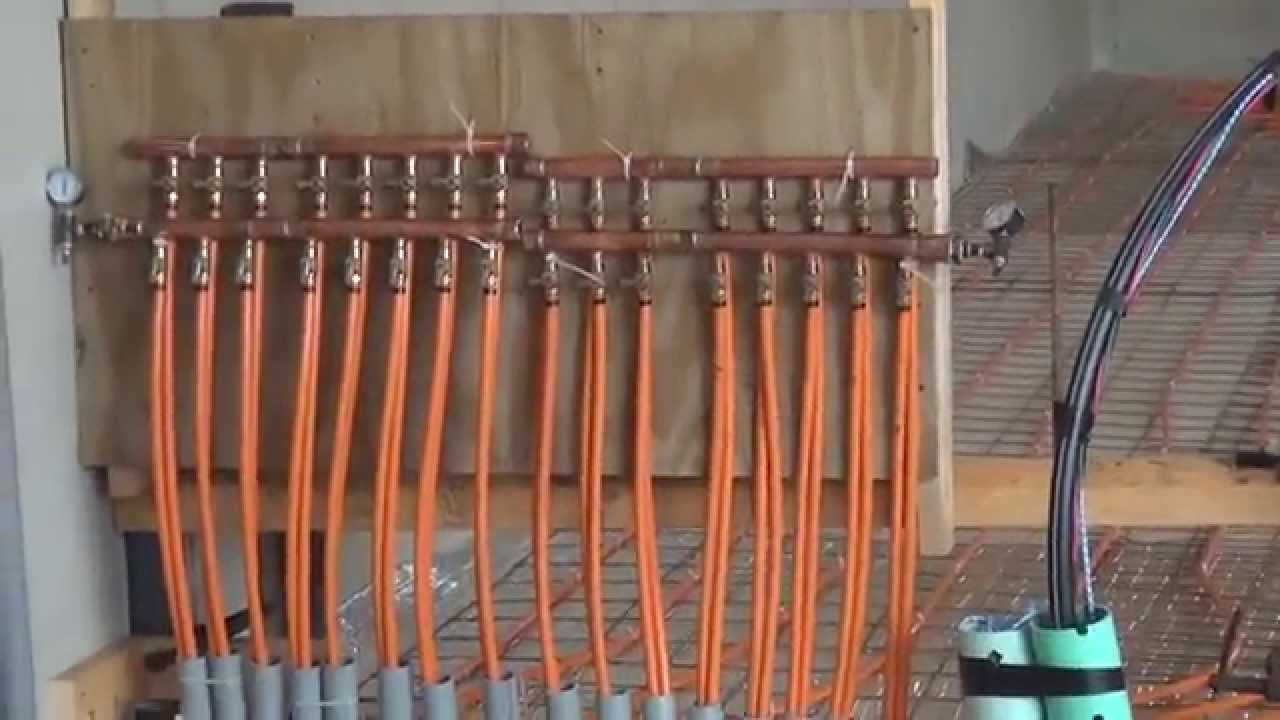
- Operation: Involves tubes embedded in the concrete floor (hydronic system with heated water) or electric mats under flooring. Heat radiates upward, warming the entire space evenly from the ground up.
- Suitability: The ultimate luxury heating, best installed during new construction or a major renovation due to installation complexity. Excellent for consistent, even warmth.
- Initial Cost:
Highest of all options, typically $4-$15 per square foot (electric) or $6-$20 per square foot (hydronic) for materials and installation.
- Benefits: Unparalleled comfort, incredibly even heat distribution, highly efficient once running, completely silent, invisible.
- Drawbacks: Extremely high initial cost and complex installation (especially hydronic), slow to heat up (but retains heat well), repairs can be difficult and expensive if issues arise.
The Ultimate Garage Heating Walkthrough



Welcome to your essential guide for transforming your cold, unwelcoming garage into a comfortable, functional workspace year-round. This comprehensive walkthrough details every critical step, from initial assessment and crucial insulation strategies to selecting and safely installing the right heating system for your needs. By following these practical, actionable steps, you’ll not only enhance your comfort but also protect your tools, vehicles, and projects from harsh temperatures, ensuring energy efficiency and, most importantly, safety.
Step 1: Assess Your Garage and Needs
What you need: Tape measure, notepad, pen, camera (optional), a clear understanding of your garage’s primary use.
Instructions: Begin by thoroughly evaluating your garage’s dimensions (length x width x height), existing insulation levels (walls, ceiling, and garage door), and the presence/condition of windows and service doors. Take note of the typical outside temperatures in your region. Crucially, define how you plan to use the garage – occasional hobbies, daily projects, vehicle maintenance, or just basic frost protection? This assessment directly impacts the required British Thermal Unit (BTU) output and type of heater needed. For instance, a 2-car garage (approx. 20x20x8ft) in a cold climate might require 40,000-60,000 BTUs for comfortable working conditions, but less if it’s exceptionally well-insulated.
Pro Tip: Do not guess your garage’s dimensions or insulation level. Measure accurately and visually inspect the walls, ceiling, and the garage door itself. A garage with poor insulation can lose up to 50% of its heat through the door alone.
Step 2: Insulate First: The Foundation of Heat Retention
What you need: Insulation (fiberglass batts, rigid foam boards, or spray foam kit), utility knife, tape measure, safety glasses, heavy-duty gloves, dust mask/respirator, staple gun, vapor barrier (if not integrated), flashing tape, caulk gun, expanding foam sealant.
Instructions: Before even considering a heater, prioritize proper insulation. For exposed wall studs, install R-13 to R-19 fiberglass batts. If covering existing walls, consider 1-2 inches of rigid foam boards (R-5 to R-10) for added thermal break. For the ceiling, aim for R-30 to R-49 if there’s an attic space above. The most critical area often overlooked is the garage door; use rigid foam panels or specialized insulation kits (targeting R-8 to R-12). Ensure a vapor barrier is installed on the warm-in-winter side of the insulation to prevent moisture issues. Proper insulation can dramatically reduce heating costs by 30-50%.
Pro Tip: The garage door is a major heat loss culprit. A dedicated garage door insulation kit is often the most cost-effective and impactful upgrade for immediate thermal improvement. Look for kits that are easy to install and designed for your door type.
Step 3: Seal Air Leaks: Preventing Heat Escape
What you need: Caulk gun, exterior-grade sealant/caulk, low-expansion expanding foam sealant, various types of weatherstripping (vinyl, rubber, or foam), utility knife, work light.
Instructions: Even with excellent insulation, air leaks can severely compromise heating efficiency. Systematically inspect around all windows, service doors, the main garage door frame, electrical outlets, and any plumbing or wiring penetrations for drafts. Use exterior-grade caulk to seal smaller gaps (up to 1/4 inch) around frames. For larger gaps, use low-expansion expanding foam, being careful not to overfill. Install or replace worn weatherstripping around all service doors. Crucially, ensure the garage door’s bottom seal (astragal) is in good condition and makes continuous contact with the floor. Also, check the perimeter of the garage door frame and add weatherstripping if gaps are present.
Pro Tip: On a windy day, perform a “smoke test” using an incense stick. Hold it near suspected leak points; if the smoke wavers or gets sucked in, you’ve found a draft that needs sealing. This is far more effective than just visual inspection.
Step 4: Choose Your Heating Method Wisely
What you need: Knowledge of different heater types, your budget, and the garage assessment data from Step 1 regarding power availability (e.g., 120V, 240V, natural gas line).
Instructions: Selecting the right heater is crucial.
- Electric Forced-Air Heaters: Excellent for smaller, well-insulated garages. Relatively easy to install (some are plug-and-play, others require 240V hardwiring) but can be costly to operate in high-energy-cost areas.
- Propane/Natural Gas Heaters: Offer high BTU output, making them suitable for larger or less insulated spaces. They require a professionally installed gas line and proper venting to the outside for safety. Generally more cost-effective to run than electric.
- Infrared/Radiant Heaters: Heat objects and surfaces directly, rather than the air. Ideal for zoned heating or garages with high ceilings, as heat isn’t lost to air circulation. Available in electric or gas models.
- Mini-Split Heat Pumps: The most energy-efficient option, providing both heating and cooling. Higher upfront cost and require professional installation, but offer significantly lower running costs long-term.
- Wood Stoves: Economical if you have access to cheap wood, but demand a chimney, significant safety clearances, and regular loading/maintenance.
Pro Tip: Absolutely avoid using unvented propane or kerosene “torpedo” heaters for extended periods inside. They produce significant moisture and carbon monoxide, posing serious health risks and potential damage to tools/vehicles without constant, extensive ventilation.
Step 5: Install Your Chosen Heater
What you need: Specific tools for your heater type (e.g., drill, screwdriver, wrench set, electrical wiring tools, gas pipe tools), appropriate mounting hardware, safety gear (gloves, eye protection), and the heater’s owner’s manual.
Instructions: Strictly adhere to the manufacturer’s installation guidelines for your specific heating unit.
- Electric Heaters: For 120V units, simply plug into a dedicated outlet. For 240V models, a dedicated circuit is mandatory, often requiring a qualified electrician for wiring and breaker installation. Mount securely to wall or ceiling studs, ensuring all specified clearances from combustible materials are maintained.
- Gas Heaters: These are typically ceiling-hung or wall-mounted. They necessitate a professionally installed gas line and a proper venting system that exhausts combustion byproducts directly outside. Always use a soap-and-water solution to check all gas connections for leaks after installation.
- Radiant Heaters: Often ceiling-mounted or portable. Position them to provide a direct line of sight to the areas you wish to heat, always respecting minimum clearances.
- Mini-Split Systems: This is a complex installation involving refrigerant lines, electrical connections, and mounting both an indoor and outdoor unit. This work almost always requires a certified HVAC technician to ensure proper function, efficiency, and to avoid voiding warranties.
Pro Tip: Diligently double-check all specified clearances from walls, ceilings, and any flammable materials. Failing to maintain these few inches can create a significant fire hazard. Never attempt to bypass built-in safety features.
Step 6: Optimize Ventilation and Safety
What you need: Carbon monoxide (CO) detector, smoke detector, ABC-rated fire extinguisher, exhaust fan (optional).
Instructions: Safety is paramount. Install a battery-operated carbon monoxide detector at eye-level or higher, at least 5 feet away from any combustion heating appliance, and test it monthly. If using any gas-fired heater (even vented models), CO monitoring is non-negotiable. Ensure adequate fresh air supply, especially when using any combustion appliance. For garages where vehicle idling or work with fumes (e.g., painting, solvents) is common, consider installing a dedicated exhaust fan. Position a multi-purpose (ABC rated) fire extinguisher near an exit. Always keep flammable liquids, rags, and other combustible materials well away from the heater.
Pro Tip: Never use your home’s central HVAC system to heat your garage. It’s typically undersized for garage volumes, can potentially draw dangerous fumes into your living space, and generally violates most building codes, posing serious health and safety risks.
Step 7: Set Up Thermostatic Control for Efficiency
What you need: Compatible thermostat (wired or wireless), mounting hardware, appropriate wiring tools (if a wired thermostat), and the heater’s owner’s manual.
Instructions: A thermostat is vital for maintaining a consistent, comfortable temperature while preventing energy waste. Install a thermostat that is specifically compatible with your heating unit (e.g., a line-voltage thermostat for electric garage heaters, or a low-voltage thermostat for gas-fired or forced-air systems). Mount it on an interior wall, away from direct sunlight, drafts, and the heater itself, typically at a height of about 5 feet. Program it to maintain a comfortable working temperature (e.g., 60-65°F / 15-18°C) when you’re using the garage, and a lower “setback” temperature (e.g., 40-45°F / 4-7°C) when unoccupied to protect tools and prevent pipes from freezing, while still saving energy.
Pro Tip: Invest in a smart thermostat for enhanced convenience. These can be controlled remotely via your smartphone, allowing you to pre-warm the garage before you arrive, maximizing comfort and optimizing energy usage. Many offer geofencing features for even greater efficiency.
Step 8: Perform Initial Test and Adjustments
What you need: Accurate thermometer, timer, and the heater’s owner’s manual.
Instructions: With installation complete and all safety checks performed, power on your heating system. Allow it to run for at least an hour, carefully monitoring its performance. Check for proper heat distribution – are there any noticeable cold spots? Is the thermostat accurately reflecting the ambient temperature? Listen for any unusual noises or odors. If you’ve installed a gas heater, re-check gas connections with a soap-and-water solution after it has been running for a period to confirm no leaks have developed under heat. Adjust thermostat settings as needed to find your ideal comfort level without overheating the space. Confirm that the heater cycles on and off as expected, maintaining the set temperature.
Pro Tip: Pay close attention to your first month’s energy bill after installation. If it’s significantly higher than anticipated, it’s a strong indicator to re-evaluate your insulation, air sealing, and thermostat programming. Even small adjustments in these areas can lead to substantial energy savings over time.
✅ Final Checklist
- Heater securely mounted with all proper clearances from combustibles?
- All significant air leaks sealed (windows, service doors, main garage door perimeter, penetrations)?
- Garage door, walls, and ceiling adequately insulated according to your climate and needs?
- Carbon monoxide and smoke detectors installed and tested in appropriate locations?
- Thermostat correctly wired and programmed for optimal comfort and energy efficiency?
- An ABC-rated fire extinguisher readily accessible near an exit?
Important Notes:
- Safety Considerations: Never leave combustion heaters unattended, especially portable ones. Always ensure proper ventilation when operating any fuel-burning appliance. Keep all flammable liquids, paints, solvents, and other combustible materials far away from heat sources. When working with highly flammable substances, always turn off heating units or ensure exceptionally robust ventilation.
- When to Seek Professional Help: It is strongly recommended to hire professionals for gas line installation or modifications, installation of dedicated 240V electrical circuits, or mini-split heat pump installation. If you are ever unsure about any part of the installation process, or suspect a code violation, always consult with a licensed professional to ensure safety and compliance.
- Estimated Time and Cost Range:
- Time: Allow 1-3 days for insulation and air sealing (DIY, depending on garage size and existing condition), plus 1/2 day to 2 days for heater installation (depending on heater type and whether you DIY or hire a professional).
- Cost (Estimates):
- Insulation & Sealing Materials (DIY): $200 – $800+
- Electric Heater (portable 120V): $50 – $200
- Electric Heater (240V wall/ceiling mounted): $150 – $600 + $200-$500 (electrician for circuit)
- Gas Heater (propane/natural): $400 – $1500 + $300-$1000 (professional gas line/venting)
- Mini-Split Heat Pump (professional installation included): $1500 – $4000+
- Carbon Monoxide Detector & Fire Extinguisher: $50 – $100
Key Factors for Choosing Your Garage Heater
Selecting the ideal garage heater requires a pragmatic assessment of your space and your personal priorities. Ignoring these factors can lead to an inefficient system, wasted money, or even safety hazards.
Evaluating Your Garage & Its Environment
- Garage Size and Layout: The most fundamental factor. A small, single-car garage needs far less BTU output than a large, multi-bay workshop. Use online calculators to estimate necessary BTU/hr based on square footage and ceiling height. The layout (open vs. cluttered) also impacts heat distribution.
- Insulation Levels: Critical for efficiency. A well-insulated garage (walls, ceiling, garage door) will retain heat much better, allowing smaller, less powerful, and more energy-efficient heaters to suffice. Conversely, a poorly insulated garage will require a much larger and more powerful heating system to combat heat loss, leading to higher running costs regardless of the heater type.
- Existing Power Access: Consider your electrical service. Do you have readily available 120V outlets, or is a 240V circuit (required for many powerful electric heaters and mini-splits) necessary? Is a natural gas line already plumbed to the garage, or would you need propane tank storage? This significantly impacts installation cost and complexity.
- Ventilation Needs: Crucial for safety, especially with combustion heaters (gas, wood). These produce carbon monoxide and other exhaust gases that must be vented outside. Ensure adequate clearances and a safe venting path. Even unvented gas heaters require significant air changes to prevent oxygen depletion and dangerous fume buildup. Electric heaters typically require no special ventilation.
Assessing Your Personal Requirements
- Budget (Initial vs. Running Costs): Differentiate between the upfront purchase and installation cost versus the ongoing energy expenses. A cheaper electric heater may have high running costs, while an expensive mini-split could save you money over time through efficiency. Your budget will dictate what systems are even feasible.
- Desired Temperature & Frequency of Use: Do you just want to take the chill off to keep pipes from freezing, or do you need a comfortable 68°F workspace for daily projects? Occasional use (weekends) might justify a portable, less efficient heater, while daily, long-term use demands a more permanent, efficient solution to manage energy bills.
- Noise and Aesthetics: Some heaters (forced air, fans on mini-splits) produce noise, which might be a concern in a workspace. Others (radiant, radiant floor) are virtually silent. Aesthetics and the physical space a heater occupies (wall-mounted, floor-standing, ceiling-hung) are also considerations, especially in a finished garage.
Efficiency, Safety, and Ventilation Considerations
Prioritizing Safety with Garage Heaters
Introducing a heat source to your garage means prioritizing safety. Garages often house flammable materials and tools, making adherence to safety protocols critical. Always follow manufacturer instructions for installation and operation to prevent accidents.
- Clearance: Maintain specified distances between your heater and walls, ceilings, vehicles, and any flammable items. This prevents fire hazards.
- Carbon Monoxide (CO) Detection: Essential for any combustion-based heater (natural gas, propane, kerosene). CO is an odorless, invisible killer; a detector is vital for early warning.
- Fuel Storage: Store portable fuel sources safely away from the heater itself, in well-ventilated areas, and according to local regulations.
- Electrical Safety: Plug electric heaters into properly grounded outlets. Avoid overloading circuits and use extension cords only if they are heavy-duty and rated for the appliance.
Ventilation for a Healthy Environment
Proper ventilation is crucial, especially with combustion heaters or when performing fume-generating tasks. Stagnant air can quickly become unhealthy, affecting air quality and potentially causing issues like moisture buildup.
- Combustion Byproducts: Heaters using gas or kerosene produce exhaust gases. Even “ventless” units require fresh air. Cracking a window or door provides necessary airflow.
- Moisture Control: Good airflow helps prevent condensation, which can lead to mold or rust on tools and equipment.
- Exhaust Fans: Consider installing a small exhaust fan if you frequently use combustion heaters or engage in activities like painting or welding to actively remove stale air.
- Regular Air Exchange: Even with electric heaters, occasionally opening the garage door for a few minutes refreshes the air, improving comfort and air quality.
Optimizing Garage Heat Retention and Maintenance
Sealing and Insulating for Maximum Efficiency
Even the best heater will struggle if your garage can’t hold onto warmth. Investing in heat retention significantly reduces energy waste and maximizes your heating efforts. Think of it as putting a warm, energy-efficient coat on your garage.
- Insulate Walls & Ceilings: Just like your home, proper insulation (fiberglass, rigid foam) in garage walls and ceiling dramatically reduces heat transfer, keeping the warmth inside.
- Garage Door Upgrades: Often the largest uninsulated surface. Add insulation kits (foam panels) or upgrade to an insulated door. Crucially, replace worn bottom seals and perimeter weatherstripping.
- Seal Gaps & Cracks: Use caulk to seal small cracks around windows, door frames, and utility penetrations. Weatherstripping on pedestrian doors prevents drafts.
- Window Enhancements: For existing windows, consider adding storm windows or plastic film kits to improve their thermal performance without full replacement.
Smart Maintenance for Longevity
Regular, proactive maintenance of both your heating unit and the garage structure ensures efficiency and safety for years. Neglecting these simple tasks can lead to higher costs, reduced performance, or premature equipment failure.
- Heater Cleaning: Periodically clean your heater per manufacturer guidelines – this might involve cleaning air filters, dusting coils, or checking burner components.
- Inspect Seals Annually: Check your garage door’s bottom seal, perimeter weatherstripping, and window seals before winter. Replace anything that’s cracked or brittle.
- Check for Structural Leaks: Visually inspect for new cracks in walls or gaps around conduits. Seal them promptly to prevent heat escape.
- Professional Servicing: For fixed, complex systems like natural gas heaters, a professional tune-up every few years ensures optimal, safe performance.
Conclusion
Transforming your garage into a comfortable, functional space through effective heating is entirely achievable. We’ve covered popular heating methods, along with crucial considerations for safety, ventilation, and heat retention. Remember, the best solution balances output with your specific needs, budget, and garage environment.
Your next steps should involve assessing your garage’s current insulation and ventilation. For complex installations or safety concerns, don’t hesitate to consult an HVAC professional. With careful planning, you can soon enjoy a warm, inviting garage all year round, enhancing both your projects and your home’s overall functionality.
❓ Frequently Asked Questions
What are the main types of heaters suitable for garages, and how do they differ?
Garage heaters primarily include electric (portable, infrared, forced-air), propane/natural gas (forced-air, radiant), ductless mini-splits, and wood-burning stoves. They differ significantly in fuel type, installation complexity, upfront cost, operating efficiency, and ventilation requirements.
How important is garage insulation when considering a heating system?
Garage insulation is paramount for efficient heating. A well-insulated garage minimizes heat loss, allowing a smaller heater to maintain comfort and significantly reducing energy bills. Prioritizing insulation upgrades before installing a heater is highly recommended for optimal performance.
What are the critical safety considerations for heating a garage?
Safety considerations vary by heater type but generally include proper ventilation to prevent carbon monoxide buildup (especially with gas/propane heaters), clearance from combustibles, secure mounting, and correct electrical wiring. Always follow the manufacturer’s installation and operation instructions carefully.
Should I choose an electric heater or a propane/natural gas heater for my garage?
The choice depends on fuel availability, desired heat output, and operating costs. Electric heaters are simple to install but can be expensive to run; gas heaters offer powerful, fast heat but require gas lines and significant ventilation. Natural gas is usually cheaper than propane if available.
What is a ductless mini-split, and why might it be a good option for a garage?
A ductless mini-split is an efficient, all-in-one heating and cooling system that doesn’t require ductwork. It’s a good garage option because it provides consistent, targeted climate control, is highly energy-efficient, and can be zoned, making it ideal for well-insulated garages used frequently.
How can I maximize the efficiency of my garage heating system?
Maximize efficiency by ensuring your garage is well-insulated, sealing air leaks around doors and windows, using weatherstripping, and strategically placing your thermostat. Regular maintenance of your heating unit and only heating when necessary also contribute to lower energy consumption.