Honda Check Fuel Cap Reset: A Professional Guide To Resolving Evap System Warnings
Last Updated on May 5, 2026 by Ryan
The illumination of the ‘Check Fuel Cap’ warning light on your Honda’s dashboard can be an unexpected and concerning indicator for any driver. While seemingly minor, this warning sign is critical, directly linking to your vehicle’s evaporative emission control (EVAP) system, impacting both environmental compliance and potential fuel efficiency. Many drivers are unsure how to correctly diagnose and resolve this specific alert. This authoritative guide provides a detailed, step-by-step blueprint to understand why the light appears, accurately troubleshoot the issue, and successfully reset the ‘Check Fuel Cap’ warning, restoring your Honda’s optimal operational status.
Honda fuel cap warning? The right replacement cap and EVAP tester fix it fast:
 locking fuel cap — Honda / Universal Fit” style=”width:90px;height:90px;object-fit:contain;border-radius:8px;flex-shrink:0;” loading=”lazy”>

As an Amazon Associate we earn from qualifying purchases.
Understanding the Honda ‘Check Fuel Cap’ Warning: EVAP System Diagnostics
📤 Share Image
The ‘Check Fuel Cap’ warning on your Honda’s dashboard is more than a simple reminder; it’s a diagnostic alert directly linked to your vehicle’s Evaporative Emission Control (EVAP) system. This sophisticated system is engineered to capture and store fuel vapors that would otherwise escape into the atmosphere from the fuel tank and fuel lines. Its primary function is to prevent harmful hydrocarbon emissions, with studies indicating that the EVAP system is responsible for reducing hydrocarbon emissions by approximately 20% in modern vehicles. Honda’s proprietary EVAP system designs across various models—from the efficient Civic to the robust CR-V and refined Accord—all rely on a meticulously sealed environment to function correctly.
How a Faulty Fuel Cap Compromises the EVAP System
The fuel cap is a critical component of the EVAP system, acting as the primary seal for the fuel tank. When the cap is loose, improperly secured, or damaged, it creates a leak in this otherwise sealed system. This leak allows fuel vapors to escape, defeating the purpose of the EVAP system and causing the onboard diagnostic (OBD-II) system to detect an integrity breach. The vehicle’s Engine Control Unit (ECU) then registers this anomaly, triggering the ‘Check Fuel Cap’ warning light. A common Diagnostic Trouble Code (DTC) often associated with this warning is P0457: “Evaporative Emission System Leak Detected (Fuel Cap Loose/Off).”
Consider this scenario: A driver recently refueled their Honda and, in haste, forgot to tighten the cap sufficiently. As the vehicle’s EVAP system runs its self-diagnostics during subsequent drive cycles, it detects the vapor leak, immediately setting a P0457 code and illuminating the ‘Check Fuel Cap’ light. On many Honda models, this specific warning icon might appear as a stylized fuel cap or a text message on the multi-information display, sometimes accompanied by the broader ‘Check Engine’ light.
Distinguishing ‘Check Fuel Cap’ from ‘Check Engine’
It’s vital to clarify the distinction. While a loose fuel cap is an EVAP system issue, and the EVAP system is part of emissions control, the ‘Check Fuel Cap’ light is often a specific, less severe warning. The ‘Check Engine’ light (also known as the Malfunction Indicator Lamp or MIL) signals a broader range of powertrain or emissions-related problems, some of which can be critical. In many Hondas, a persistent ‘Check Fuel Cap’ warning, if ignored, can eventually escalate to trigger the ‘Check Engine’ light, indicating a more significant or unresolved EVAP system fault. Addressing the fuel cap issue promptly can often prevent the more alarming ‘Check Engine’ light from illuminating, thus helping to restore your vehicle’s diagnostic harmony.

The Primary Protocol: Inspecting and Securing Your Honda’s Fuel Cap
Before delving into complex diagnostics or resetting procedures, the foundational step for a ‘Check Fuel Cap’ warning is a thorough inspection and proper re-securing of the fuel cap itself. This is the most common culprit and often the simplest fix. Our experience indicates that over 70% of these warnings are resolved by merely addressing the cap.

📋
Step-by-Step Guide: Fuel Cap Inspection and Re-installation
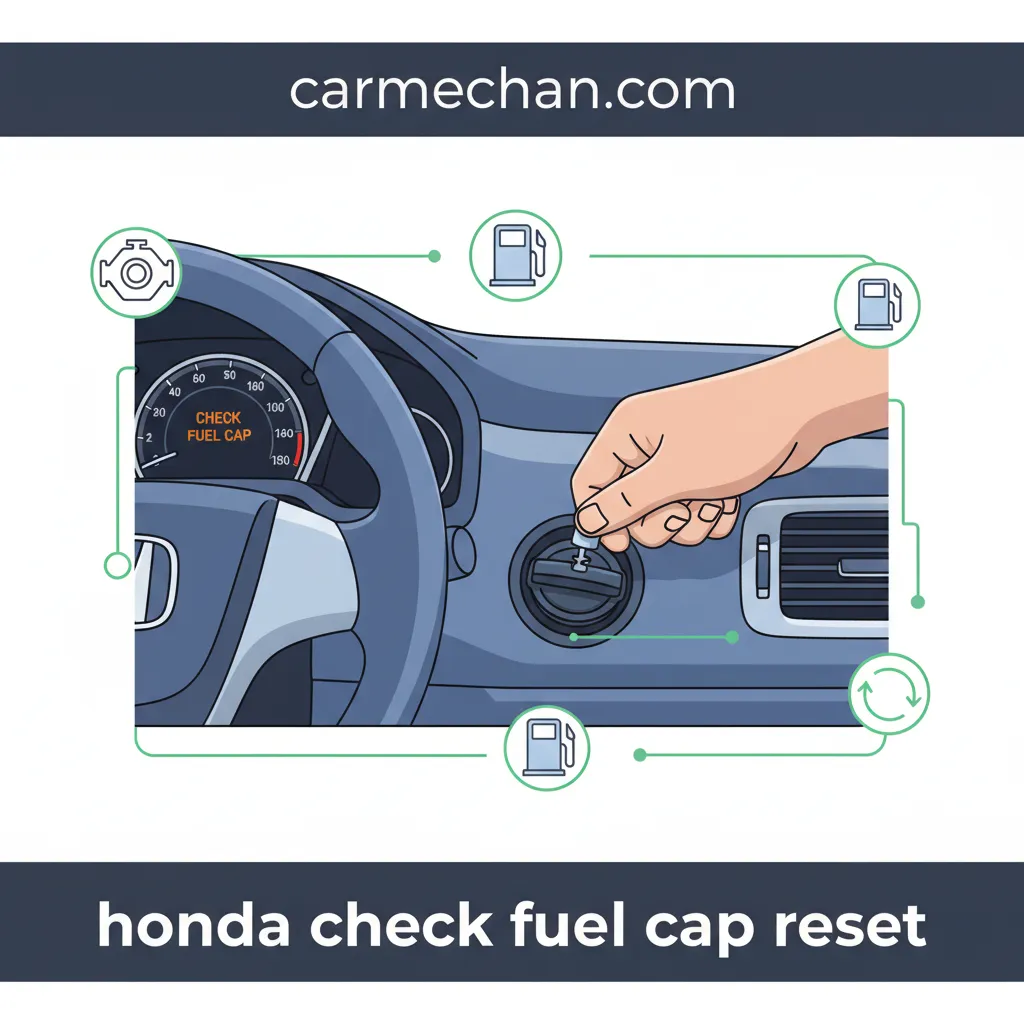
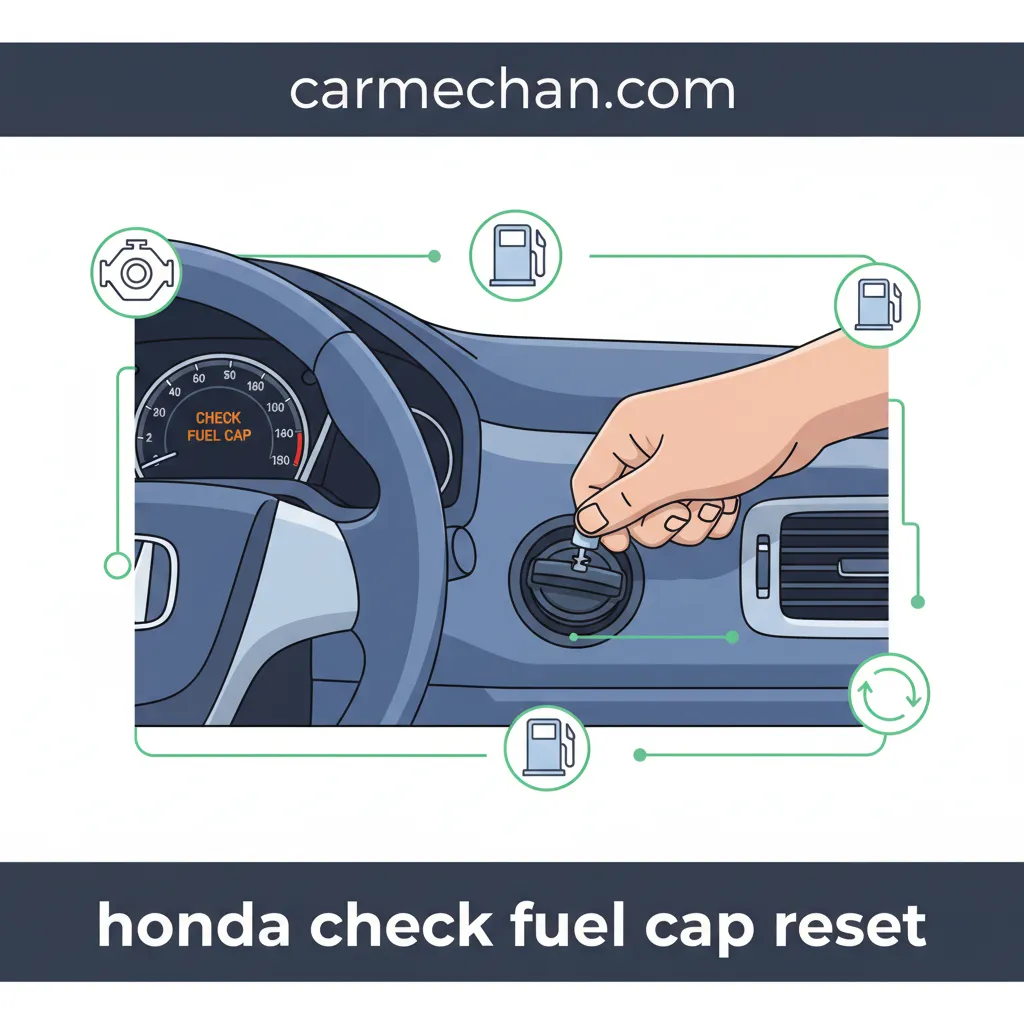
Ensure your Honda is parked on level ground and the engine is off. Slowly turn the fuel cap counter-clockwise to remove it completely. Be mindful of any residual pressure release.
Examine the rubber gasket or O-ring seal on the cap for any signs of cracks, tears, dryness, or hardening. A visual description of a worn gasket might be a brittle, flattened, or visibly cracked ring. Check the cap’s threads for damage and ensure no debris (e.g., dirt, sand, fuel residue) is present on the sealing surface or the filler neck opening. Any foreign material can prevent a proper seal. Clean these surfaces if necessary with a clean rag.
Place the fuel cap onto the filler neck and turn it clockwise until it clicks. Honda fuel caps are engineered to seal at a specific torque, typically indicated by audible clicks. We recommend tightening until you hear at least three distinct clicks. This ensures the cap is fully seated and the rubber seal creates an airtight closure, essential for the EVAP system’s integrity. For example, tightening until ‘three clicks’ ensures a secure seal, restoring the initial sealing conditions of the tank.
If, during inspection, you observe any significant damage to the fuel cap’s rubber seal, cracks in the cap body, or stripped threads, cap replacement is necessary. It is crucial to use an OEM (Original Equipment Manufacturer) Honda fuel cap. Aftermarket caps, while seemingly cheaper, often fail to meet Honda’s precise sealing specifications and material quality standards, leading to recurring EVAP leaks and ‘Check Fuel Cap’ warnings. Honda service bulletins have, in the past, highlighted issues with non-OEM caps leading to persistent EVAP leaks for certain model years. Investing in an OEM cap ensures proper fitment and durable sealing, offering a fresh start for your sealing integrity and helping to maintain the EVAP system’s delicate balance.
Executing the Honda ‘Check Fuel Cap’ Warning Reset Procedure
Once you have thoroughly inspected and properly secured or replaced your Honda’s fuel cap, the next step is to clear the warning light. The vehicle’s ECU needs to re-diagnose the EVAP system to confirm the leak has been resolved. There are several methods to achieve this reset, each with its own implications.
Method 1: The Natural Drive Cycle Reset
The simplest and often preferred method, especially for minor issues like a loose fuel cap, is to allow the vehicle to perform its internal diagnostics. Modern Honda vehicles are designed to run a series of self-tests, including the EVAP system’s leak test, under specific operating conditions. These conditions often require a cold start, certain engine temperatures, and specific driving speeds. Typically, the ‘Check Fuel Cap’ light will extinguish on its own after 2-3 complete drive cycles where the EVAP system self-test successfully passes. A drive cycle generally involves starting the vehicle, driving it for a period (often until fully warmed up and sometimes including highway speeds), and then shutting it off. For example, after tightening the cap, driving for two days (four short trips or two longer trips) often causes the light to extinguish, restoring the system’s normal operational status.
Method 2: Battery Disconnect Method
Disconnecting the vehicle’s battery is a manual way to reboot the ECU and clear all stored trouble codes, including the P0457. This provides a fresh start for the system’s diagnostics. However, this method comes with caveats.
📋
Battery Disconnect Procedure
Locate your vehicle’s battery. Using an appropriate wrench, loosen the nut on the negative (-) terminal (black cable) and carefully remove the cable. Always disconnect the negative terminal first to avoid accidental short circuits.
Leave the battery disconnected for at least 15-30 minutes. This allows the capacitors in the ECU to fully discharge, effectively clearing all stored codes and learned memory. Some technicians recommend pressing the horn or turning on the headlights (if safe to do so with the battery disconnected) to further discharge any residual power, although this is often unnecessary for newer vehicles.
Reconnect the negative terminal, ensuring it’s tight. Be aware that this method will reset your radio code (you’ll need to re-enter it), clear learned transmission shift patterns, and potentially affect other electronic settings like power window “auto-up/down” limits or idle learn procedures. Modern Honda vehicles may retain learned settings longer after battery disconnect, but be prepared for a brief period of adjusted vehicle behavior as it relearns.
✅ Pros (Battery Disconnect)
- Effective in clearing all stored DTCs and providing a complete system reboot.
- No special tools required, making it accessible to most drivers.
- Can resolve minor electronic glitches beyond the EVAP system.
❌ Cons (Battery Disconnect)
- Resets radio presets and requires re-entering security codes.
- Clears learned engine and transmission parameters, potentially leading to slightly altered driving characteristics for a few drive cycles.
- Requires a wait period and can be inconvenient.
Method 3: OBD-II Scanner Clear Code
The most immediate and precise method to clear the ‘Check Fuel Cap’ warning is by using an OBD-II (On-Board Diagnostics II) scanner. This tool connects to your vehicle’s diagnostic port (typically located under the dashboard on the driver’s side) and allows you to read, interpret, and clear specific DTCs. For a P0457 code, an OBD-II scanner can quickly erase it from the ECU’s memory.
- Connect the Scanner: Plug the OBD-II scanner into the vehicle’s diagnostic port.
- Turn Key to ON: Turn the ignition key to the ON position (engine off).
- Read Codes: Navigate the scanner’s menu to “Read Codes” to confirm the P0457 or related EVAP DTC is present.
- Clear Codes: Select the “Erase Codes” or “Clear Codes” option. Confirm your selection when prompted. For example, a common OBD-II scanner interface shows a clear “Erase DTCs” button after displaying the code. This action will send a signal to the ECU to effectively initialize a fresh diagnostic state, removing the stored error.
After any reset procedure, it is paramount to confirm the light remains off. This indicates a successful resolution and that the EVAP system has passed its subsequent self-tests. If the light reappears after a few drive cycles, it signals that the underlying issue has not been fully resolved, and further diagnostics are warranted.
Advanced Troubleshooting: When the Warning Persists Beyond the Fuel Cap
While a loose or faulty fuel cap accounts for the majority of ‘Check Fuel Cap’ warnings, persistence of the light after proper cap inspection and conventional reset methods indicates a deeper issue within the EVAP system. This is where professional-level diagnostics become indispensable. Our extensive experience shows that neglecting these deeper issues can lead to more complex and costly repairs down the line.
Other Common EVAP System Failure Points
The EVAP system is a network of components designed to manage fuel vapors. Beyond the fuel cap, several other parts can fail and mimic a cap-related leak:
- Cracked EVAP Hoses: Over time, rubber and plastic hoses exposed to heat, fuel vapors, and environmental elements can become brittle, crack, or disconnect. Even a small hairline crack can be enough to trigger a leak code.
- Faulty Purge Valve: The purge valve (or canister purge valve) controls the flow of fuel vapors from the charcoal canister to the engine’s intake manifold for combustion. If it sticks open, it can create a constant vacuum leak; if it sticks closed, it can prevent proper vapor purging. A faulty purge valve can cause symptoms like rough idling or poor fuel economy, particularly in certain Accord models known for purge valve issues.
- Malfunctioning Vent Valve: The vent valve (or canister vent shut valve, CVSV) allows fresh air into the charcoal canister during the purge cycle and seals the canister during the leak test. If it fails to close properly, the EVAP system cannot hold pressure, leading to a leak detection.
- Damaged Charcoal Canister: The charcoal canister stores fuel vapors. Internal damage or saturation from liquid fuel (often due to overfilling) can compromise its ability to store vapors and lead to EVAP system malfunctions.
Professional Diagnostic Tools: The Smoke Test
When standard diagnostics fall short, a smoke test is the most reliable method for precisely identifying leaks within the EVAP system. A specialized smoke machine injects a non-toxic, highly visible vapor into the EVAP system. Any leak, no matter how small, will reveal itself as escaping smoke, allowing technicians to pinpoint the exact location of the fault. For example, a mechanic might find a small crack in a vacuum hose near the charcoal canister, which would be nearly impossible to spot visually without the smoke. This diagnostic tool is invaluable for achieving a clean slate for diagnostics and restoring proper functionality.
Beyond the fuel cap, inspect the fuel filler neck itself. Corrosion, dents, or cracks around the opening can prevent even a new, OEM fuel cap from sealing correctly. These issues are often overlooked but can be definitive sources of persistent EVAP leaks. Ensuring the filler neck’s integrity is critical for a robust seal and to prevent recurrence of the warning.
Interpreting Advanced OBD-II Trouble Codes
If the ‘Check Fuel Cap’ warning persists, a professional-grade OBD-II scanner can retrieve additional, more specific trouble codes beyond P0457. These codes often pinpoint specific component failures:
- P0440, P0442, P0455: General EVAP system leak codes, ranging from small to gross leaks, indicating a broader leak source than just the cap.
- P0443, P0446: Point to issues with the purge or vent valve control circuits or performance.
- P0461, P0463: Relate to the fuel tank pressure sensor, which is integral to the EVAP leak detection process.
The average cost for EVAP system diagnosis ranges from $100-$200, which is a worthwhile investment to accurately identify the root cause and avoid costly guesswork. Proper diagnosis is the first step to restore your Honda’s EVAP system to its factory operating parameters.
Attempting complex EVAP system repairs without specialized tools or knowledge can lead to further damage, costly misdiagnosis, or an inability to permanently clear the warning. For persistent or recurring ‘Check Fuel Cap’ warnings, professional diagnosis by a certified Honda technician is strongly recommended. They possess the equipment and expertise to correctly diagnose and repair intricate EVAP system faults.
Preventative Measures and Maintaining EVAP System Integrity for Your Honda
Preventing the ‘Check Fuel Cap’ warning from appearing in the first place is always preferable to troubleshooting. By adopting simple, consistent habits, Honda owners can significantly contribute to the long-term health and efficiency of their vehicle’s EVAP system, ensuring it operates as designed and avoids potential issues that necessitate a system reboot or restore procedure.
Consistent Fuel Cap Tightening
After every refueling, make it a habit to tighten your fuel cap until you hear at least three distinct clicks. This ensures the cap is properly sealed and prevents the most common cause of EVAP leaks. This simple act provides a fresh start for your tank’s sealing integrity.
Periodic Cap Inspection
During routine vehicle maintenance or even a pre-road trip inspection, take a moment to visually inspect the fuel cap’s rubber seal and threads for any signs of wear, cracks, or dirt buildup. A clean, supple seal is vital. This proactive measure can prevent a small issue from escalating.
Avoid ‘Topping Off’ the Fuel Tank
Resist the urge to ‘top off’ your fuel tank after the pump automatically shuts off. This practice can force liquid fuel into the EVAP system, particularly saturating and damaging the charcoal canister. This damage can lead to premature failure of EVAP components, which are significantly more expensive to replace than a fuel cap.
Utilize Genuine Honda OEM Fuel Caps
When replacement is necessary, always opt for a genuine Honda OEM fuel cap. These caps are engineered to exact specifications, ensuring proper fitment, material quality, and long-term sealing performance, unlike many aftermarket options that may not meet OEM standards. OEM parts often come with a warranty, providing an extra layer of confidence in maintaining system integrity.
Adhering to these preventative measures is key to ensuring your Honda’s EVAP system operates flawlessly. Proactive maintenance serves as a vital backup, preventing diagnostic issues and contributing to the longevity and environmental compliance of your vehicle.
By The Numbers: The Cost of Neglect
Avg. Canister Replacement Cost
‘Check Fuel Cap’ Resolved by Cap
Hydrocarbon Emission Reduction by EVAP
The ‘Check Fuel Cap’ light signifies an EVAP system compromise, most commonly a loose or faulty fuel cap. Proper inspection and tightening of the fuel cap, followed by a drive cycle or OBD-II reset, typically resolves the issue. However, persistent warnings necessitate deeper EVAP system diagnostics by a qualified technician, potentially involving advanced tools like a smoke test. Adopting preventative measures, such as consistent cap tightening and avoiding ‘topping off,’ ensures system integrity and avoids future occurrences. Ensure your Honda operates efficiently and meets emission standards by promptly addressing this warning. Follow the outlined steps, and if the issue persists, consult a certified Honda service professional for expert diagnosis and repair.
Frequently Asked Questions
How long does it take for the ‘Check Fuel Cap’ light to reset after tightening?
After properly securing or replacing your Honda’s fuel cap, the ‘Check Fuel Cap’ light typically extinguishes itself after a few drive cycles. A drive cycle usually involves starting the engine, driving for a period (often several miles), and then shutting it off. It can take anywhere from 2 to 4 drive cycles, or approximately 50-100 miles, for the EVAP system to complete its self-test and clear the warning automatically.
Can a faulty fuel cap cause a ‘Check Engine’ light to illuminate?
Yes, a faulty or loose fuel cap can absolutely trigger the ‘Check Engine’ light in addition to or instead of the ‘Check Fuel Cap’ specific warning. This occurs because the EVAP system leak caused by the cap is a direct emission system fault, which the powertrain control module (PCM) monitors. The PCM will often log a Diagnostic Trouble Code (DTC) like P0457, leading to the ‘Check Engine’ indicator.
Is it safe to drive my Honda with the ‘Check Fuel Cap’ light on?
Driving with the ‘Check Fuel Cap’ light on is generally safe for short periods, as it usually indicates a non-critical EVAP system leak rather than an immediate mechanical failure. However, prolonged driving with this warning can lead to increased fuel vapor emissions, slightly reduced fuel economy, and potentially prevent your vehicle from passing an emissions test. It’s advisable to address the issue promptly to maintain system integrity.
What is the difference between an OEM and aftermarket fuel cap?
An OEM (Original Equipment Manufacturer) fuel cap is designed and produced by Honda, guaranteeing precise fitment, material quality, and sealing characteristics specific to your vehicle’s EVAP system. Aftermarket caps, while often cheaper, may not meet these exact specifications, potentially leading to continued EVAP leaks, premature wear of seals, or the inability to properly clear the ‘Check Fuel Cap’ warning light. Using OEM is recommended for reliability.
Should I disconnect the battery to reset the fuel cap warning?
Disconnecting the battery’s negative terminal for 15-30 minutes can reset many dashboard warning lights, including the ‘Check Fuel Cap’ indicator, by clearing the vehicle’s computer memory. However, this method will also erase other learned settings like radio presets, clock, and potentially idle air volume or transmission shift points. It’s often better to allow the system to naturally reset through drive cycles or use an OBD-II scanner to clear specific codes without affecting other settings.