Draw a Porsche: Capture Iconic Sports Car Design Details
Last Updated on September 1, 2026 by Ryan
Learning how to draw a Porsche involves mastering its distinctive silhouette and iconic details. This article provides comprehensive insights into capturing the essence of these legendary sports cars, from initial sketches to refined details, helping artists of all levels achieve realistic results.

Prime for Young Adults — 6 Months Free
Students and 18–24s get six months of Prime free, then half price.
Start 6 Months Free🎯 Key Takeaways
Recommended Best Deal Products

- Start with basic shapes for accurate proportion.
- Focus on iconic curves and unique design elements.
- Master perspective for dynamic car drawings.
- Use shading to add depth and realism.
- Practice regularly to refine your technique.
You want to draw a recognizable Porsche, and this guide will show you how. We will break down its complex, sculpted form into simple geometric shapes, then build up the iconic silhouette, and finally refine the defining details. This practical, step-by-step approach demystifies drawing these incredible sports cars, making it accessible even if you are relatively new to automotive sketching. Understanding this foundational method equips you to capture the essence of any Porsche model with confidence and precision.
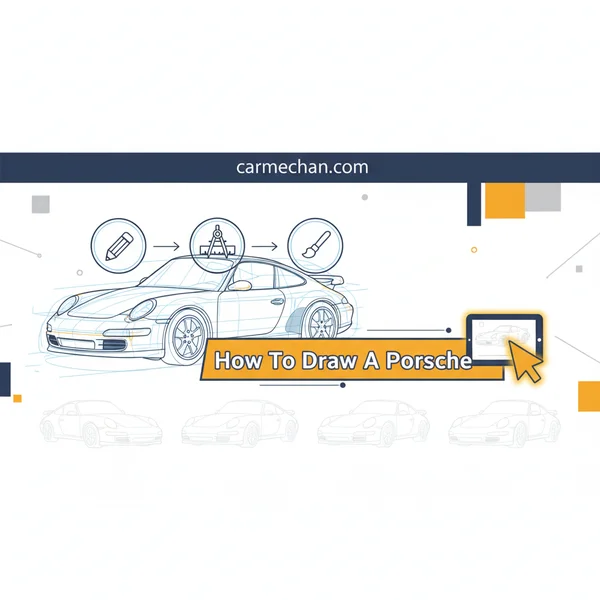
Your goal is to accurately translate the distinctive design language of a Porsche onto paper. By focusing on fundamental proportions and key visual cues, you will develop the practical skills needed to render these machines with authenticity. This isn’t about rote copying; it’s about understanding the underlying structure and design principles that make a Porsche instantly identifiable, ensuring your drawings have both accuracy and dynamism.
Understanding Porsche’s Distinctive Design Language
Drawing a Porsche successfully hinges on recognizing its unique design DNA. It is more than just a car; it is a sculpted statement, a blend of engineering and art. Your ultimate goal is to translate this visual language onto paper, ensuring instant recognition. Pay close attention to how engineers and designers meticulously balance aerodynamics with aesthetic appeal in every curve and line.

Mastering Proportions and Silhouette
Every Porsche, from a classic 911 to a modern Taycan, shares fundamental proportional cues. Start by observing the car’s overall stance. It is inherently low and wide, asserting an aggressive road presence. The cabin typically sits far back on the chassis, creating a distinct long-hood, short-rear-deck profile. This balance is critical. Sketching these primary massing blocks first, as simple rectangles and wedges, establishes your foundational perspective. Focus intently on the relationship between the wheelbase and the overhangs.
The roofline often flows seamlessly into the rear, avoiding sharp angles, reflecting its aerodynamic purpose. Strong, defined fender flares are another hallmark, giving power and athleticism to the design. When you begin your sketch, consider setting up a basic horizontal line for the ground and a vanishing point if you are aiming for perspective. Then, block out the general length and width of the car as a simple box or series of boxes. This initial geometric stage is paramount for getting proportions right before any curves are introduced.
Spotting Iconic Features
Specific details truly define a Porsche, making it unmistakably itself. The headlights are almost always integrated smoothly into the front fenders, often with a characteristic oval or round shape, sometimes slightly flattened. Observe the strong curvature of the front hood, sweeping down to meet these lights. At the rear, the engine cover often slopes aggressively, punctuated by a distinctive taillight strip or individual lights. Side air intakes, present on many mid-engine models like the Boxster or Cayman, are not just functional; they are design elements that contribute to the car’s dynamic profile. Look for subtle creases and character lines that guide your eye along the bodywork. These are not random; they emphasize motion and form. Capturing these unique elements accurately, even in early construction stages, ensures your drawing reads as a Porsche, not just a generic sports car.
How to Draw a Porsche Like a Pro: A Practical Walkthrough
Recommended Best Deal Products

Welcome to your definitive guide on capturing the iconic lines and aggressive stance of a Porsche on paper! This step-by-step walkthrough is meticulously crafted to help both aspiring artists and seasoned sketchers recreate the elegance and power of these legendary sports cars. By following these detailed instructions, focusing on proportions, and paying attention to specific design cues, you’ll learn to break down a complex subject into manageable parts, building confidence with each stroke. Get ready to transform your blank canvas into a stunning representation of automotive art.
Step 1: Establishing the Foundation – Basic Proportions and Silhouette
What you need: A clean sheet of drawing paper (preferably slightly textured for pencil grip), a 2H or 4H pencil (for light construction lines), a ruler or straight edge, and a kneaded eraser.

Audible — Listen Free for 30 Days
One free credit a month and thousands of titles included.
Listen Free for 30 DaysInstructions: Begin by sketching a very light, long horizontal rectangle near the bottom-center of your paper. This will serve as the car’s base and define its overall length. Think about the specific Porsche model you want to draw (e.g., a 911, Cayman, or Panamera) and its characteristic low, wide stance. Divide this rectangle into roughly three equal parts for the front, cabin, and rear sections, ensuring the cabin section is slightly offset towards the rear for a typical Porsche profile. Lightly draw an elongated oval or gently sloped line above the rear section for the start of the roofline, connecting it to a shorter, lower line for the front hood. Focus on getting the overall length-to-height ratio accurate, usually around 3.5 to 4 times longer than it is tall for a sports car.
Pro Tip: Always draw construction lines very lightly. These lines are guides, not permanent marks, and should be barely visible. Drawing too dark at this stage makes correcting mistakes difficult and can leave unwanted indentations on your paper.
Step 2: Defining the Wheelbase and Arches
What you need: HB pencil, compass or circular template (optional but recommended for perfect circles), kneaded eraser.
Instructions: Based on your initial rectangle, mark the positions of the wheels. Porsche’s often have a relatively long wheelbase for their size, with the wheels pushed to the corners. Sketch two perfect circles for the wheels, ensuring they are slightly larger in diameter than the height of the main body section, giving the car its characteristic low-slung, performance look. The front wheel should be just inside the front third of your base rectangle, and the rear wheel closer to the end of the rear third. Draw the elegant curves of the wheel arches around these circles; Porsche arches are often quite pronounced, especially over the rear wheels, conveying power and grip. Make sure the tops of the wheel arches align with the top of your car’s main body line or slightly above it.
Pro Tip: When placing wheels, remember that a Porsche’s front axle is typically further forward, and the rear wheels often appear to “fill” the wheel wells more completely due to wider tires. Use a compass for accuracy, but freehand circles can be perfected with practice.
Step 3: Sculpting the Main Body Contours
What you need: HB pencil, 2B pencil, kneaded eraser.
Instructions: Now, you’ll start to give your Porsche its distinctive shape. Refine the roofline, ensuring the classic “flyline” that tapers smoothly towards the rear for models like the 911. Outline the side windows, making the side glass sleek and narrow. Connect the wheel arches with the lower body line, adding the gentle curves and creases that define the side panels. Pay attention to the subtle curvature of the door panels and how they flow into the fenders. For many Porsches, there’s a distinct line running from the front fender, through the door, and into the muscular rear fender. Erase any unnecessary construction lines from Step 1 and 2 that are no longer needed, using your kneaded eraser to lift graphite without smudging.
Pro Tip: Reference images are crucial here. Study the specific model you’re drawing. Note where body lines intersect, how they bend, and the subtle changes in surface direction that give a Porsche its characteristic “sculpted from a single block” appearance. Don’t be afraid to make several light passes until the contour feels right.
Step 4: Detailing the Front and Rear Fascia
What you need: 2B pencil, fine-point eraser (or a sharpened kneaded eraser).
Audible Premium Plus — Annual Membership
12 audiobook credits up front, plus the full Audible catalogue.
See Annual PlansInstructions: Focus on the headlights and taillights – key identifiers for any Porsche. For a 911, sketch the iconic round or slightly oval headlights. Position them slightly above the front bumper line, angled inward. Add the inner details of the headlight assembly, such as projector lenses or LED daytime running lights. Detail the front bumper with its air intakes and grilles; these vary greatly by model and generation. Move to the rear, adding the taillight design. Modern 911s feature a distinctive full-width LED light bar, while older models have individual lights. Sketch the exhaust tips, often dual or quad, symmetrically placed. Add the subtle lip spoiler or active rear wing if applicable to your chosen model, positioned near the rear window line or trunk lid.
Pro Tip: The angle and position of headlights can drastically change the “expression” of the car. Pay close attention to how they sit within the fender and bonnet lines. For grilles, use a cross-hatching technique to suggest mesh without drawing every single opening.
Step 5: Adding Interior, Windows, and Wheel Details
What you need: 2B pencil, 4B pencil, kneaded eraser, cotton swab or blending stump (optional).
Instructions: Begin by darkening the outlines of the side windows and windshield. Consider sketching a simple interior, like a steering wheel or dashboard outline, visible through the glass, but keep it minimal to avoid distracting from the exterior. For the wheels, carefully draw the spokes. Porsche wheels are often intricate, with multiple spokes or a distinctive five-spoke design. Don’t forget the center cap with the Porsche crest. Add the brake calipers, which are usually large and visible behind the spokes. Draw the subtle door handles and side mirrors, ensuring they proportionally align with the overall design. These small elements add a layer of realism and completeness to your drawing.
Pro Tip: To make windows look like glass, use subtle gradients of gray, reserving stark white for reflections. For wheels, drawing too many tiny details can make them look busy; focus on the main spoke pattern and the general impression of complexity. Symmetry for spokes is key if drawing from a direct side profile.
Step 6: Introducing Shading and Depth
What you need: 4B pencil, 6B pencil (for darkest areas), blending stump or cotton swab, kneaded eraser.
Instructions: This step brings your Porsche to life by adding dimension. Determine your light source and begin applying shading. The darkest areas will typically be under the car, inside the wheel wells, and in any deep crevices or air intakes. Use a 4B pencil for mid-tones on the body panels, gradually building up the layers. Porsche body panels are often highly reflective, meaning you’ll have stark contrasts between light and shadow. Use your blending stump or cotton swab to smooth out pencil strokes, creating seamless transitions. Leave small areas completely white for highlights, especially along sharp edges and curves, to simulate gloss paint. Pay attention to the subtle shadows cast by the mirrors and spoilers.
Pro Tip: For reflective surfaces like car paint, don’t shade uniformly. Instead, create sharp gradients from light to dark, mirroring the environment. Think of the reflections as distorted images of the surroundings. Using cross-hatching in multiple directions before blending can help create smoother tonal values.
Step 7: Final Refinements and Polish
What you need: 6B or 8B pencil (for ultimate darks), fine-point eraser, white gel pen (optional for extreme highlights), a clean soft brush (to remove eraser dust).
Instructions: With your darkest pencil (6B or 8B), go over key outlines and deepest shadows to make them pop. Darken the tire rubber, the exhaust pipe openings, and the tightest panel gaps. Use your fine-point eraser to clean up any smudges and to pull out precise highlights, for example, along the top edge of a fender or the chrome trim around windows. If you have a white gel pen, use it sparingly for the brightest pin-point reflections on the glass or chrome accents. Add the Porsche emblem (if visible) on the hood or wheels. Review your drawing from a distance to ensure all proportions still look correct and that the overall impact is strong. Sign and date your masterpiece!
Pro Tip: Step away from your drawing for a few minutes and then return with fresh eyes. This helps you spot inconsistencies or areas that need more attention. Sometimes, flipping your drawing upside down or viewing it in a mirror can also reveal proportional errors you missed.
✅ Final Checklist
- Have all initial construction lines been erased or integrated smoothly into the final drawing?
- Are the wheels perfectly circular and proportionally correct to the car’s body?
- Do the specific Porsche features (headlights, roofline, fender flares) match your chosen model?
- Is there a good range of tonal values from the brightest highlights to the darkest shadows, creating depth?
- Are all the small details (door handles, mirrors, emblems) present and accurately placed?
Important Notes:
- Safety considerations or warnings: While drawing is generally safe, be mindful of sharp pencil tips. Ensure good lighting to prevent eye strain during prolonged sessions. Keep your drawing area clean to avoid smudging your work with loose graphite or dirt.
- When to seek professional help: For advanced techniques like perspective, hyperrealism, or commissioned automotive art, consider enrolling in specialized drawing courses or seeking guidance from experienced automotive illustrators. Online tutorials and communities can also provide valuable feedback.
- Estimated time and cost range: Drawing a detailed Porsche can take anywhere from 3-6 hours for a beginner to 1-2 hours for an experienced artist, depending on the level of detail and shading. The cost is minimal, primarily for art supplies: a basic set of drawing pencils (HB, 2B, 4B, 6B), a kneaded eraser, a good quality drawing paper pad (A4 or A3), and potentially a blending stump or cotton swabs. This usually ranges from $15-$40 for a good starter kit, which will last for many drawings.
Essential Tools and Materials for Automotive Sketching
You do not need an elaborate art studio to start drawing Porsches effectively. The right basic tools, however, make a significant difference in your control, precision, and overall confidence. Focus on acquiring quality over quantity. Your chosen materials should support your journey from establishing initial construction lines to adding the most intricate, detailed refinements.

Pencils and Paper for Precision
- Graphite Pencils: Invest in a small but versatile range.
- 2H Pencil: Ideal for light, easily erasable construction lines. These lines establish your basic geometric forms and proportions without leaving deep indentations or ghost marks.
- HB Pencil: Perfect for initial outlines and beginning mid-tone shading. It is a versatile all-rounder, offering a good balance of darkness and erasability.
- 2B or 4B Pencil: Essential for darker, bolder outlines, deep shadows, and accentuating details like tire treads, grilles, or dark window areas. These softer leads add crucial depth and contrast to your drawing.
- Smooth Drawing Paper: Opt for a smooth, heavier-weight paper (e.g., 90-120 gsm or 60-80lb bond). This type of surface allows pencils to glide easily and erasers to work cleanly without damaging the paper. An A3 size (or larger) sheet provides ample space for initial rough sketches and allows for more detailed work without feeling cramped.
- Kneaded Eraser: Unlike standard block erasers, a kneaded eraser lifts graphite rather than rubbing it away, preserving the paper surface from damage. It is excellent for softening lines, cleaning up smudges, or gently lightening areas without aggressive rubbing.
- Ruler or Straight Edge: While a Porsche is a symphony of curves, a ruler is invaluable for establishing initial perspective lines, ground planes, and ensuring symmetry in your foundational block-out stage. Use it strictly for setup, not for drawing the car’s actual curved body lines.
Refining Details and Adding Polish
Once your basic sketch is solid and the proportions are correct, a few additional tools can significantly elevate your drawing and add a professional touch.
- Fineliners (e.g., 0.1mm, 0.3mm, 0.5mm): For crisp, clean final outlines and intricate, sharp details such as badges, vents, panel gaps, or window frames. They give a precise, illustrative finish to your work.
- White Gel Pen or Acrylic Paint Marker: A fantastic tool for adding sharp, brilliant highlights to glass surfaces, chrome accents, or LED lights. These bright, contrasting spots bring your drawing to life and simulate reflections.
- Blending Stumps/Tortillons: These tightly rolled paper tools help smooth out graphite shading, creating seamless gradients for reflective bodywork and soft transitions in shadows. They are key for achieving a polished look.
Remember, consistent practice with these tools will significantly improve your control and confidence. Starting with simple geometric shapes on your smooth paper, using your 2H pencil, is the perfect and most effective way to begin capturing a Porsche’s iconic form.
Welcome back! In the first part of our guide, we explored the foundational elements of drawing Porsches, from understanding their design philosophy to identifying specific iconic features. Now, let’s push further, tackling the nuances of proportion and bringing your drawings to life with sophisticated shading.
Key Proportional Challenges and Solutions for Sports Cars
Drawing a sports car like a Porsche isn’t just about getting the details right; it’s fundamentally about capturing its unique, dynamic stance. These vehicles have proportions distinct from everyday cars, and understanding them is crucial for a believable drawing.
Mastering the Low Stance and Wide Track
One of the first things you notice about a Porsche is its low, aggressive posture. This isn’t an accident; it’s central to its performance and visual appeal. When you draw, you need to emphasize this flatness and width.
- Think “squashed” not “tall”: Compare the height of a Porsche 911 to a typical sedan. It’s significantly lower. Your initial construction lines or bounding box should reflect this.
- Wheels pushed to the corners: Porsches, especially the 911, often have minimal overhangs. The wheels are placed far out, giving the car a planted, wide stance. This is vital for conveying its athletic character.
- Embrace the width: From a head-on or rear-on view, the vehicle should appear wide and stable. Don’t be afraid to exaggerate the width slightly in your mind’s eye to counteract any tendency to draw it too narrow.
Paying close attention to how low the body sits relative to the wheels, and how far apart those wheels are, will instantly make your drawing feel more like a true sports car.
Balancing the Iconic Rear Engine Hump
The 911, in particular, has a rear-engine configuration that dictates a very specific, recognizable profile. This isn’t just a flat trunk; it’s a beautifully sculpted area that houses the engine.
- Continuous flow: Observe how the roofline gracefully slopes down and merges into the engine cover. It’s often a continuous, elegant curve, not an abrupt change. This creates that distinctive “humped” rear.
- Volume, not flatness: Imagine the engine underneath. This area has significant volume. When sketching, think of it as a rounded form rather than a flat plane.
- Reference the rear window: The angle and curve of the rear window are critical indicators for the start of the engine cover’s slope. Use it as a guide to define the overall rear profile accurately.
Successfully depicting this unique rear form differentiates a generic sports car drawing from an authentic Porsche 911 representation.
Elevating Your Porsche Drawings with Advanced Shading Techniques
Once your proportions and details are solid, shading is what transforms your line drawing into a dynamic, three-dimensional representation. Porsche’s sleek surfaces and vibrant paint finishes demand thoughtful application of light and shadow.
Capturing Reflective Surfaces and Metallic Sheen
Porsche paintwork is designed to reflect light in sophisticated ways, often with a metallic sheen. Simply filling areas with flat color won’t capture this.
- Observe distorted reflections: Car bodies are curved. They reflect their environment in distorted, stretched, and often broken patterns. Don’t just draw a static highlight; observe how light sources (sky, ground, other objects) appear on the surface.
- Vary your tones: A metallic surface isn’t uniformly bright. It will have areas of intense highlight (specular reflections), mid-tones, and soft shadows that still carry a hint of the paint’s color.
- Sharp vs. soft edges: Highlights often have sharper edges where the surface curves abruptly, while broader reflections might be softer. Use this contrast to define the car’s sculpted lines.
- The “light catcher” effect: The edges of body panels or sharp creases often catch light more intensely, creating thin, bright lines that emphasize the car’s structure.
Think of the car’s surface as a mirror, showing you the world around it, albeit in a stylized way. This approach adds immense realism and visual interest.
Defining Form Through Gradients and Contrast
Shading isn’t just about making things dark; it’s about creating a sense of volume and depth through the skillful use of value changes.
- Smooth gradients are key: Many areas of a Porsche’s body curve smoothly. Your shading should reflect this with gradual transitions from light to dark, creating a soft, rounded feel.
- Strategic contrast: Use strong contrast where body panels meet or where a sharp crease defines a line. For example, the line separating the fender from the hood often has a distinct value change that makes it “pop.”
- Layering for depth: Don’t try to get the perfect shade in one go. Build up your values through multiple layers, gradually darkening areas and refining transitions. This allows for greater control and smoother results.
- Consider your light source: Always keep in mind where your light source is coming from. This dictates which areas are brightest, which are in shadow, and where cast shadows will fall, adding to the illusion of depth.
By carefully applying gradients and understanding where to create sharp contrasts, you’ll give your Porsche drawing a convincing three-dimensional form that truly stands out.
Conclusion
Drawing a Porsche is a rewarding artistic journey that blends technical precision with an appreciation for automotive aesthetics. We’ve covered the crucial steps, from understanding its design DNA and pinpointing iconic details to mastering its unique proportions and elevating your work with advanced shading. Remember, it’s about observing, understanding, and then translating that knowledge onto your paper. Don’t be afraid to simplify complex forms initially and build up your drawing in layers. The more you practice seeing how light interacts with those legendary curves, the more confident your lines and shading will become. So grab your preferred drawing tools, find your favorite Porsche reference, and let your passion for this iconic sports car guide your hand. The road to mastery is paved with practice and enjoyment!
❓ Frequently Asked Questions
What makes a Porsche challenging to draw compared to other cars?
Porsches have very specific, highly recognizable design elements, particularly their iconic headlight shapes, sleek roofline, and muscular fenders. Capturing these unique curves and proportions accurately without making it look generic is the main challenge.
How can I ensure my Porsche drawing looks dynamic and not static?
To create a sense of dynamism, focus on perspective and foreshortening, suggesting speed lines or a turning motion. Also, use varied line weights and contrast in shading to imply light reflecting off its moving surfaces.
What reference materials are most helpful when drawing a specific Porsche model?
High-quality reference photos from multiple angles are essential, focusing on the specific model you wish to draw. Look for shots that clearly show the car’s profile, front, rear, and interior details, paying attention to light sources and shadows.
Are there common mistakes beginners make when drawing Porsches, and how can they be avoided?
Common mistakes include incorrect proportions, misaligned wheels, and generic headlight shapes. Avoid these by carefully measuring and using construction lines, cross-referencing with your reference image frequently, and studying the car’s specific details.
How do I add realism through shading and highlights to a Porsche drawing?
To add realism, understand where light hits the car’s reflective surfaces, creating strong highlights and deep shadows. Use a variety of pencil grades to build up smooth tonal transitions, emphasizing the metallic sheen and sculpted forms.
What are the benefits of practicing drawing specific car models like a Porsche?
Practicing specific models like a Porsche significantly improves your observation skills, understanding of complex forms, and ability to render reflective surfaces. It also helps you develop a visual library of unique design elements, making future automotive drawings more accurate and confident.