How to Draw a McLaren: Master Its Sleek Supercar Design
Last Updated on September 1, 2026 by Ryan
This guide breaks down how to draw a McLaren into simple, manageable steps, allowing artists of all levels to capture its iconic design. You’ll learn to outline its sleek silhouette and add intricate details like distinctive headlights and vents, transforming your drawing into a dynamic supercar masterpiece.
🎯 Key Takeaways

- Outline basic shapes first for accurate proportions.
- Focus on McLaren’s unique headlights and aerodynamic lines.
- Use light pencil strokes for initial sketching and corrections.
- Practice perspective to give your drawing depth and realism.
- Apply shading techniques to create a three-dimensional effect.
You want to learn how to draw a McLaren, and this guide will show you exactly how. We’ll break down its iconic design into achievable steps, focusing on precision and authenticity. Forget generic car drawings; you’ll learn to capture the unique essence of a McLaren, ensuring your artwork accurately reflects its supercar status.
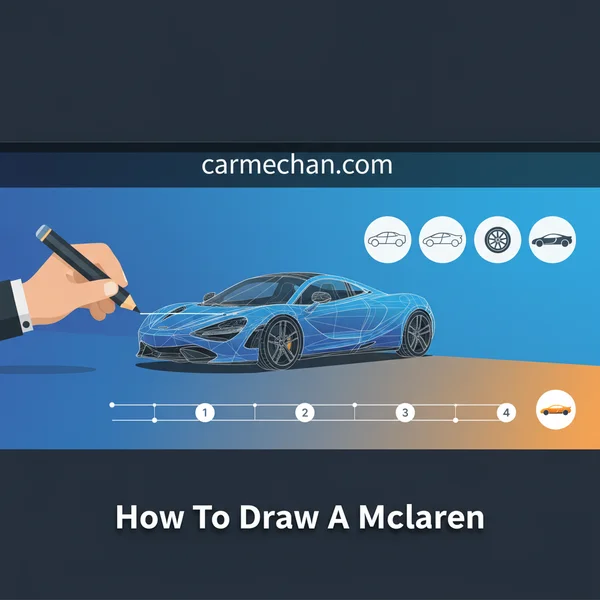
Understanding its core aesthetic philosophy and preparing your drawing tools are the crucial first steps. This foundation ensures your drawing accurately reflects McLaren’s engineering artistry, allowing you to create a supercar sketch that truly stands out. Let’s get started on mastering those sleek lines.
Understanding McLaren’s Signature Design Aesthetics
To draw a McLaren accurately, you must first understand its distinctive design language. McLaren cars aren’t just fast; they are literally sculpted by air, a philosophy visible in every curve and line. Recognizing these characteristics is fundamental before your pencil even touches the paper, as it informs every proportion and detail you’ll create.

📤 Share
💾 Download
The “Shrink-Wrapped” Philosophy: Function Over Form (and Form Because of Function)
McLaren’s design is often described as “shrink-wrapped.” This means the body panels appear tightly stretched over the car’s mechanical components, emphasizing functionality and minimal excess. When drawing, this translates to very little visual “fat” or unnecessary bulk. You should perceive the car’s structure underneath the skin.
Focus on tight, athletic proportions: a low stance, wide track, and a cabin pushed forward for optimal weight distribution and driver visibility. The car always looks poised and ready to pounce. A practical drawing tip here: Think about the underlying chassis and engine as the skeleton; the bodywork is a taut skin over that. Avoid puffy, rounded shapes. Instead, look for taut surfaces that pull tightly towards key functional points like wheel arches or air intakes, suggesting tension and aerodynamic efficiency.
Distinctive Visual Cues: Identifying a McLaren at a Glance
Every McLaren features specific elements that instantly define its brand identity. Pay close attention to these details as you study your reference images:
- Headlights: Often slender, boomerang-shaped, or featuring a distinctive “eye-socket” design. They rarely extend far into the fender and are typically integrated seamlessly with the front aerodynamic elements. Observe their precise shape and how they contribute to the car’s aggressive gaze.
- Side Air Intakes: These are prominent, deep, and highly functional, typically located just behind the dihedral doors. They are absolutely crucial for engine cooling and managing airflow along the car’s flanks. Note their precise angles, sharp edges, and how they carve into the side profile.
- Aerodynamic Lines: Look for continuous, uninterrupted lines that flow purposefully from the front splitter, over the hood, across the roof, and down to the rear diffuser. These aren’t just decorative; they guide airflow for downforce and stability. Identify the primary “flow lines” on your chosen McLaren model.
- Low Profile and Wide Stance: McLarens sit exceptionally low to the ground with a broad, planted appearance. Emphasize this distinctively wide, grounded presence when establishing your initial proportions and perspective.
Before sketching, mentally trace these key flow lines and unique shapes on your reference image. Understand their purpose and how they contribute to the car’s overall aggressive, yet elegant, posture. This mental exercise will greatly improve your observational skills and accuracy.
Master McLaren in 8 Simple Steps
Welcome to your comprehensive guide on how to draw a McLaren – one of the most iconic and visually striking supercars in the world. This guide will walk you through the process, from establishing the fundamental proportions to adding the intricate details that make a McLaren unmistakable. By carefully following each step, you’ll develop the skills to capture the aggressive yet elegant lines of these engineering marvels, transforming a blank page into a dynamic automotive artwork. Precision and patience are key, so let’s grab our pencils and begin this exciting artistic journey!
Step 1: Laying the Foundation – Basic Proportions and Chassis Outline
What you need: A sheet of drawing paper, a 2H or 4H pencil (for light lines), a ruler, and an eraser.
Instructions: Begin by lightly sketching the overall length and height of your McLaren. A good starting ratio for many McLaren models is approximately 5 units long for every 1 unit high, creating that characteristic low-slung profile. Use your ruler to draw a faint horizontal line for the ground plane and another for the approximate height of the car. Then, lightly block out a long, narrow rectangle that represents the main body or chassis, leaving space for the wheels. This initial box doesn’t need to be perfect, but it establishes the car’s presence on your page and its fundamental dimensions.
Pro Tip: Keep your lines extremely light in this stage. These are merely guidelines. You should be able to erase them completely later without leaving indentations. Focus on getting the overall ‘feel’ of the car’s stretched, low stance.
Step 2: Defining the Major Forms – Cabin, Hood, and Rear Deck
What you need: Your 2H/4H pencil, eraser.
Instructions: Now, within your initial chassis outline, start to define the major sections of the McLaren. Lightly sketch the distinctively low-slung cockpit (cabin area) towards the front-mid section, noting how it barely rises above the main body. Block out the long, sleek hood that gently slopes down to the front and the similarly low and muscular rear deck that houses the engine. Observe reference images of specific McLaren models (e.g., 720S, Senna) to understand the subtle curves and how these major components flow into each other, creating a cohesive, aerodynamic shape. Pay attention to the gentle tapering of the body towards the front and rear.
Pro Tip: Avoid drawing harsh angles. McLarens are renowned for their organic, flowing lines. Use soft, continuous strokes to suggest the curvature of the body panels, even at this early blocking stage.
Step 3: Positioning the Wheels and Wheel Arches
What you need: Your 2H/4H pencil, a compass or circular template (optional but recommended), eraser.
Instructions: The wheels are crucial for a supercar’s stance. Mark the approximate center points for all four wheels (two visible in a side profile view). A general rule is that the front wheel is typically positioned roughly 1/5th of the car’s length from the front, and the rear wheel about 1/4th from the back, though this varies by model. Using a compass or by freehand, draw perfect circles for the wheels. Ensure they are the same size. Then, lightly sketch the wheel arches, making sure they elegantly hug the top portion of the wheels, following the car’s body line. McLaren arches are often quite pronounced and help define the car’s muscularity.
Pro Tip: Spend time getting the wheel placement and size correct. If the wheels are off, the entire car will look disproportionate. Use a vertical guideline from the center of the wheels to ensure they are properly aligned with the body.
Step 4: Sculpting the Iconic Silhouette and Air Intakes
What you need: Your 2H/4H pencil, eraser, a reference image of your chosen McLaren model.
Instructions: This step is where your McLaren starts to truly take shape. Refine the upper and lower contours of the car, paying close attention to the unique McLaren roofline, which often features a gentle double-bubble or a smooth, uninterrupted arc. Detail the aggressive side air intakes located behind the doors, ensuring they integrate seamlessly into the bodywork’s flowing lines. These intakes are functional and highly characteristic. Use longer, more confident strokes to connect the previously blocked-out forms, gradually building the recognizable silhouette. Think about the subtle creases and aerodynamic channels visible on the car’s flanks.
Pro Tip: Constantly compare your drawing to a reference image. Look for subtle nuances in the curves and angles that define the specific McLaren model you’re drawing. A slight exaggeration or understatement can change its character.
Step 5: Detailing the Front – Headlights and Grille
What you need: Your HB or B pencil (for slightly darker lines), eraser, sharpener.
Instructions: Move to the front of the car. Lightly sketch the distinctive McLaren headlights, which are often thin, L-shaped, or boomerang-like LED strips that follow the bodywork’s contours. Pay close attention to their angularity and how they integrate into the fenders. Below the headlights, define the main grille and the aggressive front splitter. McLarens typically have large, functional air vents and intricate aerodynamic elements at the front. Use your HB pencil to start firming up these lines, making them slightly darker and more defined than your initial guidelines. Ensure symmetry if drawing a head-on view, or correct perspective if angled.
Pro Tip: The ‘face’ of the car is crucial for recognition. Take your time with the headlights and grille. Small details here make a big difference in capturing the McLaren’s aggressive yet sophisticated aesthetic.
Step 6: Refining the Rear – Taillights and Exhaust
What you need: HB/B pencil, eraser, reference image.
Instructions: Now, focus on the rear of the vehicle. McLaren rear designs are often as distinctive as their fronts. Sketch the characteristic taillight arrangement, which might be a thin, continuous LED strip, separate angular lights, or integrated into the rear spoiler. Below the taillights, define the powerful rear diffuser and the exhaust tips, which can vary from a central high-mounted pipe to multiple lower outlets. The rear often features complex aerodynamics and vents. Use your HB pencil to refine these shapes, ensuring they match the sculpted, performance-oriented design of the McLaren.
Pro Tip: Consider the interplay of light and shadow on the diffuser and exhaust. These elements often have sharp angles and deep recesses that create strong contrast, hinting at the car’s power.
Step 7: Adding Refinements and Panel Lines
What you need: HB/B pencil, eraser, a fine-tip mechanical pencil (0.5mm) if available.
Instructions: With the main forms established, it’s time to add the finer details. Use your HB or mechanical pencil to carefully draw the panel lines that define the doors, hood, trunk, and fuel cap. These lines should be precise and consistent, not too thick. Add details like window frames, door handles (often flush-mounted on McLarens), and mirrors. Pay attention to the subtle creases and character lines that run along the bodywork – these often catch light and define the car’s musculature. Erase any remaining light construction lines that are no longer needed, cleaning up your drawing significantly.
Pro Tip: Panel lines should be thin and subtle. Avoid making them too dark or heavy, as this can make the car look cartoonish. Imagine them as shallow grooves rather than thick outlines.
Step 8: Shading, Highlights, and Final Details
What you need: A range of pencils (2H, HB, 2B, 4B), blending stump or cotton swab, kneaded eraser.
Instructions: This is where your McLaren truly comes to life. Begin applying light shades with your HB or 2B pencil to establish the general values, imagining a light source. Use a blending stump or cotton swab to smooth out graphite for gradual transitions, especially on curved surfaces. Apply darker tones with your 4B pencil in areas of shadow, such as under the car, inside air intakes, and around the wheels, to create depth. Use your kneaded eraser to lift graphite for bright highlights, mimicking reflections on the glossy paintwork and windows. Add intricate details like brake calipers visible through the wheels, tire treads, and subtle reflections in the windows and body panels.
Pro Tip: Don’t shade flatly; think about the contours of the car. Shading should follow the form, not just fill it in. High-contrast areas between light and shadow will make your McLaren pop off the page.
✅ Final Checklist
- Did you maintain consistent proportions throughout the drawing process?
- Are the wheels and wheel arches perfectly circular and aligned?
- Do the headlights and taillights match the distinctive McLaren design?
- Are all major panel lines, air intakes, and aerodynamic elements present and clearly defined?
- Have you applied shading and highlights effectively to give the car depth and realism?
Important Notes:
- Safety considerations or warnings: While drawing is generally safe, ensure good posture to prevent neck and back strain, and work in a well-lit area to avoid eye fatigue.
- When to seek professional help: If you’re passionate about improving your automotive art, consider enrolling in local art classes or seeking mentorship from an experienced automotive illustrator. They can provide personalized feedback and advanced techniques.
- Estimated time and cost range: Drawing a detailed McLaren can take anywhere from 2 to 6 hours, depending on your experience and the level of detail. The cost is minimal, typically just the price of a good set of drawing pencils (approx. $10-$25), quality paper ($5-$15 per pad), and an eraser.
Essential Tools and Preparation for Automotive Art
Great automotive art, especially when capturing the precision of a McLaren, starts with the right tools and a prepared mind. Don’t underestimate the impact of proper materials and a well-organized workspace. Having everything ready streamlines your process and prevents frustrating interruptions, allowing you to focus entirely on capturing the McLaren’s intricate form and dynamic lines.

📤 Share
💾 Download
Your Drawing Arsenal: Precision at Your Fingertips
Selecting the correct drawing tools is the first practical step towards a successful McLaren sketch:
- Pencils: A range of graphite pencils is crucial for achieving depth and control.
- Hard (H, 2H): Use these for initial, light construction lines and very subtle details. They create faint marks that erase easily and prevent unwanted smudges.
- Medium (HB, B): These are your workhorses for general outlines, defining forms, and establishing mid-tone shading.
- Soft (2B, 4B, 6B): Reserve these for deep shadows, strong definitive lines, and adding rich contrast to make your McLaren pop off the page.
- Paper: Choose smooth, medium to heavy-weight drawing paper (e.g., 80-100lb or 180-220gsm). Smoother surfaces allow for cleaner, finer details and crisp lines, which are absolutely essential for rendering the sleekness and precise edges of a McLaren. Textured paper can hinder sharp lines.
- Erasers:
- Kneaded eraser: Ideal for lifting graphite gently without damaging the paper surface. Perfect for subtle corrections, softening edges, and lightening areas.
- Plastic/Rubber eraser: Use this for more precise, firm erasing of construction lines and any definite mistakes.
- Ruler: Absolutely non-negotiable for establishing accurate perspective, geometric proportions, and ensuring straight lines, especially during the initial block-in phase. A transparent ruler is particularly useful for easy alignment.
- Reference Images: The single most important tool in your arsenal. Gather multiple high-quality photos of your chosen McLaren model (e.g., 720S, Artura, P1) from various angles – front, side, three-quarter, and rear. Zoom in on specific details like headlights, wheels, and air intakes. Print them out or display them prominently on a second screen for constant, easy access.
Setting Up for Success: Your Focused Workspace
A well-prepared environment significantly enhances your drawing experience and results:
- Lighting: Ensure you have even, bright lighting across your drawing surface. Natural light is often best, but a good, adjustable desk lamp can supplement and eliminate shadows cast by your hand or body.
- Surface: Work on a stable, flat surface. An angled drawing board can greatly improve comfort, reduce neck strain, and sometimes aid in perceiving perspective more accurately.
- Comfort: A comfortable chair and good posture are vital to prevent fatigue during longer drawing sessions, allowing you to maintain focus and precision without physical discomfort.
- Minimize Distractions: Clear your workspace of clutter. Your McLaren drawing deserves your full attention. Keep your essential tools within easy reach and your reference images directly in your line of sight for constant comparison and accuracy checks.
Capturing Distinctive Features: Headlights, Vents, and Wheels
Once your foundational shape is solid, it’s time to infuse your drawing with the unmistakable personality of a McLaren. These specific details are what truly elevate your artwork from a generic supercar sketch to a finely tuned automotive portrait.
The Iconic Headlights and Taillights
McLaren’s lighting elements are more than just functional; they are integral to the car’s visual identity, often appearing as sleek, sharp “eyes” or dynamic strips that cut through the bodywork.
- Observe their predatory gaze: McLaren headlights often boast a narrow, angular, and integrated design that follows the contours of the fender or hood, giving the car an intense, focused expression.
- Hint at internal structure: Even if you’re simplifying, subtly indicating the individual LED elements, light pipes, or lens texture can significantly enhance realism.
- Taillight drama: McLaren taillights are frequently thin, horizontal lines or unique boomerang shapes that emphasize the car’s extreme width and low stance. Note how they wrap around the rear.
- Precision is key: Slight deviations in the angle or curve of these features can drastically alter the car’s character. Use ample reference photos to capture their exact form.
Aggressive Vents and Aerodynamics
McLaren’s design philosophy is driven by aerodynamics, and its numerous vents aren’t just aesthetic; they sculpt the car’s dynamic form, telling a story of airflow and performance.
- Depth and dimension: Remember, these aren’t flat cut-outs. Vents have depth, often with complex internal structures. Show the perspective of the opening and how light falls into them, creating crucial shadows that define their three-dimensionality.
- Sharp creases and angles: Notice the strong, defining lines and creases that surround these vents. They direct airflow and contribute to the car’s aggressive, purposeful stance.
- Model-specific design: Each McLaren model (e.g., 720S, Senna, Artura) features unique vent designs. Study your chosen reference closely, as a simple change in shape can differentiate one model from another.
The Dynamic Wheels
The wheels of a McLaren are often intricate, multi-spoke designs that convey both speed and lightness, grounding the vehicle while suggesting movement.
- Start with perfect circles: Begin by accurately drawing perfect ellipses for the outer tire and inner rim. Precision here is paramount, as distorted wheels will instantly compromise the drawing.
- Intricate spoke patterns: Focus on the individual spoke design. Are they thin or thick? How many are there? Do they curve gracefully or form sharp angles? Pay attention to the negative space created between the spokes.
- Brake caliper accents: Don’t forget the prominent brake calipers peeking through the spokes. These are often brightly colored (e.g., yellow, red) and add a powerful visual accent, emphasizing the car’s performance capabilities.
- Tire details: The tire isn’t just a black circle. Consider its sidewall details, tread pattern, and the slight bulge where it meets the ground, adding weight and realism.
Achieving Depth and Realism Through Shading and Perspective
A mere line drawing, no matter how accurate, only provides a blueprint. To make your McLaren truly leap off the page, you must master the interplay of light and shadow and ensure it sits solidly within a three-dimensional space.
Mastering Light and Shadow for Form
McLarens are defined by their complex, flowing curves and sharp, angular creases, which interact with light in captivating ways. Shading is your primary tool for conveying this three-dimensional volume and highly reflective surface.
- Identify your light source: Before applying any tone, determine where the light is coming from. This single decision dictates where all your highlights, mid-tones, and shadows will fall.
- Reflective surfaces are key: Supercar paint is highly reflective. Don’t shade with only gradual tones. Instead, look for crisp, bright highlights contrasting with deep, dark shadows, especially along the car’s defining edges and curves. These sharp reflections are what communicate the car’s sleekness and material quality.
- Cast shadows ground the car: The shadow the car casts on the ground beneath it is vital. It anchors the vehicle, giving it weight and a sense of belonging in its environment. Observe its shape and softness.
- Utilize a full value range: Employ a spectrum of tones, from the brightest whites of direct highlights to the darkest blacks of deep recesses and ambient occlusion in crevices. This strong contrast creates visual impact and depth.
- Treat glass realistically: Windshields and windows are also highly reflective, often mirroring the sky or surrounding environment. Use precise shapes of light and dark to indicate their transparency and reflective qualities.
Using Perspective for Dynamic Presence
While your initial construction lines establish basic perspective, refining it further makes your McLaren appear robust, dynamic, and correctly situated in space, preventing it from looking flat or distorted.
- Reinforce vanishing points: Revisit your vanishing points to ensure that all parallel lines in your McLaren (e.g., the top and bottom of the side windows, the front and rear bumpers) converge correctly, making the car recede realistically into the distance.
- Ellipses of the wheels: The perfect circles of the wheels become ellipses in perspective. The degree of their “squash” and the orientation of their major and minor axes are crucial. Wheels closer to the viewer will appear fuller, while those further away will be narrower.
- Foreshortening for drama: Elements like the hood, front fascia, or rear diffuser will appear shorter and wider when viewed head-on or at a strong angle. A subtle exaggeration of this foreshortening can add dramatic impact and a sense of power.
- Connect to the ground plane: Ensure the car looks like it’s firmly on the ground, not floating. The bottom edge of the tires should convincingly connect to the surface, and the cast shadow significantly aids in this illusion.
- Interior visibility: If visible through the windows, even the slightest hint of the dashboard or seats must follow the same perspective rules, contributing to the overall sense of depth.
Conclusion
Drawing a McLaren is an incredibly rewarding artistic endeavor that pushes your observational skills and technical precision. It’s about more than just replicating lines; it’s about understanding the seamless synergy of engineering, aerodynamics, and breathtaking design. From mastering foundational shapes and refining intricate details to bringing them to life with expert shading and perspective, each step builds towards creating a truly stunning piece of automotive art.
Ready to put your newfound knowledge to the test? Start small by focusing on a single, challenging feature, like a headlight or a wheel, before tackling the whole car. Consistently analyze high-quality McLaren reference images, asking yourself why certain lines flow the way they do or how light creates specific reflections. Regular practice, even in short bursts, will dramatically improve your eye and your hand.
So grab your pencils, open up those reference images, and prepare to unleash your inner automotive artist. Your sleek McLaren masterpiece awaits!
❓ Frequently Asked Questions
What are the key elements that define a McLaren’s design, making it instantly recognizable?
McLaren cars are known for their distinctive ‘speedmark’ headlights, flowing aerodynamic body lines, prominent air intakes, and a sleek, low-slung profile that emphasizes performance and efficiency. These features combine to create an unmistakable silhouette.
How can I ensure the proportions are correct when starting the drawing, especially for a complex supercar like a McLaren?
Begin by sketching basic geometric shapes like rectangles and ovals to establish the overall length, width, and height. Use construction lines and compare different parts of the car to reference points to maintain accurate scale throughout the drawing process.
What techniques are best for rendering the reflective and metallic surfaces often found on a McLaren’s bodywork?
To portray reflections, use a variety of shading values from very dark to very light, including sharp edges to define reflected objects or light sources. For metallic sheen, employ subtle gradients and small, bright highlights to mimic light catching the surface.
How do different McLaren models (e.g., 720S vs. P1) impact the drawing process, and should I stick to one?
Different McLaren models have unique styling cues, such as headlight shapes, vent designs, and rear diffuser configurations. It’s highly recommended to choose one specific model for your drawing to accurately capture its particular characteristics rather than creating a generic composite.
What are common mistakes beginners make when drawing supercars, and how can they be avoided?
Common mistakes include inaccurate proportions, neglecting perspective, over-detailing early on, and inconsistent light sources. Avoid these by focusing on basic shapes first, using reference images extensively, applying a consistent light source, and gradually adding details.
Can I use reference images, and if so, how should I choose them effectively to aid my drawing?
Absolutely, reference images are crucial for accuracy. Choose multiple clear, high-resolution photos of your chosen McLaren model from various angles (front, side, three-quarter) to understand its forms. Look for images with good lighting to help identify shadows and highlights.