How to Build a Lego Car: Design & Engineering for Kids & Adults
Last Updated on September 1, 2026 by Ryan
Building a Lego car is a fantastic way to explore basic engineering and design principles. This guide provides everything you need to know, from essential parts to step-by-step construction and customization ideas. You’ll learn how to create stable, functional vehicles that roll smoothly and stand up to play.

Prime for Young Adults — 6 Months Free
Students and 18–24s get six months of Prime free, then half price.
Start 6 Months Free🎯 Key Takeaways
Recommended Best Deal Products


- Start with a strong chassis for stability.
- Choose correct wheels and axles for smooth motion.
- Focus on structural integrity to prevent parts separating.
- Experiment with different designs for unique cars.
- Test your car for rolling efficiency and durability.
Building a functional Lego car starts with understanding a few core principles, not just piling bricks. You need stability, proper wheel alignment, and a solid chassis to ensure your creation rolls smoothly and stays together. This guide focuses on the fundamental design and construction techniques for assembling a robust, moving Lego vehicle using common bricks. Forget complex mechanisms for now; we’ll focus on getting your car rolling efficiently and reliably, offering practical, step-by-step guidance you can apply immediately to your brick collection.

Mastering these foundational techniques will empower you to create any basic Lego car, from a simple sedan to a rugged truck. By focusing on the structural integrity of the chassis and the precision of your wheel attachments, you’ll lay the groundwork for more elaborate designs in the future. We’ll equip you with the knowledge to select the right parts and assemble them for optimal performance, ensuring your car withstands play and looks great.
Foundational Design Principles for Lego Vehicles
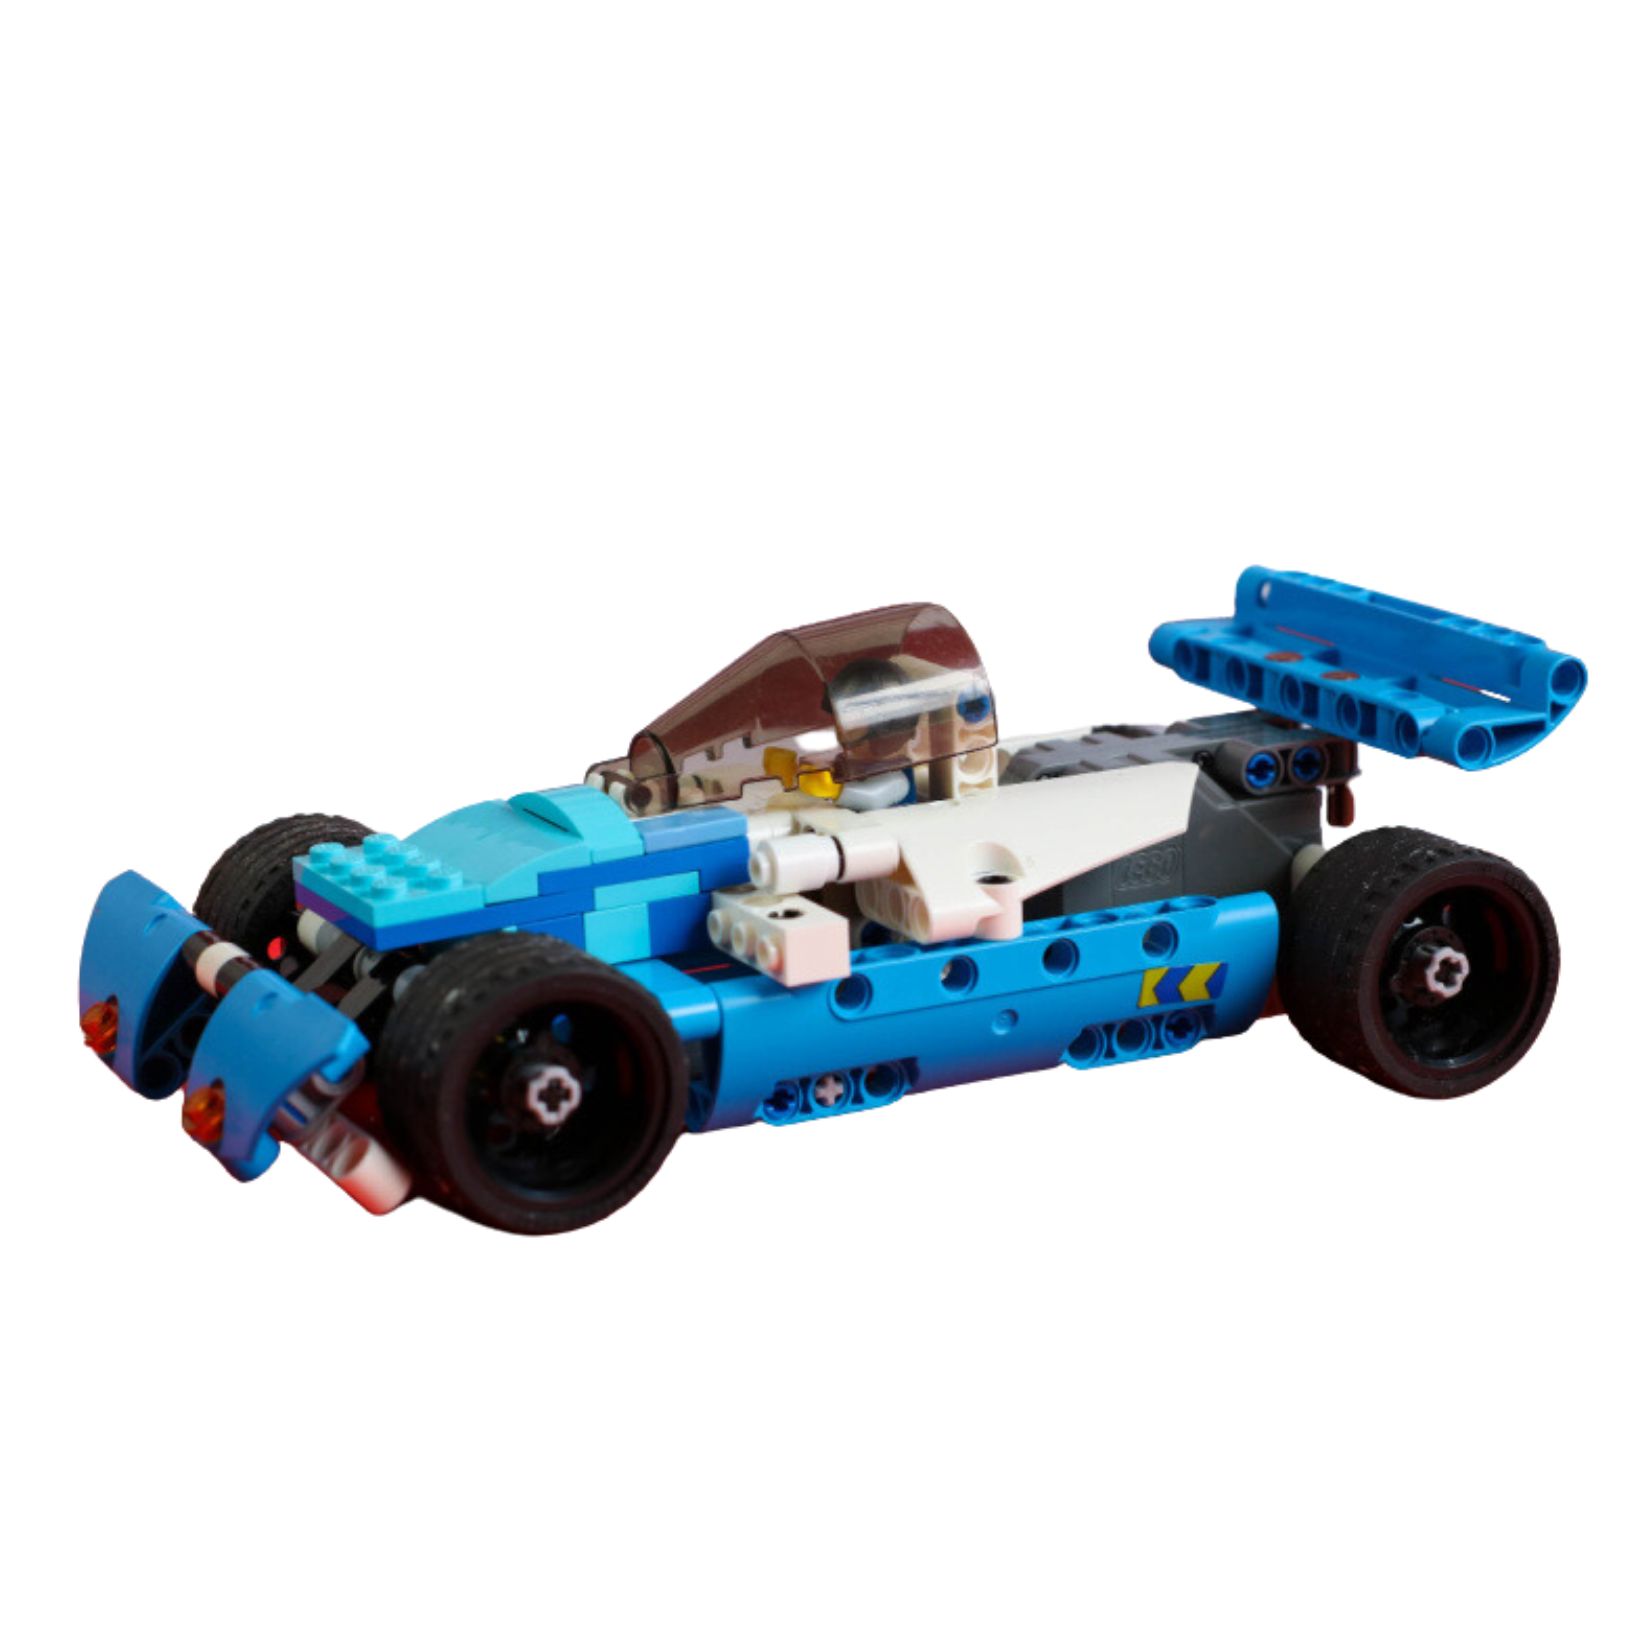
Before attaching any wheels, establishing a strong, flat base – your chassis – is paramount. This base must distribute weight evenly and resist twisting. Think of it as the car’s skeleton. Using larger plates for the base provides inherent stability. For instance, a 6×10 or 8×12 plate is ideal. Avoid narrow strips that will flex or break easily under stress. The goal is a rigid platform that can support the body and internal components without sagging.
Building a Robust Chassis Frame
Your chassis needs more than just a baseplate; it requires structural reinforcement. Think of a real car’s frame. You’ll build up from the baseplate using bricks to create sturdy beams. Interlocking bricks across multiple studs provides superior strength. For example, rather than stacking 1×4 bricks directly on top of each other, offset them to overlap connections. This technique, called “brick bonding” or “staggering,” prevents weak points and increases the frame’s torsional rigidity.
- Start with a wide baseplate: Use a minimum 6×10 or 8×12 plate to prevent flex.
- Layer and overlap bricks: Build up the frame using 2xX bricks, staggering their placement over the baseplate.
- Create a rigid perimeter: Enclose the baseplate edges with bricks to form a strong border.
- Aim for even weight distribution: Ensure brick layers are balanced across the chassis length and width.
Ensuring Structural Integrity and Balance
A well-designed chassis isn’t just strong; it’s also balanced. An unbalanced car will pull to one side or tip over during movement. As you build the body onto your chassis, frequently check for symmetry and even weight distribution. Place identical brick configurations on opposite sides to maintain balance. Use technic pins or axle pins to connect larger sections securely if your design involves modular components. These provide a much stronger connection than studs alone. Consider the overall footprint; a wider chassis generally offers better lateral stability, especially if you plan a taller body.
Mastering LEGO Car Construction in 8 Simple Steps
Recommended Best Deal Products



Welcome to your ultimate guide for building an impressive LEGO car from scratch! Whether you’re a seasoned LEGO enthusiast or just starting out, this comprehensive walkthrough will take you through each crucial stage, from initial concept to the final polished vehicle. Following these detailed steps ensures your creation is not only robust and functional but also a true reflection of your imagination, helping you avoid common building pitfalls and unlock your creative potential.
Step 1: Planning Your Design & Gathering Bricks
What you need: A diverse collection of LEGO bricks (various sizes, colors, specialty elements), a clear workspace, and perhaps a pen and paper for sketching. Consider essential components like wheels, axles, and plates for the base.
Instructions: Before touching a single brick, decide on the type of car you want to build – a sleek sports car, a rugged off-roader, a classic sedan, or even a futuristic concept vehicle. Sketching a simple design can help visualize the proportions and key features. Think about the overall length, width, and height. Then, gather all the bricks you think you might need. It’s often helpful to sort bricks by color or type to speed up the building process. Don’t worry if your initial collection isn’t perfect; you can always swap bricks later. Aim to have at least 150-200 assorted bricks for a decent-sized car, including 4 wheels and 2 axles.

Prime Gaming — Free In-Game Loot
Free monthly games, in-game content and a Twitch channel sub.
Claim Free LootPro Tip: Start with a relatively simple design if you’re new to car building. Focus on getting the basic structure right before adding intricate details. A good initial plan saves time and frustration in later stages, often preventing the need to dismantle entire sections.
Step 2: Building the Chassis – The Foundation
What you need: Long flat LEGO plates (e.g., 2×8, 2×10, 4×8, or a dedicated LEGO car chassis piece), standard bricks for reinforcement, and basic connector pins if using Technic elements.
Instructions: The chassis is the backbone of your car, dictating its size and strength. Begin by creating a sturdy rectangular base using interlocking long plates. For maximum stability, ensure bricks overlap across different layers, avoiding long seams. For example, if you use two 2×8 plates side-by-side, cap them with a 4×8 plate in the next layer. If you have a dedicated LEGO car chassis piece, this step is simplified, but you’ll still need to build around it. Aim for a chassis that is wide enough (at least 6-8 studs) to accommodate your wheels comfortably and long enough (at least 12-16 studs) for your desired body length. This base needs to be robust enough to support the entire vehicle without bending or breaking under its own weight.
Pro Tip: Use a combination of overlapping plates and standard bricks on the underside of your chassis to create a very strong, rigid base. Avoid simply stacking plates directly on top of each other in the same pattern, as this creates weak points and reduces structural integrity.
Step 3: Attaching the Axles and Wheels
What you need: LEGO axles (various lengths, e.g., 4, 6, 8 studs long), axle bricks or Technic pins/axle connectors, LEGO wheel hubs, and rubber tires of appropriate size.
Instructions: Now it’s time to get your car rolling! Determine the optimal placement for your front and rear wheels on the chassis, typically leaving 2-4 studs from each end. For standard LEGO cars, axles typically attach to dedicated axle bricks (e.g., a 2×4 brick with two axle holes) or via Technic pins/bushings that hold the axle securely. Ensure the axles are perfectly perpendicular to the chassis for straight rolling; use a ruler or visual alignment check. Slide the wheel hubs onto the axles, then firmly press the rubber tires onto the hubs. Test each wheel assembly by giving it a spin to ensure it spins freely without excessive friction or wobble. Adjust axle length if the wheels rub against the car’s body or the chassis.
Pro Tip: Use Technic bush pieces on the axles between the wheel hub and the car body to minimize friction and prevent the wheels from rubbing against the chassis. This ensures a smoother, more efficient roll for your vehicle and prevents wear on the bricks.
Step 4: Constructing the Main Body Structure
What you need: An assortment of standard LEGO bricks (e.g., 1×2, 1×4, 2×2, 2×4, 2×6), angled bricks, and specialty elements for shaping (e.g., arches, curved slopes, modified bricks with studs on sides).
Instructions: With the chassis and wheels in place, begin building the main body upwards from the base. Start by establishing the outer perimeter of your car, creating the side panels, front, and rear sections. Use interlocking bricks of various sizes to build up walls that are strong and aesthetically pleasing. For example, build a layer with 2×4 bricks, then the next with 1×4 and 2×2 bricks, ensuring brick boundaries don’t align perfectly. Pay attention to the overall shape you envisioned in Step 1, such as tapering for a sports car or a more boxy shape for an SUV. Consider using sloped bricks for the hood and trunk areas to give your car a more aerodynamic and realistic appearance. Continuously check for symmetry and ensure that the structure is securely fastened to the chassis.

Audible — Listen Free for 30 Days
One free credit a month and thousands of titles included.
Listen Free for 30 DaysPro Tip: Avoid stacking many small bricks directly on top of each other for the outer walls, as this creates weak vertical seams. Instead, use longer bricks and overlap them across layers to create a stronger, more cohesive wall structure that won’t easily fall apart under handling.
Step 5: Designing the Cockpit and Interior
What you need: Flat tiles (1×2, 2×2, 2×4) for flooring, a steering wheel element, seats (can be custom-built or pre-molded), clear window/windshield pieces, and small decorative elements (e.g., 1×1 round tiles).
Instructions: Focus on the driver’s area next. Create a flat floor for the interior using smooth flat tiles, which provide a clean, finished look and allow a minifigure to stand or sit easily. Position the driver’s seat (or multiple seats) within the cockpit area, ensuring there’s enough room for a LEGO minifigure if you plan to include one. Attach a steering wheel to the front of the cockpit, typically using a 1×2 or 1×1 modified brick with a clip. For the windshield, integrate clear window bricks or a dedicated windshield piece into the front of the cabin structure. You can add dashboard details using small printed tiles or 1×1 round tiles to represent gauges or buttons, making the interior more realistic and engaging.
Pro Tip: Experiment with different seat designs. Simple seats can be made from a 2×2 brick topped with a 1×2 brick and a 1×2 slope for the backrest. For larger cars, you might want to build more elaborate, multi-brick seats using a combination of sloped and flat pieces for contours.
Step 6: Adding Aesthetic Details & Functionality
What you need: Headlight bricks (with transparent yellow/white 1×1 round plates), taillight bricks (with transparent red 1×1 round plates), grilles, spoilers, mirrors (clip plates with small tiles), exhaust pipes (round bricks or Technic pins), and other decorative elements like vents or specialized tiles.
Instructions: Now comes the fun part of personalizing your ride. Integrate specific pieces for headlights at the front (e.g., 1×2 bricks with studs on the side for attaching round plates) and taillights at the rear, typically using clear, transparent, or colored translucent bricks. Add a grille piece to the front of the car, either a dedicated grille brick or an arrangement of small plates, for a realistic touch. Consider adding side mirrors, either using small flat tiles (e.g., 1×1 round or square) attached with clip bricks or dedicated mirror elements. If building a sports car, a spoiler at the rear can enhance its aggressive look. Exhaust pipes can be created using round bricks or specialized Technic pins. These details are crucial for defining the car’s character and making it unique.
Pro Tip: Use complementary brick colors for details to make them stand out. For example, a black car with red taillights and yellow headlights will have a more striking appearance than one with uniform colors, drawing the eye to key features.
Step 7: Reinforcing and Testing Stability
What you need: Any additional structural bricks (e.g., Technic pins, longer plates, modified bricks with studs on multiple sides) you deem necessary for strengthening, and your hands for gentle testing.
Instructions: Before declaring your car complete, it’s vital to ensure its structural integrity. Gently pick up and handle the car, looking for any parts that feel loose or wobbly. Pay particular attention to the connections between the chassis and the main body, as well as any large panels (like the roof or hood). If you find weak points, reinforce them by adding more overlapping bricks, especially on the inside of the structure, or by using longer plates to bridge connections across multiple existing bricks. Give the car a few gentle pushes across a flat, smooth surface to check if the wheels spin freely and if it rolls straight without veering or toppling. Make any necessary adjustments to ensure durability during play.
Pro Tip: The best way to reinforce is often by adding bricks that connect two different parts or layers. For example, a 2×4 brick that spans across a joint between two 2×2 bricks will create a much stronger connection than just stacking more 2x2s directly on top of each other. Think of it like adding internal bracing.
Step 8: Final Touches and Personalization
What you need: Small decorative pieces (e.g., antennae, small flags, transparent slopes), custom stickers (optional), a LEGO minifigure (optional).
Instructions: With the main build complete and stability confirmed, it’s time for the finishing touches. Add any last small decorative elements like antennae on the roof, roof racks, hubcaps (if not already part of your wheels), or special emblems (like a custom 1×1 tile). If you have LEGO stickers, this is the perfect time to apply them to add racing stripes, logos, or license plates, adhering them carefully to flat surfaces. Place a LEGO minifigure in the driver’s seat to truly bring your creation to life and give it a sense of scale. Take a moment to admire your work and perhaps give your new vehicle a unique name. Your custom LEGO car is now ready for display, play, or integration into a larger LEGO city scene!
Pro Tip: Consider the “story” of your car. Is it a racing champion, a rugged explorer, or a stylish urban cruiser? Adding subtle details that align with its story, like a tiny tool in the trunk, a custom roof rack, or unique color accents, can significantly enhance its character and overall appeal.
✅ Final Checklist
- All wheels spin freely and the car rolls smoothly without friction.
- The chassis and body are securely connected, and no parts wobble or feel loose.
- All visible bricks are firmly attached, aligned, and there are no unsightly gaps.
- Aesthetic details like lights, grille, and any special features are correctly in place.
- The car can withstand gentle handling and a minor bump without falling apart.
- A minifigure (if applicable) fits comfortably in the cockpit.
Important Notes:
- Safety Considerations: LEGO bricks are generally safe for their intended age range. Always be mindful of small pieces around young children (under 3 years old) and pets who might swallow them. Ensure any custom modifications don’t create sharp edges or hazards.
- Estimated Time and Cost Range: Building a basic to moderately complex LEGO car can take anywhere from 30 minutes to 2 hours, depending on the complexity of your design and your building experience. The “cost” is highly variable, relying on your existing LEGO collection. Acquiring specific new parts or a starter car-themed set might range from a few dollars for individual bricks to $20-$50+ for specialized sets or bulk buys.
Optimizing Wheel and Axle Integration
The movement of your Lego car hinges entirely on correctly integrated wheels and axles. This is often where many beginner builders encounter friction or instability. Precision in attaching these components ensures your car rolls freely and in a straight line. You need to select the right axle length and ensure they are parallel to each other and perpendicular to the chassis.

Selecting the Right Axles and Wheels
Lego offers various axle types: Technic axles, classic metal axles, and axle plates. For a basic car, Technic axles are often the most straightforward to integrate with standard bricks using Technic bricks (bricks with holes). Wheels come in numerous sizes; choose wheels that are proportionate to your chassis size and won’t rub against the car body. Ensure all four wheels are identical to prevent uneven rolling. The most common wheels for simple cars are those with a center hole that fits a Technic axle perfectly.
- Axle Types:
- Technic Axles: Often black or grey, measured in studs (e.g., 8-stud axle). Insert directly into Technic bricks.
- Axle Plates (2×2 with pin or 2×4 with axle hole): Integrate well with standard bricks for smaller vehicles.
- Wheel Selection: Choose wheels with a central hole that firmly grips your chosen axle.
- Consistent Size: Always use four identical wheels for optimal performance.
Achieving Smooth, Friction-Free Rotation
Friction is the enemy of a fast Lego car. To minimize it, ensure axles spin freely. Technic bricks with axle holes are ideal for holding axles. Place two Technic bricks, spaced appropriately, to support each axle. The axle should pass through them smoothly, with no bending or forcing. Leave a tiny bit of “play” (a fraction of a millimetre) between the wheel hub and the Technic brick to prevent rubbing. You can use bushings (small, round Technic pieces) to secure wheels tightly on the axle while still allowing free rotation, preventing them from wobbling or falling off.
- Identify axle attachment points: Use 1×2 or 1×4 Technic bricks (with holes) on your chassis.
- Ensure parallel placement: The Technic bricks holding each axle must be perfectly aligned, parallel to each other.
- Insert axles gently: Slide the axle through the Technic bricks without force.
- Add wheels and bushings: Place a wheel on each end of the axle, securing it with a bushing (if needed) to prevent it from sliding inward too much. Leave a minimal gap for free spin.
- Test for friction: Manually spin each wheel. It should rotate freely for several seconds without resistance.
<h2>Creative Bodywork and Aesthetic Considerations</h2>
<p>Once your chassis and drivetrain are solid, it’s time for the fun part: giving your Lego car its unique identity. Bodywork isn’t just about making your car look cool; it’s also about enclosing and protecting the internal mechanisms while maintaining structural integrity. This is where your imagination truly takes the wheel.</p>
<h3>Shaping Your Vision: From Form to Function</h3>
<p>Think about the type of car you want to create. Is it a sleek sports car, a rugged off-roader, or a futuristic concept vehicle? Let your ideas guide your brick selection. Start by building a basic shell around your chassis, then gradually refine its shape.</p>
<ul>
<li><strong>Use Slopes and Curves:</strong> Incorporate sloped bricks, curved bricks, and even inverted slopes to create aerodynamic shapes, fenders, and flowing lines. These elements instantly elevate the visual appeal beyond a simple box.</li>
<li><strong>Reference Real Cars (or your imagination):</strong> Look at pictures of actual cars for inspiration on headlight placement, grille designs, or rooflines. Or, unleash your creativity to design something entirely new and unique.</li>
<li><strong>Balance Aesthetics and Stability:</strong> As you add body panels, ensure they are securely attached. A beautiful car that falls apart easily isn’t much fun. Use robust connection points like Technic pins or multiple studs.</li>
</ul>
<h3>Adding Personality: Details and Finishing Touches</h3>
<p>The magic is often in the details. These small additions can transform a generic Lego car into a character-filled masterpiece. Think about how real cars communicate their style and purpose.</p>
<ul>
<li><strong>Headlights and Taillights:</strong> Use clear, translucent, or colored bricks to simulate lights. They add realism and a sense of direction.</li>
<li><strong>Interior Elements:</strong> Even if simple, a steering wheel, seats, or a dashboard can make your car feel more complete and functional, especially if it has opening doors or a removable roof.</li>
<li><strong>Spoilers and Accessories:</strong> For a sports car, a rear spoiler adds a touch of speed. For an off-roader, consider roof racks, side mirrors, or even winch elements.</li>
<li><strong>Color Schemes:</strong> A consistent or thoughtfully contrasted color palette can dramatically impact your car’s look. Don’t be afraid to experiment with accent colors.</li>
</ul>
<h2>Performance Enhancement and Problem-Solving Techniques</h2>
<p>Once your Lego car is built and looking great, the next step is to make it perform its best. Whether you’re aiming for speed, durability, or just smooth movement, understanding how to optimize performance and troubleshoot issues is key to becoming a Lego car master.</p>
<h3>Optimizing for Speed and Durability</h3>
<p>A well-designed Lego car doesn’t just look good; it functions flawlessly. Here’s how to refine your creation for optimal movement and strength.</p>
<ul>
<li><strong>Reduce Friction:</strong> Ensure your wheels spin freely. Use Technic axle pins and bushes to minimize contact between moving parts. Avoid forcing axles through holes that are too tight. Sometimes, simply swapping to a different wheel or tire type can make a difference.</li>
<li><strong>Weight Distribution:</strong> For speed and stability, try to distribute the weight evenly, or slightly heavier towards the front or rear depending on your desired outcome (e.g., more weight over driving wheels for traction, or lighter front for speed).</li>
<li><strong>Strengthen Weak Points:</strong> Pay attention to where your car might flex or break under pressure. Add extra layers of bricks, use interlocking bricks, or reinforce crucial joints with Technic beams for added rigidity, especially around the axles and chassis connection points.</li>
<li><strong>Wheel Alignment:</strong> Check that all wheels are parallel and firmly attached. Misaligned wheels can create drag and cause the car to veer.</li>
</ul>
<h3>Troubleshooting Common Challenges</h3>
<p>Even the best builders encounter issues. The ability to identify and solve problems is a crucial skill. Don’t get discouraged; view challenges as opportunities to learn.</p>
<ul>
<li><strong>Car Pulls to One Side:</strong> <em>Possible causes:</em> Misaligned wheels, uneven friction on one side, or an unbalanced weight distribution. <em>Solution:</em> Recheck wheel attachments, ensure axles spin freely on both sides, and adjust weight.</li>
<li><strong>Wheels Don’t Spin Freely:</strong> <em>Possible causes:</em> Axles are too tight, rubbing against other bricks, or have too much friction. <em>Solution:</em> Loosen axle connections slightly, use spacers (bushes), or ensure no bodywork is touching the wheels.</li>
<li><strong>Chassis/Bodywork Collapses:</em> <em>Possible causes:</em> Insufficient connections, too much overhang, or weak structural points. <em>Solution:</em> Add more interlocking bricks, reinforce connections with plates or Technic bricks, and ensure all parts are securely joined.</li>
<li><strong>It Just Doesn’t Look Right:</strong> <em>Possible causes:</em> Disproportionate parts, awkward angles, or a lack of detail. <em>Solution:</em> Take a step back, compare it to your inspiration (if any), and be willing to rebuild sections. Experiment with different bricks and colors.</li>
</ul>
<h2>Conclusion</h2>
<p>Building a Lego car is an incredibly rewarding journey, blending creativity with fundamental engineering principles. From laying a sturdy foundation to crafting distinctive bodywork and fine-tuning performance, each step teaches valuable lessons in design, problem-solving, and patience. Remember, there’s no single “right” way to build; the joy is in the exploration and innovation.</p>
<p>So, gather your bricks, embrace the challenge, and let your imagination soar. Don’t be afraid to experiment, dismantle, and rebuild. Every iteration brings you closer to your perfect Lego creation. Now, what are you waiting for? Grab your bricks and start building your next amazing Lego car today!</p>
❓ Frequently Asked Questions
Recommended Best Deal Products


What are the fundamental principles for designing a stable Lego car chassis?
A stable chassis requires a wide base, balanced weight distribution, and strong interlocking brick connections to prevent flexing. Ensure the structure is rigid to support the car’s body without sagging, typically by using cross-bracing or larger base elements.
How do I select the right Lego wheels and axles for optimal performance?
Choose wheels with rubber tires for better grip and larger diameters for higher speed. Axles should be the correct length to allow free wheel rotation without excessive wobble, typically using Technic pins or dedicated axle bricks for secure attachment and minimal friction.
Are there different techniques for building the body of a Lego car?
Yes, you can use classic brick-stacking for robust designs, SNOT (Studs Not On Top) techniques for smoother surfaces, or incorporate Technic elements for intricate mechanical features like opening doors. Experiment with slopes, curves, and unique parts to enhance aesthetic appeal and aerodynamics.
How can I customize my Lego car beyond a basic model?
Customization involves adding intricate details like working steering, opening doors, detailed interiors, or spoilers using various bricks and specialized parts. Explore different color schemes, incorporate unique themes like a monster truck or a race car, and don’t be afraid to mix brick types for creative results.
What are common challenges when building Lego cars and how can I troubleshoot them?
Common issues include wheels not spinning freely (check axle alignment/friction), parts falling off (reinforce connections with more interlocking bricks), or poor stability (widen base/lower center of gravity). Test your car iteratively on a flat surface and strengthen weak points as you identify them.
Can I integrate motorized elements into a custom Lego car, and what should I consider?
Yes, you can integrate motors from Lego Power Functions or Powered Up sets, but you’ll need to design a robust frame to handle the motor’s torque and battery weight. Consider gearing ratios for desired speed vs. power, ensure easy access for battery changes, and plan for switch/receiver placement.