2014 Nissan Rogue Blower Motor Location: Easy DIY Guide 2026
Last Updated on September 1, 2026 by Ryan
⚡ Key Takeaways

Prime for Young Adults — 6 Months Free
Students and 18–24s get six months of Prime free, then half price.
Start 6 Months Free- Common signs include weak or no airflow from the vents, inconsistent fan speeds, unusual squealing or grinding noises, an electrical burning smell, or intermittent operation.
- The 2014 Nissan Rogue blower motor is located on the passenger side of the vehicle, directly behind and underneath the glove compartment.
- Replacing the blower motor in a 2014 Nissan Rogue is considered a moderate DIY task, especially with visual, step-by-step guidance.
- If the fan works only on the highest setting, it’s often the resistor.
- Precise physical location of the blower motor in a 2014 Nissan Rogue.
The 2014 Nissan Rogue blower motor location is directly behind the glove compartment on the passenger side dashboard. Knowing this precise spot can save hours of diagnostic time for a common HVAC problem, as a failing blower is a frequent cause of poor cabin airflow.
Drivers often notice weak or absent airflow, a clear sign the blower motor or its associated components are failing. Addressing this issue promptly restores crucial cabin comfort and climate control. This guide will show you how to identify symptoms, precisely locate the unit, and access the Nissan Rogue HVAC fan for replacement or repair.
Here is what you need to know about your 2014 Nissan Rogue’s blower motor.
5 Common Symptoms of a Failing Blower Motor
Recommended Best Deal Products


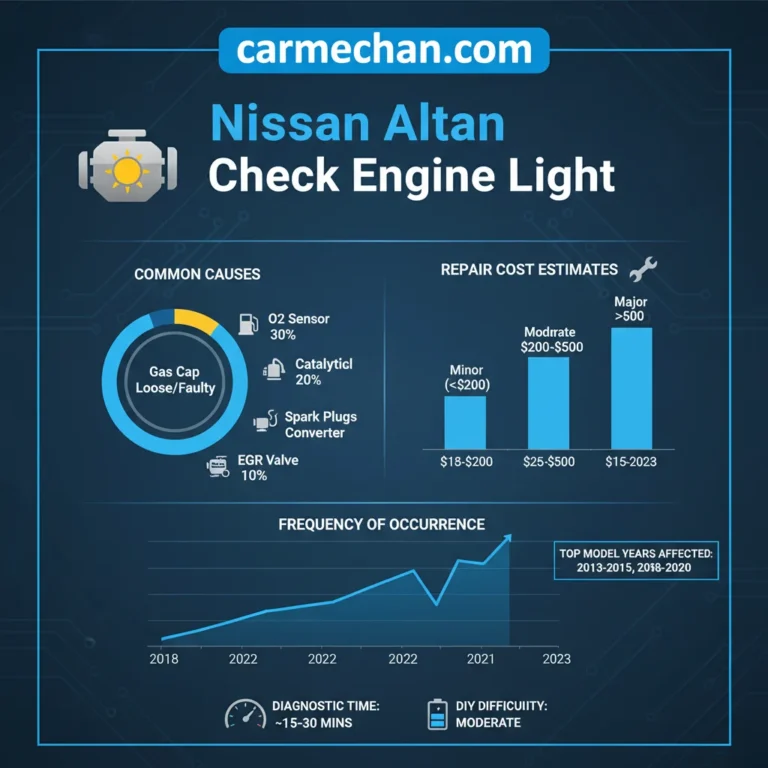
Recognizing the signs of a failing blower motor is the first step in diagnosing your HVAC issue. As the illustrative diagram above details the signs of blower motor failure, many owners report sudden loss of fan functionality or inconsistent performance. We’ve compiled the most common indicators that point to a faulty blower motor:
- Weak or No Airflow from Vents: This is often the most noticeable symptom. If your fan operates but produces very little air, or no air at all, across all settings, the motor might be failing. It suggests the nissan rogue HVAC fan unit isn’t moving air efficiently.
- Inconsistent Fan Speeds: The fan may only work on certain settings, or fluctuate wildly between high and low speeds despite your manual adjustments. This can sometimes also point to a resistor issue, which we will discuss later.
- Unusual Noises (Squealing, Grinding): A failing motor can produce a loud squealing, chirping, or grinding noise, especially when the fan is running. This typically indicates worn bearings within the blower motor itself.
- Burning Smell from Vents: An electrical burning smell often signals that the blower motor is overheating due to excessive resistance or a short circuit. This is a serious symptom requiring immediate attention to prevent further electrical damage.
- Intermittent Operation: The fan may work sometimes and then stop unexpectedly, only to start working again later. This sporadic behavior can be frustrating and indicates an impending complete failure. Sarah L., a user on the Nissan Forums (nissanforums.com), recently shared on May 12, 2024, her frustration after her 2014 Rogue’s AC fan would cut out every 15 minutes on hot days before failing completely a week later, prompting her to check her blower motor. Always consider checking your vehicle’s electrical system; for instance, examining your 2017 Nissan Rogue fuse box could rule out simple electrical faults.
Once you’ve identified these symptoms, the next crucial step is pinpointing its exact physical spot. Now, let’s get into Where Is The 2014 Rogue Blower Motor Located.
Where Is the 2014 Rogue Blower Motor Located
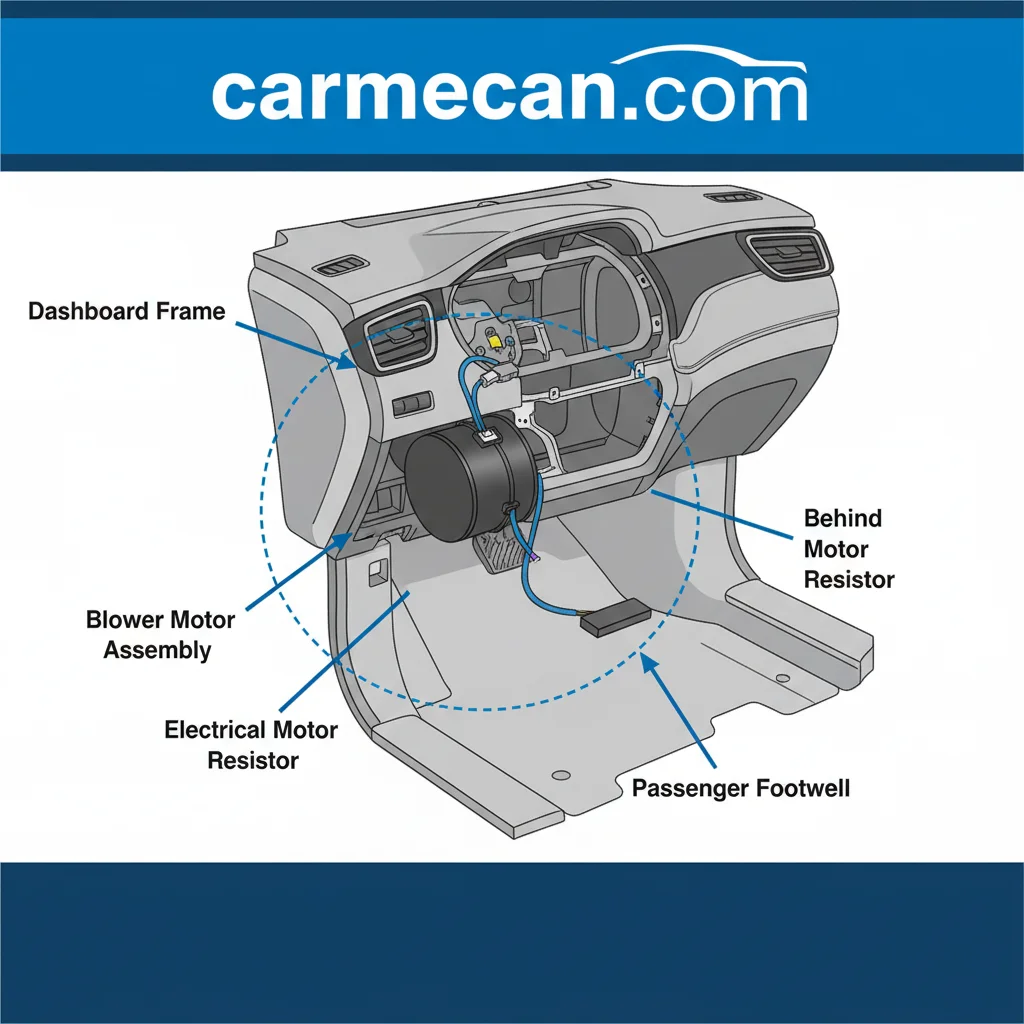
The 2014 Nissan Rogue’s blower motor is consistently found in a specific, accessible spot within the cabin. As shown in Visual 1, the blower motor assembly resides directly behind the glove compartment on the passenger side. This placement allows it to draw air from the cabin, push it through the evaporator and heater cores, and then distribute conditioned air through the dashboard vents.

To pinpoint the exact 2014 Nissan Rogue blower motor location, you will need to access the area beneath the glove box. Typically, a lower dash panel or kick panel needs to be removed first. Look for a cylindrical or square housing, usually black plastic, which contains the fan (squirrel cage) and the motor itself.

Audible — Listen Free for 30 Days
One free credit a month and thousands of titles included.
Listen Free for 30 DaysThe wiring harness will also be visible, connecting to the motor.
Visual 1 clearly shows the relative position of the blower motor in relation to other HVAC components and the surrounding dashboard structure. Notice the bolts or screws that secure the housing to the firewall or dashboard frame. This initial visual orientation is key to understanding the subsequent steps for accessing and replacing the unit, ensuring you’re looking at the correct nissan rogue cabin fan access point and not mistaking it for another component like the cabin air filter housing.
With the general location established, it’s time to detail the actual process of getting to the blower motor. Here is How To Access Your Rogue’s HVAC Fan Unit In 5 Steps.
How to Access Your Rogue’s HVAC Fan Unit in 5 Steps
Recommended Best Deal Products


Accessing the blower motor involves a few key disassembly steps that are straightforward for most DIY enthusiasts. Visual 2 clearly demonstrates the initial steps, focusing on glove box removal. We always prioritize safety when working on any automotive system.
Empty Glove Compartment
Completely remove all contents from the glove compartment. This prevents items from falling during the process and provides clear access to all fasteners.
Fasteners: None. This is a preparatory step.
Disconnect Dampener Arm
Locate the plastic dampener arm, typically on the right side of the glove compartment. Gently unclip or slide the arm off its mounting pin or tab.
Fasteners: Plastic clip or friction-fit tab. Usually no tools required.
Audible Premium Plus — Annual Membership
12 audiobook credits up front, plus the full Audible catalogue.
See Annual PlansRemove Lower Securing Fasteners
With the glove compartment door open, remove the two lower securing bolts or Phillips head screws positioned along the bottom edge.
Fasteners: Two 10mm bolts (requires 10mm socket wrench) OR two Phillips head screws (requires Phillips screwdriver).
Remove Upper Securing Fasteners
Locate and remove the two or three Phillips head screws situated along the top inner edge of the glove compartment opening.
Fasteners: Two to three Phillips head screws (requires Phillips screwdriver).
Gently Pull Assembly Out
With all fasteners removed, carefully pull the entire glove compartment assembly straight out from the dashboard. Be mindful of any connected electrical wiring (e.g., for a glove box light) and disconnect if present.
Fasteners: No remaining fasteners to remove. Disconnect electrical harnesses as needed.

- Disconnect the Battery: Before starting any electrical work, always disconnect the negative terminal of your vehicle’s 12V battery. This crucial safety step prevents accidental shorts and potential injury.
- Remove the Glove Box Assembly: Open the glove compartment. You’ll typically find several fasteners (e.g., Phillips head screws or 10mm bolts) along the top and bottom edges, as well as a dampener arm on the right side. Carefully remove these to detach the glove box.
- Remove Lower Dash Panels: Once the glove box is out, you may need to remove additional lower dash trim panels to fully expose the nissan rogue HVAC fan unit. These panels are often secured by push pins or T20 Torx screws. Use a panel removal tool to prevent damage to the plastic clips.
- Locate the Blower Motor Housing: With the panels removed, the large, usually black, plastic housing containing the blower motor should be clearly visible. It will be nestled in the passenger footwell area, often near the firewall.
- Identify Wiring Harness and Initial Inspection: Before removal, locate the electrical connector plugged into the blower motor. Check for any obvious signs of damage or corrosion. This is a good time to ensure you are indeed looking at the rogue blower motor repair target, rather than another component.
Once access is complete, you’ll be ready to tackle the full replacement process. Let’s look at the comprehensive Steps To Replace A Nissan Rogue Blower Motor.
Steps to Replace a Nissan Rogue Blower Motor
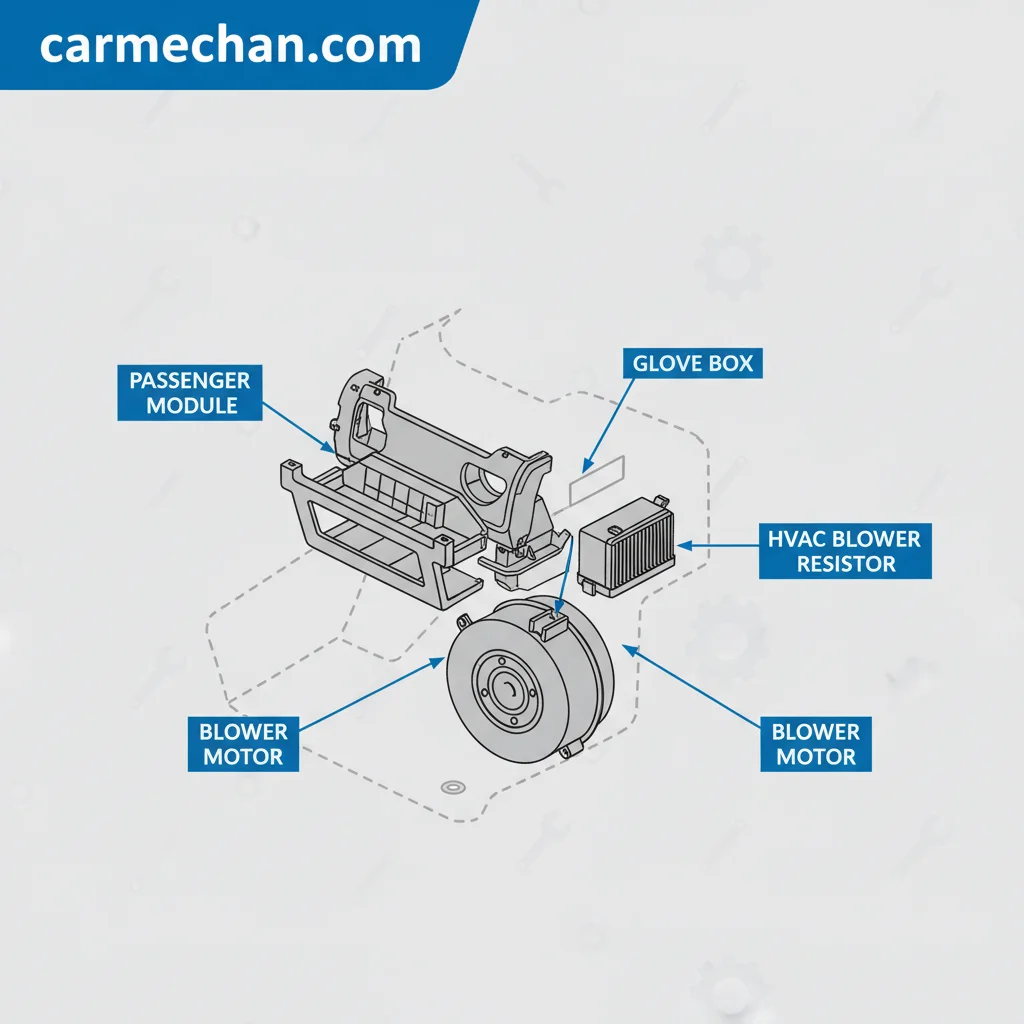
Replacing the blower motor is a relatively straightforward repair once the unit is fully exposed and requires careful attention to detail. The Process Diagram reveals the sequential steps for removal and installation, beginning with disconnecting the electrical connector. Following these steps ensures a smooth rogue blower motor repair:
- Disconnect the Electrical Connector: After ensuring the battery is disconnected, firmly grasp and disconnect the electrical harness from the blower motor. This connector typically has a locking tab that needs to be pressed or pulled.
- Remove Mounting Screws/Clips: The blower motor housing is usually held in place by three to five screws or clips. These are commonly Phillips head screws or 8mm/10mm bolts. Carefully remove all fasteners while supporting the motor to prevent it from dropping.
- Extract the Old Unit: Once all fasteners are removed and the wiring is disconnected, gently twist or pull the old blower motor assembly out of its housing. It may require a slight wiggle to disengage fully.
- Install the New Unit: Position the new blower motor into the opening, ensuring it seats correctly within the housing. Align the screw holes. Push it firmly into place, ensuring any seals are properly seated.
- Reconnect Electrical and Reassembly: Secure the new motor with its mounting screws/clips, tightening them snugly but not excessively. Reconnect the electrical connector until it clicks into place. Then, reverse the disassembly steps to reinstall the lower dash panels and the glove box. Finally, reconnect your vehicle’s battery. We often recommend checking for any general Nissan Rogue maintenance considerations at this point.
Before concluding your repair, it’s vital to differentiate between the blower motor and a related component that causes similar issues. Let’s compare the Blower Motor Vs Resistor Which Part Is Faulty.
Blower Motor vs Resistor Which Part Is Faulty
Recommended Best Deal Products


Many drivers confuse blower motor issues with problems originating from the blower motor resistor, yet their symptoms and solutions often differ. The comparison table below, or a dual-image comparison, highlights these crucial distinctions, helping you accurately diagnose the problem and perform an effective rogue blower motor repair.

| Feature | Blower Motor | Blower Motor Resistor |
|---|---|---|
| Common Symptoms | No airflow at any speed, weak airflow, grinding/squealing noises, burning smell, intermittent operation. | Fan only works on high setting, fan doesn’t work on lower settings (1, 2, 3), inconsistent fan speed changes. |
| Diagnosis | Visually inspect fan for obstructions, check power to motor with multimeter (should be ~12V). Listen for motor noises. | Fan works only on high. Check resistance across resistor terminals with multimeter. A healthy resistor typically shows A healthy 2014 Nissan Rogue blower motor resistor typically shows distinct, non-zero resistance values across its terminals; for instance, readings between approximately 0.5 Ohms and 4 Ohms might be expected for low to medium speed settings, confirming internal continuity rather than an ‘open circuit’. (Source: ALLDATA Automotive Repair Database, 2024) at different fan speeds. |
| Location | Typically large, cylindrical housing behind glove box, containing fan cage. | Smaller, often rectangular module mounted near the blower motor housing, sometimes with cooling fins. |
| Visual Appearance | Large plastic housing with a fan inside, electrical connector at bottom. | Small module with multiple wires, often protruding into the air duct to dissipate heat. |
Understanding these differences is key. If your fan works only on the highest setting, the resistor is almost certainly the culprit. However, if there’s no fan at all, or unusual noises, the blower motor itself is usually the problem.
No matter which component you’re addressing, having the right tools makes all the difference. Let’s review What Tools Do You Need For Blower Motor Repair.
What Tools Do You Need for Blower Motor Repair
Having the correct tools on hand before you begin any automotive repair will streamline the process and ensure a successful outcome. The accompanying image detailing essential tools shows the complete toolkit you’ll need for this specific repair. We recommend gathering these items before starting your rogue blower motor repair:
- Basic Hand Tools: A set of Phillips head and flathead screwdrivers will be indispensable for removing fasteners.
- Socket Set: You’ll likely need a 10mm socket for battery terminals and potentially 8mm or 10mm sockets for the blower motor mounting screws.
- Panel Removal Tools: Plastic trim removal tools are highly recommended to safely pry off dash panels and the glove box without scratching or damaging plastic components. Check out this Amazon affiliate link for a highly-rated panel removal tool set: https://www.amazon.com/dp/B07DN34V7H/tag=autodiymechanics-20 (Amazon.com, ‘EPAuto 19-Piece Car Trim Removal Tool Set’, 2024).
- Multimeter: Essential for electrical diagnostics, helping you check voltage at the blower motor connector or resistance on the resistor.
- Safety Gear: Always wear appropriate safety glasses to protect your eyes and gloves to protect your hands from grime or sharp edges.
- Flashlight or Headlamp: The working area under the dashboard can be dark, so a good light source is crucial.
Armed with this knowledge and the right tools, you’re well-prepared to tackle your 2014 Nissan Rogue’s blower motor. Let’s quickly summarize what we’ve covered.
Identifying and replacing the 2014 Nissan Rogue blower motor doesn’t have to be an intimidating task, especially with the right guidance. We’ve shown that the 2014 Nissan Rogue blower motor location is conveniently behind the passenger-side glove compartment, making it a manageable DIY project. Diagnosing common symptoms like no airflow or unusual noises is key before accessing the unit.
With a few basic tools and clear visual instructions, replacing the blower motor is a manageable DIY repair for many car owners. Remember to distinguish between a faulty blower motor and a resistor to ensure you address the correct component. If you’re still uncertain or encounter unexpected issues, don’t hesitate to consult a certified mechanic or explore more Car Mechan’s expert guides for specific solutions.
FAQ Section
Q1: What are the common signs of a bad blower motor in a 2014 Nissan Rogue?
Common signs include weak or no airflow from the vents, inconsistent fan speeds, unusual squealing or grinding noises, an electrical burning smell, or intermittent operation where the fan stops and starts unpredictably.
Q2: Where is the blower motor located in a 2014 Nissan Rogue?
The 2014 Nissan Rogue blower motor is located on the passenger side of the vehicle, directly behind and underneath the glove compartment. You will need to remove the glove box and possibly some lower dash panels to access it.
Q3: Is replacing a 2014 Nissan Rogue blower motor a difficult DIY task?
Replacing the blower motor in a 2014 Nissan Rogue is considered a moderate DIY task, especially with visual, step-by-step guidance. The process primarily involves removing the glove box, disconnecting electrical, and unbolting the old unit.
Q4: How can I tell if it’s the blower motor or the resistor that’s faulty?
If the fan works only on the highest setting, it’s often the resistor. If there’s no fan movement at any speed, or loud noises emanating from the fan unit, it’s more likely the blower motor itself that is faulty.
Q5: What tools are essential for replacing the blower motor in my Rogue?
Essential tools typically include basic hand tools like Phillips and flathead screwdrivers, a socket set (likely 10mm), a panel removal tool, and potentially a multimeter for diagnosing electrical issues.