Find Your 2017 Nissan Rogue Fuse Box Location Easily
Last Updated on September 1, 2026 by Ryan

For your 2017 Nissan Rogue, you’ll find primary fuse boxes in two key locations: inside the passenger cabin, typically beneath the dashboard, and under the hood in the engine bay. Knowing where these vital electrical hubs are located is crucial for any DIY car owner troubleshooting an electrical issue.
Electrical problems, from a simple dead power outlet to a non-functioning headlight, often trace back to a blown fuse. Identifying and replacing a fuse is a straightforward task that can save you time and money. On Carmechan, we empower you with the knowledge to handle these common repairs.
In this comprehensive guide, we’ll walk you through locating both fuse boxes, safely accessing them, understanding their diagrams, and even provide some critical troubleshooting steps for your 2017 Nissan Rogue fuse box location.
Where Is the Primary Interior Fuse Box?


To begin troubleshooting an interior electrical issue, your first stop will be the passenger cabin fuse box. This box typically manages circuits for accessories like your radio, power windows, interior lights, and various sensors.
We’ll guide you to its exact spot and show you how to get inside.
Identifying the Interior Fuse Panel Cover
The interior fuse box for your 2017 Nissan Rogue is conveniently located on the driver’s side of the vehicle. You will find it beneath the dashboard, nestled just to the left of the steering column.
As shown above, the fuse panel cover is a small, rectangular plastic piece. It often has a small slot or tab designed for easy removal. You won’t typically need any special tools to open it.
[Image: Location of the 2017 Nissan Rogue interior fuse box cover, beneath the driver’s side dashboard, to the left of the steering column.]
We recommend crouching down and looking up towards the underside of the dash. You should spot the cover easily.
First Look Inside What to Expect
Once you’ve located the cover, gently pry it open using your fingers or a small, non-marring trim tool. It should pop right off without much force.
Inside, you will see rows of colorful fuses of various sizes. You might also find a small white or yellow plastic tool. This is your fuse puller, an essential item for safe fuse removal.
Some models also store a few spare fuses within this compartment, which can be incredibly handy in a pinch.
Locating Your Engine Bay Fuse Box


Beyond the cabin, your 2017 Nissan Rogue also houses a critical fuse box under the hood. This exterior fuse box typically manages higher-amperage circuits for components like your engine control unit (ECU), anti-lock braking system (ABS), cooling fan, and various other essential engine functions.

Let’s pinpoint its exact position and get it open.
Opening the Engine Bay Fuse Box
You will find the engine bay fuse box positioned prominently on the driver’s side of the engine compartment. It sits relatively close to the car battery, often tucked behind it or to its side.
The diagram reveals its general placement within the engine bay. It’s usually a larger, black plastic box with a secure lid.
[Image: Location of the 2017 Nissan Rogue engine bay fuse box cover, prominently placed on the driver’s side of the engine compartment, near the battery.]
To open this fuse box, you’ll typically need to unclip one or more tabs. Some designs might require pressing down on a tab while lifting the cover, while others simply unclip upwards.
Carefully release these clips and lift the cover away. It should come off smoothly, revealing the fuses and relays underneath.
Important Labels and Components
Once the engine bay fuse box is open, you will notice a different array of components compared to the interior box. While it still contains standard blade fuses, you’ll also see larger, square or rectangular components known as relays.
These relays control higher-current circuits. The inside of the cover often has a diagram or legend printed on it, indicating the purpose and amperage of each fuse and relay. We always recommend consulting this diagram before attempting any changes.
(e.g., ECM, Fan, ABS)
FUSE LEGEND
F1: Headlights
F2: Fuel Pump
R1: ECM Relay
(various amperages)
inside of cover
How to Access Fuse Boxes Safely

Working with any electrical system requires a cautious approach to prevent injury or damage to your vehicle. We'll walk you through the essential safety steps before you even touch a fuse.

Adhering to these guidelines ensures a smooth and safe troubleshooting process.
Essential Safety Precautions
- Turn Off the Engine: Always start by turning off your 2017 Nissan Rogue's engine. Remove the key from the ignition to ensure no power is accidentally sent through circuits while you're working.
- Consult Your Owner's Manual: Your vehicle's owner's manual contains specific instructions and warnings tailored to your Rogue. It also has the most accurate fuse diagrams.
- Use the Right Tools: A plastic fuse puller is essential for safely removing fuses. Avoid using metal pliers or screwdrivers, which can short circuits or damage the fuse box. A reliable work light for mechanics can also be invaluable in dimly lit areas.
Never attempt to bypass a fuse or replace a fuse with one of a higher amperage rating than specified. This can lead to serious electrical system damage, wiring fires, and poses a significant safety risk to you and your vehicle. Only use fuses with the exact amperage specified by Nissan.
Step-by-Step Fuse Inspection
Once safety precautions are in place, you can proceed with inspecting your fuses:
Fuse Inspection Steps
Identify the Circuit: Before handling any fuses, determine which circuit the suspected fuse belongs to. Consult your 2017 Nissan Rogue's owner's manual or the fuse box diagram to correctly identify the circuit and its corresponding fuse.
Use the Fuse Puller: With the ignition off, carefully use the plastic fuse puller (usually found in the fuse box or tool kit) to gently extract the suspected fuse from its slot. Avoid using metal tools that could short circuits.
Visually Inspect the Fuse: Hold the removed fuse up to a light. Look for a broken wire or a dark, burnt appearance inside the clear casing. A visibly broken filament indicates a blown fuse, while an intact filament suggests the fuse is still good.
- Identify the Suspect Circuit: Based on the electrical component that isn't working, use your owner's manual or the diagram on the fuse box cover to locate the corresponding fuse.
- Use the Fuse Puller: Gently grasp the top of the fuse with the fuse puller. Pull straight up with a firm, steady motion until the fuse slides out.
- Visually Inspect the Fuse: Hold the fuse up to a light. A good fuse will have an intact metal wire or strip running between the two prongs. A blown fuse will show a broken or melted wire, sometimes with discoloration inside.
- Test with a Multimeter (Optional but Recommended): For a more accurate test, set a multimeter to the continuity setting. Touch one probe to each metal blade of the fuse. A good fuse will show a reading of zero or emit a beep, indicating continuity. A blown fuse will show an open circuit or no beep.
- Replace if Blown: If you identify a blown fuse, replace it with a new fuse of the exact same amperage rating and type. Push the new fuse firmly into the slot until it seats securely.
Comparing 2017 Rogue Fuse Box Diagrams
Understanding the differences between your Rogue's interior and engine bay fuse box diagrams is crucial for effective troubleshooting. Each diagram serves a distinct purpose, mapping out different electrical systems within your vehicle.

We'll look at what makes them unique and how to best use them.
Interior Vs. Engine Bay Diagram Layouts
The interior fuse box diagram, often found on the back of its cover or in your owner's manual, focuses on cabin accessories. It lists fuses for your infotainment system, power windows, door locks, interior lighting, and sometimes even crucial safety features like airbags and ABS sensors.
[Image: 2017 Nissan Rogue interior fuse box diagram, showing fuse locations and functions for cabin accessories.]
Conversely, the engine bay fuse box diagram details components critical for vehicle operation. This includes fuses for the engine control module (ECM), fuel pump, headlights, cooling fans, and other high-current systems necessary for starting and running the car.
[Image: 2017 Nissan Rogue engine bay fuse box diagram, detailing fuses and relays for engine and high-current systems.]
As the diagrams reveal, while both contain fuses, the systems they protect are vastly different. Always refer to the correct diagram for the box you are inspecting.
| Feature | Interior Fuse Box Diagram | Engine Bay Fuse Box Diagram |
|---|---|---|
| Primary Function | Protects cabin accessories and low-current systems. | Protects high-current systems and engine components. |
| Common Circuits | Radio, windows, lights, power outlets, dashboard. | ECM, ABS, fuel pump, headlights, cooling fan, ignition. |
| Typical Fuse Types | Mini, ATO/ATC blade fuses. | ATO/ATC blade fuses, JCASE fuses, cartridge fuses. |
| Contains Relays? | Rarely, or for very specific functions. | Frequently contains multiple relays for high-current switching. |
| Location of Diagram | Inside cover or owner's manual. | Inside cover or owner's manual. |
The Verdict
Always cross-reference the specific fuse with the correct diagram (interior for cabin issues, engine bay for performance/exterior electrical) to ensure accurate identification and replacement. Rely on your owner's manual for the most precise information.
Important Fuse Types and Amperage Details
Fuses are not a one-size-fits-all component. Your 2017 Nissan Rogue utilizes specific types and amperage ratings to protect various circuits. Understanding these details is paramount for safe and effective fuse replacement.

We'll cover the common types you'll encounter and why amperage matters so much.
Common Fuse Types in Your Rogue
Most modern vehicles, including the 2017 Nissan Rogue, primarily use blade-type fuses. These are color-coded according to their amperage rating, making them easy to identify.
- Mini (ATM) Fuses: These are the smallest blade fuses, commonly found in interior fuse boxes for lower-current accessories.
- ATO/ATC (Regular) Fuses: Standard-sized blade fuses, used for a wide range of applications in both interior and engine bay fuse boxes.
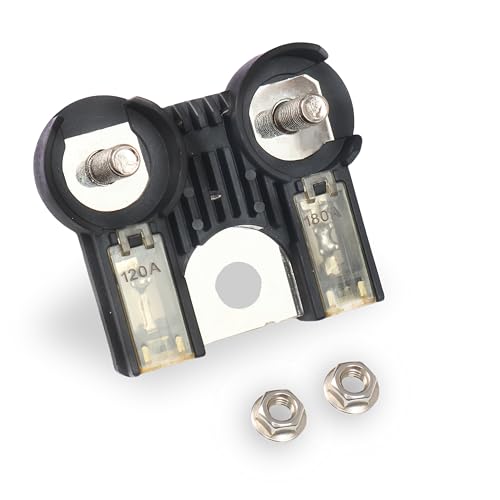
- Maxi (APX) Fuses: Larger blade fuses designed for higher current protection, typically found in the engine bay.
- JCASE Fuses: A cartridge-style fuse, larger than blade fuses, used for very high-current circuits, also exclusively found in the engine bay.
[Image: Common automotive fuse types with color coding, displaying Mini, ATO/ATC, Maxi, and JCASE fuses.]
As shown above, each type has a distinct physical appearance, but their purpose remains the same: to act as a sacrificial link in an electrical circuit, blowing out to prevent damage to more expensive components.
Amperage Ratings and Why They Matter
The amperage rating of a fuse indicates the maximum current it can safely handle before blowing. This rating is printed on the top of the fuse and is also visually represented by its color.
For example, a 10-amp fuse is red, a 15-amp is blue, and a 20-amp is yellow. It is critical to always replace a blown fuse with one of the exact same amperage rating and physical type. Nissan recommends specific amperage ratings for each circuit to prevent electrical damage and ensure proper vehicle function.
[Image: A blown fuse with a visibly broken filament compared to a good fuse with an intact filament.]
As the image reveals, a blown fuse clearly shows its internal wire broken. Replacing it with an incorrect fuse can lead to serious consequences. For instance, improper fuse replacement, such as using a fuse with a higher amperage rating, can lead to serious electrical system damage or even vehicle fires.
Critical Electrical Troubleshooting Steps
When an electrical component in your 2017 Nissan Rogue stops working, it can be frustrating. However, with a systematic approach, you can often diagnose and fix the problem yourself. We'll guide you through effective troubleshooting.
These steps help you pinpoint whether a blown fuse is the culprit or if a deeper issue is at play, perhaps with related electrical system components like your battery.
Identifying Blown Fuse Symptoms
Common symptoms of a blown fuse are usually quite specific:
- A single accessory or system stops working (e.g., one headlight, a specific power outlet, the radio but not other dashboard functions).
- No power to a particular circuit, even when the vehicle is running.
- Sometimes, you might notice a burning smell, though this is less common with simple fuse blows and could indicate a more serious issue.
If multiple, unrelated electrical systems fail simultaneously, the problem is less likely a single fuse and more likely an issue with a main fuse, a relay, or even the vehicle's battery or alternator.
Step-by-Step Troubleshooting Guide
- Confirm the Symptom: Double-check that the component indeed isn't working. Is the power outlet truly dead, or is your charger faulty?
- Consult the Owner's Manual: Identify which fuse protects the problematic component. This will tell you which fuse box to check (interior or engine bay) and the specific fuse number and amperage.
- Locate and Access the Fuse Box: Follow the steps outlined earlier to safely open the correct fuse box.
- Visually Inspect the Fuse: Use the fuse puller to remove the identified fuse. Look for a broken or melted wire.
- Test the Fuse (if visual inspection is inconclusive): Use a multimeter set to continuity mode. If there's no continuity, the fuse is blown.
- Replace the Blown Fuse: Insert a new fuse of the exact same amperage and type.
- Test the Component: Turn the ignition to the ON position (or start the engine if required) and check if the component now works.
If the new fuse blows immediately or the component still doesn't work:
→ There might be a short circuit in the wiring or a fault with the component itself. It's time to consult a qualified mechanic for further diagnosis. Do not repeatedly replace fuses as this can cause damage.
while troubleshooting can be empowering, sometimes problems require professional expertise. For complex issues, a visit to your mechanic is the safest course of action.
Locating and understanding the fuse boxes in your 2017 Nissan Rogue is an essential skill for any car owner. We've shown you exactly where the interior and engine bay fuse boxes are, how to access them safely, and how to interpret their diagrams. By familiarizing yourself with these details, you're well-equipped to handle common electrical issues.
Always prioritize safety and use the correct replacement fuses to prevent further damage. With this guide, you can confidently address many electrical quirks your 2017 Nissan Rogue might present, keeping you on the road safely and efficiently.
Frequently Asked Questions
Q1 Can I Use Any Fuse as a Replacement for My 2017 Nissan Rogue?
No, you must use a fuse with the exact same amperage rating and physical type. Using a fuse with a different amperage can damage your vehicle's electrical system or even cause a fire. Always match the specifications provided in your owner's manual.
Q2 What Should I Do If a New Fuse Blows Immediately After Replacement?
If a new fuse blows immediately, it indicates a persistent electrical issue, likely a short circuit in the wiring or a faulty component. Do not continue replacing fuses. At this point, it's best to seek professional diagnosis from a qualified mechanic.
Q3 Where Can I Find the Fuse Diagram for My 2017 Nissan Rogue?
The fuse diagrams for your 2017 Nissan Rogue are typically printed on the inside of the fuse box covers themselves. You will also find comprehensive diagrams, along with fuse locations and functions, within your vehicle's owner's manual.
Q4 Are There Spare Fuses Available in the Car?
Many 2017 Nissan Rogue models come with a few spare fuses stored within one of the fuse boxes, most commonly the interior one. Check the fuse box cover or the surrounding compartment for a small holder containing extra fuses of various common amperages.
Q5 Is It Safe to Pull Out Fuses Without Disconnecting the Battery?
Yes, it is generally safe to pull out individual fuses as long as the engine is off and the ignition key is removed. However, for maximum safety, especially when working on the engine bay fuse box for extended periods, disconnecting the negative battery terminal is a recommended precaution.