Optimal Tire Pressure: How Much Air Should Your Tires Have?
Last Updated on September 1, 2026 by Ryan
The optimal air pressure for your tires is always found on your vehicle’s driver’s side door jamb placard or owner’s manual. Maintaining this recommended pressure is crucial for ensuring safety, maximizing fuel efficiency, and extending the lifespan of your tires.
🎯 Key Takeaways


- Find your exact PSI on the driver’s side door jamb placard.
- Check tire pressure when tires are cold for accuracy.
- Correct inflation significantly boosts your vehicle’s fuel economy.
- Proper tire pressure enhances handling, braking, and overall safety.
- Maintain pressure to prevent uneven wear and extend tire lifespan.
The precise amount of air your tires need isn’t a guess; it’s a critical specification set by your vehicle’s manufacturer. Finding this exact number is the first step to ensuring your car operates safely, efficiently, and extends the life of your tires.

Proper tire pressure profoundly impacts everything from your car’s handling and braking performance to how much you spend on gas and how often you replace your tires. Ignoring this simple maintenance check can lead to significant safety risks and unnecessary expenses.
Understanding Your Vehicle’s Recommended Tire Pressure


Where to Find the Official Numbers
Forget generic advice or the maximum pressure listed on the tire’s sidewall. Your vehicle’s optimal tire pressure is unique to your car model, its weight distribution, and its intended use. Here’s where you’ll find the definitive information:
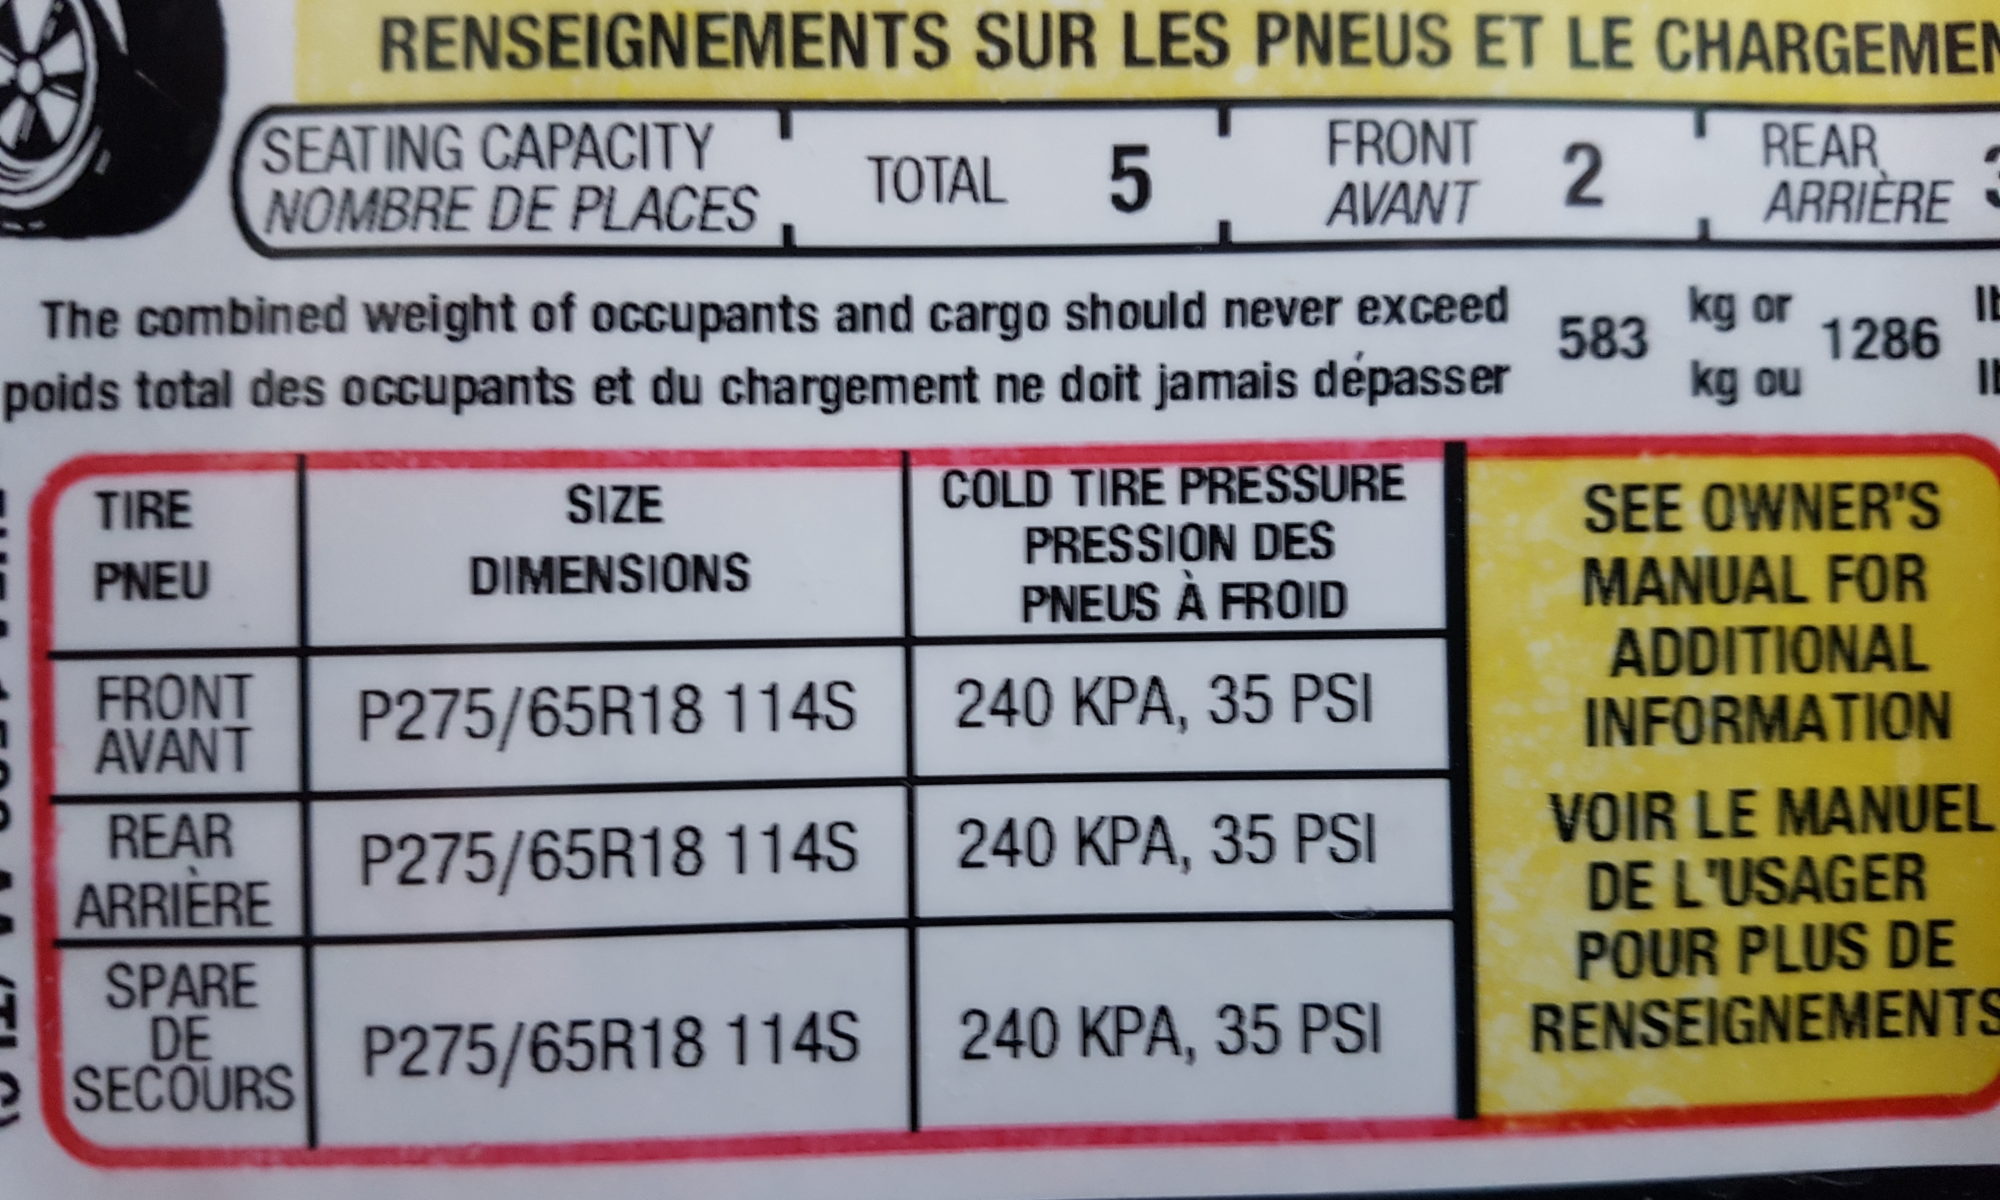
- Driver’s Side Door Jamb Placard: This is the most common and accessible location. Open your driver’s side door, and look for a sticker or placard affixed to the door frame. It usually provides details for both front and rear tires, and often for different load conditions.
- Owner’s Manual: Your vehicle’s owner’s manual contains a wealth of information, including the recommended tire pressures. Check the section related to tires or maintenance.
- Fuel Filler Flap: Less common, but some manufacturers place a small sticker with tire pressure recommendations inside the fuel filler flap.
It’s crucial to understand that the number on the tire sidewall (e.g., “Max. Press. 44 PSI”) is the maximum cold inflation pressure for the tire itself, not the recommended operating pressure for your specific vehicle. Always follow your vehicle manufacturer’s guidelines.
PSI or Bar? Reading the Placard
The placard or manual will specify the recommended pressure in either Pounds per Square Inch (PSI) or Bar, or sometimes both. Most regions use PSI, but Bar is common in Europe and other metric-system areas. Simply match your tire gauge to the unit provided.
- Your vehicle’s placard might list different pressures for the front and rear tires. This is common due to weight distribution.
- It may also specify different pressures for light load vs. heavy load conditions (e.g., carrying passengers or cargo). Adjust accordingly before a long trip with a full car.
Checking your tire pressure should be done when the tires are “cold,” meaning the vehicle hasn’t been driven for at least three hours, or driven for less than a mile at moderate speed. Driving heats up tires, increasing pressure temporarily.
Everything You Need to Know About Tire Pressure
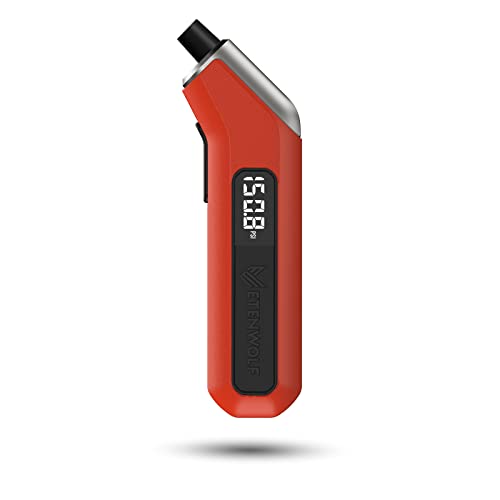


Maintaining proper tire pressure is one of the simplest yet most crucial aspects of vehicle maintenance. It directly impacts your safety on the road, fuel efficiency, tire longevity, and overall driving performance. This comprehensive guide will walk you through each step of checking and adjusting your tire pressure, ensuring your vehicle is always running optimally. Follow these detailed instructions to keep your tires perfectly inflated, saving you money and enhancing your driving experience.
Step 1: Locate Your Vehicle’s Recommended PSI
What you need: Your vehicle, owner’s manual (optional).
Instructions: Before checking your tires, you must know the manufacturer’s recommended tire pressure. This crucial number, expressed in pounds per square inch (PSI), is specific to your vehicle model and is not found on the tire itself. Look for a sticker usually located on the driver’s side door jamb (when the door is open), inside the glove compartment, or on the fuel filler flap. If not there, consult your vehicle’s owner’s manual. Note that front and rear tires might have different recommended pressures. Always use the “cold” PSI rating specified by the manufacturer.
Pro Tip: The PSI listed on the tire’s sidewall is the tire’s maximum pressure, not the recommended operating pressure for your specific vehicle. Never use this number for regular inflation.
Step 2: Gather Your Tools
What you need: A reliable tire pressure gauge (digital or stick type), access to an air compressor (your own, a portable unit, or at a gas station).
Instructions: A good quality tire pressure gauge is essential. Digital gauges offer precise, easy-to-read measurements, while traditional stick gauges are affordable and durable. Familiarize yourself with how your chosen gauge works. If you need to add air, ensure you have access to an air source. Many gas stations have free air pumps, or you might consider investing in a small portable air compressor that plugs into your car’s 12V outlet. Having your own compressor offers convenience, allowing you to top up tires anytime, anywhere.
Pro Tip: Invest in a good quality digital tire gauge; they are more accurate and easier to read than traditional stick gauges. Regularly cross-check your gauge against another trusted gauge for accuracy.
Step 3: Check Tire Pressure When Cold
What you need: Your vehicle, your tire pressure gauge.
Instructions: For the most accurate reading, tires should be “cold.” This means the vehicle hasn’t been driven for at least three hours, or has been driven for less than a mile at moderate speed. Driving heats up the air inside the tires, causing the pressure to increase and giving you a falsely high reading. Unscrew the cap from the tire’s valve stem and firmly press the tire pressure gauge onto the valve stem until the hissing sound stops and the gauge provides a reading. Read the displayed number. Repeat this process for all four tires, and don’t forget your spare tire if it’s easily accessible and you have an appropriate gauge.
Pro Tip: Always check all five tires (including the spare, if applicable). A forgotten spare could leave you stranded in an emergency. If your spare is a temporary “donut,” it might have a much higher recommended PSI (e.g., 60 PSI) than your regular tires.
Step 4: Add Air If Necessary
What you need: Air compressor or gas station air hose, your tire pressure gauge.
Instructions: If any tire’s pressure is below the recommended PSI, it’s time to add air. Connect the air hose nozzle securely to the tire’s valve stem. Add air in short bursts (2-3 seconds at a time) and then remove the air hose to re-check the pressure with your gauge. Repeat this process, adding small amounts of air and checking frequently, until the tire reaches your vehicle’s recommended cold PSI. It’s always better to add air gradually to avoid over-inflation and ensure precision.
Pro Tip: It’s often easier to slightly over-inflate a tire (by 1-2 PSI) and then release air slowly to reach the exact target pressure, giving you more control over the final adjustment.
Step 5: Release Air If Over-Inflated
What you need: Your tire pressure gauge, a small pointed object (e.g., the tip of a pen cap, a car key).
Instructions: If your tire’s pressure is above the recommended PSI, you need to release some air. Use a small pointed object to gently press down on the metal pin located in the center of the valve stem. You’ll hear air escaping. Release air in very short bursts (1-2 seconds) and then remove the object and re-check the pressure with your gauge. Repeat this process, releasing small amounts of air and checking frequently, until the tire reaches your vehicle’s recommended cold PSI. Be careful not to release too much air, as adding it back takes more time.
Pro Tip: When releasing air, push the pin in gently and briefly. It’s easy to lose a lot of air quickly. Aim to get within 0.5-1 PSI of the target, then make tiny, precise adjustments.
Step 6: Replace Valve Caps
What you need: The valve caps you removed earlier.
Instructions: Once you’ve achieved the correct pressure for all tires, don’t forget to screw the valve caps back onto each valve stem. These caps play a vital role in protecting the valve stem from dirt, moisture, and road debris, which can otherwise cause the valve to leak air over time. Ensure they are tightened finger-tight – no need to over-tighten them with tools. Properly sealed valve stems help maintain consistent tire pressure between checks, preventing gradual air loss.
Pro Tip: Valve caps also act as a secondary seal. If your valve stem core ever develops a slow leak, a good cap can often prevent significant air loss until you can address the issue.
Step 7: Monitor Regularly
What you need: A calendar or reminder system.
Instructions: Proper tire pressure isn’t a “set it and forget it” task. Tires naturally lose about 1-3 PSI per month, and significant temperature changes can also affect pressure (a drop of 10°F can result in a loss of about 1 PSI). Make it a habit to check your tire pressure at least once a month, and always before embarking on a long road trip. Regular monitoring will help you catch slow leaks early, ensure optimal performance, and prevent premature tire wear. Set a recurring reminder on your phone or mark it on your calendar to stay on top of this crucial maintenance.
Pro Tip: If your vehicle has a Tire Pressure Monitoring System (TPMS) light, don’t wait for it to illuminate. The TPMS usually only activates when a tire is significantly under-inflated (typically 25% below recommended PSI), meaning you’ve already lost a lot of pressure. Regular manual checks are always best.
✅ Final Checklist
- Confirmed the recommended cold PSI for all tires from the vehicle’s door jamb or manual.
- Checked tire pressure when tires were cold (driven less than 1 mile or sat for 3+ hours).
- Adjusted all four main tires (and spare, if applicable) to the exact recommended PSI.
- Replaced all valve caps securely.
- Planned for monthly tire pressure checks.
Important Notes:
- Safety Considerations: Always perform tire pressure checks on a level surface. Be mindful of traffic if using a gas station air pump. Avoid touching hot brake components after driving.
- When to Seek Professional Help: If a tire consistently loses pressure rapidly, if you notice any bulging or cracks on the tire sidewall, or if you suspect a puncture, consult a professional mechanic or tire specialist immediately. Never drive on a significantly under-inflated or damaged tire.
- Estimated Time and Cost Range: This task typically takes 5-15 minutes to complete. The cost is usually free if you own a gauge and use a free air pump, or around $1-5 for a quick air fill at a gas station. A reliable tire pressure gauge can cost between $10-$30.
The Critical Impact of Proper Tire Inflation
Enhanced Safety and Performance
Correct tire pressure is fundamental to your vehicle’s safety systems. It directly influences how your car handles and responds on the road.
- Improved Handling and Steering: Properly inflated tires provide optimal contact with the road, leading to precise steering response and stable handling. Under-inflated tires feel mushy and unresponsive, making cornering dangerous. Over-inflated tires reduce the contact patch, making the car feel skittish.
- Shorter Braking Distances: When your tires have the right amount of air, they can grip the road effectively, allowing your braking system to perform as designed and stop your vehicle in the shortest possible distance.
- Reduced Risk of Blowouts: Both severe under-inflation and over-inflation can lead to tire failure. Under-inflation causes excessive heat buildup, while over-inflation makes the tire more susceptible to impact damage.
Saving Money: Fuel Economy and Tire Lifespan
Beyond safety, maintaining correct tire pressure saves you money in the long run by improving fuel efficiency and extending the life of your tires.
- Optimized Fuel Economy: Under-inflated tires increase rolling resistance, meaning your engine has to work harder to move the car. This directly translates to more fuel consumed per mile. Studies show that for every 1 PSI drop in pressure in all four tires, fuel economy can decrease by 0.2%.
- Even Tire Wear and Extended Lifespan:
- Under-inflation: Causes the outer edges of the tire tread to wear prematurely, as the center of the tread sinks inward.
- Over-inflation: Causes the center of the tire tread to wear out first, as the tire bulges, reducing contact with the road at the edges.
By ensuring your tires are always at the manufacturer’s recommended pressure, you promote even wear across the entire tread surface, maximizing the tire’s operational life and delaying costly replacements.
Factors Influencing Tire Pressure and Performance
While your car’s manufacturer provides the ideal baseline, external factors can subtly influence your tire pressure and how your vehicle performs. Understanding these helps you maintain optimal conditions, ensuring safety and efficiency.
Temperature Fluctuations
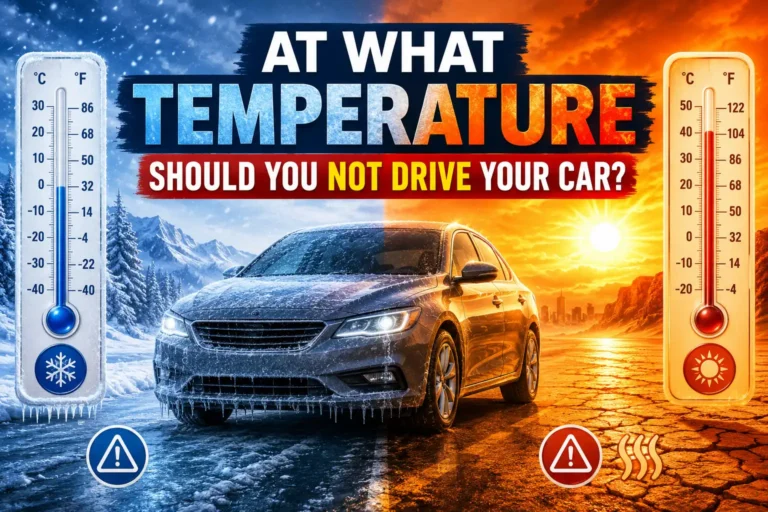
Air, like many substances, expands when it’s hot and contracts when it’s cold. This basic physics principle directly impacts your tire pressure readings. For every 10-degree Fahrenheit change in ambient temperature, your tire’s pressure can fluctuate by about 1 PSI (pounds per square inch).
- Cold Weather: Tires lose pressure as the temperature drops. If you fill your tires on a warm day, they will register lower in colder weather, potentially dropping below the recommended PSI.
- Hot Weather: Conversely, very hot days can cause the air inside your tires to expand, increasing the PSI. This is why it’s always recommended to check your tire pressure when the tires are “cold” – meaning they haven’t been driven for at least three hours or more than a mile.
- Driving Heat: Even on a mild day, driving generates friction, heating the tires and temporarily increasing internal pressure. This is normal and already accounted for by manufacturers; don’t try to release air from warm tires.
Load and Driving Conditions
The weight your vehicle carries also plays a role in required tire pressure. Your car’s door jamb sticker often provides different recommendations for “normal load” and “maximum load” (when the car is full of passengers and cargo).
- Heavy Loads: If you’re frequently hauling heavy cargo or embarking on a road trip with a fully loaded vehicle, slightly increasing your tire pressure to the manufacturer’s specified “max load” PSI can improve handling and prevent excessive tire flex, which can generate dangerous heat.
- Driving Style: Aggressive driving with rapid acceleration, hard braking, and sharp turns will cause tires to heat up more quickly than gentle driving. While you shouldn’t adjust pressure based on driving style, maintaining correct pressure helps tires handle these stresses better.
- Road Conditions: While rough roads don’t directly change internal tire pressure, optimal inflation ensures your tires can absorb impacts effectively without damage or compromising stability.
Common Misconceptions About Tire Air Pressure
The world of automotive maintenance is rife with myths, and tire pressure is no exception. Clearing up these common misunderstandings can save you money, improve safety, and extend the life of your tires.
The "Maximum Pressure" Myth
One of the most widespread misconceptions is confusing the maximum pressure stamped on the tire’s sidewall with the recommended operating pressure. These two numbers are distinctly different and serve separate purposes.
- Sidewall Max Pressure: This number, often followed by "MAX. PRESS.", indicates the maximum cold inflation pressure that the tire can safely hold. It’s a safety limit set by the tire manufacturer, not a recommendation for daily driving. Exceeding this pressure can lead to tire failure.
- Vehicle Manufacturer’s Recommendation: The pressure listed on your car’s door jamb sticker (or in the owner’s manual) is the optimal cold inflation pressure for that specific vehicle, taking into account its weight, handling, and load capacity. This is the number you should always follow.
Ignoring your car’s specific recommendation and inflating to the tire’s maximum pressure will often result in an overinflated tire, leading to a harsh ride, reduced traction, and uneven wear.
Over-Inflating for Better Fuel Economy
The idea of over-inflating tires to squeeze out a few extra miles per gallon is a dangerous misconception that trades safety and tire longevity for marginal fuel savings. While slightly higher pressure can theoretically reduce rolling resistance, the downsides far outweigh any potential benefits.
- Compromised Safety: Over-inflated tires have a smaller contact patch with the road. This reduces grip, making your vehicle less stable and significantly increasing braking distances, especially in wet conditions. It also makes the tire more susceptible to damage from potholes or road debris.
- Reduced Ride Comfort: An over-inflated tire is harder and less able to absorb road imperfections, leading to a much bumpier and less comfortable ride for passengers.
- Uneven Tire Wear: With less contact on the outer edges, an over-inflated tire will wear out prematurely in the center of its tread. This necessitates earlier tire replacement, costing you more in the long run.
Trying to outsmart the engineers who designed your car and tires by deliberately over-inflating is a risky gamble. Always stick to the recommended pressure for the best balance of safety, performance, and tire life.
The Bottom Line on Tire Pressure
Understanding and maintaining optimal tire pressure isn’t just a recommendation; it’s a fundamental aspect of responsible vehicle ownership. Correctly inflated tires are your unsung heroes, silently working to keep you safe, save you money at the pump, extend the life of your tires, and ensure your drive is as smooth and controlled as possible.
Make a habit of checking your tire pressure regularly – aim for at least once a month and before any long trips. Invest in a good quality tire gauge and consult your vehicle’s door jamb sticker or owner’s manual. Your car, your wallet, and most importantly, your safety, will thank you for it. Drive smarter, not harder!
❓ Frequently Asked Questions
Why is the recommended tire pressure for my car often different from the maximum pressure on the tire sidewall?
The vehicle manufacturer specifies the optimal pressure (e.g., 32 PSI) for your specific car’s weight, handling characteristics, and load capacity. The tire sidewall lists the maximum pressure the tire can safely hold under any vehicle, not the recommended pressure for your particular vehicle.
How does ambient temperature affect my tire pressure readings, and why is checking ‘cold’ tires important?
Tire pressure typically drops by approximately 1 PSI for every 10-degree Fahrenheit decrease in ambient temperature and increases with higher temperatures. Checking ‘cold’ tires, meaning they haven’t been driven for at least three hours or more than a mile, ensures an accurate baseline reading unaffected by heat from driving or weather.
What should I do immediately if my Tire Pressure Monitoring System (TPMS) light illuminates on my dashboard?
If your TPMS light comes on, it indicates at least one tire is significantly underinflated. You should check the pressure of all your tires as soon as safely possible, inflate them to your vehicle’s recommended PSI, and the light should extinguish after driving a short distance.
Can incorrect tire pressure really impact my vehicle’s safety and handling performance?
Absolutely. Underinflated tires can cause sluggish steering response, increase braking distances, and generate excessive heat, potentially leading to a blowout. Conversely, overinflated tires reduce the tire’s contact patch with the road, diminishing grip, stability, and making the ride harsher.
How does maintaining the correct tire pressure contribute to tire longevity and even wear?
Correct tire pressure ensures the tire’s tread makes even contact with the road, distributing weight uniformly and promoting consistent wear across the entire surface. Underinflation causes wear on the outer edges, while overinflation leads to wear down the center, both significantly reducing the tire’s lifespan.
Should I also check the air pressure in my spare tire, and what should it be?
Yes, it’s crucial to check your spare tire’s pressure at least every six months. Full-size spares usually require the same pressure as your other tires, while temporary ‘donut’ spares often need a much higher pressure (e.g., 60 PSI) as indicated on the tire itself or in your owner’s manual.