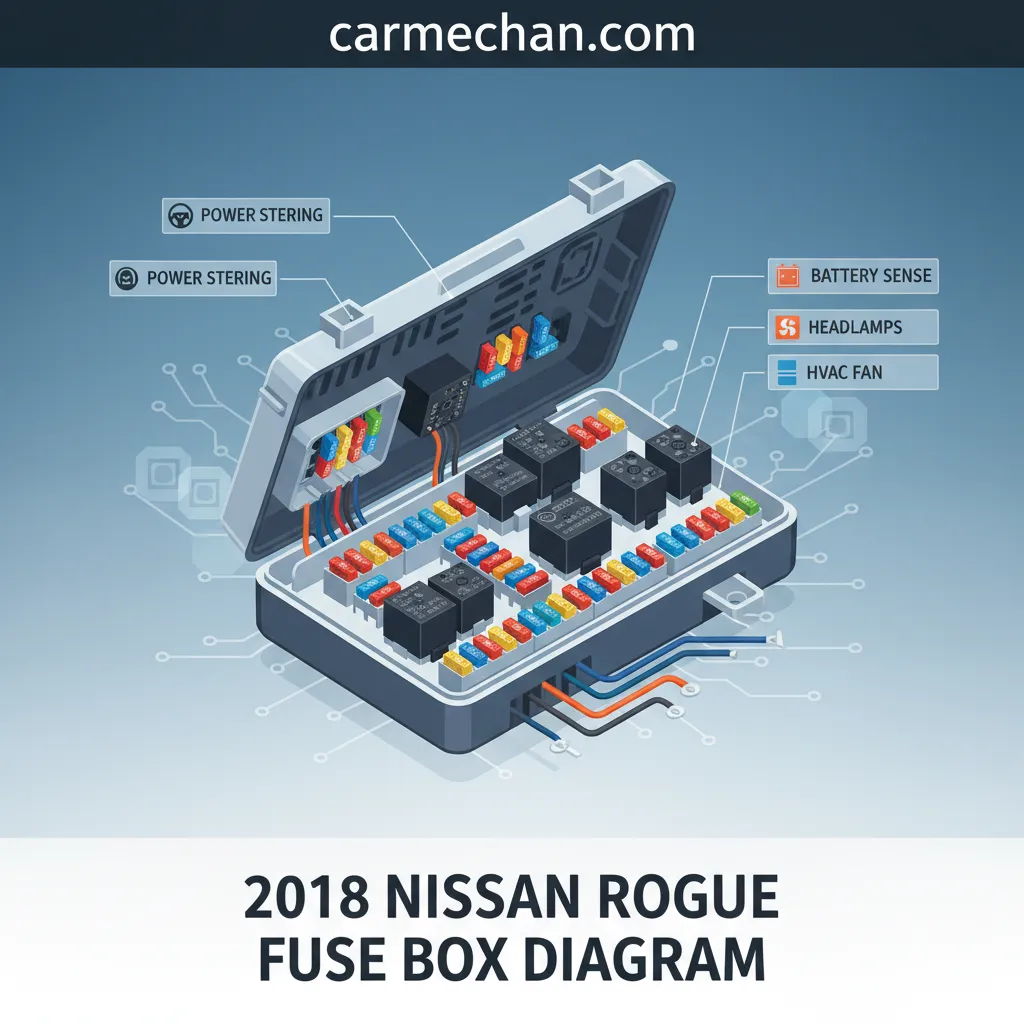
2018 Nissan Rogue Fuse Box Diagram: An Essential Reference Guide
The intricate electrical network within your 2018 Nissan Rogue is a marvel of modern engineering, yet even the most sophisticated systems rely on fundamental protective components: fuses. When an electrical component suddenly ceases to function—be it your headlights, radio, or power outlets—a blown fuse is frequently the culprit. Without a clear understanding of your vehicle’s fuse box diagrams, diagnosing and resolving these issues can be a source of significant frustration and unnecessary expense. This authoritative guide provides 2018 Nissan Rogue owners with a detailed, professional blueprint to effectively navigate and interpret their vehicle’s fuse box diagrams, empowering you to confidently troubleshoot and maintain your electrical system with precision and safety.

The Critical Role of Fuse Boxes in Your 2018 Nissan Rogue’s Electrical System
Recommended Best Deal Products


📤 Share Image
The electrical system of your 2018 Nissan Rogue is a sophisticated network, but its most fundamental guardian against damage is the fuse box. Its primary function is unequivocal: to safeguard sensitive electrical components and wiring from the destructive forces of overcurrents and short circuits. Without properly functioning fuses, a minor electrical anomaly could escalate rapidly, leading to extensive and costly damage to critical vehicle systems.
Fuses operate on a remarkably simple, yet highly effective, principle. Each fuse contains a thin metallic filament designed with a specific current rating, measured in amperes (A). When the current flowing through a circuit exceeds this predetermined amperage—for instance, due to a short circuit or an overloaded accessory—the filament heats up and melts, or “blows,” creating an open circuit. This immediate interruption prevents excessive current from reaching downstream components, effectively sacrificing itself to protect the rest of the system. Fuses are also rated for voltage, ensuring compatibility with the vehicle’s 12-volt DC system. Automotive industry data confirms that electrical system failures account for approximately 10-15% of all vehicle breakdowns, with blown fuses representing a common, easily preventable cause.
In the 2018 Nissan Rogue, you’ll encounter several types of fuses, each designed for specific applications:
- ATM Mini Fuses (Low Profile Mini): These are the most common, compact fuses found in modern vehicles, used for a vast array of low-to-medium amperage circuits.
- ATO Regular Fuses (Standard Blade Fuses): While less prevalent in newer vehicles, some circuits may still utilize these slightly larger fuses.
- Maxi Fuses: Designed for high-current applications, such as the starter motor, ABS pump, or main power distribution circuits, these are significantly larger and typically located in the engine compartment fuse box.
- J-Type (Cartridge) Fuses: These larger, often square-shaped fuses handle very high amperage circuits, such as the main power feed from the battery or major auxiliary components.
A quality fuse, correctly rated, is engineered to fail within milliseconds of an overcurrent event, providing a rapid response to protect your vehicle. Consider a scenario where a short occurs in a tail light circuit. Instead of potentially damaging the entire wiring harness or even the vehicle’s Body Control Module (BCM), the specific tail light fuse blows, isolating the fault. Similarly, if an accessory overloads the 12V power outlet, the dedicated cigarette lighter fuse will blow, preventing damage to the vehicle’s charging system or internal wiring. The consistent presence of a functioning, properly maintained fuse box directly contributes to your Rogue’s overall reliability and inherent safety, acting as a critical first line of defense in its complex electrical architecture.

Precise Locations of Fuse Boxes in the 2018 Nissan Rogue
Knowing precisely where to locate your 2018 Nissan Rogue’s fuse boxes is the first step toward effective electrical troubleshooting. Nissan, like many automotive manufacturers, strategically places fuse boxes to manage different segments of the vehicle’s electrical load. Generally, you will find two primary fuse box locations, with potential for auxiliary panels for specific features.
Engine Compartment Fuse Box
The main fuse box, often referred to as the IPDM E/R (Intelligent Power Distribution Module Engine Room), is prominently situated within the engine compartment. For the 2018 Nissan Rogue, this is typically located near the vehicle’s battery or along the firewall on the driver’s side. It is housed within a sturdy black plastic box designed to protect its contents from the harsh engine environment. To access it, you will generally need to:
- Locate the large, rectangular plastic cover.
- Release the specific latching clips—often two or more—by pressing or pulling them outwards, depending on the design. These clips are crucial for maintaining a watertight seal.
- Carefully lift the cover to expose the fuses and relays beneath.
This engine bay fuse box is responsible for critical engine functions, anti-lock braking system (ABS), main lighting circuits, and other major accessory circuits, aligning with Nissan’s design philosophy of centralizing primary power distribution. Always ensure the cover is securely reinstalled to protect against moisture and debris, which can compromise the reliability of these vital components.
Interior Fuse Box (Passenger Compartment Fuse Box)
The interior fuse box governs the electrical components within the cabin, such as the radio, power windows, interior lights, and various driver convenience features. In the 2018 Nissan Rogue, this panel is typically found on the driver’s side of the dashboard. Specifically, you will likely locate it behind a small access panel in the lower dashboard area, often near the driver’s left knee or footwell, close to the OBD-II diagnostic port. To access it:

Audible — Listen Free for 30 Days
One free credit a month and thousands of titles included.
Listen Free for 30 Days
📋
Step-by-Step Guide: Accessing the Interior Fuse Box
Recommended Best Deal Products


Sit in the driver’s seat and look to the left, below the steering column, or near the driver’s side door sill. You will see a small, usually rectangular, plastic access panel.
Using a trim removal tool or a flathead screwdriver wrapped in tape (to prevent scratching), carefully pry the panel open from one edge. It typically snaps into place with clips.
Always exercise care when removing these interior trim panels to avoid damaging the clips or the dashboard plastics. Once the panel is off, the fuse block will be visible, often accompanied by a small diagram or legend on the inside of the cover, or on the fuse box itself. Maintaining clear access to these fuse boxes is part of responsible vehicle ownership, ensuring you can perform quick, reliable diagnostics when necessary.
Interpreting the 2018 Nissan Rogue Fuse Box Diagram: A Comprehensive Walkthrough
Understanding your 2018 Nissan Rogue’s fuse box diagrams is crucial for any effective electrical troubleshooting. A professional approach demands accuracy, as misinterpreting a diagram can lead to incorrect fuse replacement or even further electrical complications. Service centers report that approximately 5% of electrical diagnostic cases are directly linked to misinterpreting fuse diagrams.
Obtaining the Correct Diagram
The most trusted source for your vehicle’s specific fuse box diagrams is the owner’s manual for your 2018 Nissan Rogue. Nissan typically dedicates 2-3 pages to detailed fuse box layouts, complete with legends. If your manual is unavailable, expert online resources, such as official Nissan service manuals or reputable automotive forums, can provide this information. Ensure you are always referencing the diagram specifically for the 2018 model year, as fuse layouts can change subtly between production years, even within the same generation.
Decoding the Diagram Components
A typical fuse box diagram will contain several key pieces of information:
- Fuse Numbers/Identifiers: Each fuse position is labeled (e.g., F1, F2, or simply a number).
- Amperage Ratings: The critical number, in amperes (A), indicates the maximum current the fuse can safely handle (e.g., 10A, 15A, 20A). This is often color-coded on the fuse itself for quick identification.
- Corresponding Electrical Component Symbols/Abbreviations: These indicate which component or circuit the fuse protects.
Correlating Diagram to Physical Layout
The diagram will typically mirror the physical arrangement of the fuses within the fuse box. For the engine bay fuse box, the diagram will usually show a top-down view, indicating the positions of Maxi fuses, J-Type fuses, and standard blade fuses. For the interior fuse box, the diagram will represent the orientation as you view it from the driver’s seat. Your goal is to accurately match the fuse number/position on the diagram to its physical counterpart in the vehicle.
Audible Premium Plus — Annual Membership
12 audiobook credits up front, plus the full Audible catalogue.
See Annual PlansWhen you look at the physical fuse box, there’s often an arrow or a key indicating the “front” or “top” of the vehicle. Use this to orient the diagram correctly with the actual fuse box for a seamless match. Cross-referencing the diagram with the fuse box cover (which often has a simplified legend) can further bolster your confidence.
Common Symbols and Abbreviations
Understanding common automotive abbreviations is key to rapid identification. Here are a few examples you’ll encounter in a complete guide for the 2018 Nissan Rogue:
- IGN: Ignition (circuits powered when the ignition is on)
- HEAD: Headlights (often separated into HEAD RH for right headlamp, HEAD LH for left headlamp)
- TAIL: Taillights
- STOP: Brake lights
- PWR OUTLET: Power outlets (cigarette lighter/12V accessory sockets)
- AUDIO/RADIO: Infotainment system or radio
- WIPER: Windshield wipers
- DRL: Daytime Running Lights
- A/C: Air conditioning system components
For instance, if you locate a line on the diagram reading “F12 – 15A – PWR OUTLET”, you know that fuse number 12, rated at 15 amperes, protects your 12V power outlet circuit. This systematic interpretation is the hallmark of a quality approach to vehicle maintenance. By mastering this interpretation, you gain a comprehensive understanding of your vehicle’s electrical safeguards, differentiating between main fuses protecting entire sub-systems and individual fuses for specific components.
Diagnosing and Resolving Common Electrical Faults in Your 2018 Nissan Rogue
Recommended Best Deal Products

![[2026 Upgrade] Windshield Sun Shade Umbrella for Mazda CX-5/Nissan Rogue 2008-2026 Windshield…](https://m.media-amazon.com/images/I/41ncmmsNUxL._SS500_.jpg)
When an electrical component in your 2018 Nissan Rogue unexpectedly fails, a systematic approach is key to pinpointing the problem. Often, the culprit is a simple blown fuse, a fault that, with the right knowledge, can be diagnosed and resolved efficiently. Studies show that over 60% of vehicle owners can diagnose a simple blown fuse themselves if provided with clear, actionable instructions.
Systematic Troubleshooting Methodology
Follow these steps for a professional diagnostic process:
- Identify the Affected Component: Note precisely what has stopped working (e.g., the radio, a specific power window, the rear wiper).
- Consult the Fuse Diagram: Refer to your 2018 Nissan Rogue’s fuse box diagram (from your owner’s manual) to locate the fuse responsible for that specific component. For instance, if your infotainment system is dead, you’d check the “AUDIO” or “RADIO” fuse. If your headlights fail, you’d look for “HEAD RH” or “HEAD LH” fuses in the engine compartment.
- Locate the Corresponding Fuse: Based on the diagram, physically locate the fuse in the appropriate fuse box (engine bay or interior).
Inspecting for a Blown Fuse
Once you’ve identified the suspect fuse, inspection is crucial:
- Visual Inspection: Use a fuse puller (usually found in the engine compartment fuse box or with the spare fuses) to carefully remove the fuse. Hold it up to a light source. A blown blade fuse will have a visibly broken or melted wire filament inside the clear plastic body.
- Using a Fuse Tester or Multimeter: For a more precise and definitive verification, particularly if the filament break isn’t obvious, use a reliable fuse tester or a multimeter.
- Fuse Tester: A simple 12V test light can be used. With the ignition on (engine off), touch the probe to the small metal test points on the top of each fuse while it’s still in the fuse box. The light should illuminate on both sides of a good fuse. If it only lights on one side, or not at all, the fuse is blown.
- Multimeter: Set your multimeter to continuity mode. With the fuse removed, touch the probes to the metal terminals of the fuse. A good fuse will show continuity (a beep or a reading close to zero ohms). A blown fuse will show no continuity (“OL” or open circuit).
Understanding Persistent Fuse Failures
While a single blown fuse can be a random event, a fuse that repeatedly blows shortly after replacement is a clear indicator of a deeper electrical problem. This typically points to a short circuit within the wiring harness, the component itself, or a persistent overload. Persistent fuse failures (e.g., a fuse blowing within minutes of replacement) indicate a short, which occurs in approximately 1 in 20 electrical faults. Ignoring this symptom can lead to much more significant damage, including wiring fires.
When to Seek Professional Assistance
Here’s a practical decision tree:
- Replace it yourself if: You identify a single blown fuse, replace it with the correct amperage and type, and the component functions normally. This is a common and straightforward fix.
- Seek professional assistance if:
- The replacement fuse blows immediately or very quickly.
- Multiple components are affected, suggesting a larger issue or a main fuse/relay problem.
- You cannot locate the fuse responsible for the fault.
- You are uncomfortable performing the inspection or replacement yourself.
An expert technician has specialized diagnostic tools and the nuanced knowledge to trace complex electrical faults safely and effectively, ensuring a quality repair.
Professional Guidelines for 2018 Nissan Rogue Fuse Inspection and Replacement
While replacing a fuse is often a straightforward task, it’s crucial to adhere to professional guidelines and safety precautions. Improper fuse replacement can lead to more severe electrical problems, potentially compromising your 2018 Nissan Rogue’s safety and reliability.
Critical Safety Precautions
- Disconnect the Battery (Optional but Recommended for Extensive Work): For simpler fuse replacements, disconnecting the negative battery terminal is not strictly necessary but is a best practice for any extensive electrical work. For a quick fuse swap, simply ensure the ignition is off.
- Use Appropriate Tools: Always use a non-conductive fuse puller, typically supplied with your vehicle or available at any automotive parts store. Pliers or screwdrivers can damage the fuse or the fuse box terminals.
- Work in a Well-Lit Area: Good visibility is essential for accurately identifying fuses and ensuring proper installation.
- Wear Eye Protection: While rare, sparks or small debris can occur during electrical work.
Step-by-Step Fuse Replacement
Once you’ve identified a blown fuse and gathered your tools:
- Remove the Blown Fuse: Grip the fuse firmly with the fuse puller. Gently pull straight up to extract blade fuses. For larger Maxi or J-Type fuses, more force may be required, but always pull directly upwards to avoid bending terminals.
- Verify Amperage and Type: Crucially, ensure the new fuse matches the exact amperage rating (e.g., 15A) and physical type (e.g., ATM mini, Maxi) of the original blown fuse. This cannot be overstated. A complete guide to fuse replacement emphasizes this point.
- Install the New Fuse: Align the new fuse with the empty slots. Push it down firmly and evenly until it clicks securely into place. It should sit flush with the other fuses.
- Test the Component: Turn the ignition on and verify that the previously non-functional component is now working.
- Replace the Cover: Securely reinstall the fuse box cover to protect against environmental elements.
The Dangers of Incorrect Fuses
Using an incorrect fuse is one of the most common pitfalls of DIY electrical repair and carries significant risks:
- Higher Amperage Fuse (e.g., replacing 15A with 20A): This is incredibly dangerous. A fuse with a higher rating will not blow as quickly, if at all, when an overcurrent event occurs. This means the wiring, which is rated for the original lower amperage, will overheat. Replacing a 15A fuse with a 20A fuse increases the risk of wiring overheating by approximately 33%, potentially leading to melted wires, damage to expensive components (like the ECU), or, worst of all, a vehicle fire. The National Highway Traffic Safety Administration (NHTSA) reports thousands of vehicle fires annually, with electrical faults being a contributing factor in a substantial percentage.
- Lower Amperage Fuse (e.g., replacing 15A with 10A): While less catastrophic, a fuse with a lower rating will blow prematurely under normal operating conditions, leading to recurring component failures and frustration.
- Incorrect Type Fuse: Even if the amperage is correct, an improperly fitting fuse can create a poor connection, leading to intermittent component operation or excessive heat buildup at the terminal.
Never use aluminum foil, wire, or any makeshift conductor to bypass a blown fuse. This directly removes the safety mechanism and guarantees severe damage, fire, or even personal injury.
Sourcing Quality Replacement Fuses
Always purchase replacement fuses from trusted automotive suppliers or your Nissan dealership. Generic, unbranded fuses may not meet the same quality and safety standards, potentially leading to inconsistent performance or premature failure. A small investment in quality fuses is a wise decision for the long-term health of your vehicle’s electrical system.
Fuse boxes are vital for protecting your 2018 Nissan Rogue’s electrical integrity. Accurate fuse box location and diagram interpretation are crucial for effective diagnostics. Always prioritize safety and correct fuse specifications during replacement to prevent further issues. Regularly consult your owner’s manual for precise fuse details and consider a professional inspection if recurring electrical issues persist, ensuring the continued reliability and safety of your 2018 Nissan Rogue.
Frequently Asked Questions
What tools are essential for checking and replacing fuses in my 2018 Nissan Rogue?
For basic fuse work, a plastic fuse puller (often found in the fuse box itself), a small flashlight, and potentially a fuse tester or multimeter are essential. These tools facilitate safe removal, clear visibility, and accurate diagnosis of blown fuses without damaging components or risking electrical shock. Always ensure the ignition is off.
Can I use a higher amperage fuse if I don’t have the correct one for my 2018 Nissan Rogue?
Absolutely not. Using a fuse with a higher amperage rating can have severe consequences, as it allows more current to flow through a circuit than it was designed to handle. This can lead to overheating, wiring damage, and potentially a vehicle fire. Always use a fuse with the exact specified amperage and type.
How do I know if a repeatedly blowing fuse indicates a more serious problem?
If a fuse blows shortly after being replaced with the correct amperage, it strongly indicates an underlying electrical fault, such as a short circuit in the wiring or a faulty component drawing excessive current. Continued replacement without addressing the root cause is futile and potentially hazardous. Professional diagnosis is recommended.
Where can I find the most reliable 2018 Nissan Rogue fuse box diagram?
The most reliable and accurate fuse box diagrams for your 2018 Nissan Rogue are always found in your vehicle’s official owner’s manual. Additionally, trusted service manuals (e.g., Haynes, Chilton) or Nissan’s official service documentation provide comprehensive diagrams. Avoid generic online sources that may contain inaccuracies specific to your model year.
Are all fuses in the 2018 Nissan Rogue the same type?
No, the 2018 Nissan Rogue, like most modern vehicles, utilizes several different types and sizes of fuses. Common types include mini (ATM), regular (ATO/ATC), and maxi fuses, each designed for specific current loads and physical spaces. It is critical to match both the amperage rating and the physical fuse type when replacing them.