Charge Your Car Battery Safely: Essential Steps & Tips
Last Updated on September 1, 2026 by Ryan
Safely charging your car battery requires precise connection steps and strict adherence to safety guidelines. Understanding your charger type and preparing the battery properly are crucial to prevent damage and ensure an effective charge, prolonging your battery’s life.
🎯 Key Takeaways


- Connect positive first, then negative/ground, ensuring ventilation.
- Prioritize safety:wear PPE, avoid sparks, ensure clear area.
- Choose a smart charger for optimal battery health and safety.
- Clean terminals and check electrolyte levels before charging.
- Disconnect in reverse order:negative first, then positive.
Charging your car battery safely at home is an entirely manageable task that can save you time and the hassle of a dead vehicle. Whether your battery is merely discharged or needs a conditioning boost, knowing the correct procedure for using a standalone battery charger is crucial. This guide provides the essential steps, equipment, and safety precautions to empower you to handle this common automotive issue with confidence, focusing on a safe and effective charging process from start to finish.

Mastering car battery charging means understanding your equipment, preparing your environment, and strictly following safety guidelines to prevent sparks, hazards, and damage. This ability ensures your battery’s longevity and your personal safety, keeping you on the road without unexpected delays. We’ll start by looking at the types of chargers you might use and the critical safety measures you must implement before connecting anything.
Understanding Battery Charger Types and Their Applications


Selecting the right battery charger is the first step toward a successful and safe charge. Not all chargers are created equal, and understanding their differences will help you choose the best tool for your battery’s needs.
Smart Chargers vs. Basic Chargers
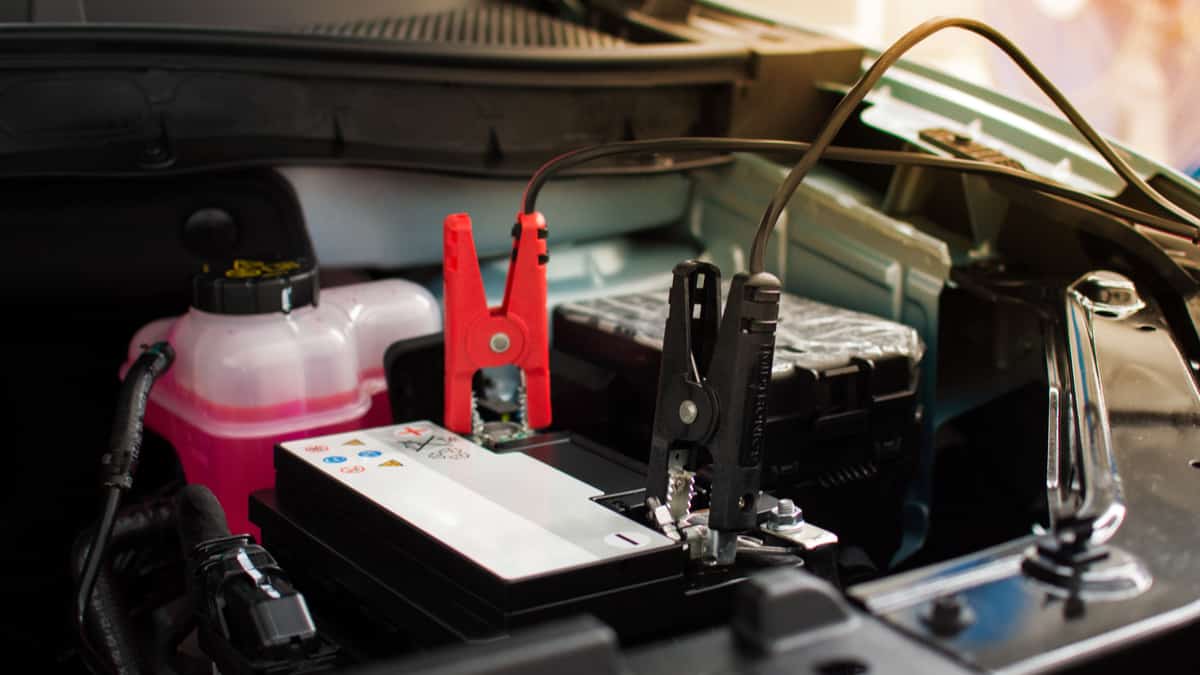
Modern battery technology pairs best with modern charging solutions. While a basic charger provides a constant voltage or amperage until unplugged, smart chargers offer a more sophisticated, multi-stage charging process. This intelligence is a significant advantage:
- Smart Chargers (Maintainers/Trickle Chargers): These are highly recommended. They monitor the battery’s voltage and current, automatically adjusting the charge cycle. They transition from bulk charging to absorption, then to a float or maintenance charge once the battery is full. This prevents overcharging, which can damage your battery, and allows them to be left connected for extended periods, perfect for vehicles stored for weeks or months. Look for models with features like desulfation mode for older batteries and reverse polarity protection.
- Basic Chargers: These deliver a steady, non-regulated charge. While effective for a quick boost, they require careful monitoring. Overcharging is a real risk if left connected too long, leading to gassing, heat, and potential battery damage. Use these with caution and never unattended.
Matching Charger Output to Your Battery
Car batteries are typically 12-volt systems, so ensure your charger matches this output. The crucial variable is the amperage (A) rating, which dictates how quickly your battery will charge:
- Low Amperage (1-2A): Ideal for battery maintainers or trickle charging, especially for long-term storage. These provide a slow, gentle charge over many hours, ensuring the battery stays topped off without stress. Charging a deeply discharged battery with a 1-2A charger could take 24-48 hours or more.
- Medium Amperage (4-10A): A good all-around choice for regular charging. A 10A charger can usually bring a moderately discharged car battery to full charge in 6-12 hours, depending on its capacity and discharge level. This range balances speed with battery health.
- High Amperage (15-20A+): Best for faster charging of significantly discharged batteries or for larger vehicle batteries (trucks, RVs). While quicker, higher amperage charging generates more heat and can stress the battery more. Only use high-amp settings when time is a factor and monitor the battery closely. For safety, avoid pushing very high amps into a deeply discharged or frozen battery.
Always consult your battery’s specifications for recommended charging parameters, though most 12V car batteries are compatible with the chargers described above. A charger that’s too powerful for a very small battery, or too weak for a very large one, might not be efficient or safe.
The Ultimate Car Battery Charging Walkthrough


A dead car battery can derail your day, but knowing how to properly charge it can save you time, money, and stress. This comprehensive, step-by-step guide will walk you through the entire process of charging a car battery safely and effectively, from initial setup to final checks. Following these instructions meticulously is crucial to prevent damage to your battery, your vehicle, and most importantly, to ensure your personal safety.
Step 1: Prioritize Safety Above All Else
What you need: Safety glasses, chemical-resistant gloves, well-ventilated area, non-conductive mat (optional), baking soda and water (for spills).
Instructions: Car batteries can release highly flammable hydrogen gas during charging, which can explode with a single spark. The sulfuric acid inside is also corrosive and can cause severe burns. Before you even touch the battery, don safety glasses and chemical-resistant gloves. Ensure you are working in a well-ventilated area, such as outdoors or in a garage with the door open, to dissipate any potential gas buildup. Remove any metal jewelry, such as rings or watches, that could accidentally short-circuit the battery terminals and cause severe burns or damage. Keep children and pets away from the charging area.
Pro Tip: Always have a mixture of baking soda and water readily available to quickly neutralize any accidental acid spills on surfaces or skin. A good ratio is 1 part baking soda to 10 parts water.
Step 2: Gather Your Essential Tools and Equipment
What you need: Car battery charger (appropriate type), wire brush or battery terminal cleaner, terminal wrench (usually 10mm or 13mm), clean rags, voltage meter (optional but recommended), anti-corrosion spray (optional).
Instructions: Selecting the right battery charger is key. For most automotive applications, a 12V automatic or “smart” charger is ideal as it prevents overcharging and often includes maintenance modes. Avoid old manual chargers unless you are confident in closely monitoring the charge. Ensure the charger is rated for your battery’s chemistry (e.g., Lead-Acid, AGM, Gel). Have a terminal wrench handy to loosen and tighten battery clamps, and a wire brush for cleaning. A voltage meter can provide extra reassurance by allowing you to manually verify the battery’s charge level throughout the process.
Pro Tip: Invest in a “smart” or “automatic” charger. These devices intelligently manage the charging cycle, preventing overcharging and often offering reconditioning features that can extend battery life. They are generally safer and more user-friendly than manual chargers.
Step 3: Prepare the Vehicle and Battery for Charging
What you need: Terminal wrench, wire brush, clean rags.
Instructions: Begin by turning off your car’s ignition and all electrical accessories (lights, radio, climate control). Locate the battery; it’s typically under the hood, but can also be in the trunk or under a seat in some vehicles. Inspect the battery terminals for any signs of corrosion, which appears as a white, powdery substance. Use a wire brush or battery terminal cleaner to thoroughly remove any corrosion from both the positive and negative terminals, then wipe them clean with a rag. Clean terminals ensure a proper electrical connection, which is crucial for efficient charging. If you need to remove the battery from the vehicle, always disconnect the negative (-) terminal first, then the positive (+).
Pro Tip: Cleaning the battery terminals thoroughly is not just cosmetic. Corrosion acts as an insulator, impeding the flow of electricity and making it difficult for the battery to charge efficiently or deliver full power to start the engine.
Step 4: Connect the Battery Charger Correctly and Securely
What you need: Battery charger.
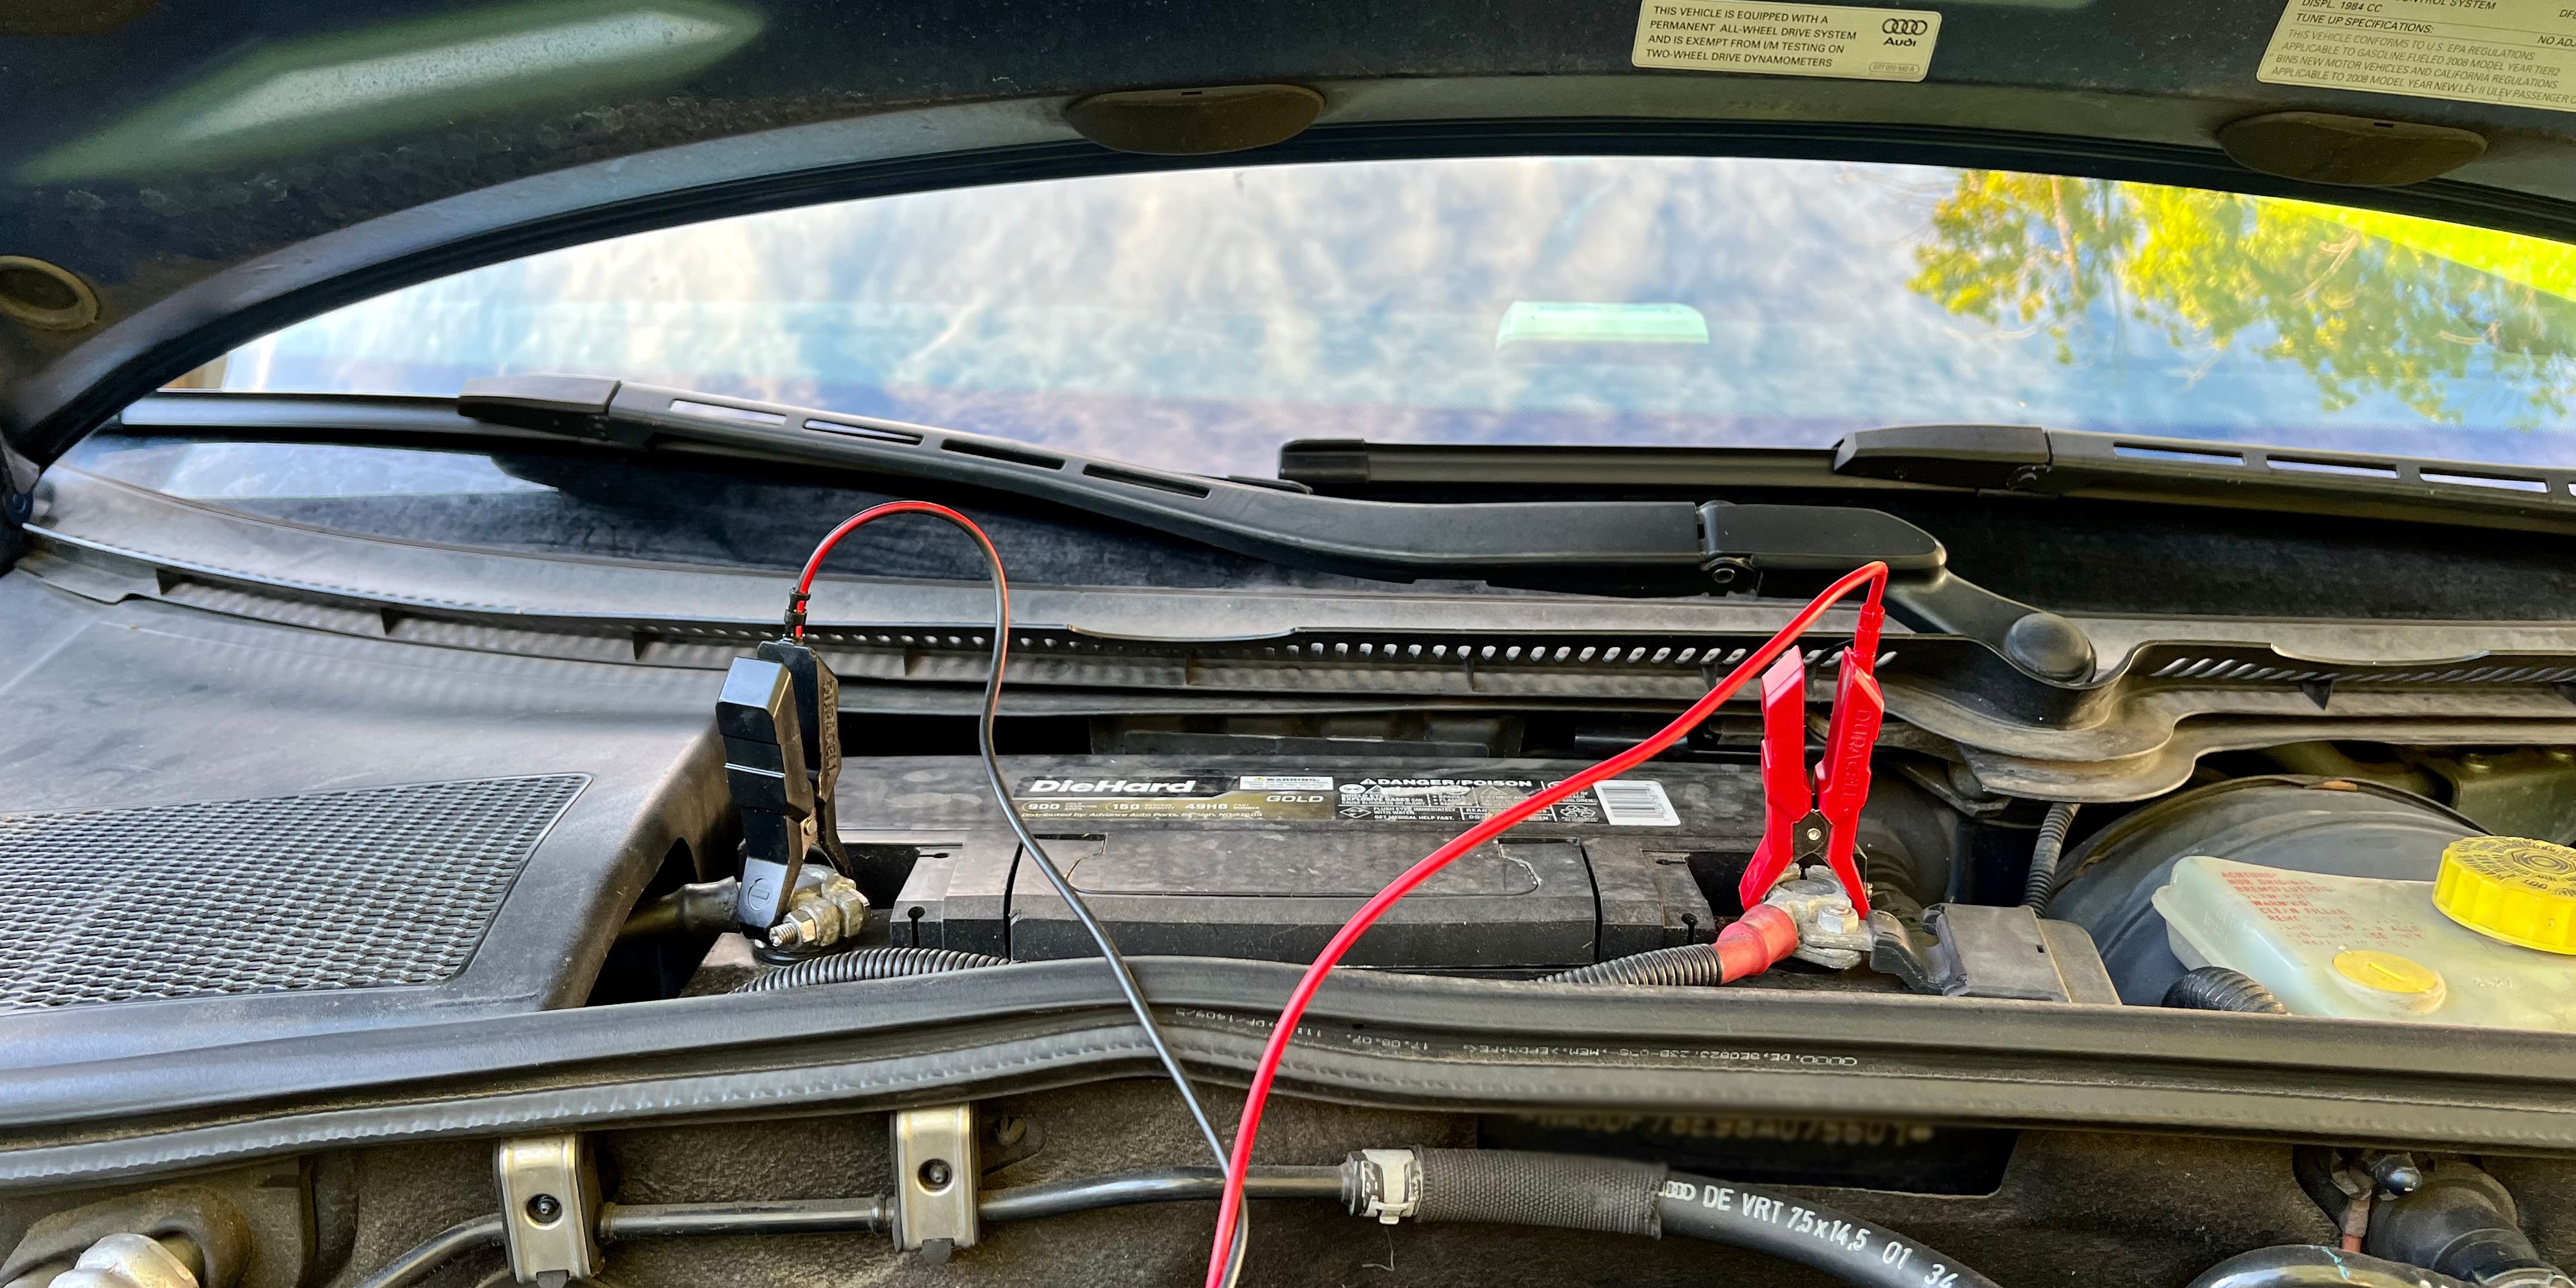
Instructions: Before making any connections, ensure your battery charger is turned OFF and UNPLUGGED from the electrical outlet. First, connect the RED positive (+) clamp from the charger to the positive (+) terminal on your car battery. This terminal is typically marked with a plus sign and might be slightly larger. Next, connect the BLACK negative (-) clamp from the charger to the negative (-) terminal on the battery. If you are charging the battery while it remains installed in the vehicle, connect the negative clamp to a bare metal part of the engine block or the vehicle’s chassis, well away from the battery, fuel lines, or any moving engine parts. This alternative grounding point significantly helps to minimize the risk of a spark occurring directly near the battery, where potentially explosive hydrogen gas might be present.
Pro Tip: Always connect the charger clamps to the battery terminals (or chassis) before plugging in or turning on the charger. This prevents the initial spark from occurring directly over the battery, reducing the risk of igniting hydrogen gas.
Step 5: Configure Your Charger and Initiate the Charging Cycle
What you need: Battery charger.
Instructions: With the clamps securely connected, you can now plug the charger into an electrical outlet. Refer to your charger’s manual for specific instructions on selecting settings. Most modern chargers require you to select the battery type (e.g., Lead-Acid, AGM, Gel) and a charging rate. For a deeply discharged battery, a higher amperage (e.g., 8-10 amps) can be used initially, often followed by a switch to a lower, slower rate (e.g., 2-4 amps) for the bulk of the charge. A slower charge is generally healthier for the battery’s long-term lifespan. Once configured, press the “start” or “charge” button on your unit to begin the process.
Pro Tip: Charging at a slower rate (lower amperage) is always preferable for optimal battery health and longevity, even if it means waiting a bit longer. High-amperage rapid charging can stress the battery and shorten its lifespan.
Step 6: Monitor the Charging Process and Battery Condition
What you need: Voltage meter (optional), charger’s display.
Instructions: Once charging begins, periodically check your charger’s display for information such as voltage, amperage, and the charging status. For a 12V lead-acid battery, you should see the voltage slowly climb from a low point (e.g., 10-11V) towards a full charge of approximately 12.6V to 12.8V. A smart charger will typically indicate “Full” or switch to a “Float” or “Maintenance” mode when complete. Listen for any unusual hissing or strong bubbling noises from the battery, and check if the battery itself becomes excessively hot to the touch; these could be signs of overcharging or an internal battery fault. Charging can take anywhere from 4 to 24 hours depending on the battery’s discharge level and charger’s amperage.
Pro Tip: Never leave a manual battery charger unattended for extended periods, especially overnight, as there is a risk of overcharging which can damage the battery or create dangerous conditions. Automatic chargers are safer for longer charging durations.
Step 7: Disconnect the Battery Charger Safely
What you need: None.
Instructions: Once your charger indicates the battery is fully charged, or it has switched to its maintenance/float mode, it’s time to disconnect. First, turn the battery charger OFF. Next, UNPLUG the charger from the electrical wall outlet. This step is critical to ensure no current is flowing through the clamps when you handle them. After the power is completely off, carefully remove the BLACK negative (-) clamp from the battery terminal (or from the chassis grounding point if you used one). Finally, remove the RED positive (+) clamp from the positive (+) battery terminal. Ensure your hands are clear of the terminals and clamps during removal to avoid accidental shorts.
Pro Tip: Always follow the reverse order of connection when disconnecting: power off first, then negative clamp off, then positive clamp off. This minimizes the risk of accidental short circuits or sparks near the battery, enhancing safety.
Step 8: Reinstall the Battery and Test Your Vehicle
What you need: Terminal wrench, anti-corrosion spray (optional).
Instructions: If you removed the battery for charging, carefully place it back into its battery tray, ensuring it’s securely positioned. When reconnecting the battery cables to the terminals, always connect the RED positive (+) cable to the positive (+) terminal FIRST. Then, connect the BLACK negative (-) cable to the negative (-) terminal. Tighten both terminal clamps firmly with your wrench, but be careful not to overtighten them, as this can damage the terminals. You may apply an anti-corrosion spray or grease to the terminals to prevent future buildup. Finally, attempt to start your vehicle to confirm the battery holds a charge and the engine turns over successfully. Check for proper function of all electrical components.
Pro Tip: Ensure terminal connections are snug and tight. Loose connections are a common cause of poor starting performance, even with a fully charged battery, and can prevent your car’s alternator from effectively recharging the battery while driving.
✅ Final Checklist
- Safety glasses and gloves were worn throughout the process.
- Battery terminals were clean and free of corrosion before connecting.
- Charger settings (battery type, amperage) were correctly configured.
- Charger clamps were connected positive-to-positive and negative-to-negative (or chassis ground) in the correct order.
- Charger was turned off and unplugged before disconnecting clamps, and clamps were removed in the correct reverse order.
- Battery cables are securely attached to the vehicle terminals, and the car starts reliably.
Important Notes:
- Safety Considerations: Never smoke or introduce any open flame or spark near a charging battery. Always ensure adequate ventilation. If you smell strong rotten egg odor, see excessive bubbling, or the battery gets extremely hot, disconnect the charger immediately and safely.
- When to Seek Professional Help: If your car battery repeatedly dies, fails to hold a charge after proper charging, or shows physical signs of damage (e.g., bulging case, leaking fluid), it likely needs to be replaced. Consult a certified mechanic or automotive service center if you are unsure about the battery’s condition or are uncomfortable performing any of these steps.
- Estimated Time and Cost Range: Charging a completely dead car battery can take anywhere from 4 to 24 hours, depending on the battery’s capacity and the charger’s output amperage. The cost typically involves the initial purchase of a reliable battery charger, which can range from $30 for a basic trickle charger to $150 for an advanced smart charger. There are no recurring costs for the charging process itself once you own the equipment.
Essential Safety Protocols Before You Begin
Before you even think about connecting a charger, prioritize safety. Car batteries contain corrosive acid and produce explosive gases. Ignoring safety precautions can lead to serious injury or damage. Preparation is key to a safe charging experience.
Personal Protective Equipment and Ventilation
Your personal safety should be paramount. Always wear appropriate personal protective equipment (PPE) and ensure your charging environment is properly ventilated:
- Eye Protection: Safety glasses or goggles are non-negotiable. Battery acid can cause irreversible eye damage, and sparks or explosions are a rare but severe risk.
- Gloves: Wear acid-resistant gloves (e.g., nitrile or latex) to protect your skin from battery acid.
- Avoid Jewelry: Remove all metal jewelry, including rings, watches, and necklaces. Metal can conduct electricity, creating a short circuit and causing severe burns if it accidentally contacts battery terminals.
- Ventilation: Charge the battery in a well-ventilated area. Batteries produce hydrogen gas during charging, which is highly flammable and explosive. An open garage door, an outdoor setting, or a space with good airflow is essential. Never charge a battery in a confined, unventilated space.
- No Sparks or Open Flames: Keep all sources of ignition away from the battery. This includes cigarettes, lighters, matches, and any tools that could create a spark. Even a small spark near charging batteries can ignite hydrogen gas.
Always have baking soda and water nearby. Baking soda effectively neutralizes battery acid in case of a spill or splash, while water can flush it away. Never lean directly over the battery during charging.
Battery and Environment Preparation
Proper preparation of both the battery and its surroundings reduces risks and improves charging efficiency:
- Clean Terminals: Corroded terminals hinder proper current flow. Use a wire brush and a battery terminal cleaner (or a paste of baking soda and water) to clean any white, blue, or green corrosion from both the battery terminals and the cable clamps. Rinse with clean water and dry thoroughly.
- Check Fluid Levels (for Flooded Lead-Acid Batteries): If you have a traditional flooded (non-sealed) lead-acid battery, carefully remove the vent caps. Check the electrolyte level in each cell. If low, add distilled water only, just enough to cover the plates. Never use tap water. Do not overfill. Sealed, maintenance-free batteries do not require this step. Replace vent caps securely before charging.
- Stable, Non-Conductive Surface: Place the battery on a stable, flat, non-conductive surface like wood or plastic. Avoid placing it directly on concrete, which some believe can slowly discharge a battery over time, though this is debated. More importantly, it keeps the battery isolated from conductive materials.
- Initial Battery Assessment: Before charging, you might want to perform a quick voltage check with a multimeter. A healthy, fully charged battery should read around 12.6-12.8 volts. If your battery reads significantly lower, especially below 10.5 volts, it might be deeply discharged or damaged beyond recovery. While charging might still be attempted, be aware that a very low voltage could indicate a sulfated or dead cell, making recovery unlikely.
Factors Influencing Car Battery Charging Time
Understanding how long it takes to fully charge your car battery isn’t always straightforward. Several variables come into play, from the battery itself to the equipment you’re using. Knowing these factors helps manage expectations and ensures you’re not waiting endlessly or risking damage.
Battery Size and State of Discharge
The physical size and capacity of your car battery are primary determinants of charging time. Batteries are typically rated in Amp-hours (Ah), indicating how much current they can deliver over a certain period. A larger Ah rating means a larger capacity, and thus, more time is required to fill it up.
- Smaller Batteries: A typical compact car battery (e.g., 40-50 Ah) will charge much faster than a large SUV or truck battery (e.g., 70-100 Ah) using the same charger.
- State of Discharge: A battery that’s only partially discharged (e.g., 70% full) will obviously take less time to top up than one that’s completely dead or deeply discharged. Trying to revive a completely flat battery will always be a longer process.
Charger Type and Amperage
The type and output amperage of your battery charger also significantly impact the charging duration. Chargers come in various forms, each designed for different needs and speeds.
- Trickle Chargers: These are low-amperage chargers (typically 1-2 Amps) designed for maintaining a battery’s charge over long periods. They are very slow for recharging a dead battery, potentially taking days.
- Standard or Smart Chargers: Ranging from 4 Amps to 15 Amps, these are the most common for home use. A 10-Amp smart charger will recharge a moderately discharged battery much quicker, often within a few hours for a typical car.
- Fast Chargers: Some chargers offer higher amperage outputs (20-50 Amps or more) for very quick recharging, but these should be used with caution. Rapid charging can generate excessive heat and potentially shorten battery lifespan if not managed by a sophisticated smart charger. Always prioritize a charger with smart features that automatically adjust amperage.
Troubleshooting Common Charging Issues and Battery Health
Even with the right equipment and knowledge, you might encounter situations where your car battery isn’t charging as expected, or you’re wondering about its overall health. A little troubleshooting can often resolve minor issues and help you identify when it’s time for a professional check-up or replacement.
Common Problems and Quick Checks
If your battery isn’t taking a charge, or your charger is showing an error, consider these common culprits:
- Loose or Corroded Connections: This is perhaps the most frequent issue. Ensure the charger clamps are firmly attached to the correct battery terminals (positive to positive, negative to negative) and that the terminals themselves are clean and free of corrosion. A poor connection prevents proper current flow.
- Charger Malfunction or Power Issue: Confirm that your charger is plugged into a live power outlet and is functioning correctly. Check for blown fuses in the charger or power supply. Some smart chargers have indicator lights for power status.
- “Bad Battery” or Error Indicator: If your smart charger displays an error code indicating a “bad battery,” it might be genuinely faulty (e.g., a shorted cell) and unable to accept a charge. In such cases, the battery may need replacement. Always consult your charger’s manual for specific error code meanings.
- Incorrect Settings: Double-check that your charger is set to the correct battery type (e.g., standard lead-acid, AGM, Gel) if it has multiple settings.
Monitoring Battery Health and Longevity Tips
Regular maintenance and attention to your battery’s health can significantly extend its lifespan and prevent unexpected breakdowns. A healthy battery is a happy battery!
- Regular Voltage Checks: Use a multimeter to periodically check your battery’s voltage when the engine is off. A fully charged battery typically reads around 12.6 to 12.8 volts. Anything consistently below 12.4 volts might indicate a need for charging or inspection.
- Keep Terminals Clean: Regularly inspect and clean battery terminals to prevent corrosion build-up. A wire brush and a baking soda/water solution can help.
- Avoid Deep Discharges: Try not to let your battery run completely flat. Deep discharges put a strain on the battery and reduce its overall life cycle.
- Check Your Vehicle’s Charging System: If your battery repeatedly loses charge, the issue might not be the battery itself but your car’s alternator or voltage regulator. A mechanic can test these components.
- Recognize Warning Signs: Slow engine cranking, dim headlights, or flickering dashboard lights are common indicators that your battery is weakening and might be nearing the end of its service life.
Conclusion
Charging your car battery safely and effectively is an essential skill for any vehicle owner. We’ve explored the importance of safety precautions, the right tools, and understanding the factors that influence charging time. From connecting your charger securely to troubleshooting common issues and knowing when your battery might need replacing, these insights empower you to maintain your vehicle’s power source with confidence.
Don’t wait for a dead battery to take action. Make regular battery checks a part of your car care routine, invest in a reliable smart charger, and address any warning signs promptly. Staying proactive ensures you’re always ready to hit the road. Drive smart, stay powered up!
❓ Frequently Asked Questions
What are the critical safety precautions to take when charging a car battery?
Always work in a well-ventilated area, wear safety glasses and gloves, and ensure no open flames or sparks are nearby. Connect the positive cable first, then the negative/ground, and disconnect in the reverse order to minimize spark risk.
How do I prepare my car battery for charging, and what initial checks are necessary?
Before charging, ensure the battery terminals are clean and free of corrosion. For non-sealed batteries, check the electrolyte levels and top up with distilled water if necessary, making sure the cell caps are removed or loosened for gas escape.
What’s the difference between a trickle charger, a smart charger, and a rapid charger?
A trickle charger provides a low, continuous current for maintenance over long periods. A smart charger automatically adjusts charging based on battery condition, preventing overcharge. A rapid charger delivers high current for quick boosts but can shorten battery life if overused.
Can overcharging damage a car battery, and how can I prevent it?
Yes, overcharging can severely damage a car battery by causing electrolyte boil-off, plate corrosion, and even swelling, significantly shortening its lifespan. Using an automatic “smart” charger with overcharge protection is the best way to prevent this.
What are the correct steps for connecting and disconnecting a battery charger?
To connect, attach the positive (+) charger clamp to the positive (+) battery terminal first, then the negative (-) charger clamp to a grounded metal part of the car chassis or the negative (-) battery terminal away from the battery itself. To disconnect, reverse the order: negative first, then positive.
How do I know if my car battery is fully charged or if it’s beyond saving?
A fully charged 12V car battery should read around 12.6-12.8 volts with a multimeter after resting for a few hours post-charge. If the battery doesn’t hold a charge, quickly drains, or shows signs like bulging or a strong sulfur smell, it’s likely beyond saving and needs replacement.